
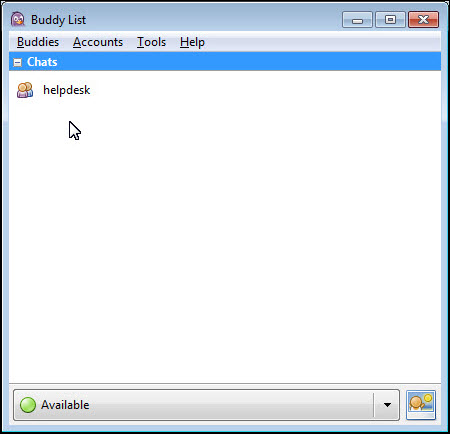
Pidgin is an instant message software you can use to join the group discussions (rooms) in the university's Jabber service. You can install the software on university computers from the Software Center.
Quick help
Detailed help
Basic settings
When launching Pidgin for the first time, you will have to adjust the program settings. The configuration of the program starts with a Welcome notification.
- Select Add.

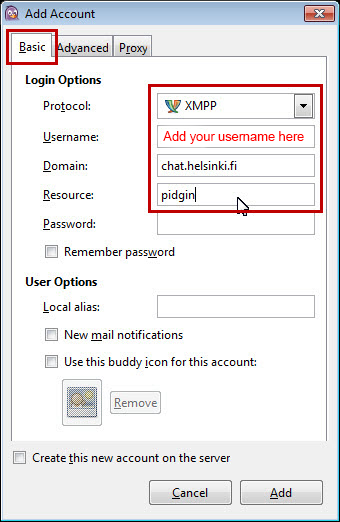
Fill from the Basic tab:
- Protocol = XMPP
- Username = your username, in the format rkeskiva
- Domain = chat.helsinki.fi
Leave the password field empty! Jabber saves passwords unencrypted.
Fill from the Advanced tab:
- Connection security = Require encryption
- Connect port = 5222
- File transfer proxies = chat.helsinki.fi
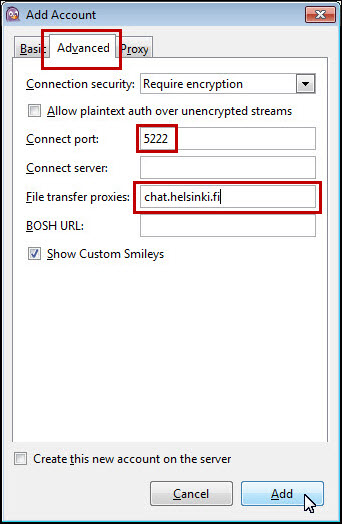
- Finally, select Add.
- Next, Pidgin will ask for your password:
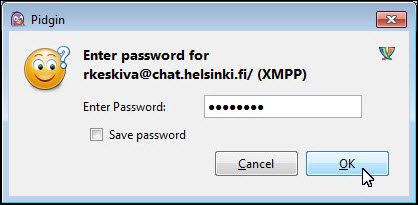
- Enter your password and click OK.
Joining rooms (discussions)
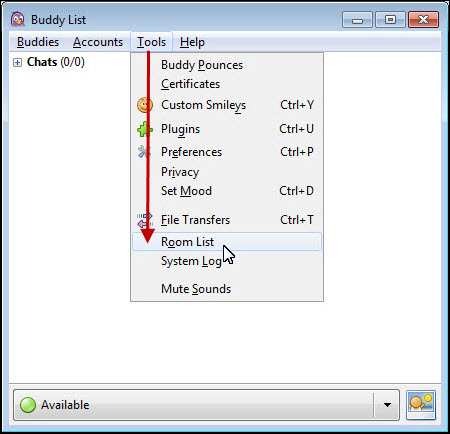
After connecting to Jabber, you need to select which room you wish to join:
- Select Tools > Room List.
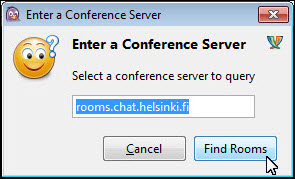
- Click Get List.
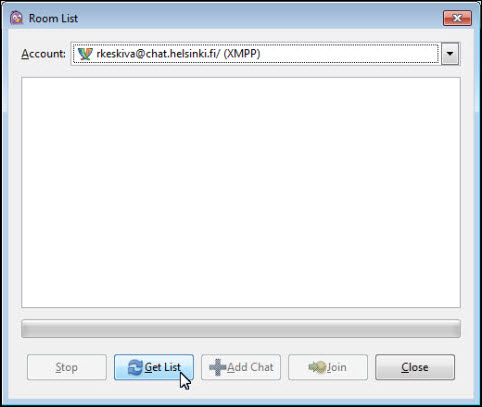
- Click Find Rooms.
- Select the room you wish to join.
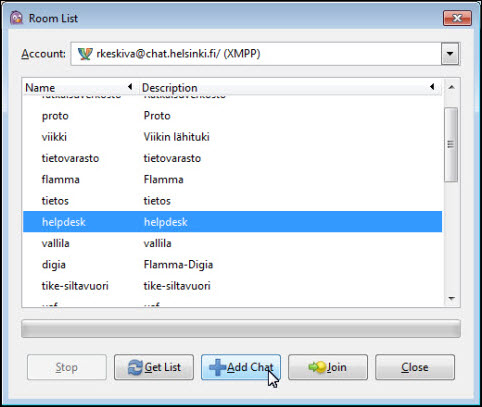
NB: the listing shows all the rooms found in the service. You may not be able to join them all!
- Select a room you wish to join from the list and click Add Chat if you wish to permanently add the room to your chat list. Click Join if you wish to join the conversation in the room but do not wish to add it to your list.
NB!: if the room is protected with a password, you cannot join (join) it directly. Instead, the room should be added to the room directory (Add Chat).
- If you selected Add Chat, you will need to fill in one more dialogue box:
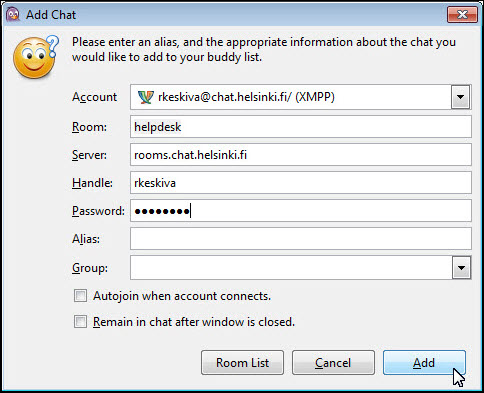
- Enter your password if the room requires it.
- If you tick Autojoin when account connects, you will automatically join the room in future when launching Pidgin.
- Finally, select Add.
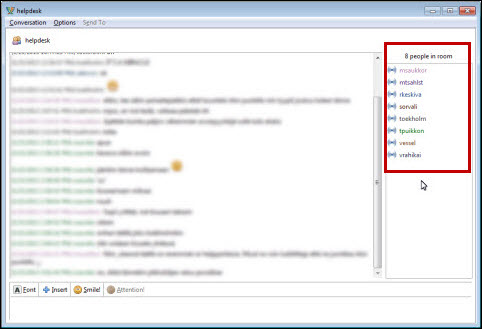
- The room will appear on the Chat list.
- Open the room by double-clicking its name.
- You can start a discussion by writing in the text field in the bottom of the screen. The usernames of other participants are displayed in the right corner of the window.
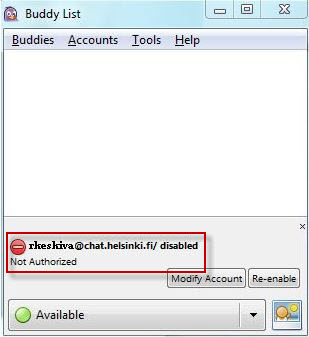
After changing the password (Not Authorized error notification)
- username@chat.helsinki.fi/ disabled. Not authorized error notification has been occurring after changing the password or when a false password has been entered in Pidgin.
The issue is solved this way:
- Close Pidgin.
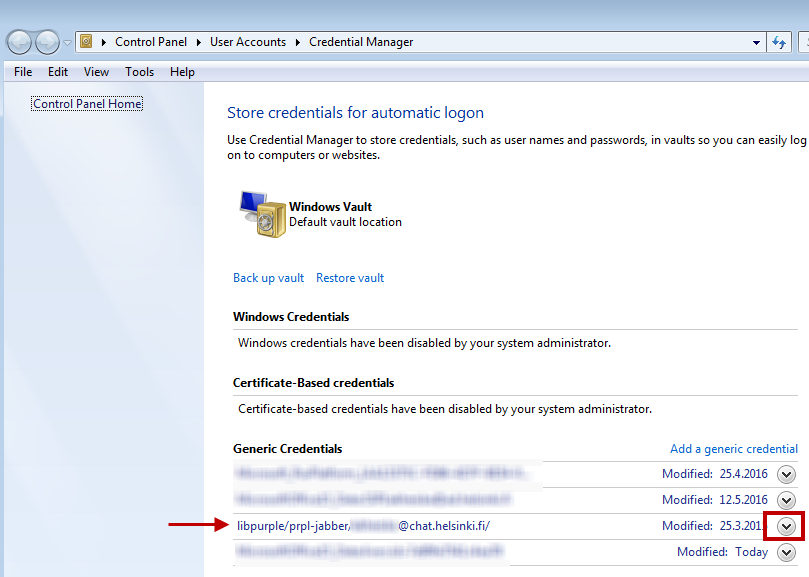
- Open the Control Panel and type vault.
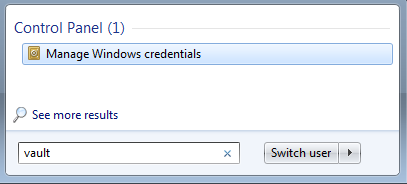
- Credential Manager opens.
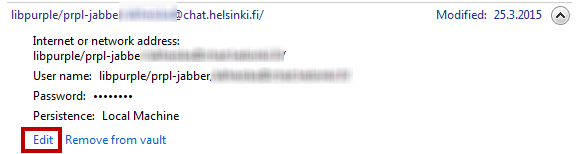
- Find and open the row libpurple/prpl-jabber/account@chat.helsinki.fi/
- Click Edit
- Type new password. Remember to click Save.
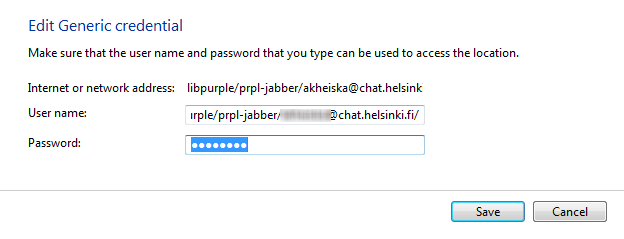
- Close the Credential Manager and launch Pidgin again.
Setting up a room
You can set up new rooms in Pidgin as follows:
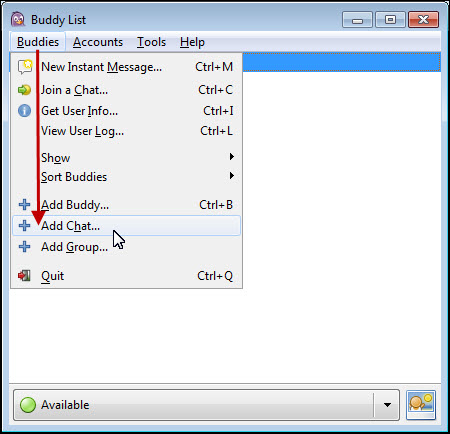
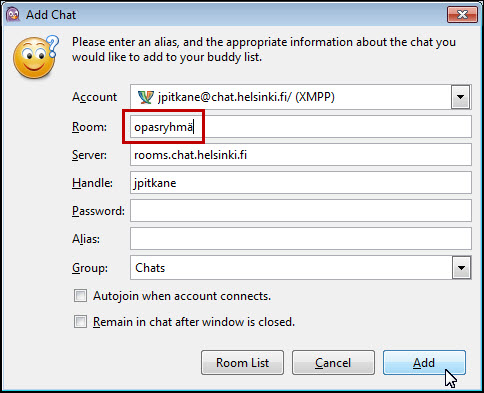
- From the top menu, select Buddies > Add Chat.
- Give the room a name and click Add.
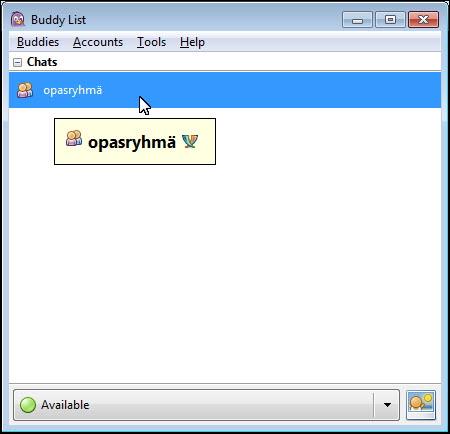
- The name of the room appears in the Buddy List window.
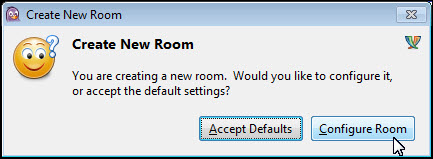
- Double-click the name of the room.
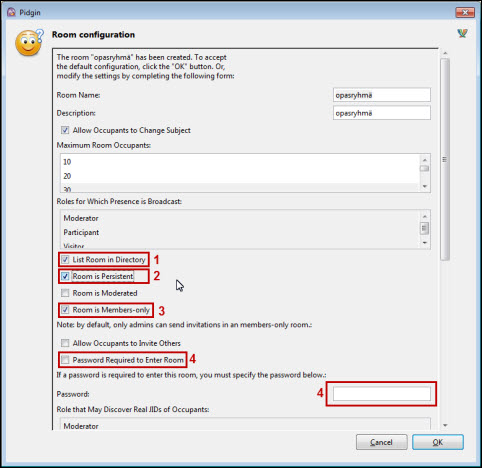
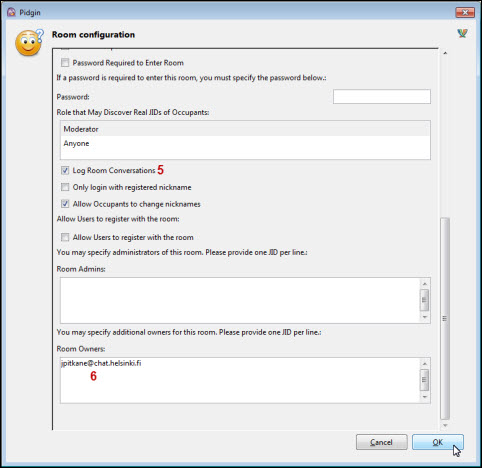
- Click Configure Room. You can change the following room settings:
- List Room in Directory (1) is the default. The room is visible to anyone.
- Tick Room is Persistent (2). As a default, the selection is not ticked, whereupon the room is deleted when the last participant logs out of the room.
- As a default, the room is for members only (3). Untick it if you wish to allow access to anyone.
- You can secure the room with a password (4). If you tick the option, participants are only allowed in the area with a password. Using a password is a recommended method of limiting the access to the rooms. You can also untick option (1) for a room intended for a limited group, but in these situations, the users must know the name of the room as it is not listed in the room directory.
- Select whether you wish to have log entries on the discussion in the area (5). A log will be compiled as a default.
- Enter the room owners. As a default, the person who created the room becomes an owner (6). Only an owner of the room can delete the room, if necessary, and has more extensive rights to change the room settings. In case of holidays or falling ill, it is recommended to add substitute owners for the room.
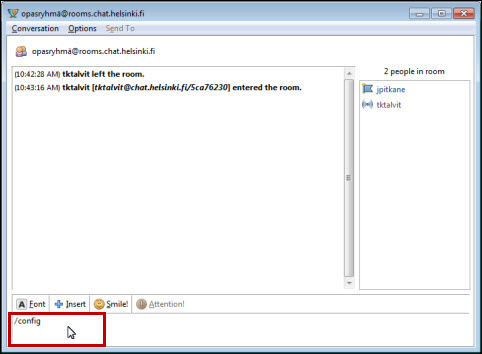
Changing a room's settings afterwards
- You can change the settings of an already set up and configured room by typing /config on the command line. By typing /help, you will see a list of available commands.
Deleting a room
An owner of the room can delete the room by changing its settings (see section Changing a room's settings afterwards). By unticking the option Room is Persistent, the room will be deleted when the last person leaves the room.
Video instruction
Give feedback
The instructions site of the University of Helsinki's IT Helpdesk helps you with IT-related issues related to your work. Let us know how we can improve our instructions. We greatly appreciate your feedback!
How would you improve these instructions?