
These instructions explain how to use a shared mailbox. In addition, they explain how to send e-mail from a shared mailbox.
Administrating the user rights of a shared mailbox
Quick help
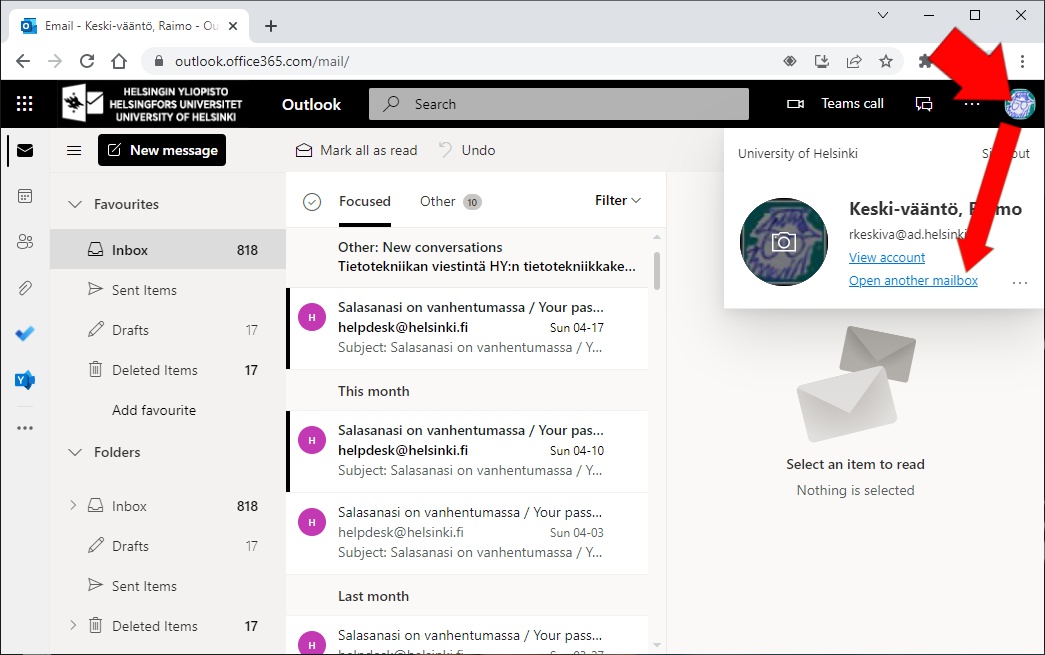
- Log into OWA. Click your photo in the top right corner. Select Open another mailbox.
- Type the beginning of the name of the shared mailbox in the field. OWA provides matching addresses to choose from, select the correct one and click Open.
- If the name is correct, the shared mailbox opens in a new tab in your browser. You can use the shared mailbox just like you would use your own mailbox.
See Detailed help for illustrated instructions and alternative methods.
Detailed help
Outlook Web App (OWA)
In OWA, there are two ways to show the shared folder.
- Option 1: A separate browser window
- Option 2: Add the shared mailbox to the primary mailbox
Option 1: A separate browser window
You can use this option for, for example, sending messages from the shared mailbox and for granting read permissions. This cannot be done based on read permissions only.
Click your picture in the top right corner of OWA. In the menu that opens, choose Open another mailbox.
- Type the beginning of the name of the shared mailbox in the field. OWA provides matching addresses to choose from, select the correct one and click Open.
- If the name is correct, the shared mailbox opens in a new tab in your browser. You can use the shared mailbox just like you would use your own mailbox.

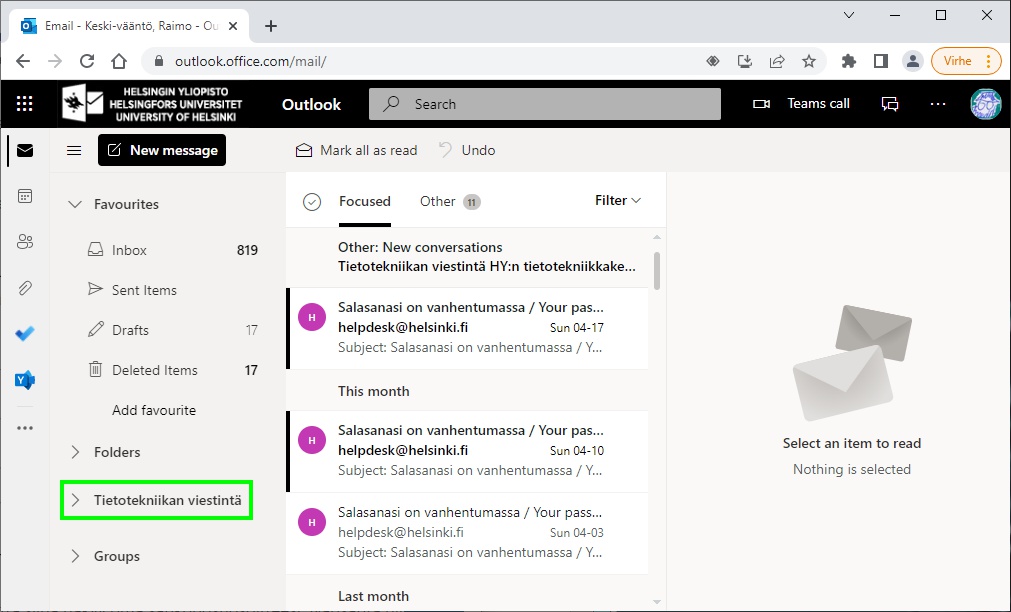
Option 2: Add the shared mailbox to the primary mailbox
This option can be used for sending messages easily from the shared mailbox. It also allows you to grant read permissions.
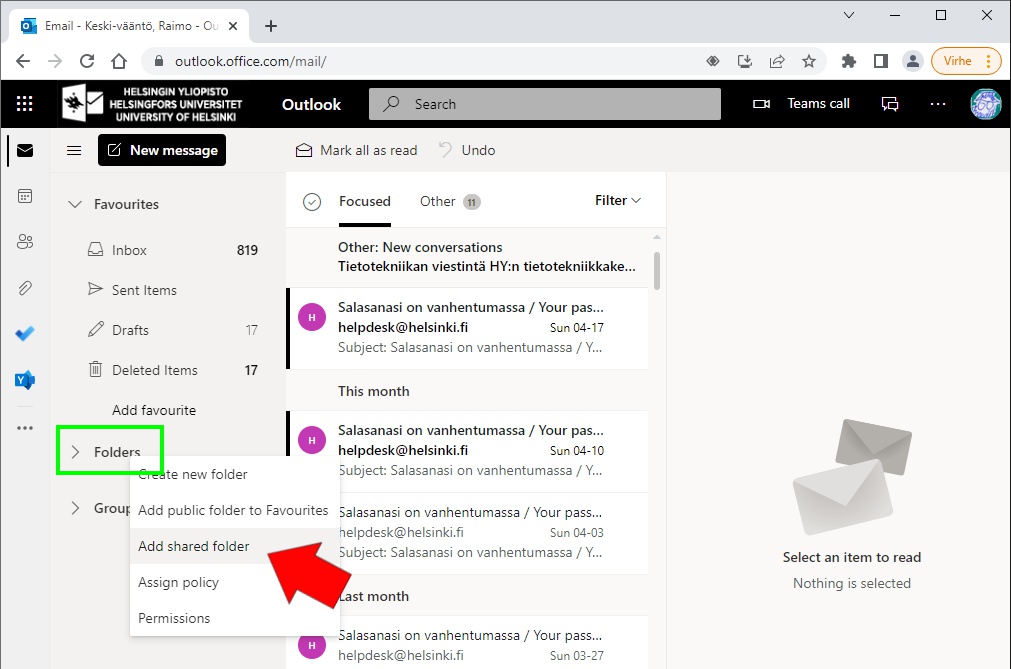
Right-click the header Folders. Select Add shared folder.
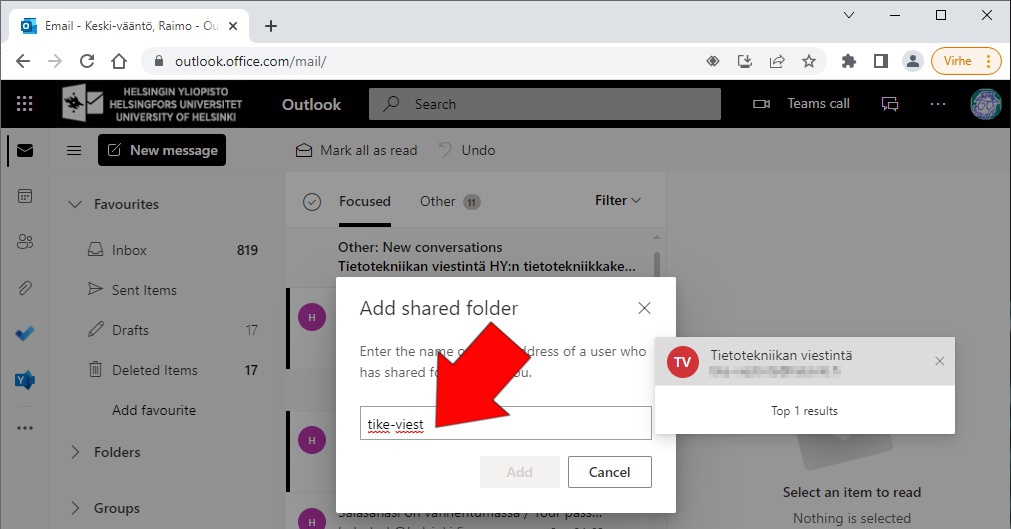
Enter the beginning of the mailbox (such as tike-viestinta). OWA suggests matching mailboxes. Select the correct one.
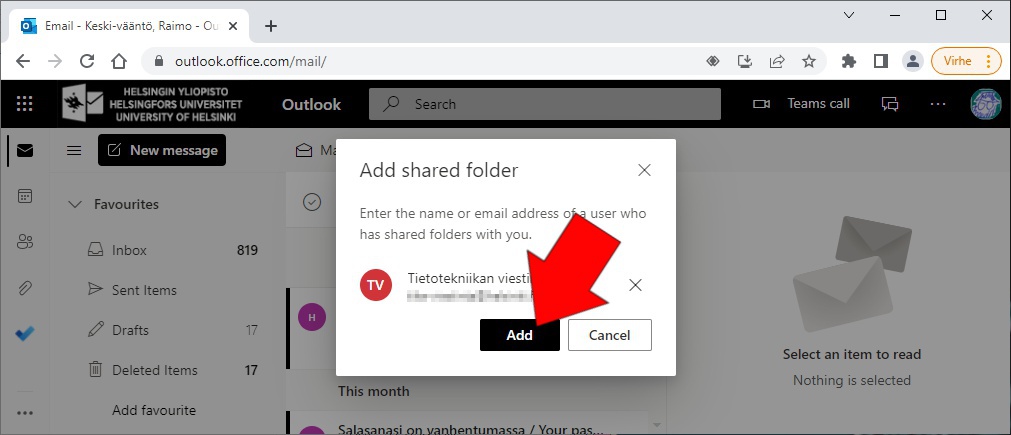
Click Add.
You'll see the shared folder on the left pane.
The mailbox is shown automatically from now on. If you want to remove the mailbox from the view, right-click the name of the shared mailbox and choose Remove shared folder.
If you use the folder in your own OWA in the future, you have to adjust the settings for two profiles.
Sending a new message in OWA
Click New message (1.) and click the icon with three dots (2.). Select Show From (3.).
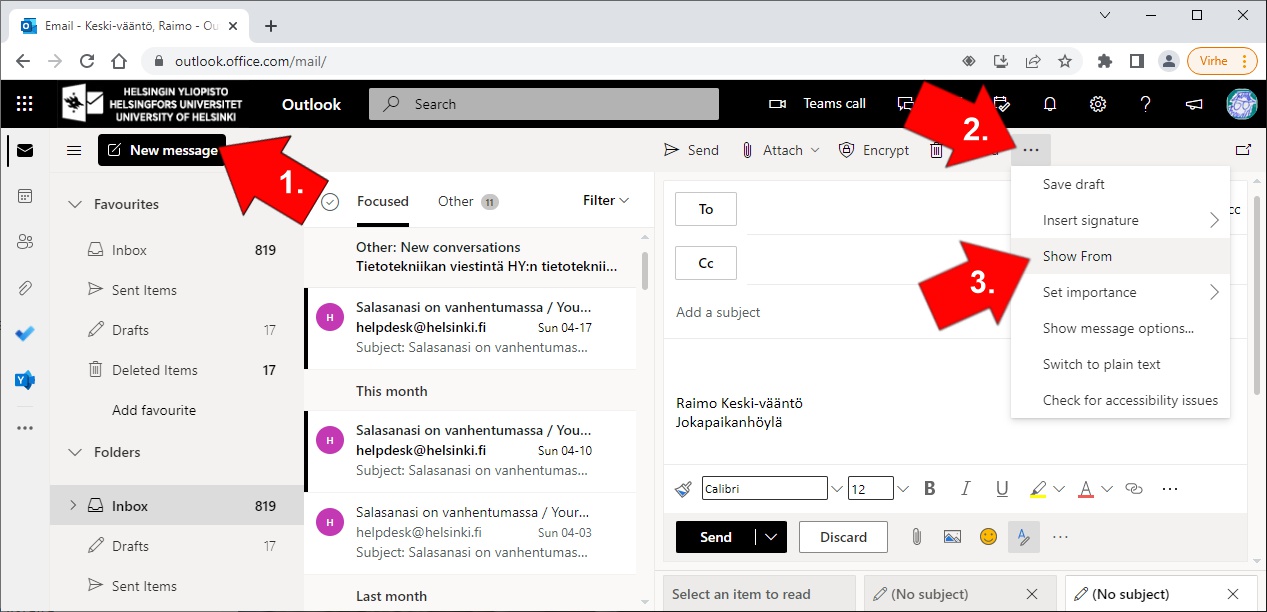
The message field now shows the sender, but it shows your own e-mail address. Click From (1.) and select Other email address (2.).
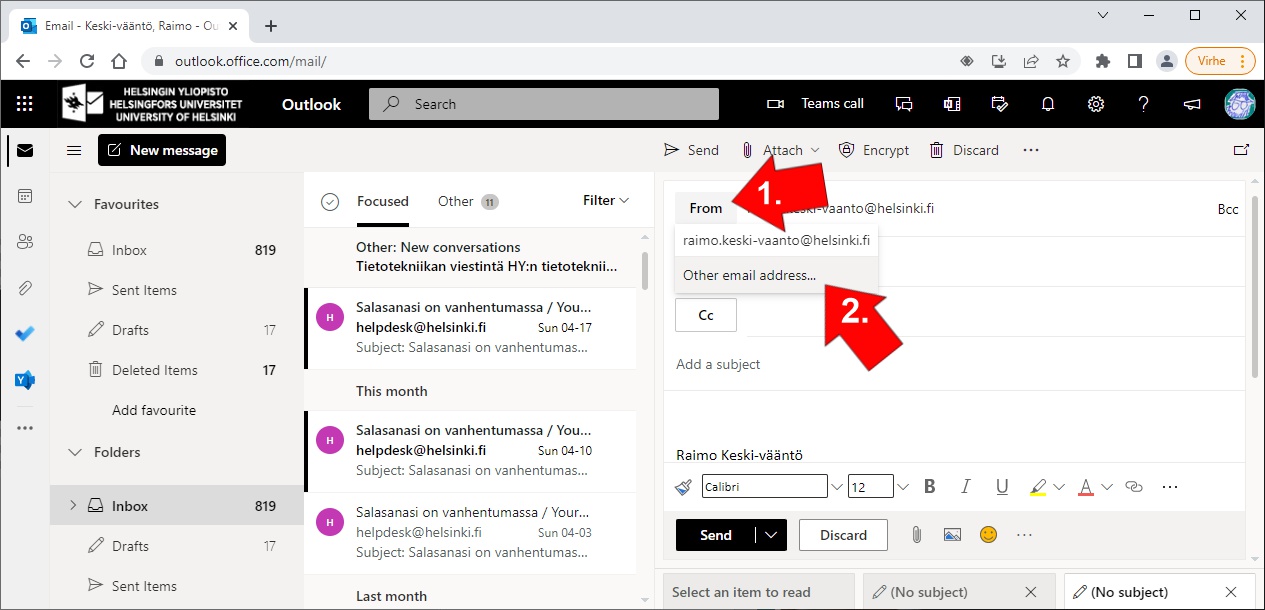
Start typing the name of the shared mailbox and select it from the list that opens.
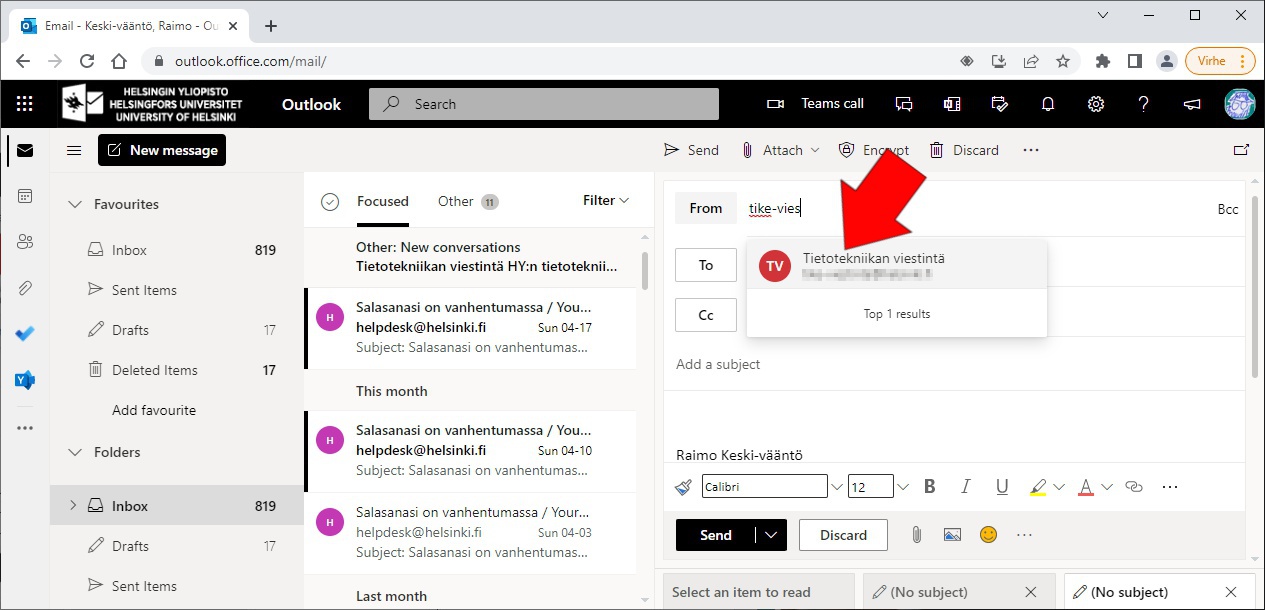
You can now send the message from the shared mailbox.
The sent messages are saved both to the Sent Items folder of the shared mailbox and to your Sent Items folder.
Outlook
Shared e-mail is shown automatically in Outlook when the permissions are in order. The folder can be found at the bottom of the left bar.
If this doesn't happen for some reason, see here for instructions.
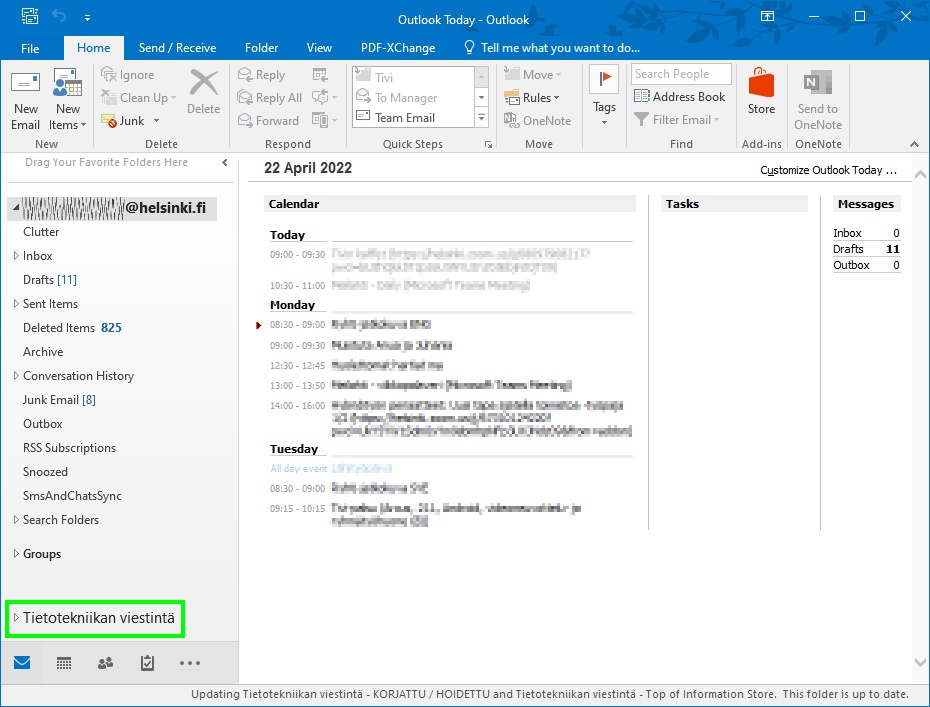
You can add the shared folder to Favorites, which makes it easier to monitor the mailbox.
Click the arrow in front of the shared folder to open the folder list. Right-click the Inbox folder of the shared mailbox. This opens a new menu for selecting Show in Favorites.
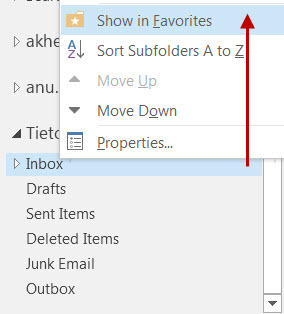
After this, you can open the shared mailbox directly from the Favorites folder.
Sending a message from the shared mailbox
When sending a new message, you can select the sender profile. First, open a new message. Click Options on the ribbon and click From.
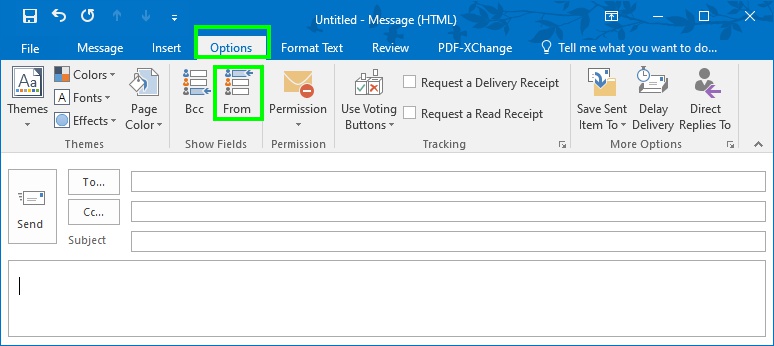
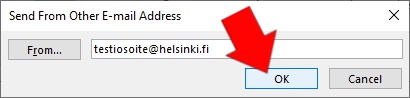
Now there's a From button in the new message. Click From and select Other email address to change sender.
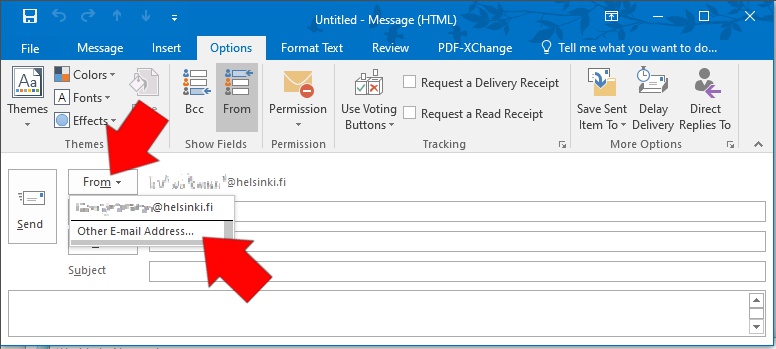
Type the email address of the sender and click OK.
After this, you can choose the desired profile from the list as you like.
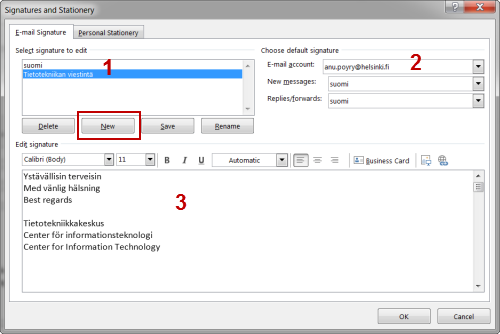
You can also specify different signatures for different sender profiles. This setting can be found by opening the window for writing a new message. In the Message tab, click Signature > Signatures... .

You can insert signatures for different purposes in the window that opens. Choose New. A new line appears in Select signature to edit (1). You can specify the default settings under Choose default signature (2). Edit signature (3) allows you to edit the signature.
Mac Outlook
Open Tools > Account...
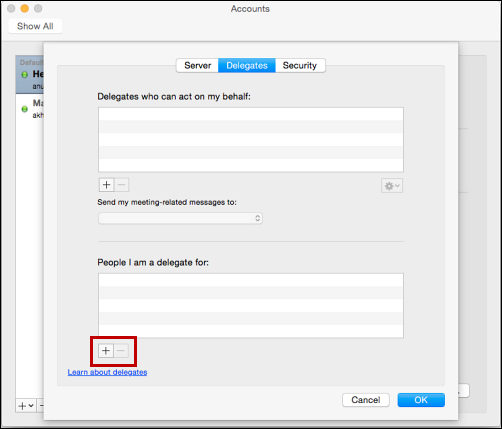
Select the Microsoft 365 account and click Advanced...
A new window will open. Select the Delegates tab (1). Add a shared account to the People I am delegate for section shown below by clicking the plus sign (2).
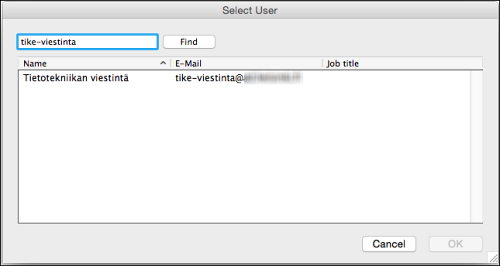
A new window will open from where you can search for a mailbox based on the name, for instance tike-viestinta. When you find the correct mailbox, select it and click OK.
Close the Accounts window and check the left bar of the e-mail view. Now you should see the shared folder here.

Thunderbird
The recommended software for using the Office 365 service is Outlook.
You can also add a shared mailbox to Thunderbird. Basically, you add your own mailbox twice but in the other mailbox, add the shared mailbox’s account to your username:
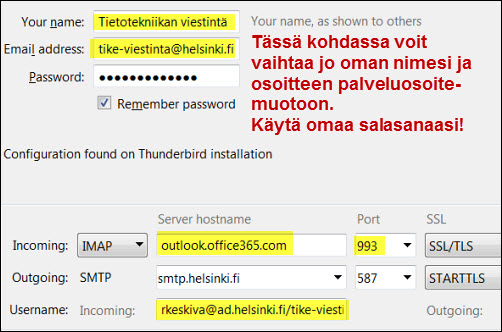
ownusername@ad.helsinki.fi/shared-mailbox
For instance, we can display the IT Center communications mailbox to Raimo Keski-Vääntö like this:
rkeskiva@ad.helsinki.fi/tike-viestinta
Here is a view of settings that have to be edited during the installation (changes marked in yellow):
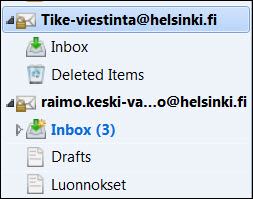
When the account has been successfully added, you will see the account in the left bar’s list of e-mails.
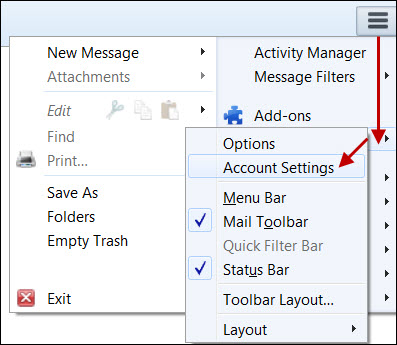
After this, you can change the name of the sender and address information, if necessary, and add a signature for this mailbox. You can open the account settings as follows:
Top right corner menu > Options > Account Settings
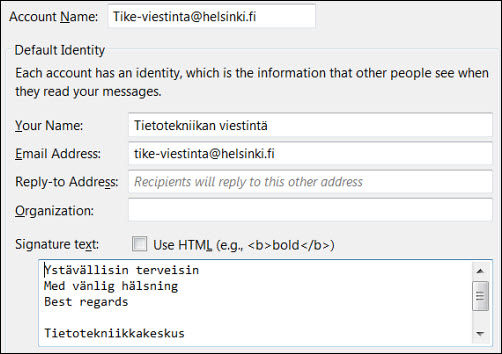
A separate Account settings window will open. Select the main page of the shared mailbox’s settings. There you will find profile settings.
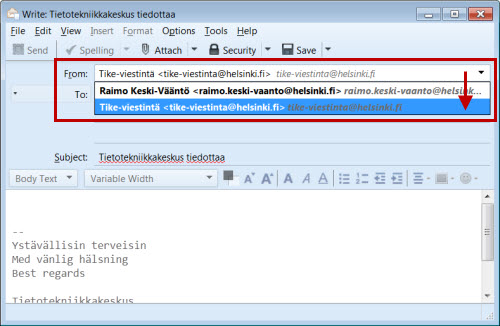
Sending a message from Thunderbird
Sending a message from a shared mailbox in Thunderbird is just like sending a message from your own mailbox, you only have to make sure that the message is sent from the correct mailbox.
When you want to send a message from a shared mailbox, first access the Inbox of the shared mailbox. Click Write. Now the information of the shared mailbox should be visible in the From field. If it is not, click the From field and select the address you want. If you have added a signature in the settings, it will also change.
Other than that, sending a message is just like sending it from your own mailbox.
Video instruction
Give feedback
The instructions site of the University of Helsinki's IT Helpdesk helps you with IT-related issues related to your work. Let us know how we can improve our instructions. We greatly appreciate your feedback!
How would you improve these instructions?