
OneNote is notebook software which collects your notes in a single location. You can create separate notebooks for different things (work, travel, hobbies, etc.). You can update them easily, as shared use with mobile devices works excellently.
OneNote is part of the Office suite, but it can also be installed as standalone software. Lighter versions of the software are available for mobile devices. OneNote is also available for Mac computers, but it has fewer properties than the Windows version.
Quick help
General about OneNote
OneNote is used to create Notebooks, in which you can create Sections containing various matters. Pages can be added under sections.
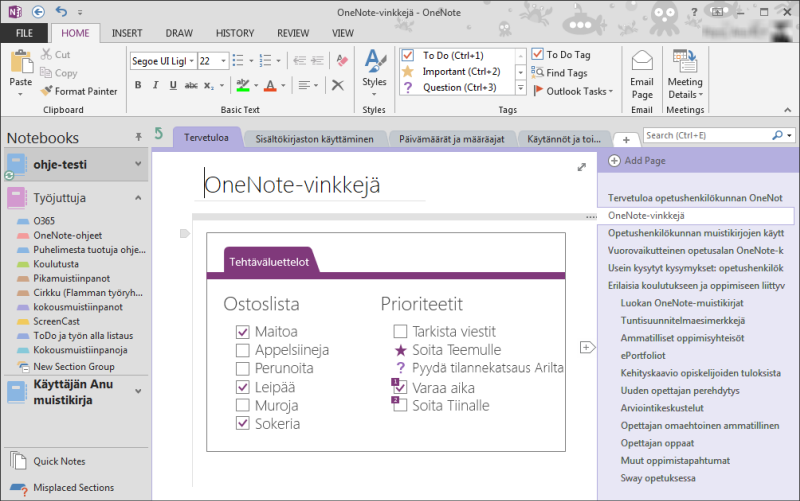
Notebooks are opened in the software, and the open notebooks are shown in the left side bar of the software. The bar can be pinned at the side so that all notebooks are shown.
See more detailed instructions from Detailed Help tab.
Detailed help
Parts of the notebook
The most important parts of the notebook are
- Sections which are shown in the Notebooks list
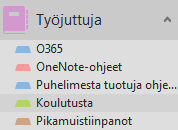
Sections are also shown as a ribbon at the top of the page
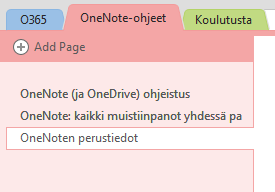
- Pages are shown in the left side bar. Click Add Page to get a new page.
View of the software:
New notebook and selection of storage location
Choose File > New. The choice of storage location opens first.
The recommended storage space is your own OneDrive so that you also have access to your notebook on mobile devices.
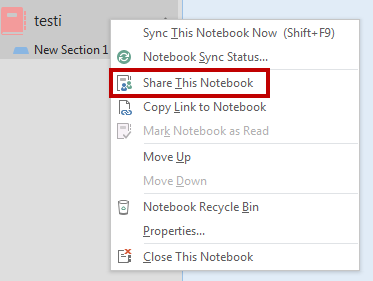
Sharing a notebook with others
When you create a new notebook, you can easily share it with the people of your choice.
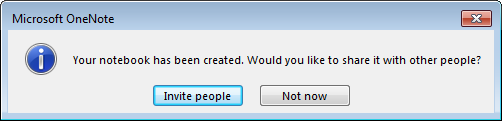
You can share directly from here, or you can right-click the bar of the notebook you wish to share later.
You can add users (e-mail addresses) in the share box that opens. You can choose a couple of settings:
- Can the person you are sharing the notebook with, edit the notebook.
- Is signing in required (Require user to sign in before accessing document). If signing in is required, the user must sign in using, for example, their Office 365 username (also Microsoft usernames can be used).

Opening and closing a notebook
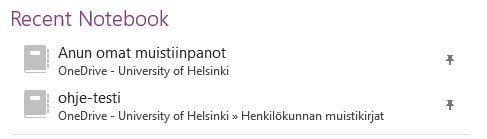
To open a notebook, choose File > Open.
The window shows the latest notebooks. You can pin the most frequently used notebooks in the view. They are shown on top and can be opened quickly.
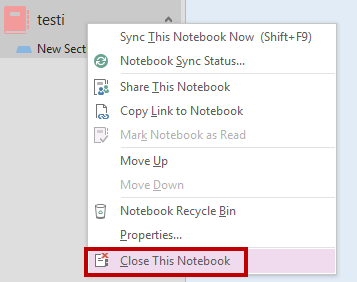
To close a notebook, right-click the bar of the notebook and choose Close This Notebook.
Adding and deleting pages
To add a new page in the notebook, click Add Page.
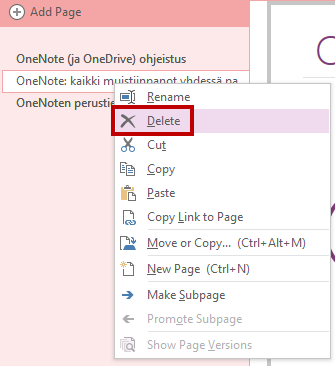
If you want to delete a page, right-click the page to delete and choose Delete in the menu.
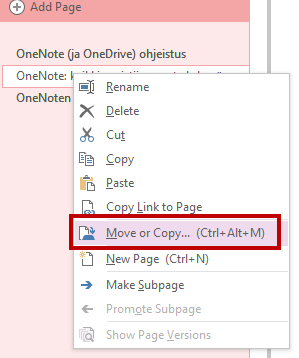
Moving tabs or pages between notebooks
You can easily move or copy tabs or pages between notebooks as follows:
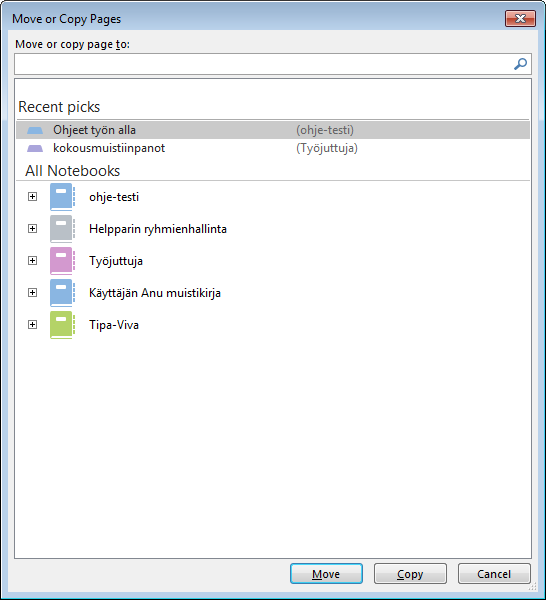
- Right-click the page or tab you want to move and choose Move or Copy… in the menu.
- A window opens for choosing the notebook and the place to which you want to move or copy the page. Choose either Move or Copy according to your needs.
Quick notes
Quick Notes are the electronic equivalent of Post-it notes.
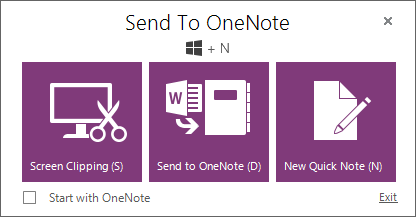
You can make a quick note on the computer without even opening OneNote. Press Windows button + N, which opens Send To OneNote. Choose New Quick Note.
Quick notes can be found at the bottom of OneNote’s left bar. It also shows the default notebook for quick notes
Synchronising
The notebook is synchronised continuously and automatically when a network connection is available. No separate Save function is required. When OneNote is offline, it only stores in the device’s own memory and synchronises the changes to the server as soon as network connection becomes available.
OneNote also works on mobile devices. The notebook can also be used without a network connection.
Read more in Microsoft’s instructions
Importing notes from other places
You can import documents, screenshots, pictures, links or video clips, for example, into your notebook. All of these can be found in the Insert tab

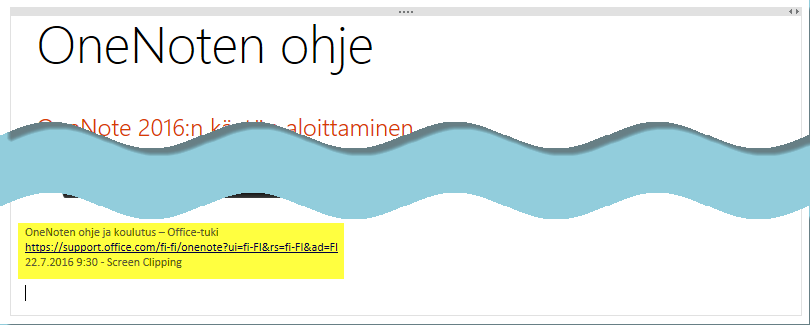
OneNote is very useful for screenshots of websites, for example. Click Screen Clipping. OneNote disappears in the background, and you can select an area in the screen as a picture. When importing screenshots from Edge, OneNote inserts a link to the page from where the picture was taken, and a date to the picture.
Video instruction
Give feedback
The instructions site of the University of Helsinki's IT Helpdesk helps you with IT-related issues related to your work. Let us know how we can improve our instructions. We greatly appreciate your feedback!
How would you improve these instructions?