How to use and manage MFA methods

Manage authentication methods can be found at https://mysignins.microsoft.com/security-info 

    See detailed help tab.

    Authentication methods management site

    Go to the authentication methods manager at
    https://mysignins.microsoft.com/security-info

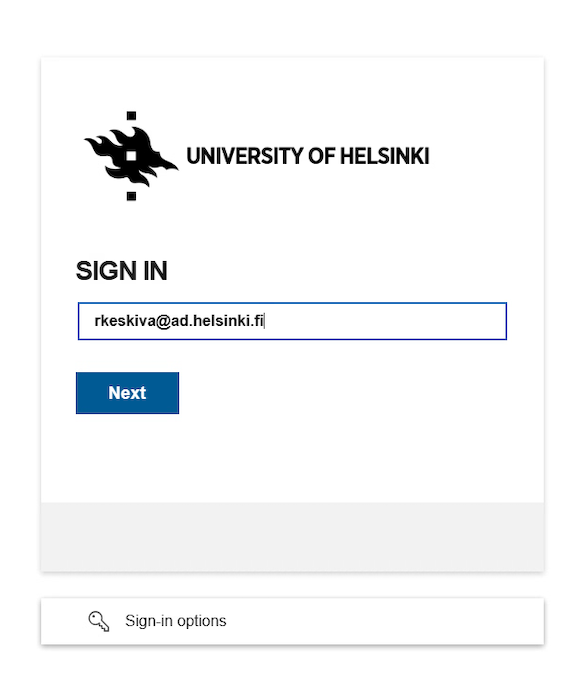
    Log in to the service. Enter your username in the form username@ad.helsinki.fi (e.g. rkeskiva@ad.helsinki.fi).


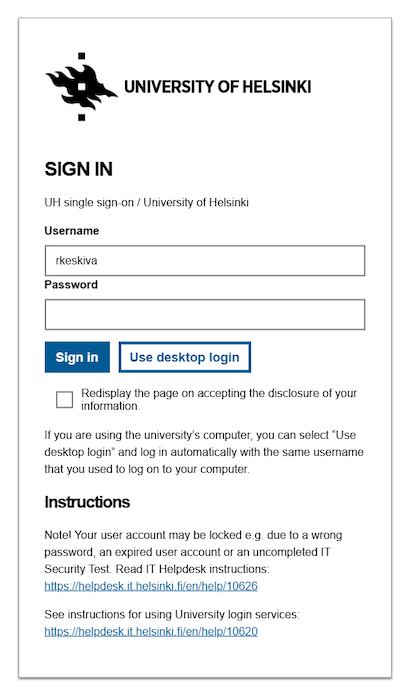
    You will be directed to the university's login page.


    Managing authentication methods

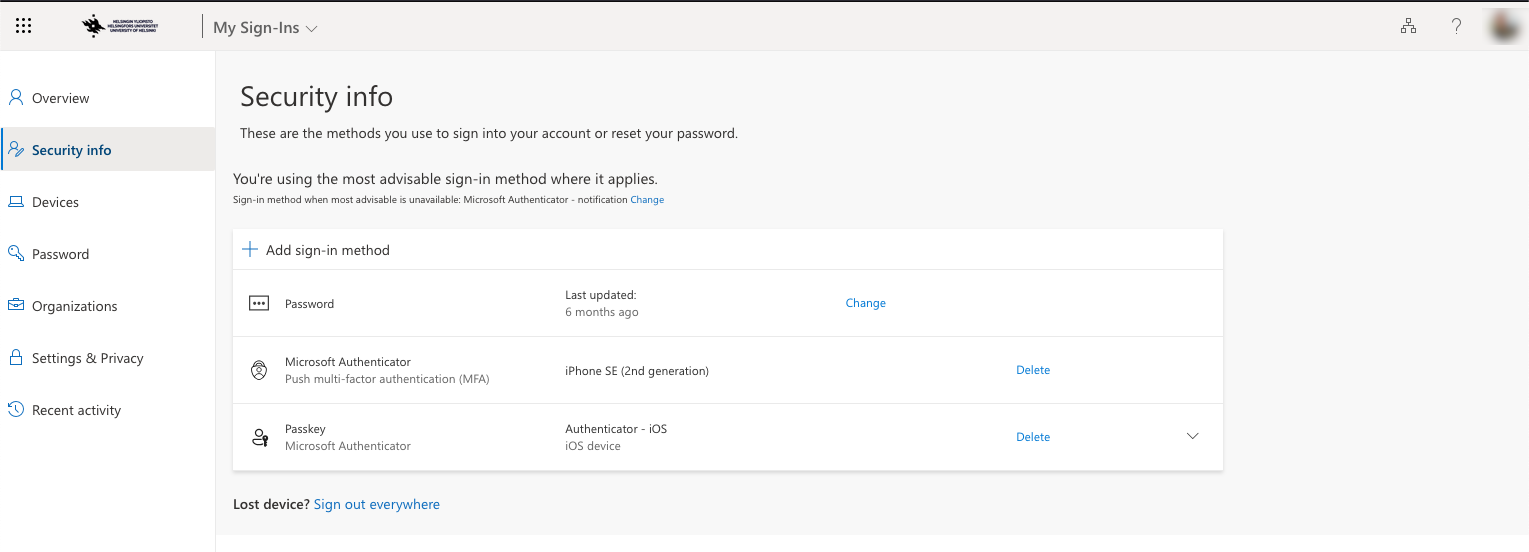
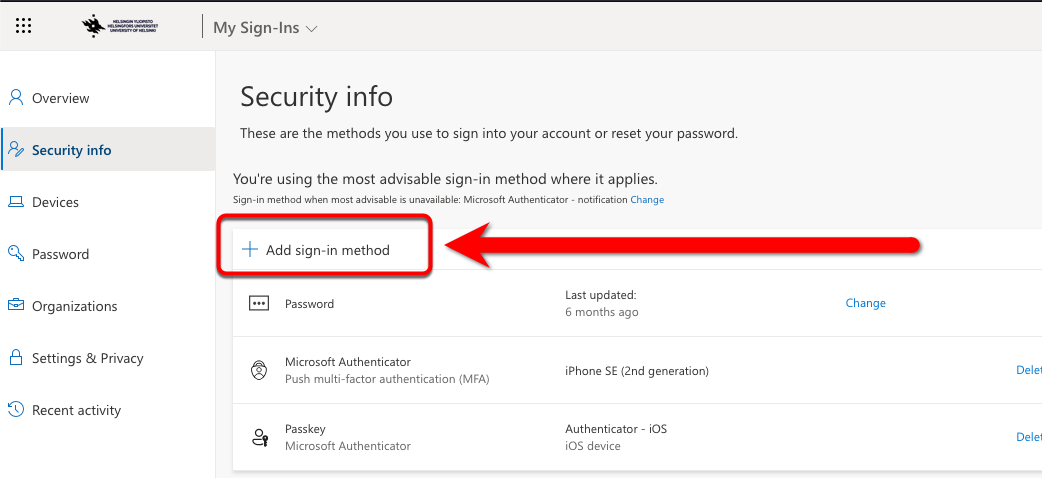
    After logging in, you can access the “Security Info” page where you can manage authentication methods.

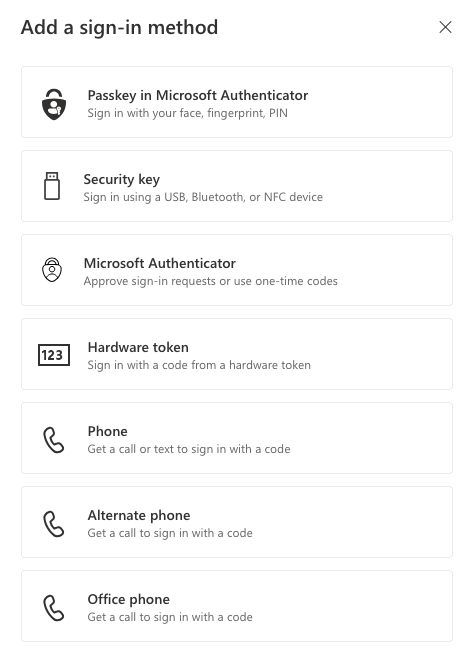
    You can add a new authentication method in the “Add method” section. Select the authentication method to be added from the list. We strongly recommend that you add at least two authentication methods!
    Confirm authentication on your phone to add the Authenticator application.

    Changing the default method

    The default method is automatically enabled when stronger authentication is required. In this case, the login service will send a verification request to the Microsoft Authenticator application or call you, depending on the method you have chosen.

    You can change the authentication method above Add method with the option Default sign-in method: <default method> Change.
    Note! This option is only displayed when at least two authentication methods are used.
    The site has an error that will not display the change button until the Security Info page has been reloaded (press F5) after adding another method.

    Deleting an authentication method

    You can disable unused authentication methods by clicking on the Delete button next to them. Deleting methods is necessary if, for example, you lose your ID or change your mobile phone with the Microsoft Authenticator application.

    Adding an authentication method

    You can add a new authentication method in the Add method section. Select the authentication method to be added from the list.

    • AThe Authenticator app is usually the easiest to use.
    • Security key means a FIDO2-compatible USB/NFC key.

    A. Adding the Authenticator app

    This guide is for Microsoft Authenticator, the easiest and safest application to use because it allows you to get a certificate-based Yes/No  approval to verify your login on your phone. You can also use other apps to access a numeric code that changes every 30 seconds. In this case, select I want to use a different authenticator app in the first step, and continue as described.

    Download the Microsoft Authenticator application on your phone and click Next to move forward in your browser.

    In the Authenticator app, select Add an account and Work or school. Click Next to move forward in your browser.

    In the Authenticator app, select Scan a QR code and scan the QR code displayed on the screen. Click Next to move forward in your browser.

    Confirm authentication on your phone.

    Click Next in your browser to return to the authentication methods manager.

    B. Adding a phone

    Enter your phone number and, if necessary, select a phone call as the method. Select Next to continue.

    The automated service will call your number. Follow the instructions and press "#" to accept the authentication.
    Please note! Many browsers use American English by default. In this case, the # sign is referred to as a pound key in the call.
    Pay attention to information security! Only accept the authentication if you are personally logging in to the service. You will never be asked to give your username or password over the phone; the approval is always given by pressing the "#"sign.

    The service will confirm the selection and the phone number is now registered. Select Done to close the window.

    C. Adding the Authenticator extension as an authentication method

    Authenticator is an extension for Chrome, Firefox and Edge browsers, which you can use as an additional authentication method for Multifactor Authentication.

    Go to website: https://authenticator.cc/

    Select Add to <Browser>, (Firefox is used in the examples). Installing extensions on each browser is done slightly differently, but the link will direct you to the extension installation. Installation on the Microsoft Edge browser is a more complex process because the extension needs to be installed from the Chrome browser app store.

    Select Add to Firefox and the browser will ask for confirmation:

    Select Add to confirm. You will receive a notification once the installation is complete. An icon similar to the extension's QR code will appear in the top right corner next to the menu (the location may vary depending on the browser). You can also allow the extension to be used in the Incognito mode of the browser by checking Allow this extension to run in Private Windows. Click Okay to continue.

    Go to Microsoft Security Info at https://mysignins.microsoft.com/security-info.The list may show already added authentication methods, if you have previously added any. Select Add method.

    Select Add a method and then Choose a method > Authenticator app. Confirm the selection by clicking the Add button.

    A new window will be opened. Select I want to use a different authenticator app.

    Press Next to continue.

    The Scan the QR code window opens. Open the Authenticator extension from a button in the top-right corner that resembles the QR code and select the Scan QR Code icon.
    Please note! The first time you use Authenticator, the browser will ask if the application is allowed to read website information. Select Allow.

    The extension will show an animation of painting the QR code. Use your mouse to paint the QR code visible in the Scan the QR code window.

    The app will tell you that the account has been added. To continue, select OK and then click Next from the Scan the QR code window.

    The app will ask you to enter an authenticator code for the Authenticator extension to verify that the account has been successfully added.

    Open the Authenticator extension from the icon in the top-right corner of your browser. You will now see a box with a large 6-digit caption in it with a Microsoft title. Click the code to copy it to the clipboard and paste the copied code into Enter code. Press Next to finish the installation.
    Please note! Each code is valid for only half a minute and the timer runs in the Authenticator extension next to the code. If you add the code too late, it will no longer work. In this case, try again and copy the code as soon as it has changed.

    Please note! A sample image of the Authenticator.cc instructions (MIT licence). The account you've added will appear under the Microsoft header and the numeric code will include your username.

    Using the extension for authentication

    When you are prompted after entering your username and password to confirm your O365 login, you can use the Authenticator code.

    If another method of identification is offered that you do not currently have available, select Sign in another way and then Use a verification code from my mobile app.

    Afterwards, a window will pop up where the code can be entered. You can also choose to remember the further identification for 90 days. Enter the code and select Verify. Keep in mind that the codes are only valid for 30 seconds at a time, so if the code is just about to expire, you might want to wait for the next one.

    D.Adding a USB Security Key

    Note! While writing this help, adding a security key does not work on Linux, but security keys can be used in a Linux/Chrome combination. This manual is based on the assumption that you have a FIDO2-compliant USB security key that has been preconfigured according to the supplier's instructions.

    Select the type of security key. The instruction have been made for a USB key.

    Click Next to move forward. You will move on to the FIDO2 authentication of the operating system.

    The next steps may vary depending on your operating system, security key model and browser, so please follow the on-screen instructions. The steps below are an example of how to register with Windows 10 and Chrome browser.

    Windows Security: Security key setup window: click OK to proceed.

    Click OK to confirm access to the security key.

    Insert the safety key as instructed in the USB port.

    Enter the PIN code you set up when installing the key.

    Touch the security key ID to confirm the authentication

    The security key is set, select Done.

    Enter a name for the security key to distinguish it from other authentication methods. Finally, select Next.

    Give feedback

    The instructions site of the University of Helsinki's IT Helpdesk helps you with IT-related issues related to your work. Let us know how we can improve our instructions. We greatly appreciate your feedback!

    How would you improve these instructions?
    Back to top