
E-lomake is an online tool that allows you to create, publish, edit and copy various questionnaires. You can use the form to gather a variety of information: registrations, feedback, research material, preliminary information or attachments. Anyone with a University of Helsinki user account can use E-lomake.
E-lomake is available at elomake.helsinki.fi
A reminder about data protection
E-lomake is not suitable for processing sensitive personal data. See the Detailed help tab for more information about data protection.
Quick help
Detailed help
Plan first – then implement
Plan the questions and the structure of the form in advance. Do you want to collect numeric or textual data? Are the reports the e-lomake offers sufficient or do you want to transfer the data for further processing to, for example, a spreadsheet program or a statistics program?
Also consider how the data on the form will be processed. You can share data processing rights with others and even have more than one person process only part of the data. It is usually a good idea to grant administrative rights to several people so that there is always someone who can edit and process the form during holiday seasons, for example.
Test the form before public use. Test saving the data, creating reports, and transferring the data. Once the form is working properly, delete your tests and make the form public.
Also plan the life cycle of the form. You can schedule the form’s publication well in advance. Consider how the form can be used once the data have been collected. You can use the form as a template for a new one, but remember to delete any unnecessary forms. You can also make forms available to administrators only to avoid the input of new responses. However, be sure to retrieve all the information on the form if you need it later.
Especially if you are creating multiple forms, you may want to consider whether the forms have the same recurring elements. You can group parts of a form into field groups that you can use in other forms. For example, you might want to make your contacts a reusable field group. You can publish reusable parts of the form for public use or make them only available to yourself. You can save work by using a suitable field group that another person has published for general use.
Pay attention to data protection
E-lomake is not suitable for collecting sensitive personal data.
Personal data are all entries describing a person, their characteristics or living conditions, which can be used to identify the person, their family or those living in the same household, such as name, personal identity code, contact details, study information, marital status.
Examples of sensitive personal data include data on racial and ethnic origin, social activities, political or religious beliefs, criminal acts, health, sexual orientation and social welfare needs. A legal basis is required for the processing of sensitive data. E-lomake must never be used to collect such data!
Please note that the Act on the Openness of Government Activities and secrecy obligations may also impose requirements on the collection and processing of data. For example, research plans and credits completed by students (except for theses) are confidential information and must not be accessed by anyone without work-related grounds for processing them.
E-lomake is not a storage place for personal data.
Delete the data collected and processed on the e-lomake when you no longer need them. Remember to also delete the data from your own computer and network drive or other storage location when they are no longer needed, such as when the event or data archiving obligation has ended. In other words, even if the data are transferred from the e-lomake, you are still required to delete the data when there is no longer a basis for processing them (the individual’s right to be forgotten).
Logging in
The e-lomake tool is available at https://elomake.helsinki.fi/
Settings
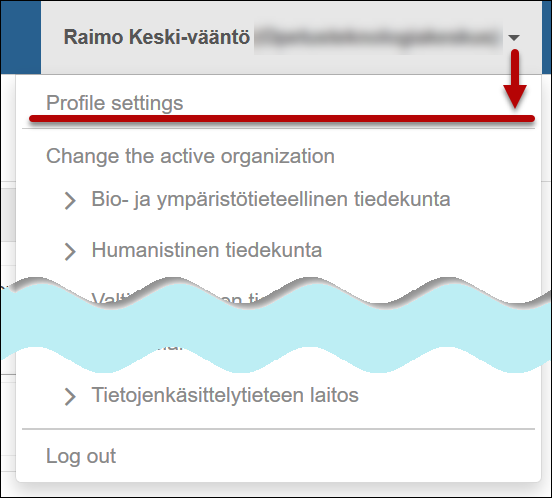
- Click on Profile Settings on the front page.
- Your personal information is displayed at the top left (1). You can change the editor language from the drop-down menu (2). When you are finished, click on Save to save the settings (3).

New form
This is an example of creating a very simple form, publishing it, and processing the data collected. Each element of the form is described in detail in the instructions of the e-lomake provider.
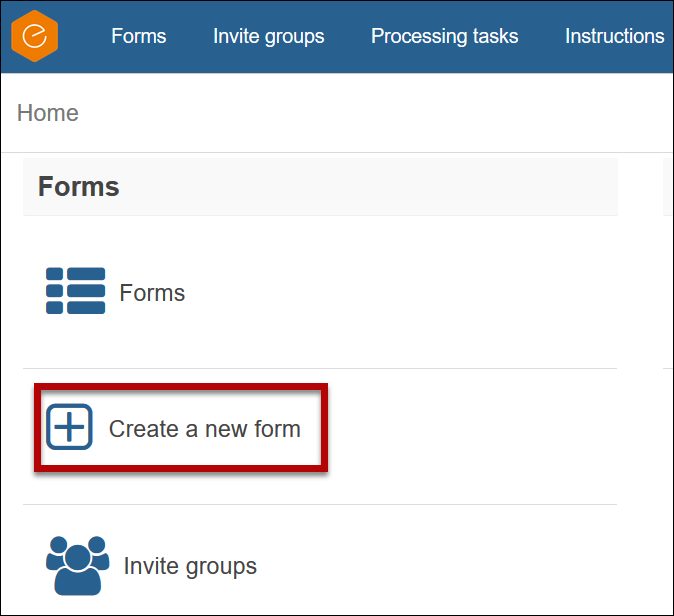
- Click on Create a new form.
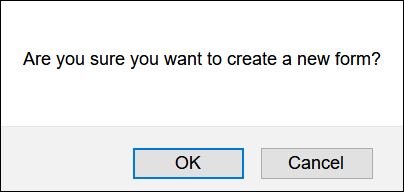
- Click on OK to confirm the creation of a new form.
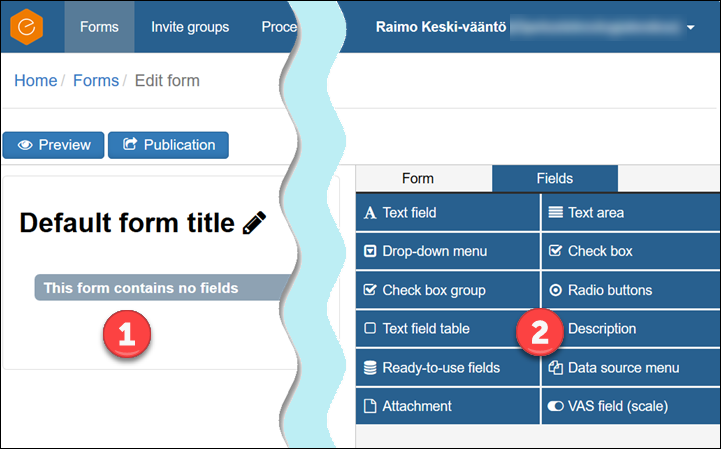
- The editor opens. The form that is gradually taking shape is displayed on the left (1). The buttons used to add elements and functionalities to the form are displayed on the right (2). The Fields tab contains the functions related to the individual elements of the form, the Form tab contains the functions related to the form as a whole.
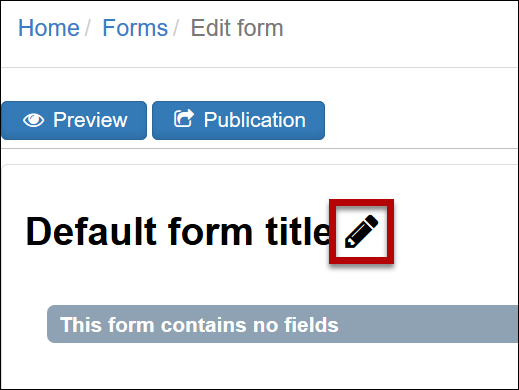
- Click on the pencil icon next to the title.
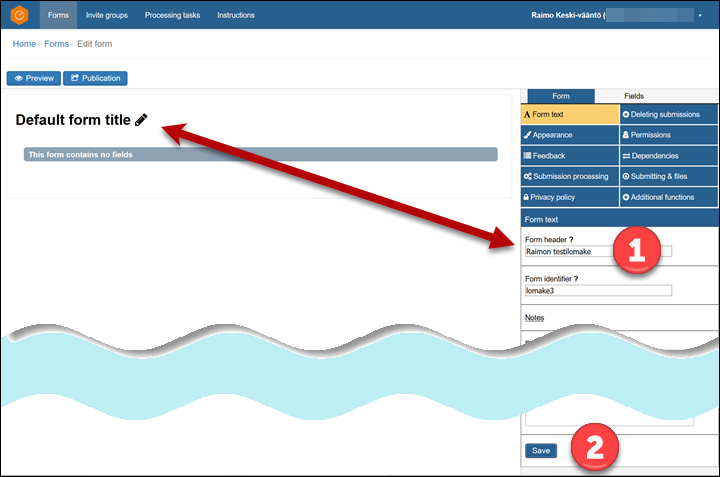
- The menus required for editing the form are displayed on the right. Enter the form title in the field Form header (1) and click on Save (2). Also note that there is a question mark next to each field. Hover the cursor over it to display the help text for that component.
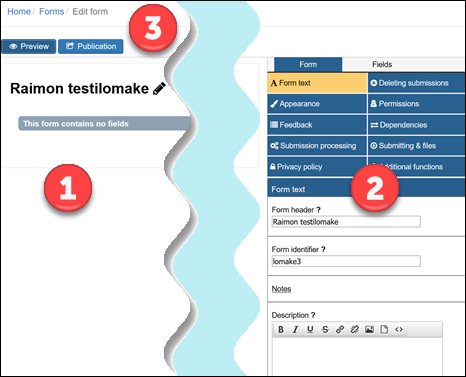
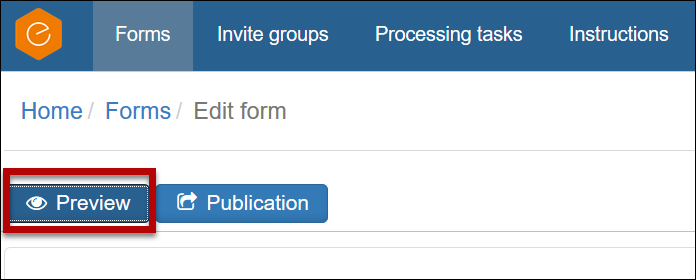
- Changes made to the form are displayed on the left (1) in the edit mode. Use the Preview button to see what the form looks like to the user. If you want to check the functionality of the form, you can publish the form temporarily by clicking on Publication. The buttons needed to create the form are displayed on the right in the edit mode (2).
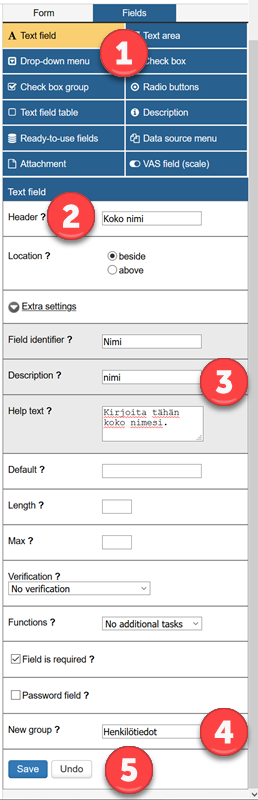
- Next, a field group that collects personal information is added. Select Text field (1) and give the field a title (2). Open Extra settings (3) and complete the required fields. Please note that this information will be placed in the new group for personal data (Henkilötiedot)(4). When creating forms, it is a good idea to design them so that the same field groups can be used in other forms. Since you often need to collect personal data, you can make the field a reusable element. When you are done, click on Save (5).
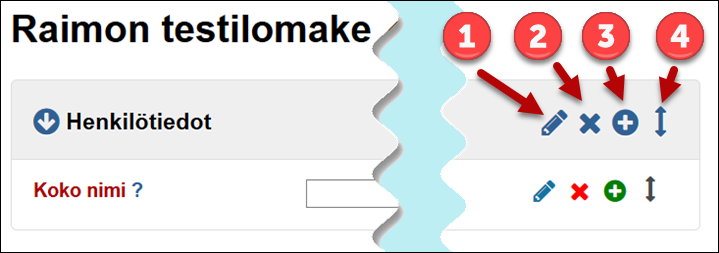
- The form saves the changes and shows the form being created. To edit the components you have added, click on the pencil icon (1); to delete a component, click on the X (2); and to duplicate a component, click on the plus symbol (3). The order of the form components can be changed by dragging them from the double-headed arrow (4) to a new location.
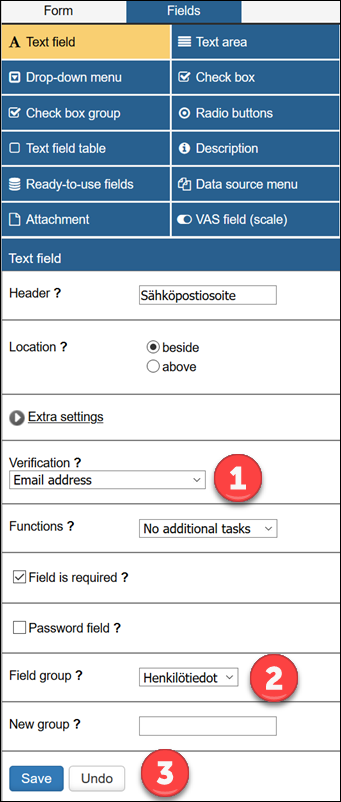
- Next, we will add an email field to the same group and check the validity of the field information. Add the field as above, but select Email address as the field type in the Verification menu (1). The field will be placed in the same Personal data group (2) as the name query added above. Click on Save (3).
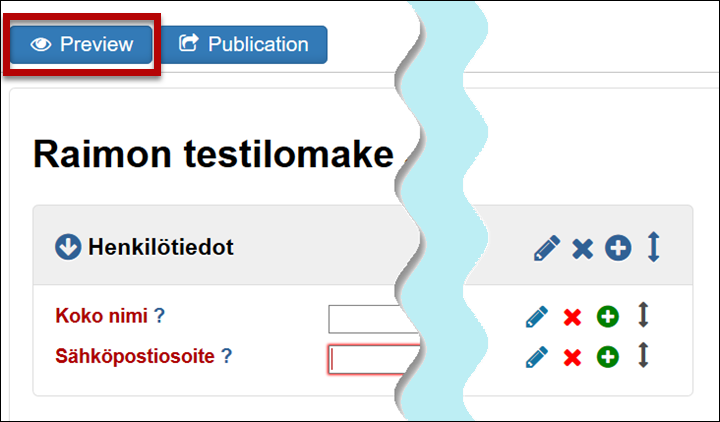
- You can review the form by clicking on Preview. A preview of the form opens in a new tab in your browser.
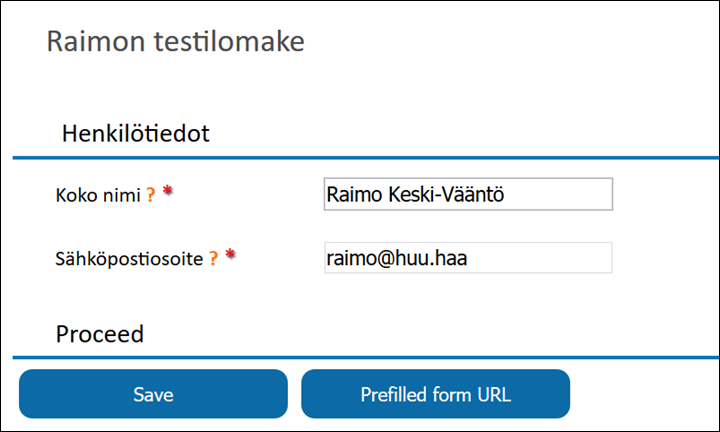
- Note that even if the value in the email field is checked, the check is very rudimentary. In practice, any string containing the @ character is considered valid. If you use the form check features, try for yourself how they work. Close the tab.
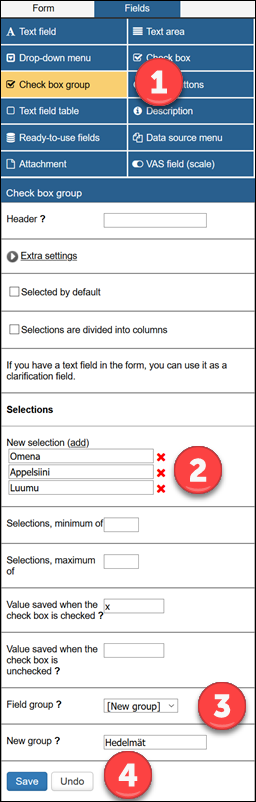
- Next, we will add a checkbox group to the form. First, open Check box group (1). Enter the options in Selections (2). If you need more rows, click on add above the column. The group will be later used to present dependencies, so we will now create a new group for it called Fruits (Hedelmät) (3). Click on Save (4).
- We will now create another similar group for root vegetables (Juurekset) with the selections carrot (porkkana), turnip (nauris) and beetroot (punajuuri). Save your changes by clicking on Save.
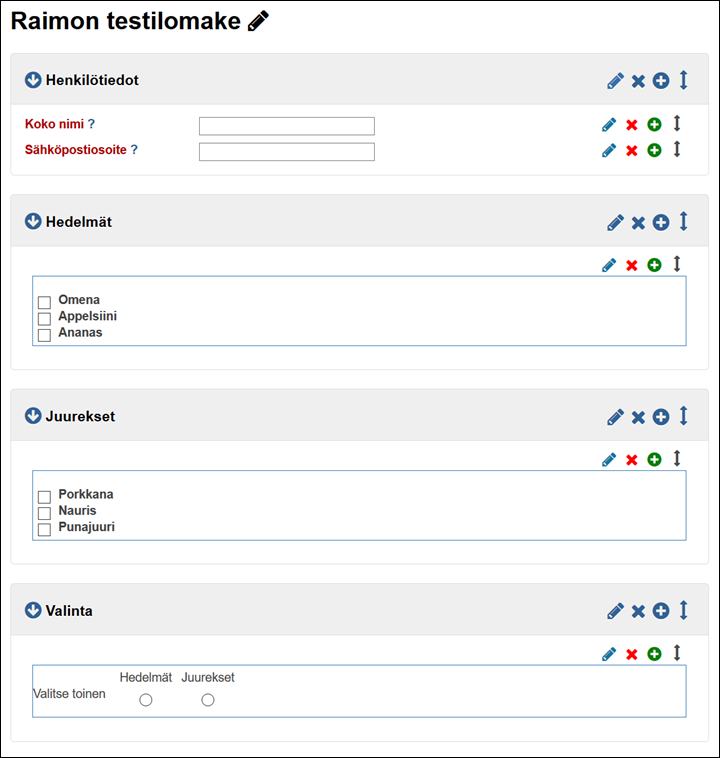
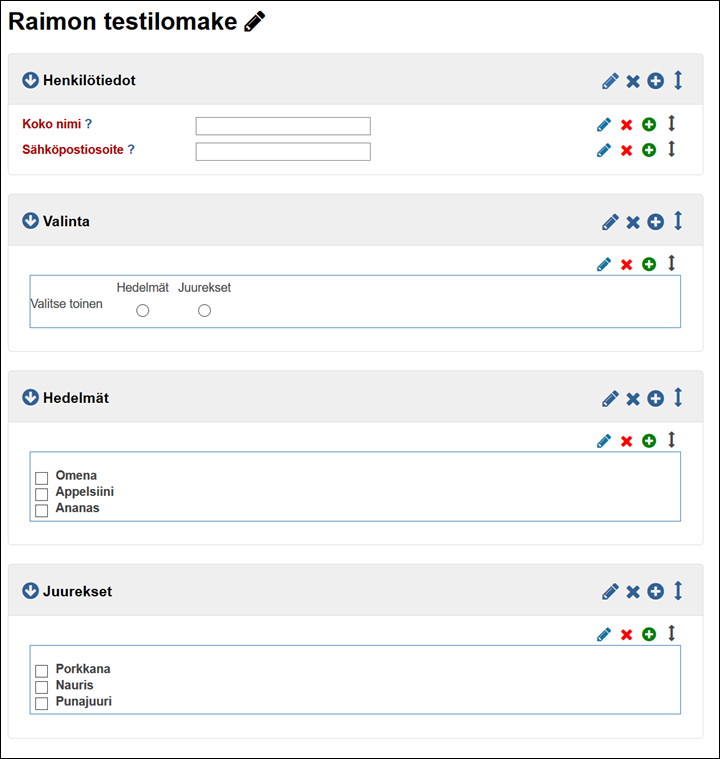
- Now the form should look like this:

Dependencies
Dependency means that respondents are shown different follow-up questions based on their previous answers. For example, if the respondent selects “Fruit” (Hedelmät), they can choose from apple (Omena), orange (Appelsiini) or pineapple (Ananas), but they do not see the options in the group for root vegetables (Juurekset). Let’s continue building our form and first create a radio button group with two options, one for fruits Hedelmät) and another for root vegetables (Juurekset).
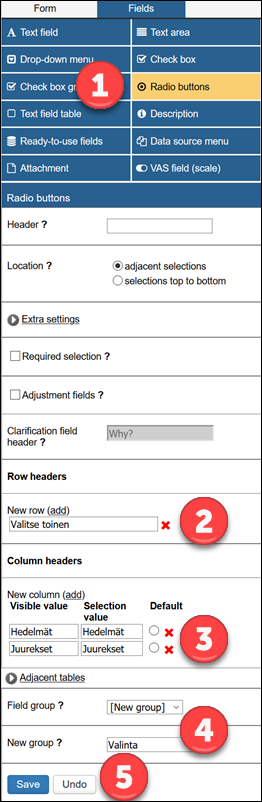
- Select Radio Buttons. Enter a row heading in field (2), options in fields (3), and place the field in a new field group (4). Save by clicking on Save (5).
- The form should look like this:
- Note that the new components are shown at the end of the form. In terms of usability, this order might not be the best one. You can reorder sections of a form by clicking and holding the double-headed arrow with your mouse and dragging the section to a new location.
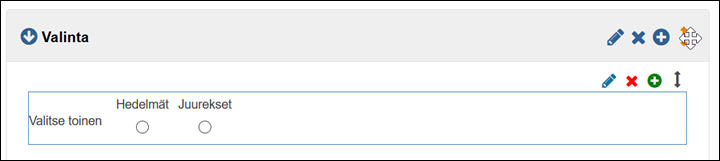
- The form looks much better now. All the field groups and fields on the form are displayed in a more natural order. The idea is that the form shown to the user displays a field group for making a selection (Valinta), with a row instructing the user to choose one (Valitse toinen) of two group options: fruits (Hedelmät) or root vegetables (Juurekset). The user will then see the items included in the group they clicked on (and not those of the other group).
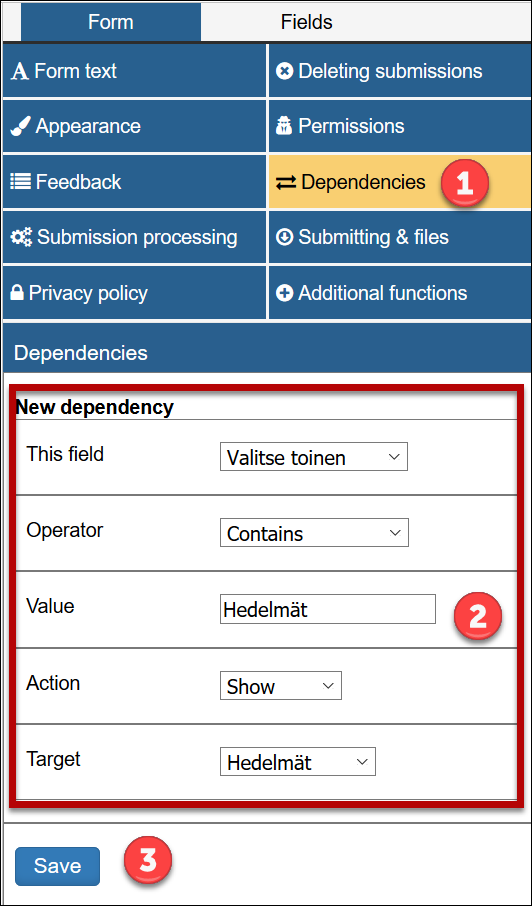
- Next, we will define the dependencies. In the Form tab, click on Dependencies (1). Complete the information in the New dependency section (2) as shown in the image.
- This field = Choose one
- Operator = Contains
- Value = Fruits (Hedelmät)
- Action = Show
- Target = Fruits (Hedelmät)
- Click on Save (3).
- Define the other dependency in the same way
- This field = Choose one
- Operator = Contains
- Value = Root vegetables (Juurekset)
- Action = Show
- Target = Root vegetables (Juurekset)
- You can later edit the dependencies by clicking on the blue ring and remove them by clicking on the red cross.
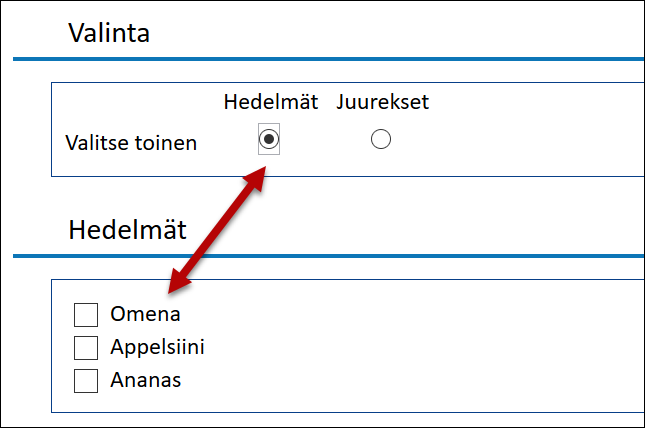
- Open the preview by clicking on Preview.
- When selecting one of the radio buttons, the corresponding checkbox should appear. NOTE THAT THE PREVIEW DOES NOT ALWAYS CORRESPOND TO THE FINAL FORM. It is always best to test the usability and appearance with a published form.

Feedback to the user
It is a good idea to give feedback to the user of the form after they have completed the form and submitted the information.
- In the Form tab, click on Feedback (1). Choose the feedback to be sent. In section (2), you can redirect the respondent to another website. In section (3), you can insert a feedback text. By clicking on Select responses, you can attach information about the answers provided on the form (3). You can also send an email (4) and add the email sender’s address (5). Click on Save (6) to save the changes.
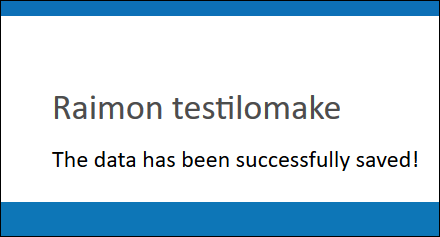
- The default feedback is very brief.
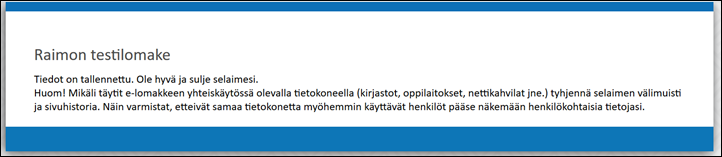
- It is usually better to write a more informative feedback text yourself, for example:

Reusing field groups
In many cases, several different forms collect the same information, such as contact information. Reusing field groups facilitates the preparation of the form and potentially its further use, as the information obtained from the different surveys is in a standard format.
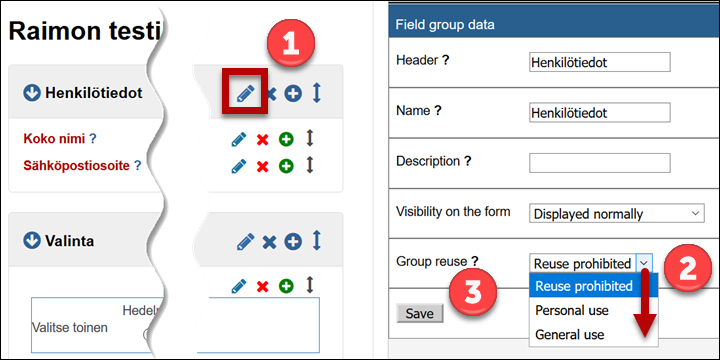
- Click the pencil icon (1) to open the field group in edit mode. In the Group reuse menu, choose whether to allow the field to be reused and who can use it (2). Click on Save (3).
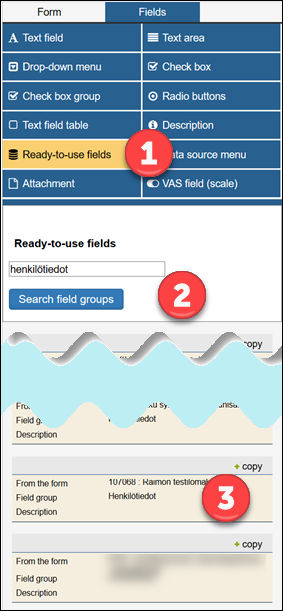
- You can find the available fields under the Fields tab, in the Ready-to-use fields menu.
Publishing a form
- Click on Publication.
- Choose Published when you are ready to publish your form. The option In admin use can be used, for example, in the testing phase. You can restrict access to the form by selecting the login method under Authentication source. You can copy a direct link to the form under Direct link to form (3). Choose your preferred settings and click on Save (4).


User authentication
- You can require users to log in to the form. Select LDAP authentication if you want users to log in with their University of Helsinki username and password.

Processing of collected data
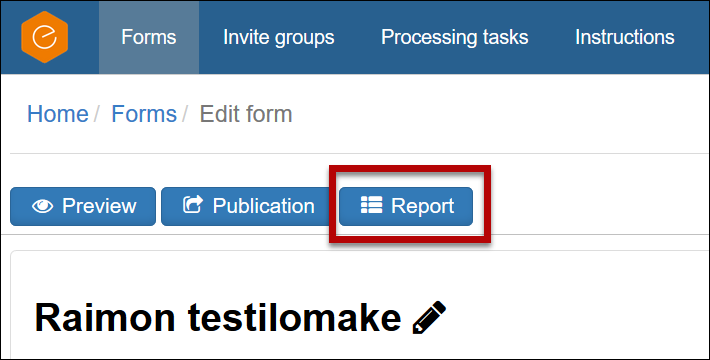
- Once the form is published, you can see a Report button in the editor. Clicking on it will open a report.
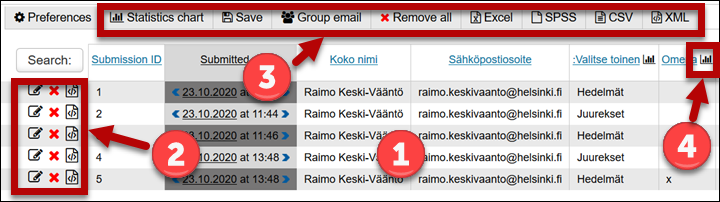
- The responses are displayed in table format (1). You can process, delete or open individual responses in XML format using the icons on the left (2). In the top row (3), you can manage the entire set of responses, for example, transfer the data to Excel or delete all of them. From the title bar, you can open a graph depicting the distribution of the responses to a single question or perform simple statistical actions by clicking on the bar diagram icon.
Parallel forms
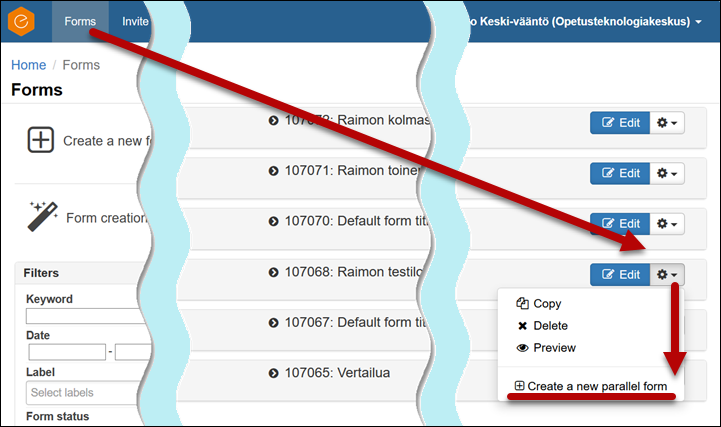
To create parallel forms, such as different language versions, follow these steps:
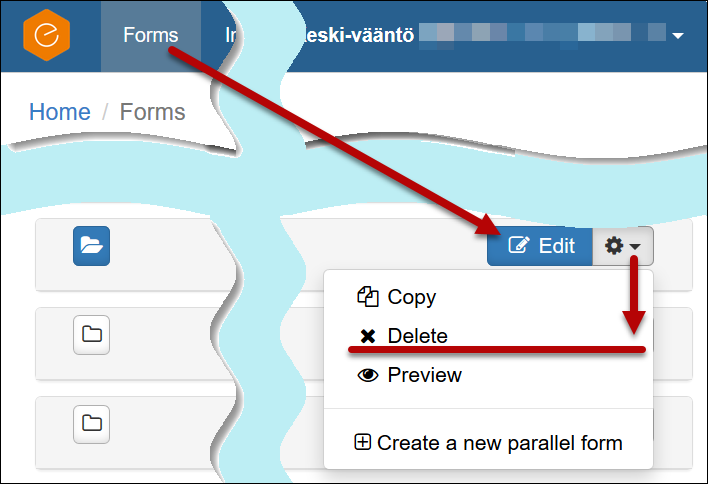
- Open the Forms tab. Click on the arrow next to the gear icon. Click on Create a new parallel form.
Granting rights
The search for e-lomake users only finds those University of Helsinki users who have logged in to the e-lomake system with their own username at least once. If the search fails to find the users to whom you want to grant rights to the form, ask them to log in to the service. User information is checked from the LDAP database in connection with the first login. It is usually a good idea to grant at least administrative rights to several people so that there is always someone who can edit and process the form during holiday seasons, for example.
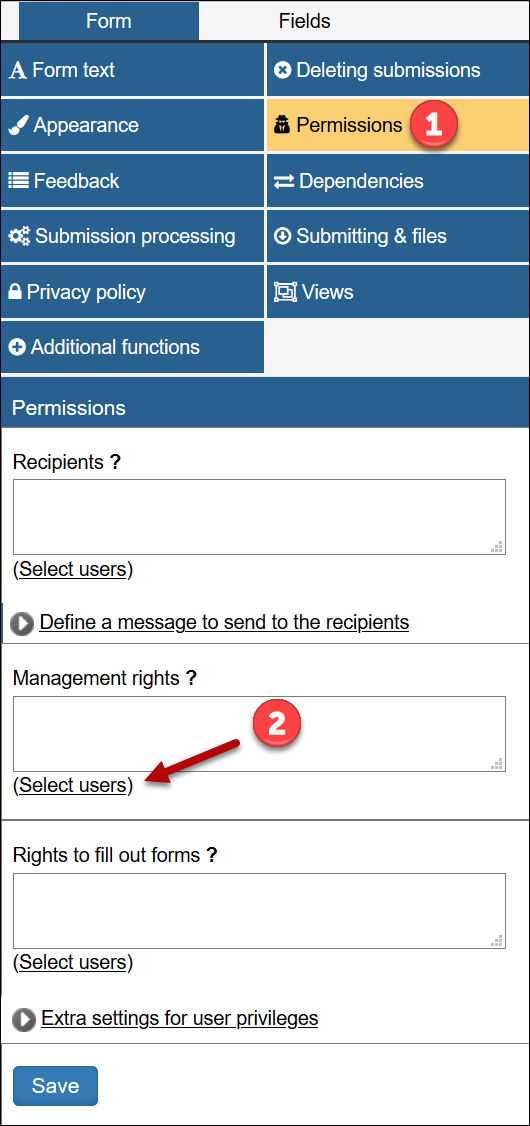
- In the Form tab, click on Permissions (1). Click on Select users (2) to search for users.
- Enter a name or a username in the search field and click on Search. Select the correct person from the list by clicking on Select (2).

Testing a form
You may want to use the form preview mode frequently when you are creating a new form. However, you cannot test all the form properties in the preview mode. Once you have completed the form, publish it, complete the form yourself, review the reports generated by the form, and check the data processing and transfer to other programs. When the form works as desired, disable the form and delete the test responses. Then publish the form for general use.
Deleting a form
- Open the Forms tab and click on the gear icon next to the form. Delete the form by clicking on Delete. Be sure to retrieve the information on the form before deleting it!
E-form user support
The e-lomake is a service provided by the IT Center. In case of technical problems and error situations, IT Helpdesk provides assistance for staff and students.
Video instruction
Give feedback
The instructions site of the University of Helsinki's IT Helpdesk helps you with IT-related issues related to your work. Let us know how we can improve our instructions. We greatly appreciate your feedback!
How would you improve these instructions?