
Starting on 25 March 2023, Multifactor Authentication will be required of all users upon login.
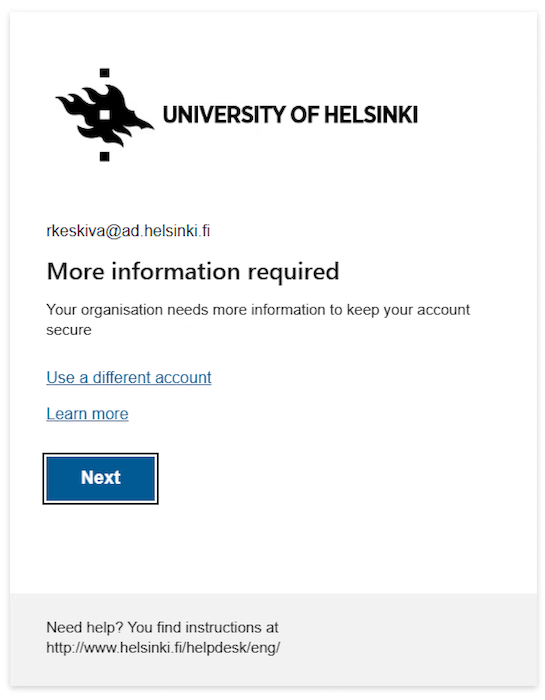
- When you log in, you will receive a More information required message after entering your username and password.
- By pressing the Next button, you will go to the Additional security verification page. If you have registered an authentication method before, you may see a Keep your account secure page. In this case, you can continue directly to adding an MFA method.
- Employees of the University of Helsinki have their work telephone number enabled by default, but you can also choose an authentication application or enter a different phone number as a method. Phone calls should always be used as a backup method only.
- The longest login interval for personal devices is 30 days, but some user groups have shorter times, such as five days for staff. On a risk basis, you may be asked to log in more often.
Quick help
Deployment
When you log in for the first time, you will receive a More information required message after entering your username and password. Follow the instructions and select at least two different authentication methods on two different devices.
NB! We strongly recommend that you register at least two authentication methods on different devices. You can add authentication methods by following the instructions Use and management of MFA methods.
Troubleshooting
All MFA instructions compiled
See the Microsoft website for more information
Detailed help
Logging in for the first time
When you log in for the first time, you will receive a More information required message after entering your username and password. Follow the instructions and select at least two different authentication methods on two different devices.
Authentication methods management site
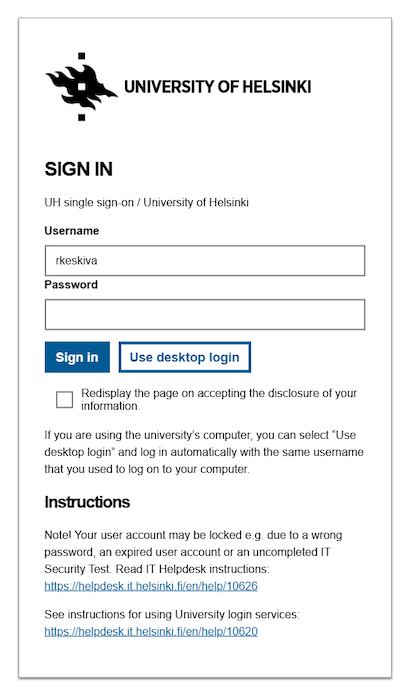
Log in to the service. Enter your username in the format username@ad.helsinki.fi (e.g. rkeskiva@ad.helsinki.fi or hy12345@ad.helsinki.fi).
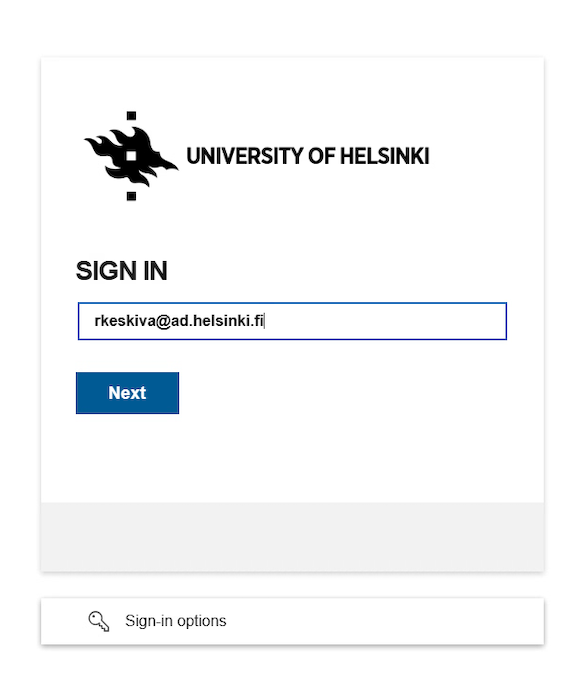
You will then be redirected to the University's login page. At this stage, you can use the short login format (e.g. rkeskiva or hy12345), but the long format, username@ad.helsinki.fi (e.g. rkeskiva@ad.helsinki.fi or hy12345@ad.helsinki.fi), also works.
Click Sign in.
Managing authentication methods
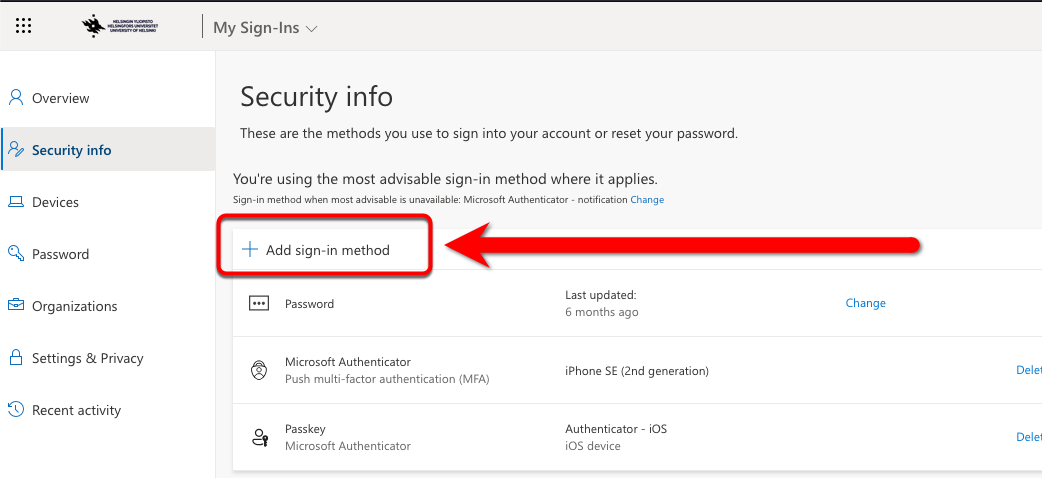
Management of authentication methods can be found at https://mysignins.microsoft.com/security-info
After logging in, you can access the “Security Info” page where you can manage authentication methods.
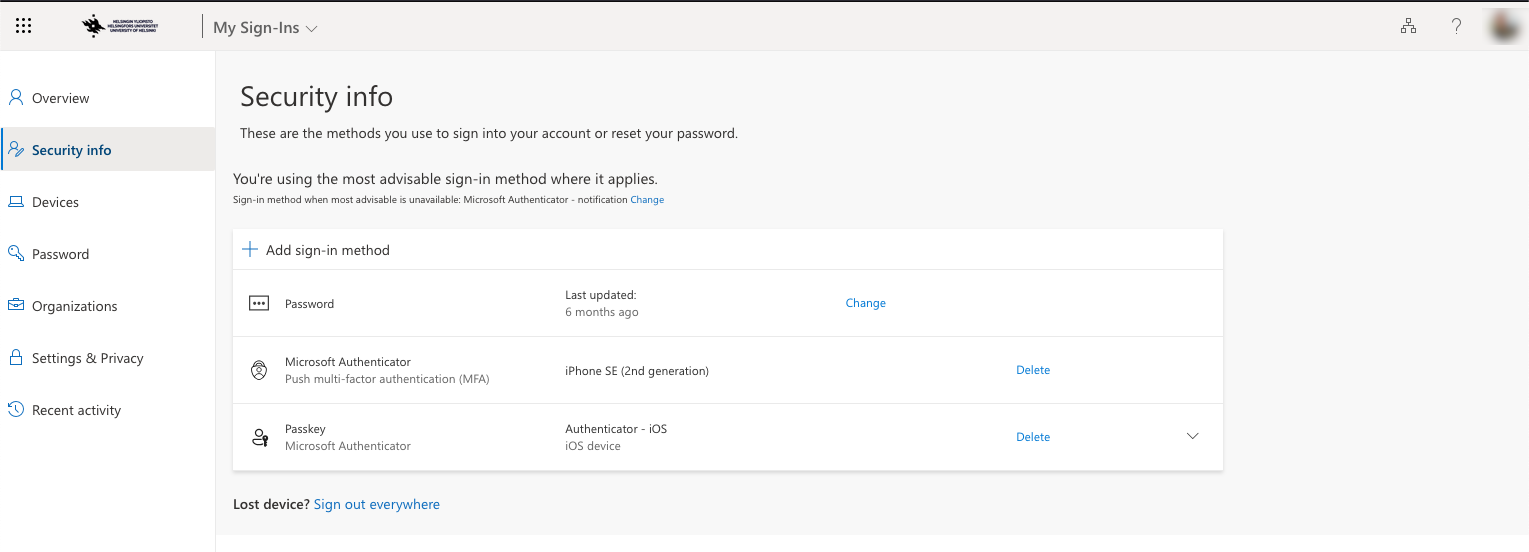
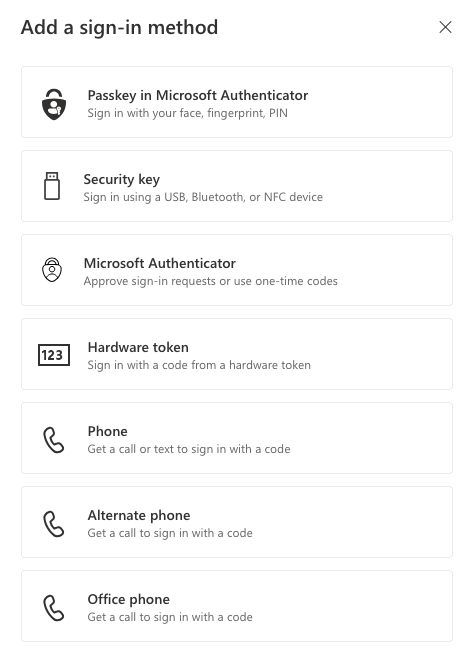
You can add a new authentication method under Add method. Select the authentication method to be added from the list.
We strongly recommend that you add at least two authentication methods on two different devices. The recommended primary methods are Passkey in Microsoft Authenticator and Microsoft Authenticator. Phone call authentication should always be a backup method only.
Adding an authentication method
Management of authentication methods can be found at https://mysignins.microsoft.com/security-info
You can add a new authentication method under Add sign in method.
Select the authentication method to be added from the list that opens.
The longest login interval for personal devices is 30 days, but some user groups have shorter times, such as five days for staff. On a risk basis, you may be asked to log in more often.
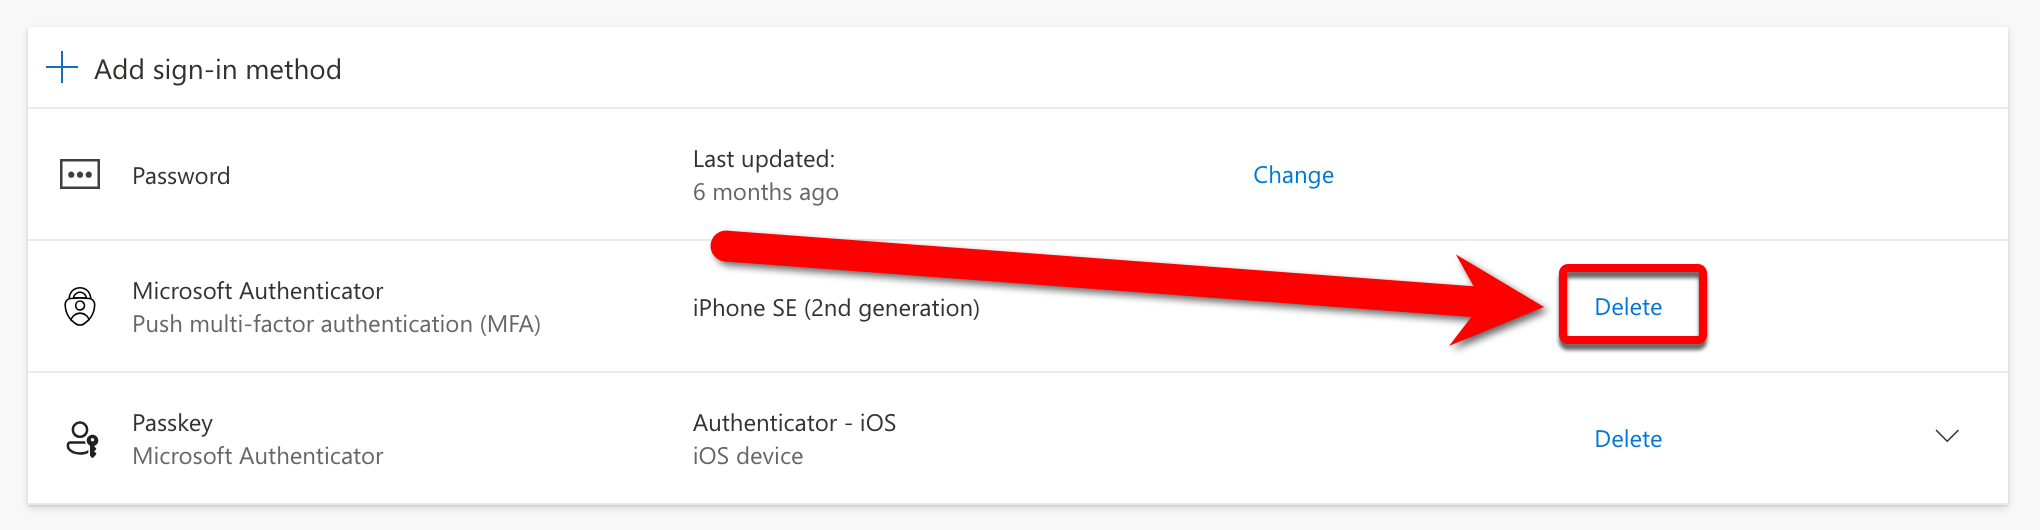
Disabling an authentication method
You can disable unused authentication methods by clicking on the Delete button next to them. Deleting methods is necessary if, for example, you lose your ID or change your mobile phone with the Microsoft Authenticator application.
All MFA instructions compiled
See the Microsoft website for more information
Video instruction
Give feedback
The instructions site of the University of Helsinki's IT Helpdesk helps you with IT-related issues related to your work. Let us know how we can improve our instructions. We greatly appreciate your feedback!
How would you improve these instructions?