
Instructions for multi-factor authentication in most common e-mail applications.
Quick help
Desktop applications
- Microsoft Outlook supports authentication directly and has been using it for years as a default method.
- The Thunderbird e-mail app has functional support at least in the latest 78 series
- The method is also supported in newer versions of Evolution.
Mobile applications
- For mobile applications, support is available in Microsoft Outlook and is used by default.
- Some other mobile apps may also support modern authentication, but these require you to see the application’s instructions and are not covered by the university’s support services.
Detailed help
Mac Mail and Calendar
E-mail and calendar apps that come with MacOS 10.14 (Mojave) and later work normally. However, depending on your Mac settings, you may need to delete and re-add your e-mail and/or calendar account in order for the service to work.
In these instructions, the previous account will be deleted and re-added. This is method is, at this time, the surest way to make multifactor authentication work.
Deleting an account
First, we'll delete the previous account. If you don't already have an account, you can skip this step and go directly to the next step.
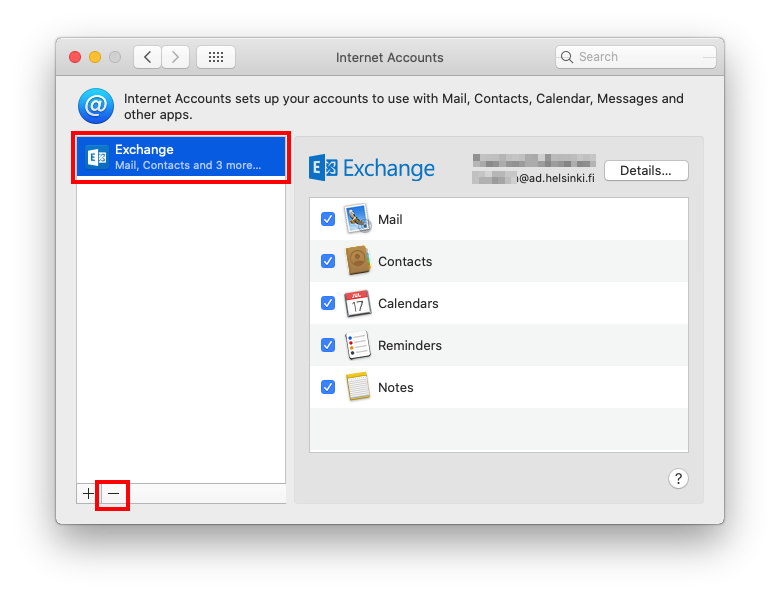
- Open System Preferences > Internet Accounts (@ icon)
- In the list on the left, select the account you want to delete. The account may be named Exchange or you may have named it, e.g. “UH”. In any case, you will see an E logo on the account.
- Then, press the minus button at the end of the list on the left.
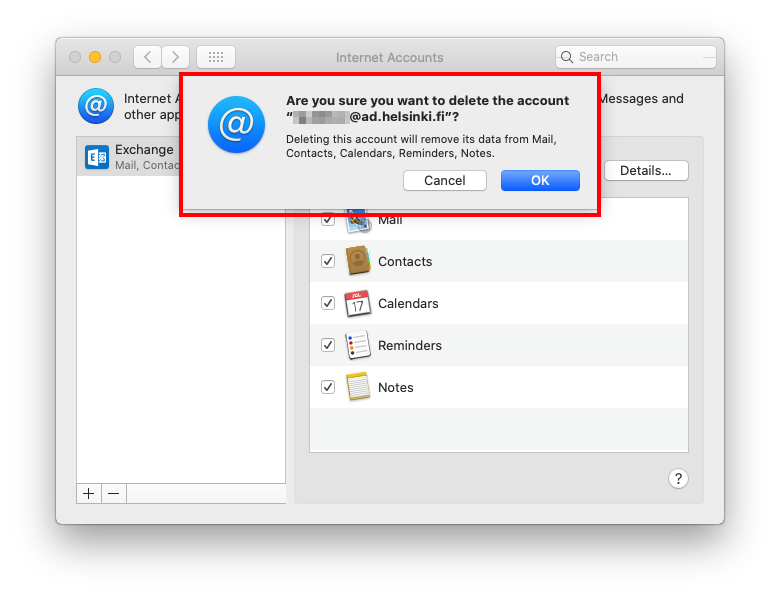
- You'll still be asked to confirm if you're sure you want to delete the account. This confirmation shows your username in a long format: username@ad.helsinki.fi (e.g. rkeskiva@ad.helsinki.fi or hy12345@ad.helsinki.fi). Click OK.
You have now successfully deleted the account and we can re-add the account to enable multifactor authentication.
Adding an account
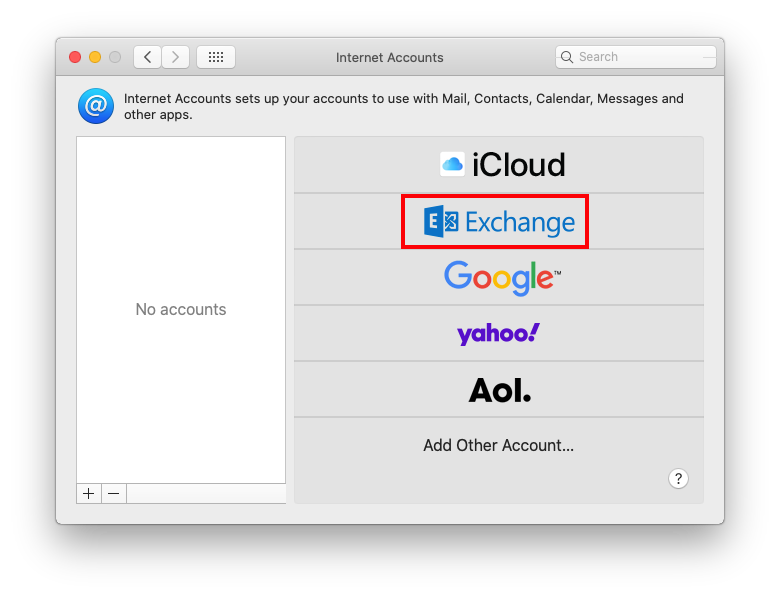
- Ensure you are in the Internet Accounts view (System Preferences > Internet Accounts (@ icon)).
- In the list on the right, select Exchange.
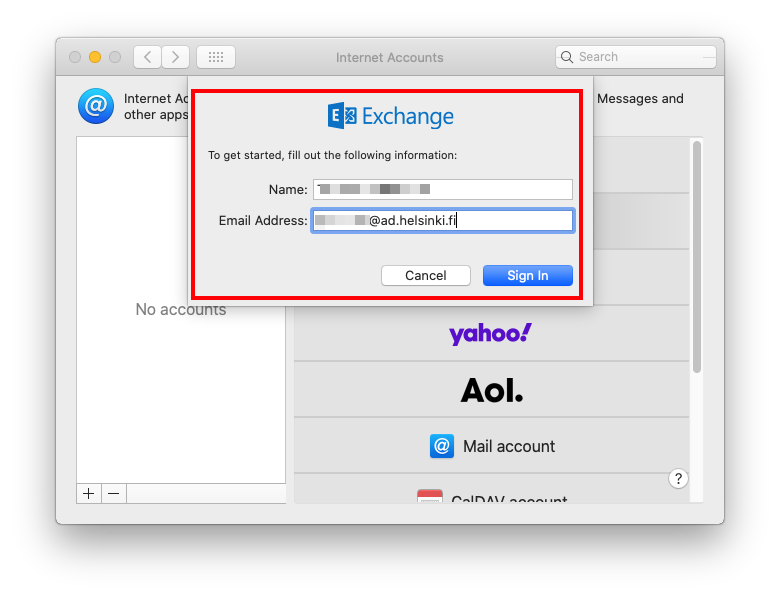
- Ensure your name is correct in the Name section and, in Email Address, enter the long form of your username: username@ad.helsinki.fi (e.g. rkeskiva@ad.helsinki.fi or hy12345@ad.helsinki.fi).
- After entering the data, click Sign In.
- Next, you'll get a confirmation that your login details will be sent to Microsoft for signing in. Select Sign In.
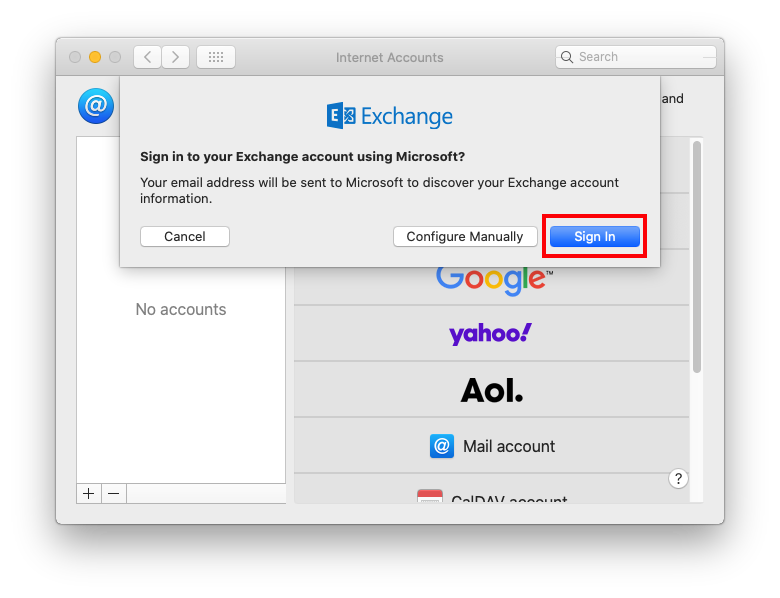
- You will then be presented with the university's login window, where you will need to enter your password and select Sign in.
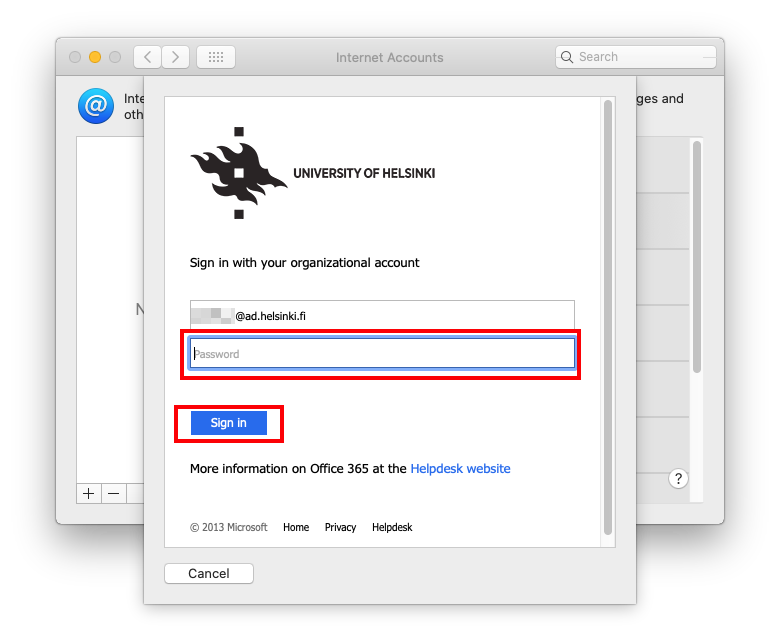
- After logging in with your username and password, you will be redirected to the Multifactor Authentication you have selected. Once authenticated, you can choose which programs you want to use with the account you have added. Here, we recommend ticking at least Mail and Calendars.
- When you press Done, your account is added and you can start using it. Then, open the programs you want to use your account with.
iOS/iPadOS Mail and Calendar Mobile
E-mail and calendar apps work normally. However, depending on your device settings, you may need to delete and re-add your e-mail and/or calendar account in order for the service to work.
Thunderbird, Evolution and Cubbli
Video instruction
Give feedback
The instructions site of the University of Helsinki's IT Helpdesk helps you with IT-related issues related to your work. Let us know how we can improve our instructions. We greatly appreciate your feedback!
How would you improve these instructions?