
In cloud services, is it even more important than before to pay attention to the confidentiality of data (e.g. e-mail).
The university offers several encryption options. These instructions cover the more flexible option for those processing large amounts of confidential data. This option should be implemented by the recommendation of e.g. your supervisor or Helpdesk.
If you have no particular reason to use this encryption method, use the lighter option:
- More information on the lighter encryption option.
- More information on other encryption options at the university. (only in Finnish)
All communications need not be encrypted.
Implement encryption when handling encrypted materials. More detailed classifications in Flamma.
Quick help
Detailed help
Find S/MIME encryption instructions for Mac here. Steps 1, 2, and 5 need only be carried out once.
Encrypted email can only be sent and read as described in these instructions on the computer on which the certificate has been installed!
1. Ordering the certificate
Send an (empty) email to smime-request@helsinki.fi.s.
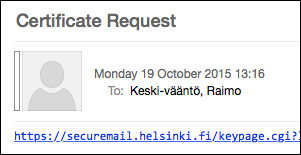
In a moment, you will receive an email from the same address with the header Certificate Request. The email will contain a link to securemail.helsinki.fi. Click on the link.
Please note that the link will work ONLY once for security reasons!
A browser window is opened for creating a password for the certificate.
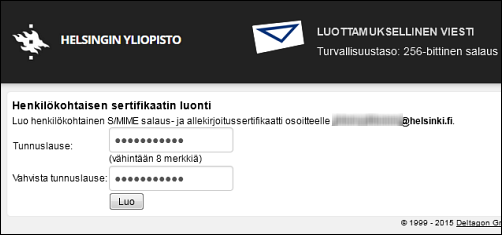
Enter the password (twice for verification) and click Create.
Remember to save the password for later use as well, as you will need it when, for instance, changing computers.
Next, the certificate is downloaded on the computer in the Downloads folder.
2. Importing to Mac
 Open Keychain Access. It is found in the path Applications > Utilities.
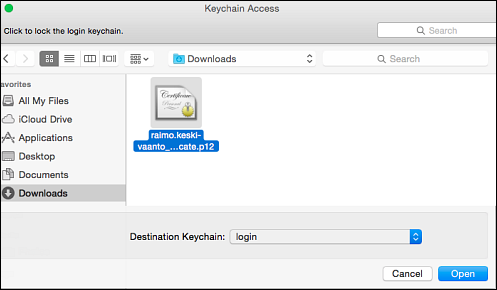
- Click File > Import Items... and find the recently created certificate in the Downloads folder (.p12 file). In the Destination Keychain drop-down menu, select Login. Click Open.
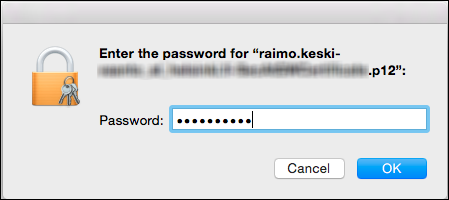
- Next, you will be asked to enter the certificate password (created in step 1).
Marking the certificate as trusted
Apple has marked the certificates in its system as trusted, but certificates imported by the user are not automatically trusted. This is why you need to mark the certificate as trusted. Follow these steps:
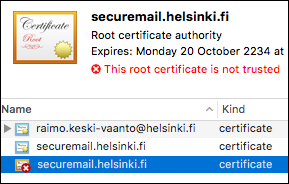
- After importing your recently created certificate, there will be three certificates in the Certificates keychain.
- Right-click the root certificate with a red cross on an envelope icon.
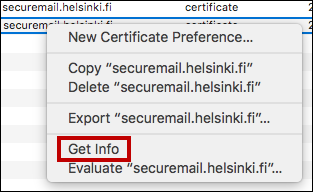
- In the pop-up menu, select Get Info.
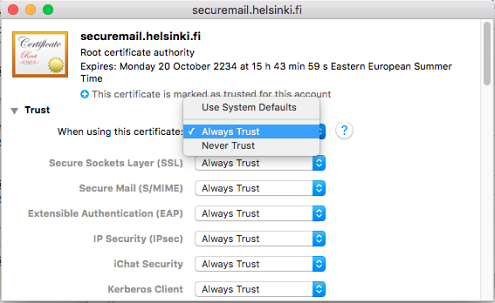
- This opens a more detailed description of the certificate. Click on the arrow in front of the Trust text to see a more specific listing.
- In the section When using this certificate, select Always trust in the drop-down menu. Without this selection, the certificate will work on the computer, but its use will cause error notifications.
- Close the root certificate window (from the red ball in the left-hand corner) and the system will ask for approval. Sign with the password of your user account (not the certificate password).
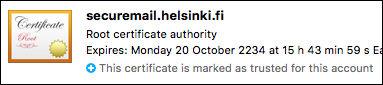
Now, the root certificate and its trust chain have been approved on this computer.
After this, adjust the settings in your email application:
Mac Mail
Reboot your computer and Mail. No more adjustments are needed for the Mail application. Go to section 3 (Ordering the recipient's certificate).
Microsoft Outlook:
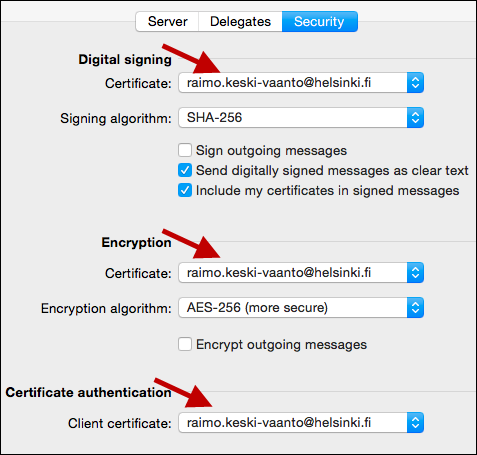
• Open Outlook > Preferences and select Accounts. Select the Helsinki.fi account and click Advanced...
• Select the Security tab. In the drop-down menu, select your email address in sections Digital signing, Encryption, and Certificate authentication. Click OK.
After computer reboot you are ready to send encrypted email with Outlook. You can continue to the next step.
3. Ordering the recipient's certificate
You must order a public certificate for each person you wish to send encrypted email.
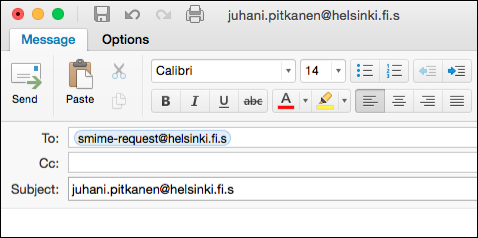
Send an email to smime-request@helsinki.fi.s with the header "recipient's email address.s (e.g. firstname.surname@helsinki.fi.s).
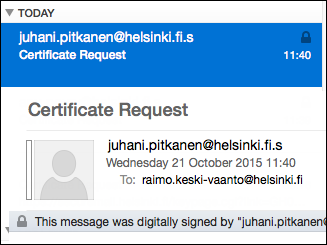
In a moment, you will receive a reply.
The next step is not obligatory but highly recommended:
- Click on the email address in the header field of the Certificate Request message and select Add to Contacts in Mail or Open Outlook contact... in Outlook. You can still edit the information in Outlook. Remember to click Save & Close when you are finished.
4. Sending an encrypted message
When you have ordered the recipient's certificate and saved the person's encrypted email address in your contacts (see the previous step), you can send an encrypted message to the person. One person can have two email addresses; an encrypted and unencrypted one.
- In Outlook, select the Options tab and click Encrypt and Sign.
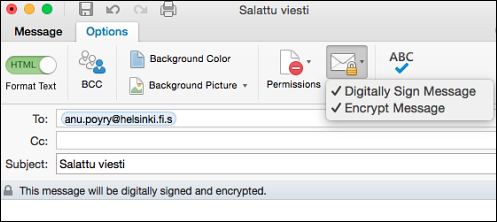
- In Mac Mail, the encryption and signature options are automatically available when the email address ends with .s. Make sure the icon appears as locked.
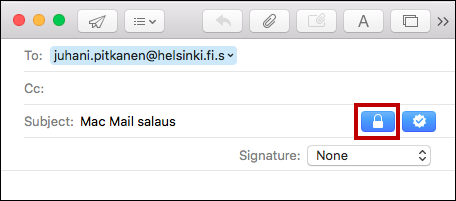
Remember to check that the address ends with .s. The address can now be found in the address book, so make sure to check that you select the encrypted email address.
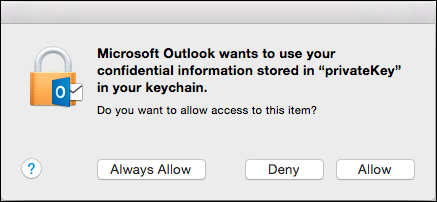
When you click Send, Outlook will ask for the permission to use the key. Select Allow. You can also select Always Allow so that this question will not be shown again.
5. Storing the certificate
The certificate is like a form of ID. Make sure to keep it safe.
The certificate should be carefully stored. However, do not store it on your work computer in an unencrypted place, but on an ENCRYPTED flash drive (instructions for encrypted flash drive). Another sufficiently safe alternative is a password-protected .zip file (instructions for password-protected .zip-file) on a university network drive only you can access. In these cases, remember to also use sufficient password protection.
If the certificate is lost, it has to be abandoned, and the information security must generate a new certificate for the user. This makes email encrypted with the old certificate permanently unreadable. If you have problems with the certificate, please contact Helpdesk.
Please note that emails should not be encrypted if it is not necessary. Only encrypt the messages containing confidential information.
6. Troubleshooting
You can read the encrypted messages but the top of the message reads Unable to verify message signature.
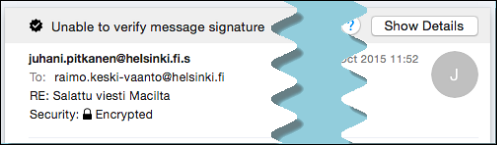
How to fix this: Make the certificate trusted on the computer.
Microsoft instructions
Video instruction
Give feedback
The instructions site of the University of Helsinki's IT Helpdesk helps you with IT-related issues related to your work. Let us know how we can improve our instructions. We greatly appreciate your feedback!
How would you improve these instructions?