
Cryptomator allows you to encrypt your data on your own workstation, on movable storage media and on cloud services.
Cryptomator works by creating a virtual drive through which the encrypted contents can be displayed, edited and augmented. The vault (the encrypted data) itself can be located on any storage media connected to the computer, such as a local drive, network drive or USB flash drive. Cryptomator is designed especially for use with cloud synchronisation services such as OneDrive.
Quick help
Detailed help
Limiting factors
Simultaneous editing of files by multiple users
When using Cryptomator on a shared drive (such as the P drive), avoid having multiple users edit files simultaneously.
Because information is not relayed through the virtual drive and the encryption layer on whether the same file is currently being accessed by another user and whether it has been edited since it was opened, the last user to save their work will overwrite, without warning, any changes to the file made by other users during the same session.
Displaying free space on the virtual drive in Windows
Windows File Explorer always displays the size of the vault as the size and free space of the system drive (C:\). However, the actual size of the vault is always determined by the size of the storage media on which it is located. For a more detailed explanation, please refer to the vendor’s support pages.
If the amount of data you wish to add to your encrypted vault exceeds the free space on the C: drive, you need to copy the files to the vault in multiple batches, with each batch being smaller in size than the amount of free space indicated by the operating system. Once the files have been copied to the vault, they are accessible.
Alternatively, you can copy the files to the vault using WinSCP or Cyberduck, for example. Both can be installed via the Software Center.
No such limit exists in the Mac and Linux operating systems.
Installing Cryptomator
Cryptomator can be installed on Windows, Mac and Linux computers:
- on Windows computers under the university’s centralised maintenance via the Software Center (instructions).
- on Mac computers under the university’s centralised maintenance via the Managed Software Center (instructions).
- Cryptomator is preinstalled on the university’s Cubbli computers
- on users’ home computers via the Cryptomator website
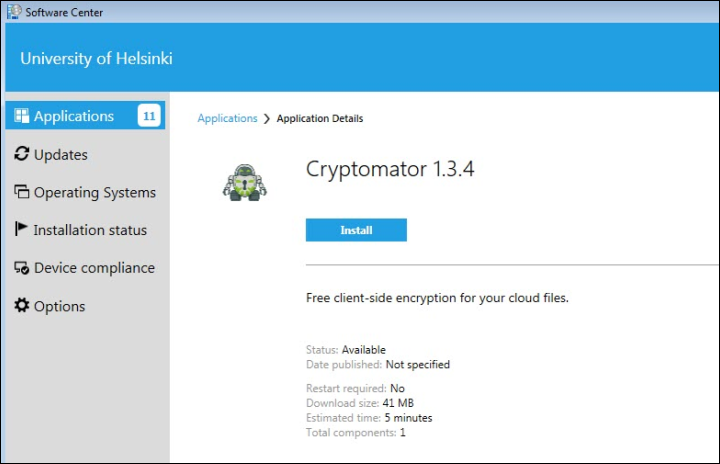
Installation on the university’s Windows computers via the Software Center:
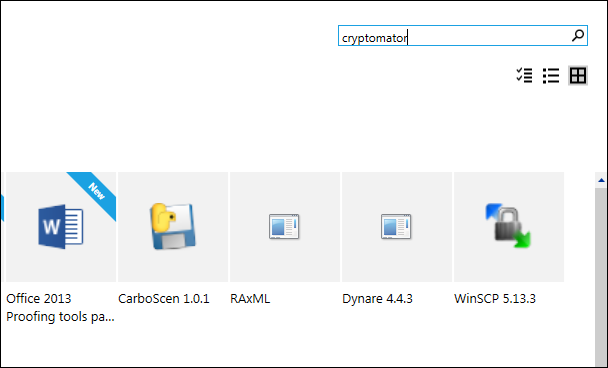
- Launch Software Center via the university menu.
-
Use the Software Center search if the program is not shown on the screen.
-
Click Install.
- Cryptomator will be ready for use in a few minutes.
Getting started with Cryptomator
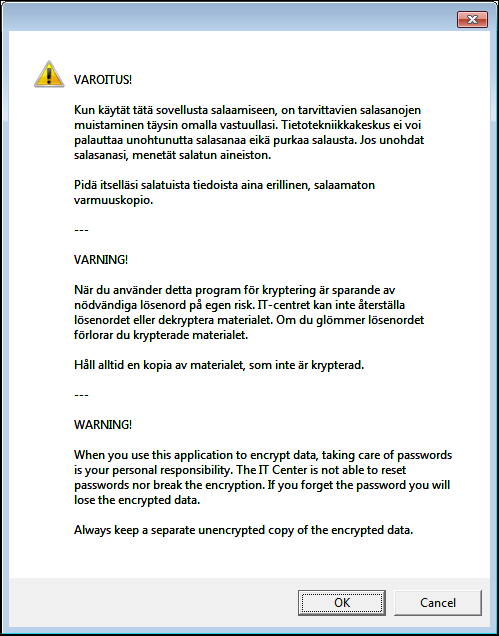
When the program is launched for the first time, the user must acknowledge the system warning regarding the consequences of forgetting passwords, as shown below. The user must acknowledge the warning before using the application.
Creating a new encrypted vault
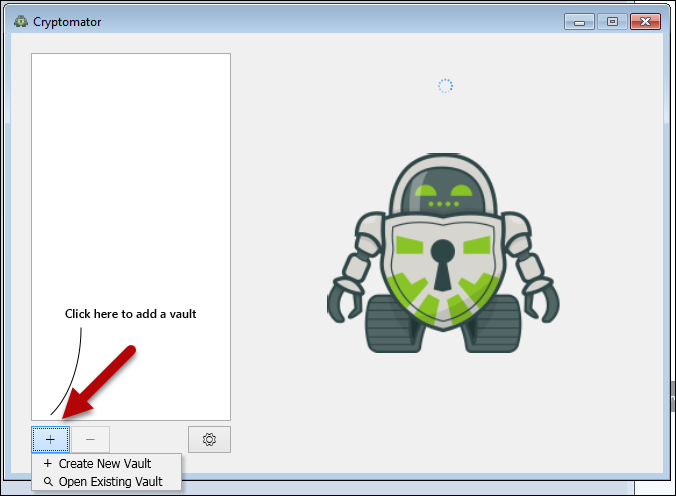
- Click the plus button and choose Create New Vault.
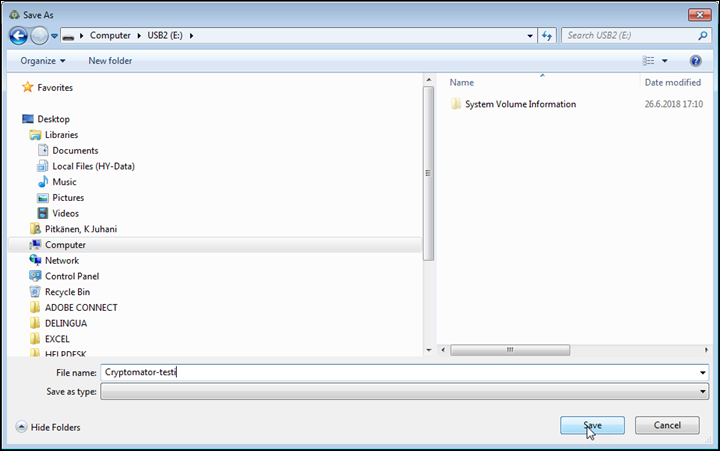
- Choose the drive and folder for creating your vault. Enter the name of your new vault in the File name field and then click Save.
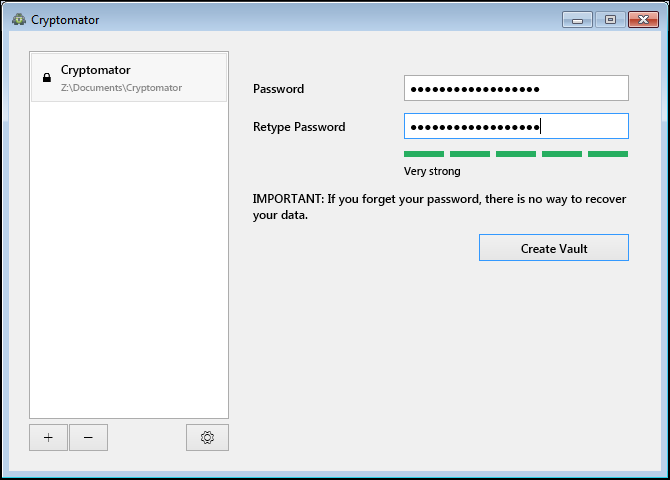
Note that Cryptomator will create a subdirectory under your selected directory. The vault and its contents will be placed inside the subdirectory. - Enter a secure password for the vault. The coloured bar under the password field will turn green when your password is sufficiently secure.
Don’t forget your password!
The IT Center can’t restore a forgotten password or decrypt your vault. If you forget your password, you will lose access to the encrypted data permanently.
- Click Create Vault.
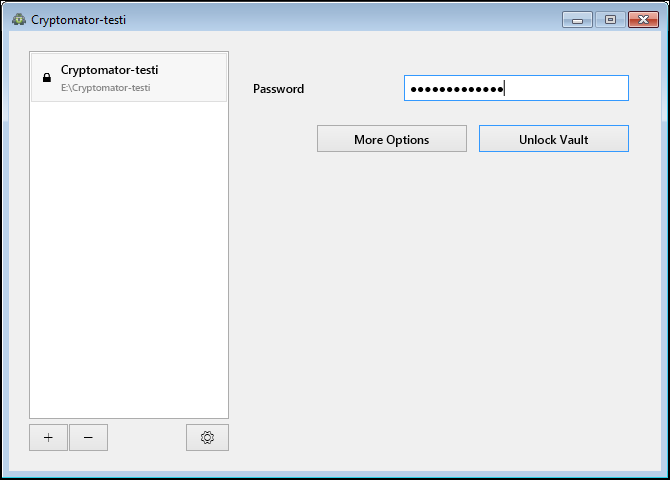
- Cryptomator will display the newly created vault. Enter the password and click Unlock Vault.
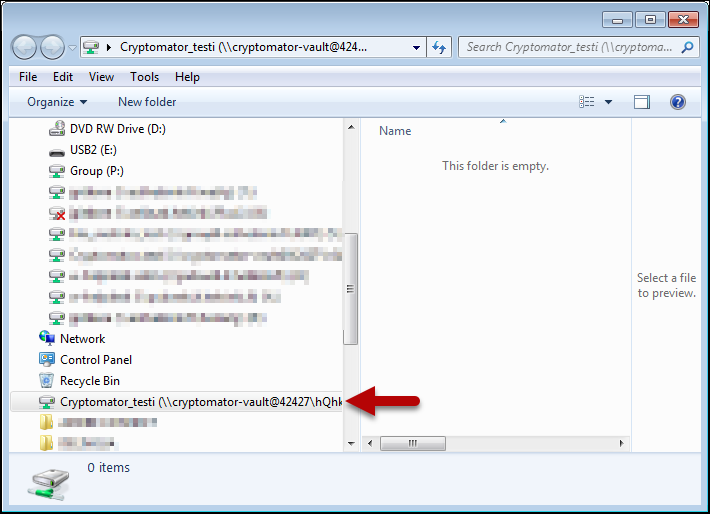
- The vault will now be displayed in the File Manager as a network drive.
Saving data in the vault
When the vault is open, you can save or copy files like you would with a normal drive, either by saving documents in the vault directly or by dragging the files to the vault with the mouse.
Opening an existing vault
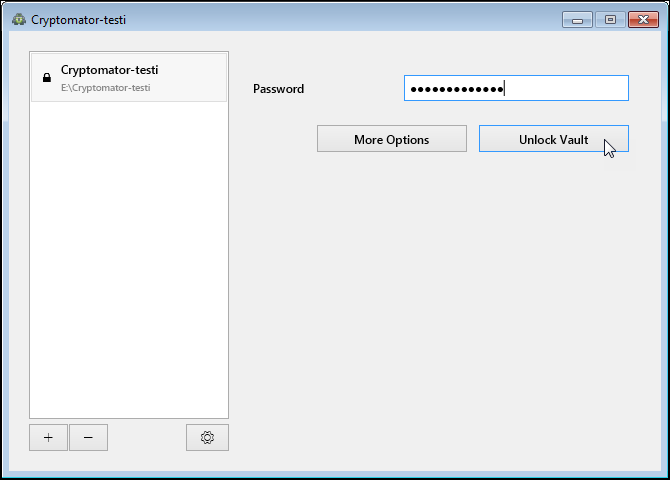
- Choose a vault from the list and enter the password. Click Unlock Vault.
Adding an existing vault to the vault list
- Click the plus button and choose Open Existing Vault.
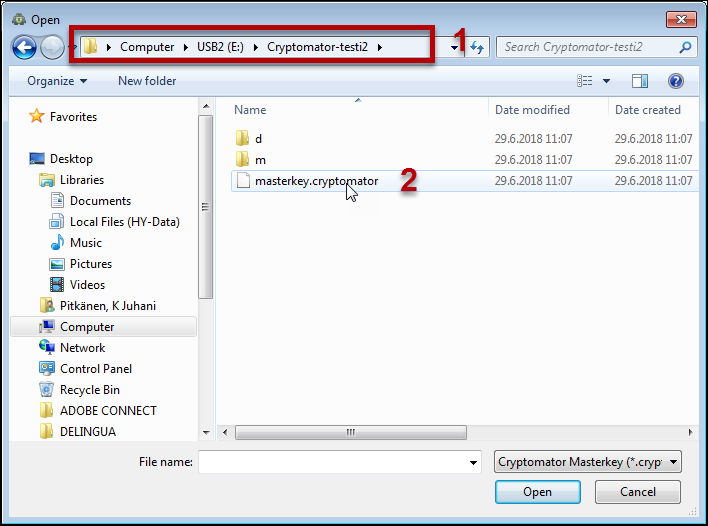
- Navigate to the directory the vault is in and double-click the file masterkey.cryptomator.
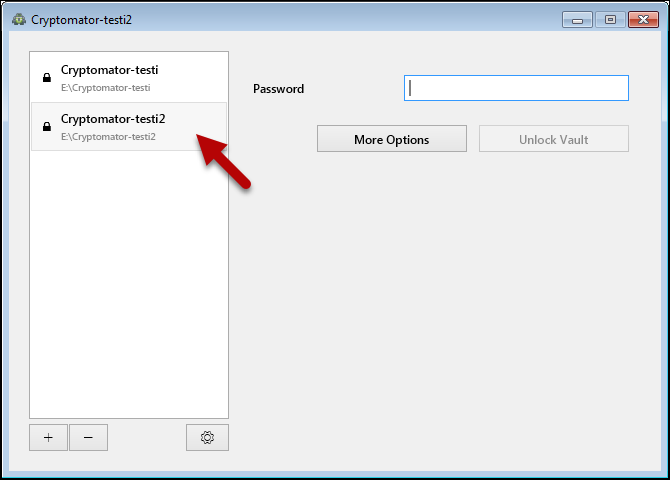
In the screenshot below, the USB flash drive has a directory called Cryptomator-testi2 (1) and the file masterkey.cryptomator is shown in that directory (2). - The vault will now be displayed in the vault list.
- To remove a vault from the list, select the vault and click the minus button. Please note that doing this only removes the vault from the list. If you wish to delete the vault permanently from the storage media, use the computer’s file manager application.


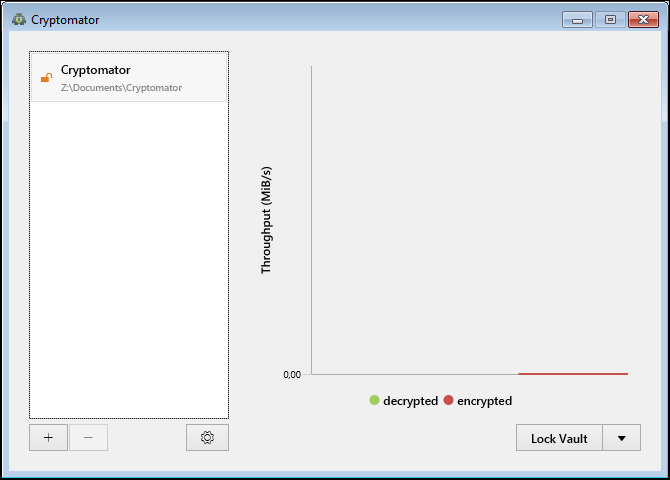
Locking the vault
Remember to close any open files and lock the vault when you finish your session!
Whenever you put your computer in power save mode (e.g. by closing your laptop computer) or log out, remember to first save and close all open files on the encrypted drive and lock the vault.
- From the list, choose a currently open vault that you wish to lock and click Lock Vault.
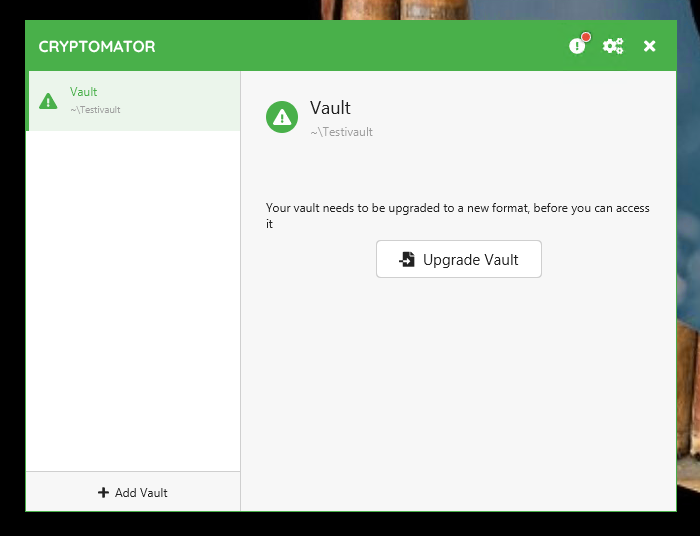
After the update
After the Cryptomator update, the Vault file must be upgraded.
- Click Upgrade Vault.
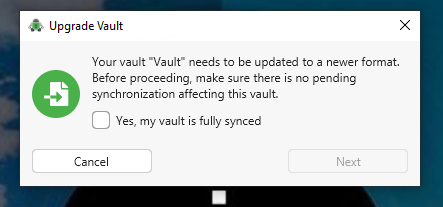
- Check the box Yes, my vault is fully synced and click Next.
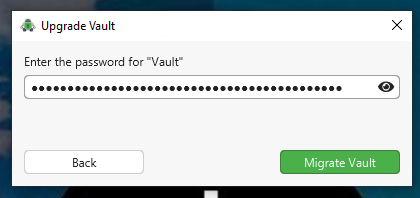
- Enter the password and click Migrate Vault.
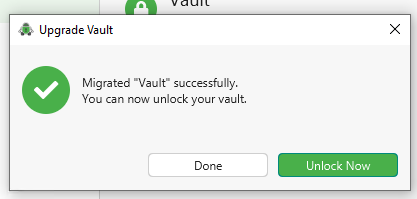
- The migration succeeded. Click Unlock Now.
Video instruction
Give feedback
The instructions site of the University of Helsinki's IT Helpdesk helps you with IT-related issues related to your work. Let us know how we can improve our instructions. We greatly appreciate your feedback!
How would you improve these instructions?