
The videos stored in the online service must be accessible from 23 September 2020 onwards, apart from a couple of exceptions. The requirements do not apply to live streaming. Stored videos must be made accessible within 14 days of publication.
Further information
- Accessibility instructions on the Celia website (in Finnish)
- Educational videos and streaming your lectures (Instructions for teaching)
- Digital Accessibility of Teaching (Instructions for teaching)
- University of Helsinki’s accessibility instructions
- Accessibility of the University’s digital services (in Flamma)
- Accessibility Guide (HU's content producer's guide wiki)
See the ScreenPal tutorials for more instructions https://screencast-o-matic.com/tutorials
Terms
- cc (closed captioning) = video caption track
- Speech to text = Google’s speech recognition service that recognises spoken text and generates text based on it.
- Sync point = synchronisation point used to mark where the text starts. The software identifies such points automatically, but you can also add your own sync points.
- Scripted = The video has been scripted
Quick help
Adding captions to videos briefly
1) Plan well in advance (main structure/script for the video)
2) Add captions any way you like (different options are presented in the instructions). Note that you can either burn the caption permanently into the video OR add a caption file in Unitube Uploader. If you are using a caption file, do not burn the text into the video.
3) Save the video (Publish)
4) Publish in Unitube, for example
You can add captions in many ways. Some of them are presented below to get you started. Try and/or watch tutorials to get a general idea of the process:
- Creating and synchronising captions in Screencast-O-Matic.
- ScreenPal's scripted option is a natural choice for screenshot videos and other tutorials.
Watch a tutorial on Unitube made by the Educational Technology Services (in Finnish). - You can also add captions to the video afterwards in Unitube Uploader. In such a case, the caption file must be available as an SRT or VTT file. This method is also covered in these instructions.
Read more instructions from the Detailed help tab
Detailed help
Adding captions
You can add captions in several different ways:
- use speech recognition (Speech to Text)
- type captions directly to the video (Blank captions)
- Scripted method
- choose captions from a prepared text file Captions from file Captions from file
Blank captions is probably the easiest way and it is the default option.
Open the video you want to add captions to. When the video opens in editing mode, start adding captions by clicking CC in the bottom right corner of the window.
A menu opens for adjusting the initial settings:
- Title: enter the language of the captions. This is used to differentiate between languages afterwards, if several language versions are created. You can also change the title in the editing window.
- If you have prepared the captions in a text file, choose Captions from file (you can edit the text in the next phase).
- The default setting is Blank Captions.
When you are ready, click Start.

Blank captions
A window opens for adding captions.
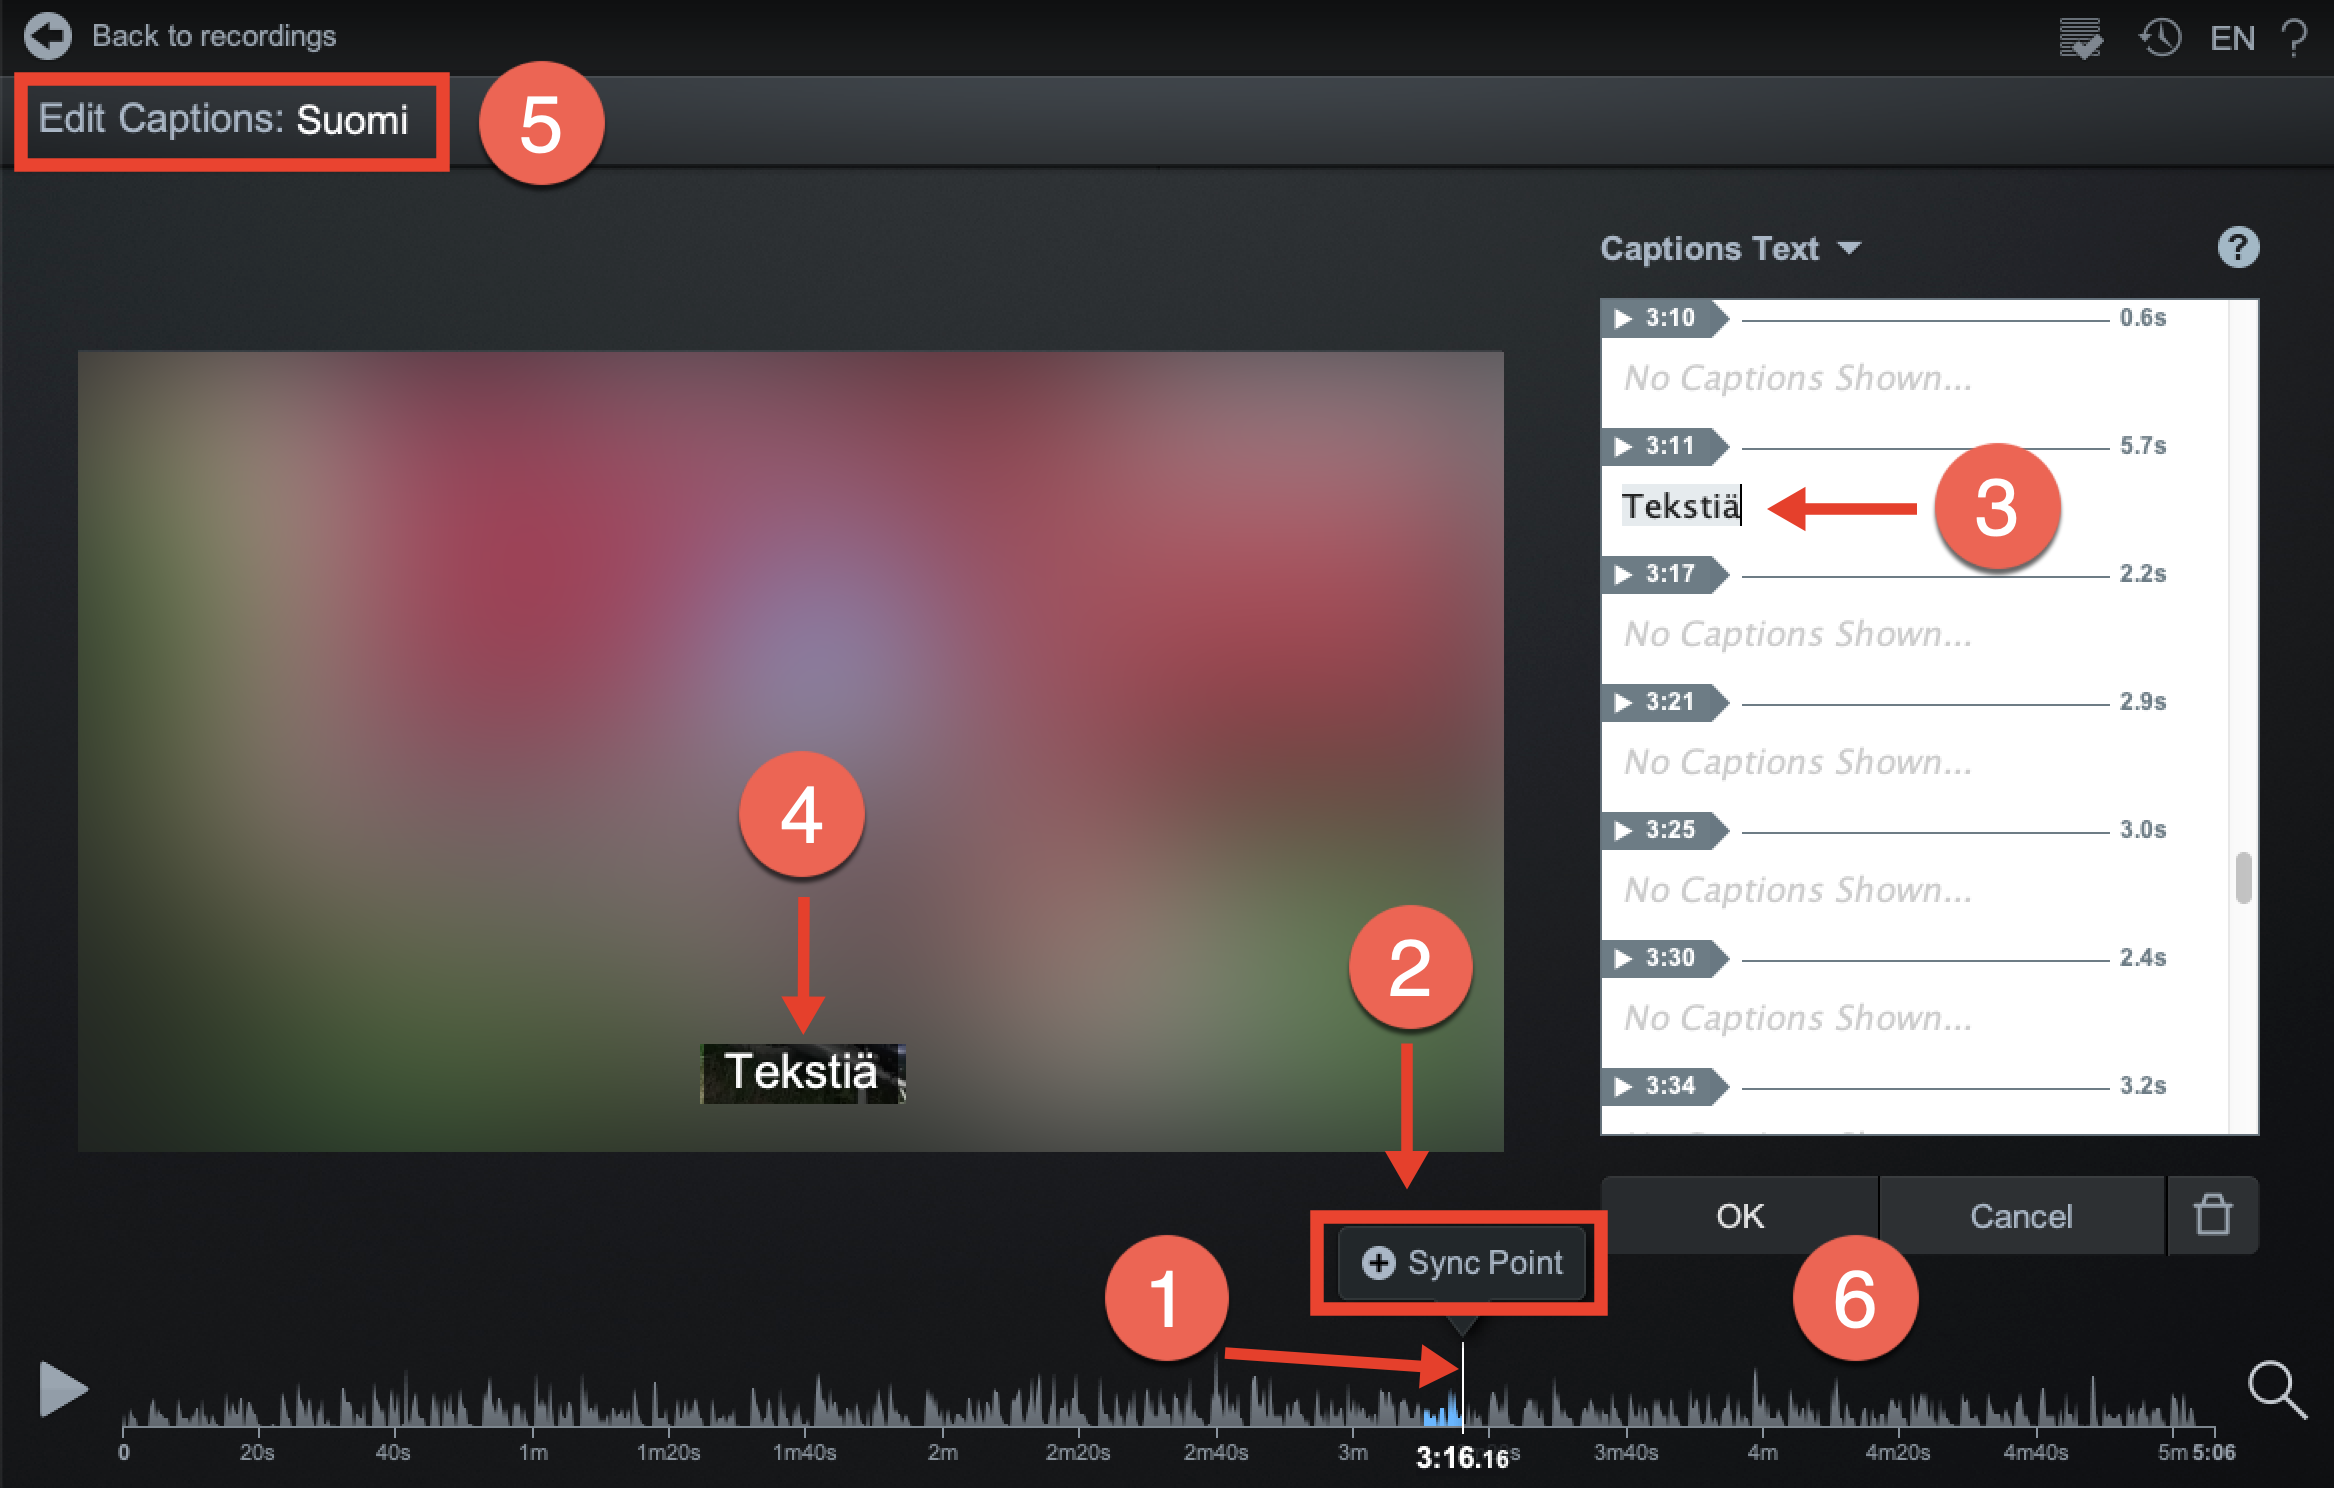
- The audio track runs at the bottom of the window. Above it, you can see a vertical line, the pointer (1).
- Click Sync Point to add a new synchronisation point (2).
- Enter the captions in the window on the right (3). The grey area shows the text length that can be shown at a time.
- The text you enter is also displayed in the preview window (4).
- You can change the language description under Edit Captions: (5).
- When you have added all the captions, click OK (6). You can then return to editing the video.
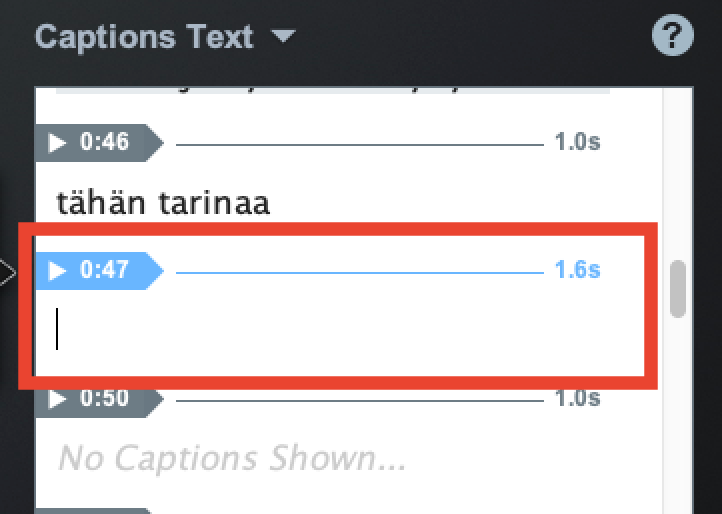
If the video contains speech, the software tries to recognise the rhythm of the sound automatically, allowing you to type the captions to predefined synchronisation points (Sync Point).
Click the arrow in the Captions Text box to hear the audio track of the sync point in question. Type the text you hear in the space below. If necessary, you can click the arrow to repeat the section.
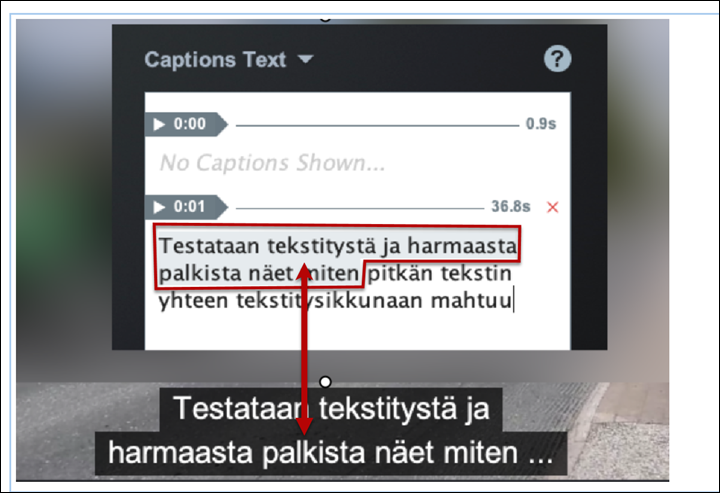
The captions are shown on the video. You can preview the captions in the video by clicking the ▶️ symbol in front of the timeline.
The amount of text that can be shown at one time is shown with grey background in the captions window. The software adds an ellipsis at joints as shown in the image in the instructions. Longer text is synchronised as several parts within the synchronisation point.
If the software does not recognise speech for some reason and create synchronisation points, you can create them yourself.
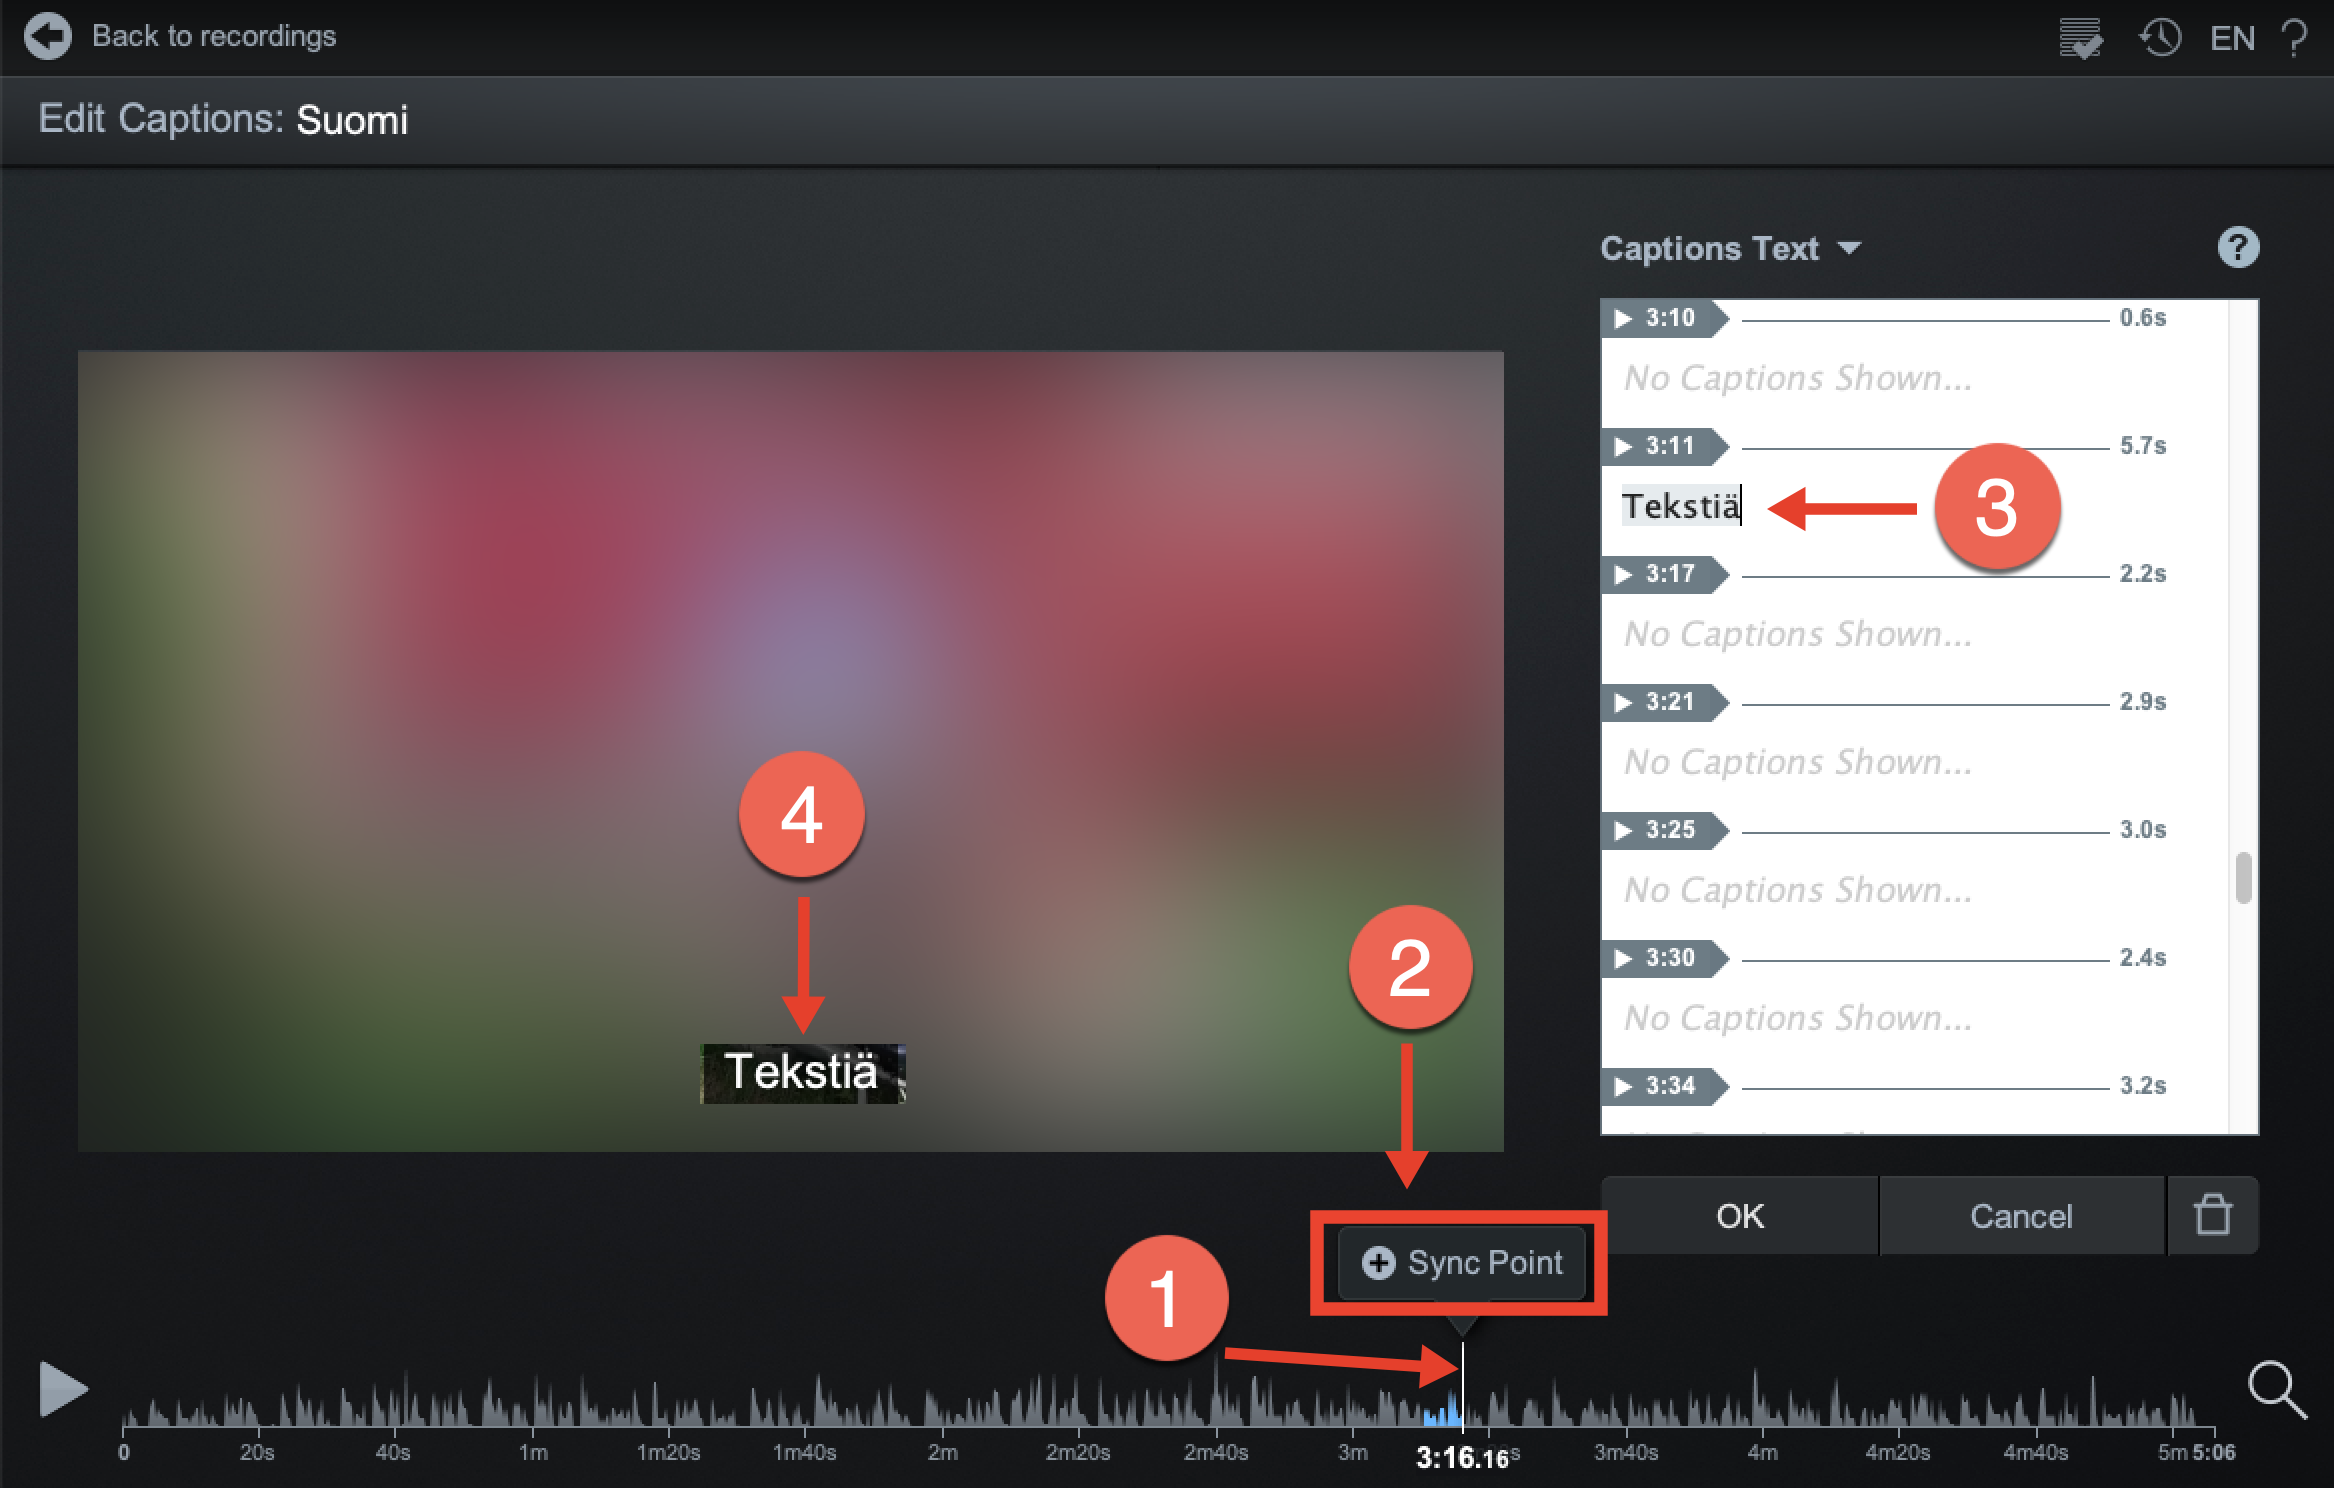
Adding your own synchronisation point
- Move the pointer (1) to the point where you want captions to start.
- Click Sync Point (2).
- A new synchronisation point for the point in question is added to the window on the right (3). Type the captions. The pointer is at the right place already.
- The text you enter is also displayed in the video (4).
If you add a synchronisation point to the wrong place, you can click X to remove it. Note! You can only remove synchronisation points that you have added yourself. You cannot remove the points added by the system.
When you click the X to remove a time stamp, the software asks for confirmation: Sure you want to remove this Sync Point? Click Remove Sync Point.
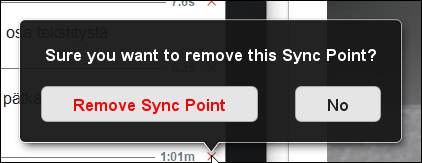
When you have selected Remove Sync Point, the system adds the text after the previous text (shown in yellow in the image):

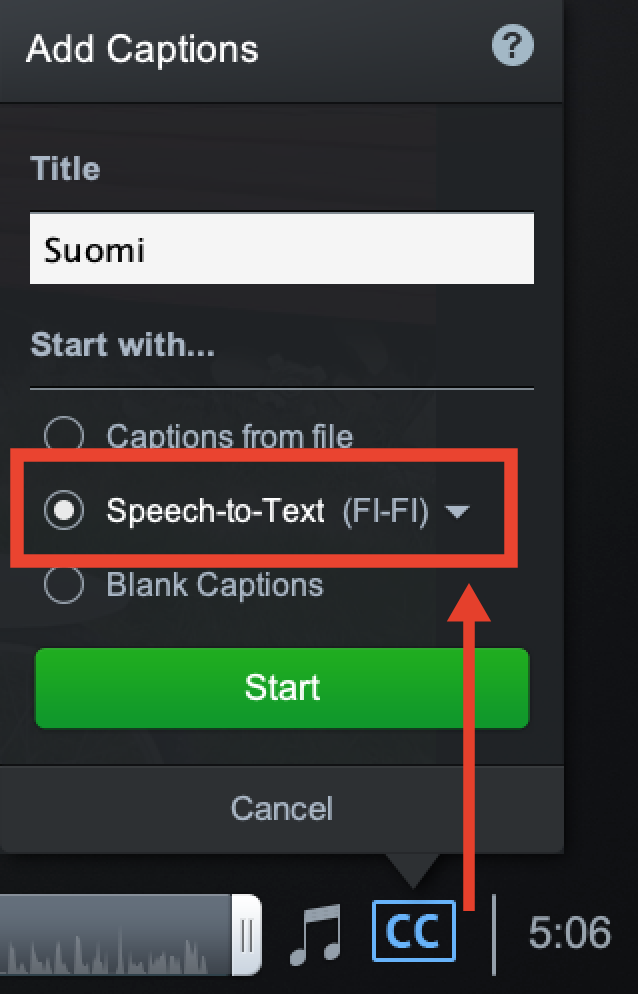
Speech-to-Text
NOTE! Speech-to-Text uses Google’s service, with speech recognition taking place in a cloud service. Keep information security in mind when using this feature! Read more on information security in Flamma.
If the voice on the video is clear, you can choose Speech-to-text as the method for adding captions. Remember to choose the language of the video from the drop-down menu. In the image, the language selected is FI-FI for Finnish. Click Start.
The software starts to recognise text. The time needed for this depends on the duration of the video. Progress is shown in the Captions Text window. The recognised text replaces the Waiting to Request text.
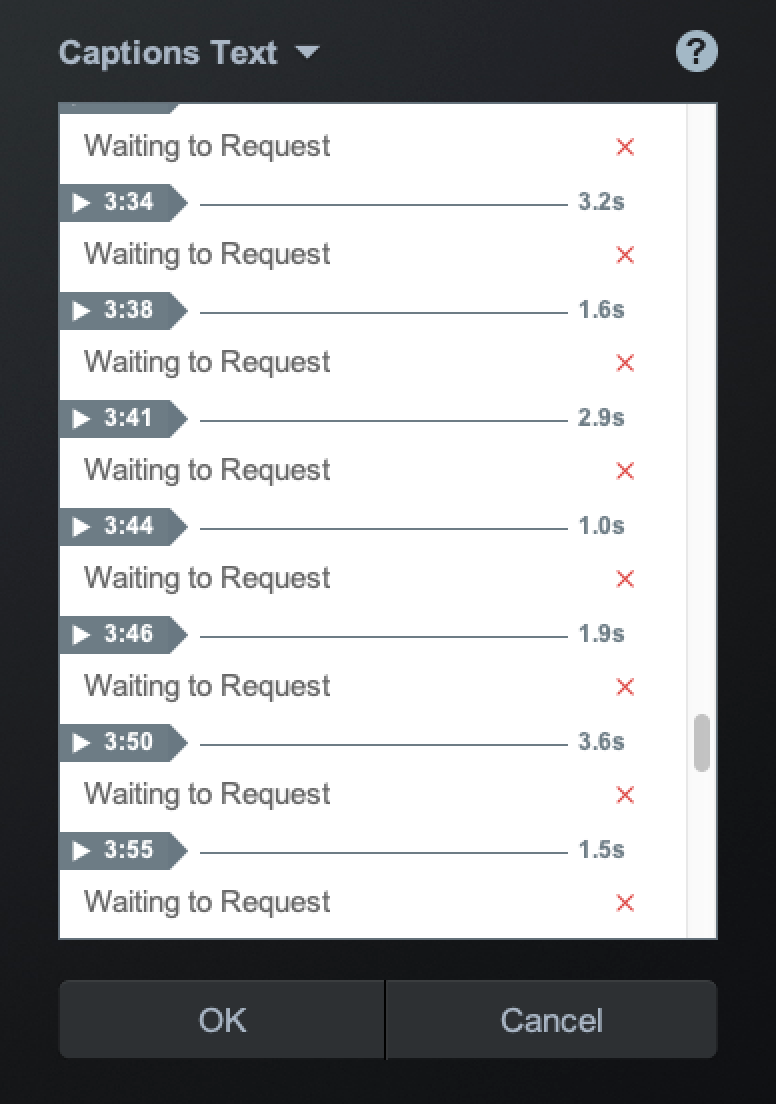
Once recognition is complete, you can start editing the text as described in the instructions for adding captions.
Scripted method
The scripted video method is especially well suited for videos that need spoken sections with captions when it must be possible to update the video at a later time.
- This option allows you to simply describe the events on the screen. Camera image can be captured by showing it in some other software. .
- You can import the script as a text file.
- If necessary, you can edit the captions freely and rearrange the sections.
- In the Scripted option, the recording is scripted and recorded one section at a time.
- The script is also used as captions in the video. You don’t need to type or reattach it when adding captions; instead, the software can create the captions directly from the script. You can enter it through the CC menu. Captions are not on by default, you have to click an option to use them.
Tutorials
- Watch a instructions video on Unitube made by Educational Technology Services(in Finnish)
- Watch Screenpal's own tutorial on the Screenpal website
Creating a video with Open Captions in a nutshell (in Finnish):
Saving a video with captions
Once the video has been edited and captioned, it is time to publish it. You can save (burn) the captions as a part of the video (Open captions), or you can import it to the publishing platform as a separate file (Closed captions). If you save the captions as a part of the video, they are always shown and cannot be hidden. You can add a separate captions file in Unitube following these instructions (link to a lower section on this page). These kinds of Closed captions can be switched on and off in the video player, as necessary.
Note! If you plan to add captions as a separate file on the video, please do not save them on the video. Otherwise, the captions are shown twice on the screen during playing.
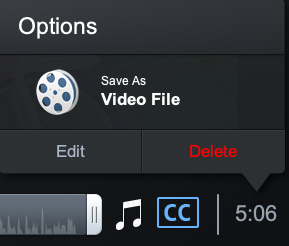
If you are in the video captions or edit mode, click Ready to return to the main video view.
In the Options menu that is already open, click Save As Video File.
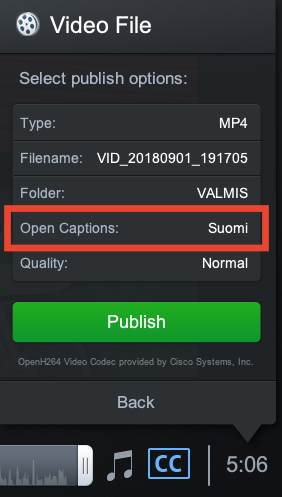
You can edit the settings for saving in the menu that opens. Click the rows to select the settings for saving.
- Type - select the saving format for the video. Options: MP4 (default), AVI
- Filename - you can edit the name used for saving the video
- Folder - choose where to save the video
- Open captions - choose the captions for the video
- Quality - video quality (options are Higher/Lower)
Once you have selected the correct settings, click Publish.
The software starts saving the video.
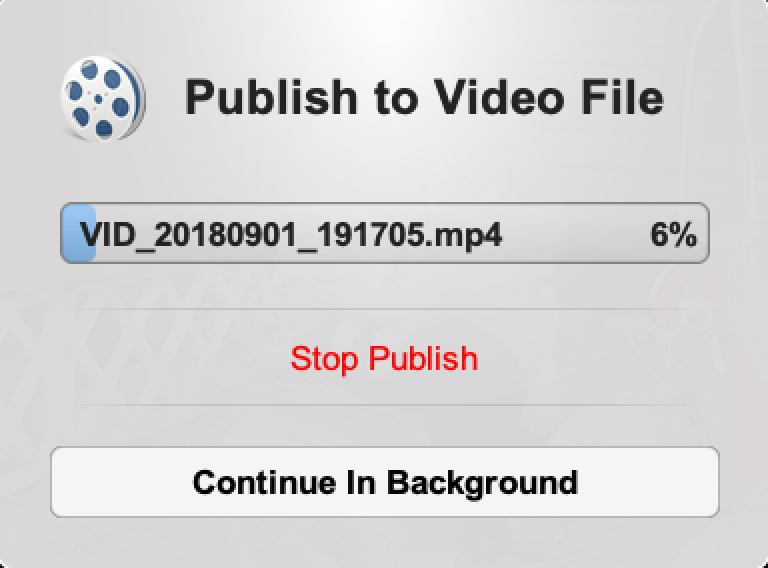
You can click Continue in Background to return to the main menu of the software. Progress is shown at the top of the main menu.

When video is ready, you can share it for publication in Unitube Uploader, for example.
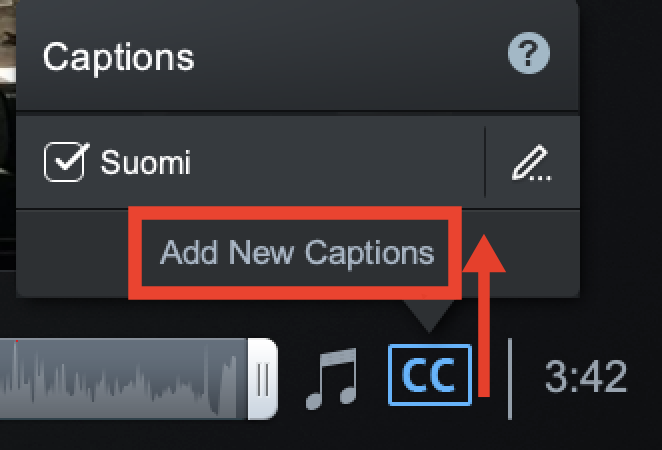
Different language versions
If you want to create different language versions of the same video, you must create a separate text track for each language. To do this, click the CC symbol in the initial video window and click Add New Captions.
Exporting the caption file to a file
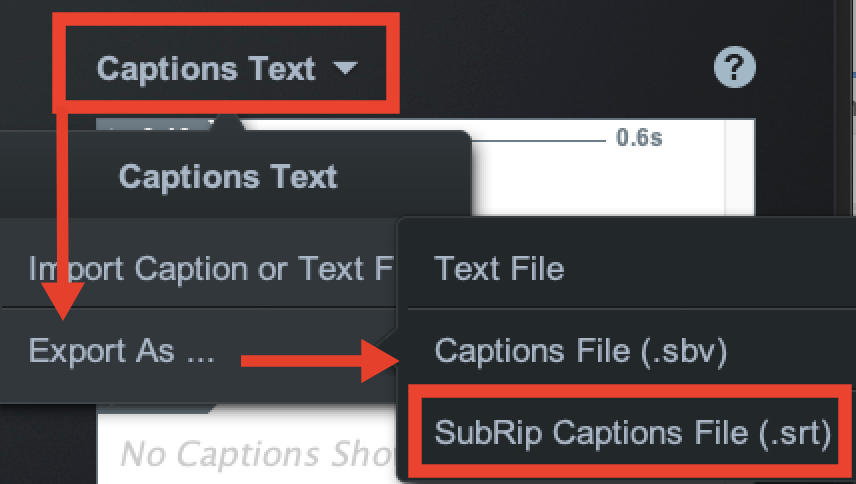
When you have created the captions in ScreenPal, you can export the captions into a separate file (to attach it to the video in Unitube Uploader) as follows:
- Click the Captions Text menu in the caption editing window. Choose Export As… > SubRip Captions File (.srt).
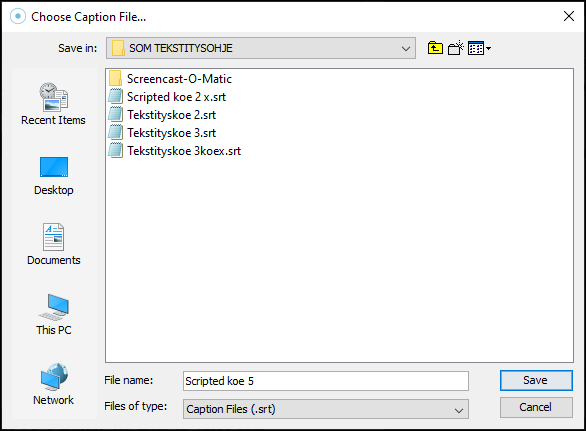
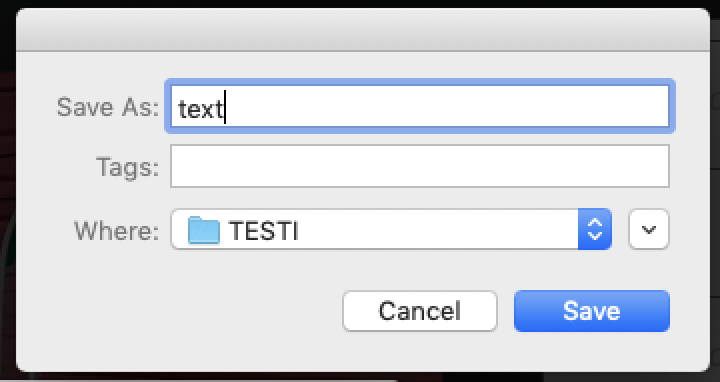
Choose the location for saving:
- Windows:
- Mac:
ScreenPal creates the file (.SRT). When it is ready, it gives the message Successfully exported caption text to file:.
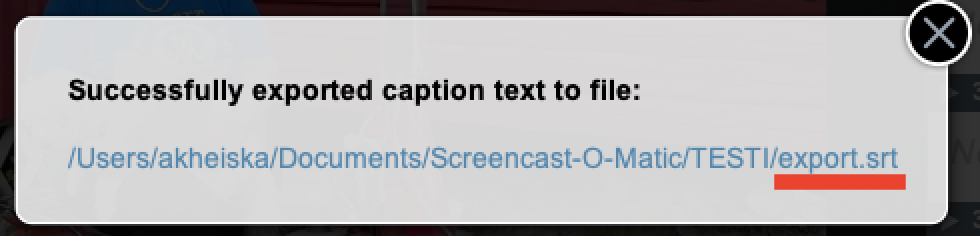
You can now close the edit window.
Adding captions to the video in Unitube Uploader
If you have already saved the video in Unitube, you can add the captions afterwards. In such a case, the captions must be created as a separate file (as explained above, for example)and then create the final file in Unitube as follows:
Find the recording to add captions to and click the video’s row to see its details.
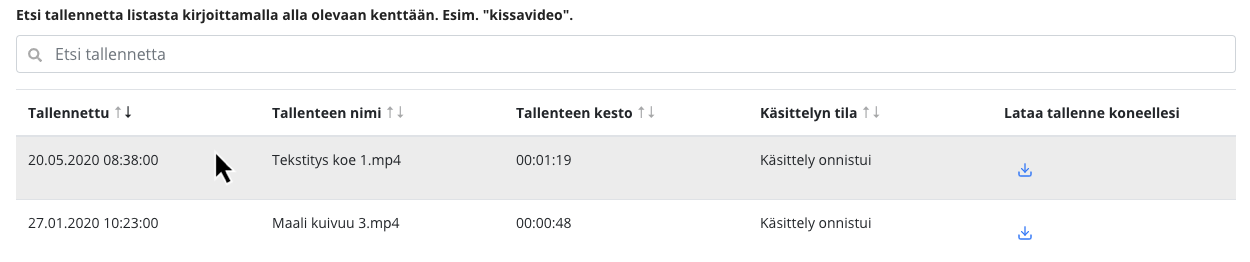
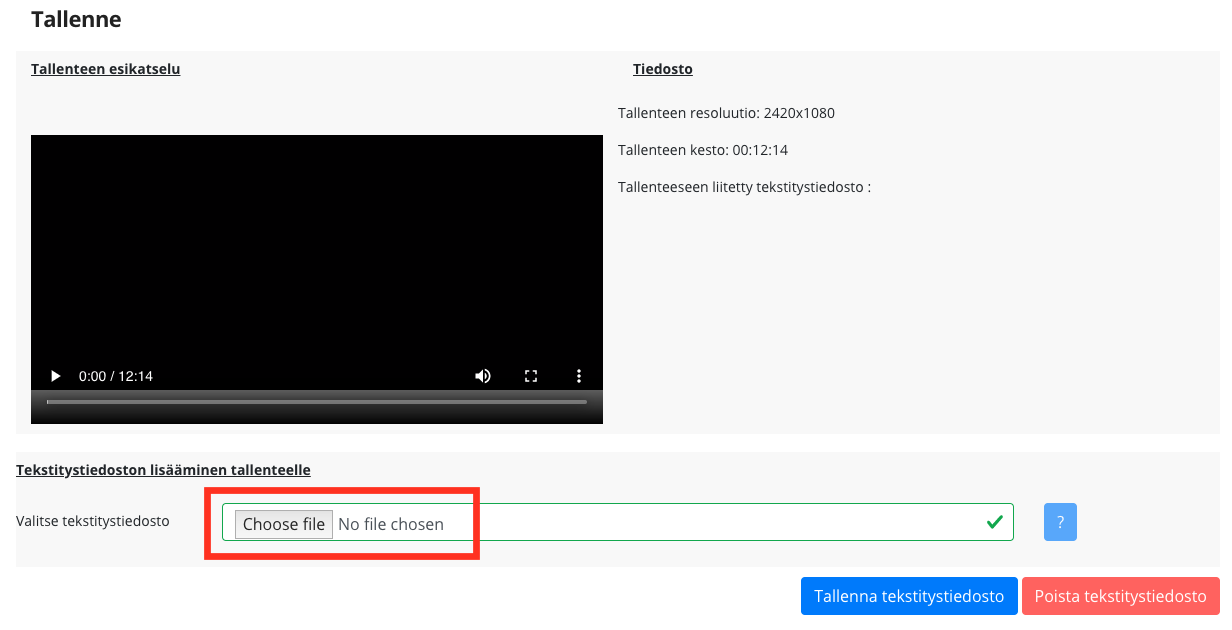
A view opens with detailed information about the video. The captions can be added in the screen under video preview. The captions file format must be .SRT or .VTT.
- Under Choose Caption File, click Choose file.
- Find the prepared captions file in the file menu that opens and then click Save caption file.
Unitube starts to work on adding the captions. Progress is shown under Videota käsitellään (Processing the recording).

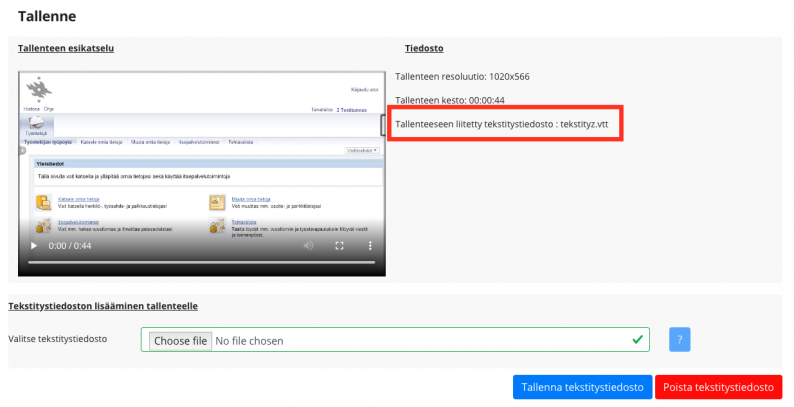
Once the processing is completed, the caption file added is shown in the recording details under Tallenteeseen liitetty tekstitystiedosto (Caption file added to the recording).
More instructions
Watch ScreenPal’s own tutorial on the ScreenPal website: https://som.screencasthost.com/v2-captions
More tutorials are available ScreenPal under the ❓ symbols.
Video instruction
Give feedback
The instructions site of the University of Helsinki's IT Helpdesk helps you with IT-related issues related to your work. Let us know how we can improve our instructions. We greatly appreciate your feedback!
How would you improve these instructions?