Subtitle Edit is a program for creating and editing subtitles that you can use on both your Windows computer covered by the University’s administration and your own Windows home computer. The program is free to use also at home.
These instructions go over the most important features for basic use of the Subtitle Edit program. You can find more help on how to use the program on the Subtitle Edit help pages and in the help videos (only in English).
Quick help
University computer
You can download the Subtitle Edit program to your work computer from the Software Center. See the detailed instructions for additional settings that are important for the operation of the program.
Home computer
You can download the Subtitle Edit program at https://www.nikse.dk/subtitleedit. Home users can use the program free of charge.
Use with a browser
You can also use Subtitle Edit directly in your browser at https://www.nikse.dk/subtitleedit
Detailed help
Table of contents
- Subtitle Edit on Windows computers covered by the University’s centralised administration.
- Basic use of the Subtitle Edit program
- Creating subtitles using a pre-made text file (e.g. manuscript)
- Text editor functions
- Correction of a pre-made subtitle file
- Automatic subtitles ("audio to text")
- Manual subtitling
Subtitle Edit on Windows computers covered by the University’s centralised administration.
Download Subtitle Edit from the Software Center (only available for administrated Windows computers). Due to the limitations of the software, it is unfortunately not possible to automatically adjust its settings to be optimal for users on administrated machines, but it is recommended that the user makes the following changes to the program settings before the deployment of the program to ensure that the functions described in the instructions work correctly.
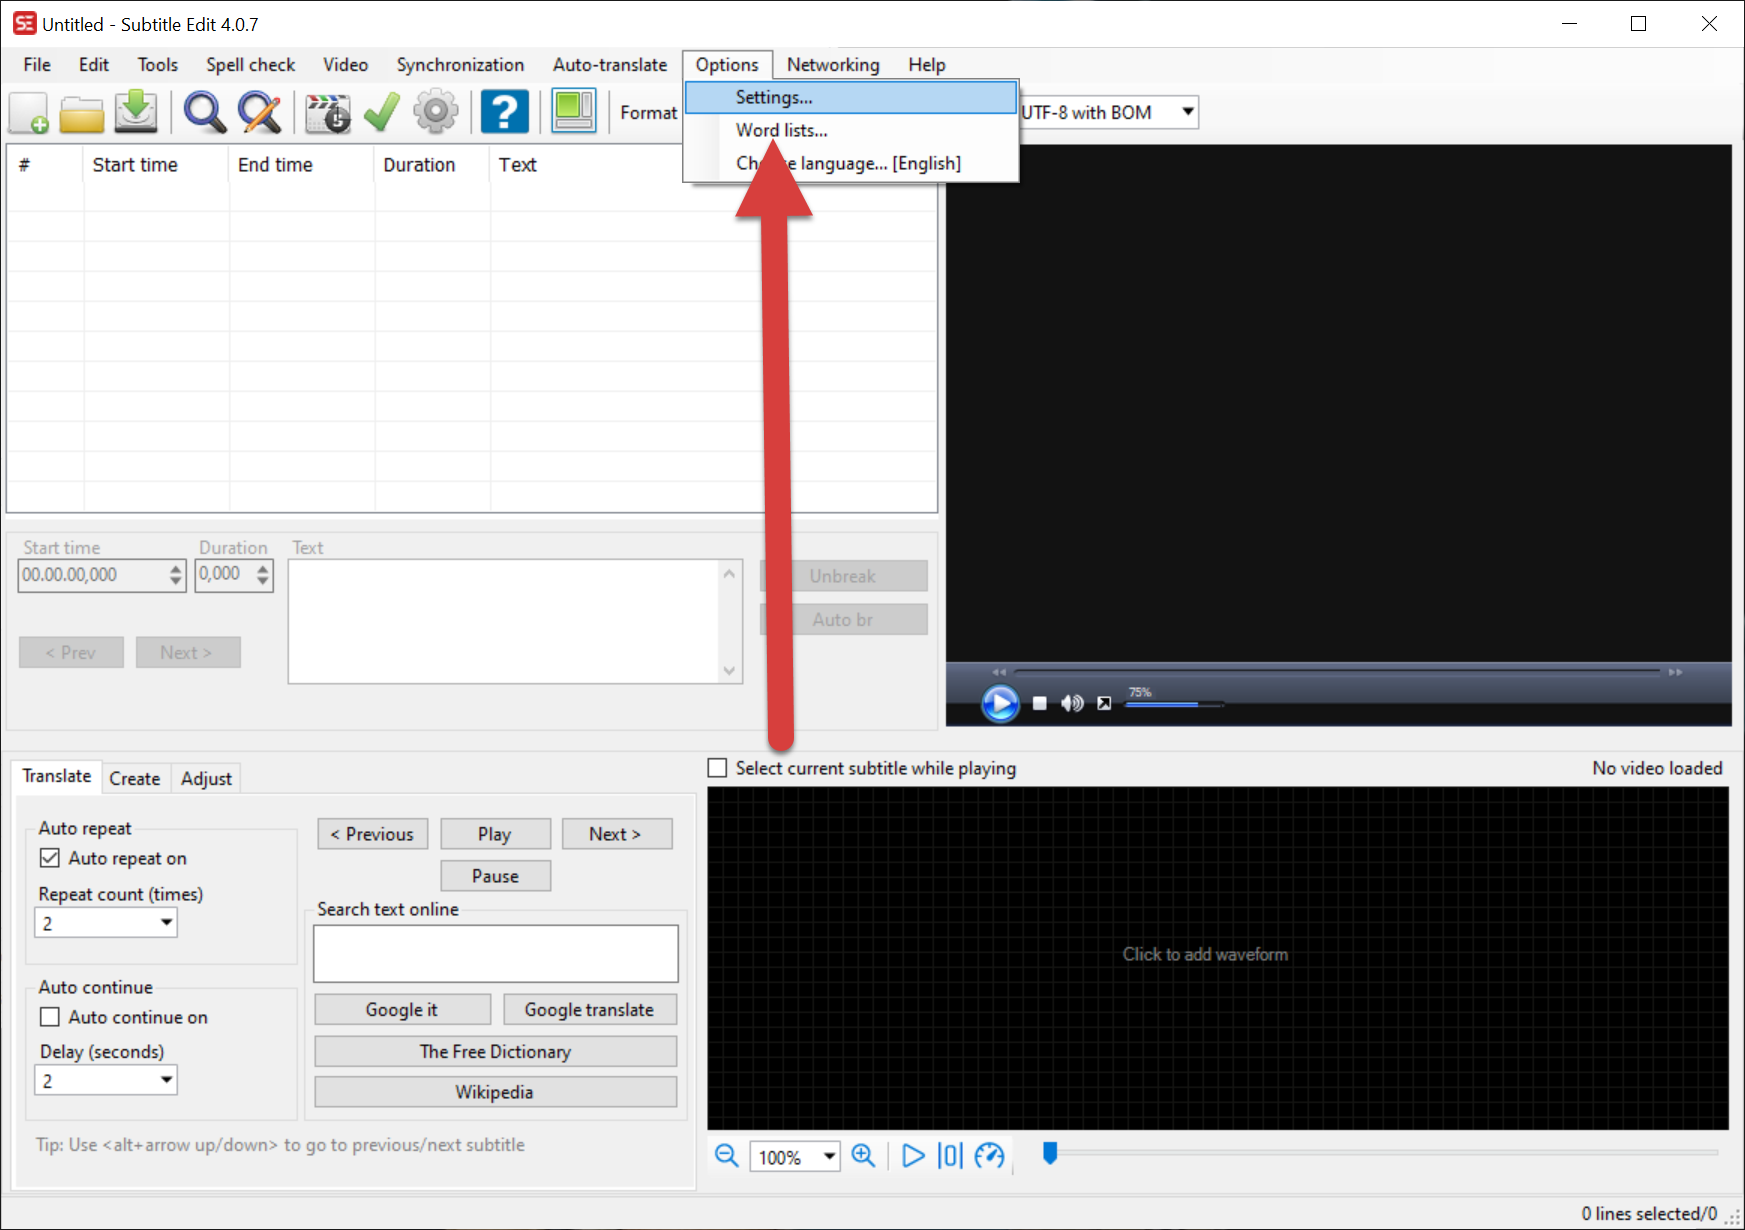
- When you open the program for the first time, it will open in the basic view. Select "Options" -> "Settings".
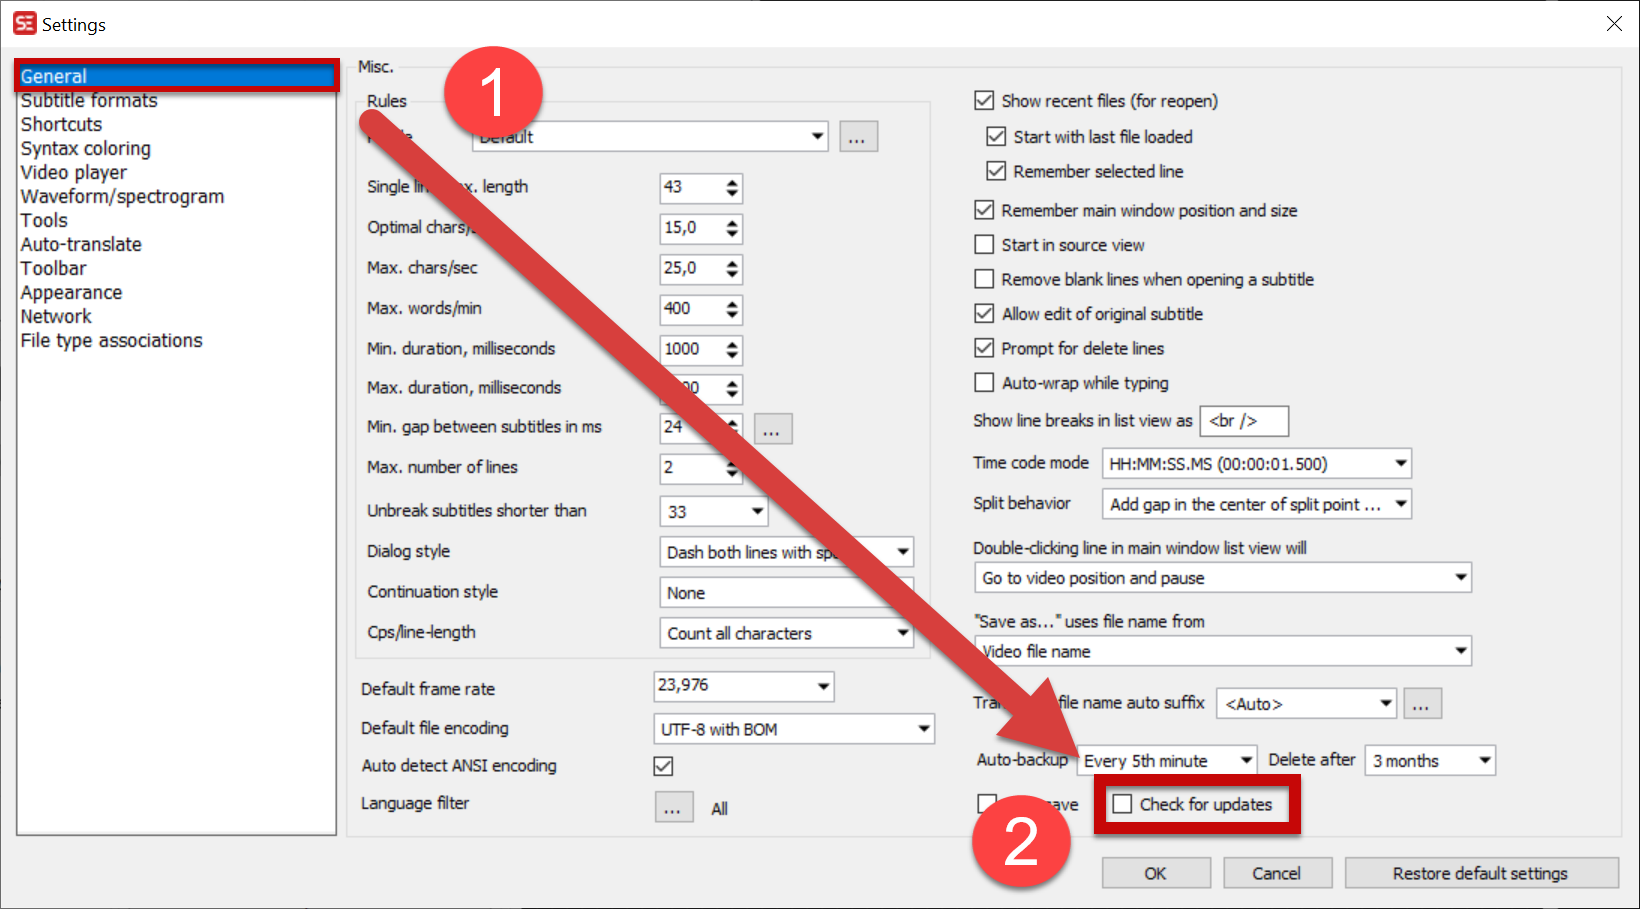
- The program settings will now open on your screen. Select (1) ”General” in the settings menu and remove the selection from (2) ”Check for updates”.
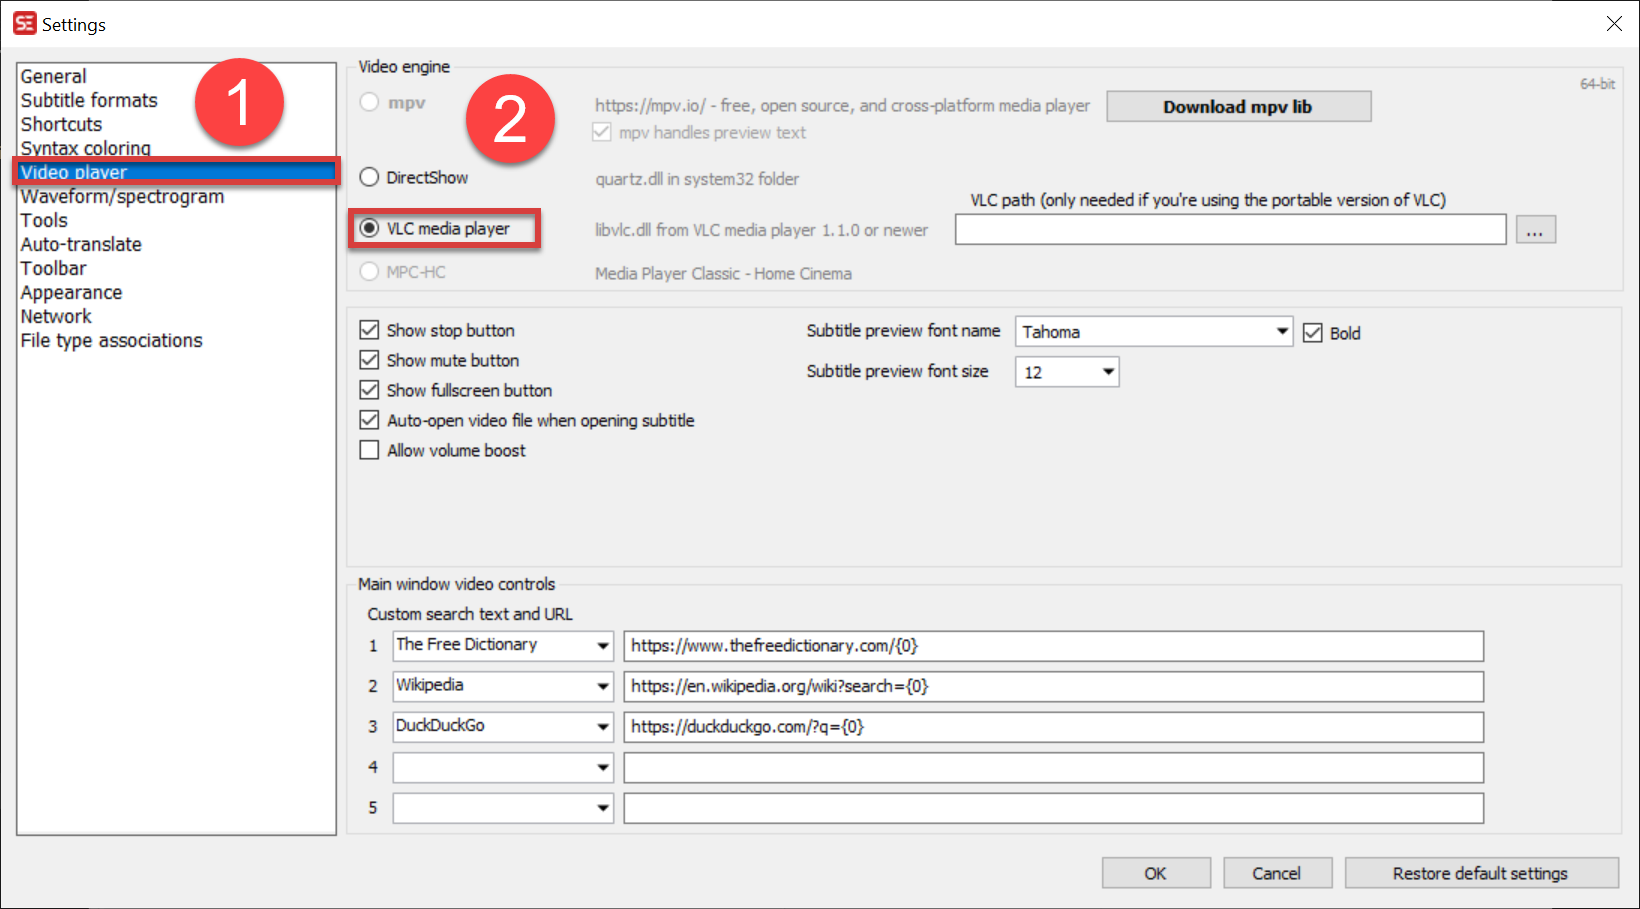
- Select (1) ”Video player” in the settings menu and check that (2) ”VLC media player” has been selected under ”Video engine”.
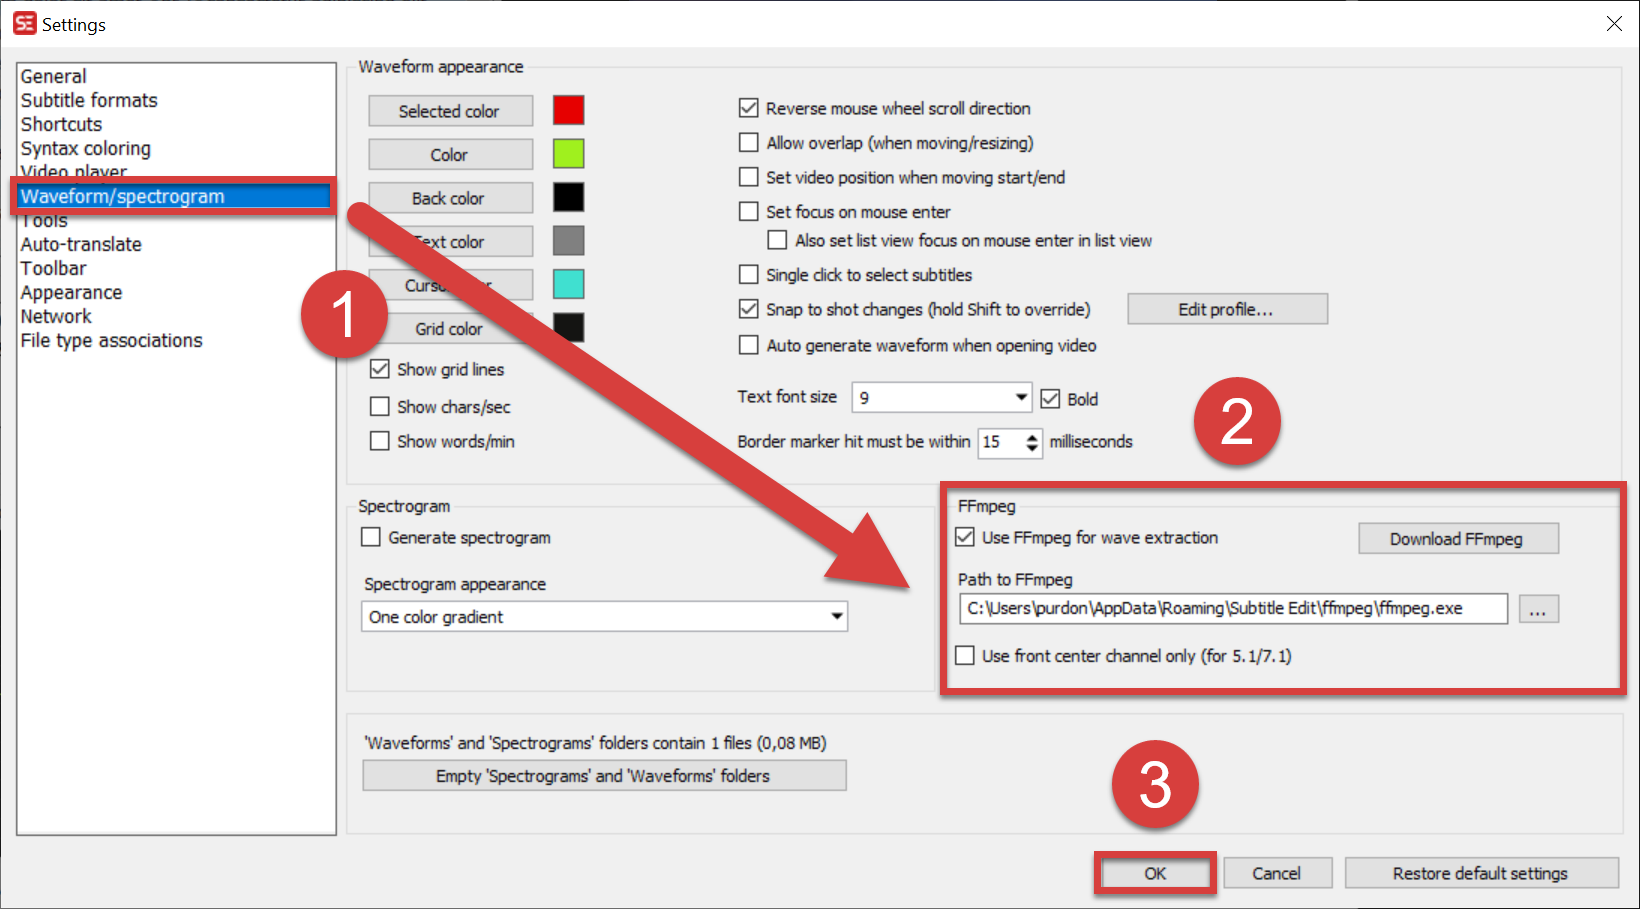
- In the settings menu, select (1) "Waveform/spectogram" and then select (2) "Use FFmpeg for wave extraction" under FFmpeg. After this, select (3) “OK” to accept the changes in the settings.
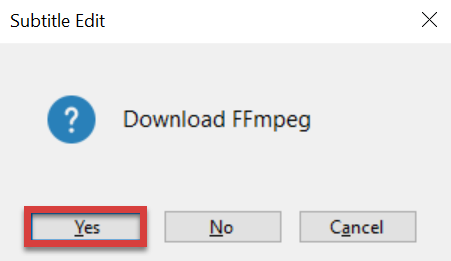
- If the program asks for permission to install the FFmpeg plugin when you make settings or later when you use different features, select “ Yes” to allow this.
Basic use of the Subtitle Edit program
When you open the Subtitle Edit program, the latest project you have edited will be automatically opened. To open another project, select "File" -> ”New".
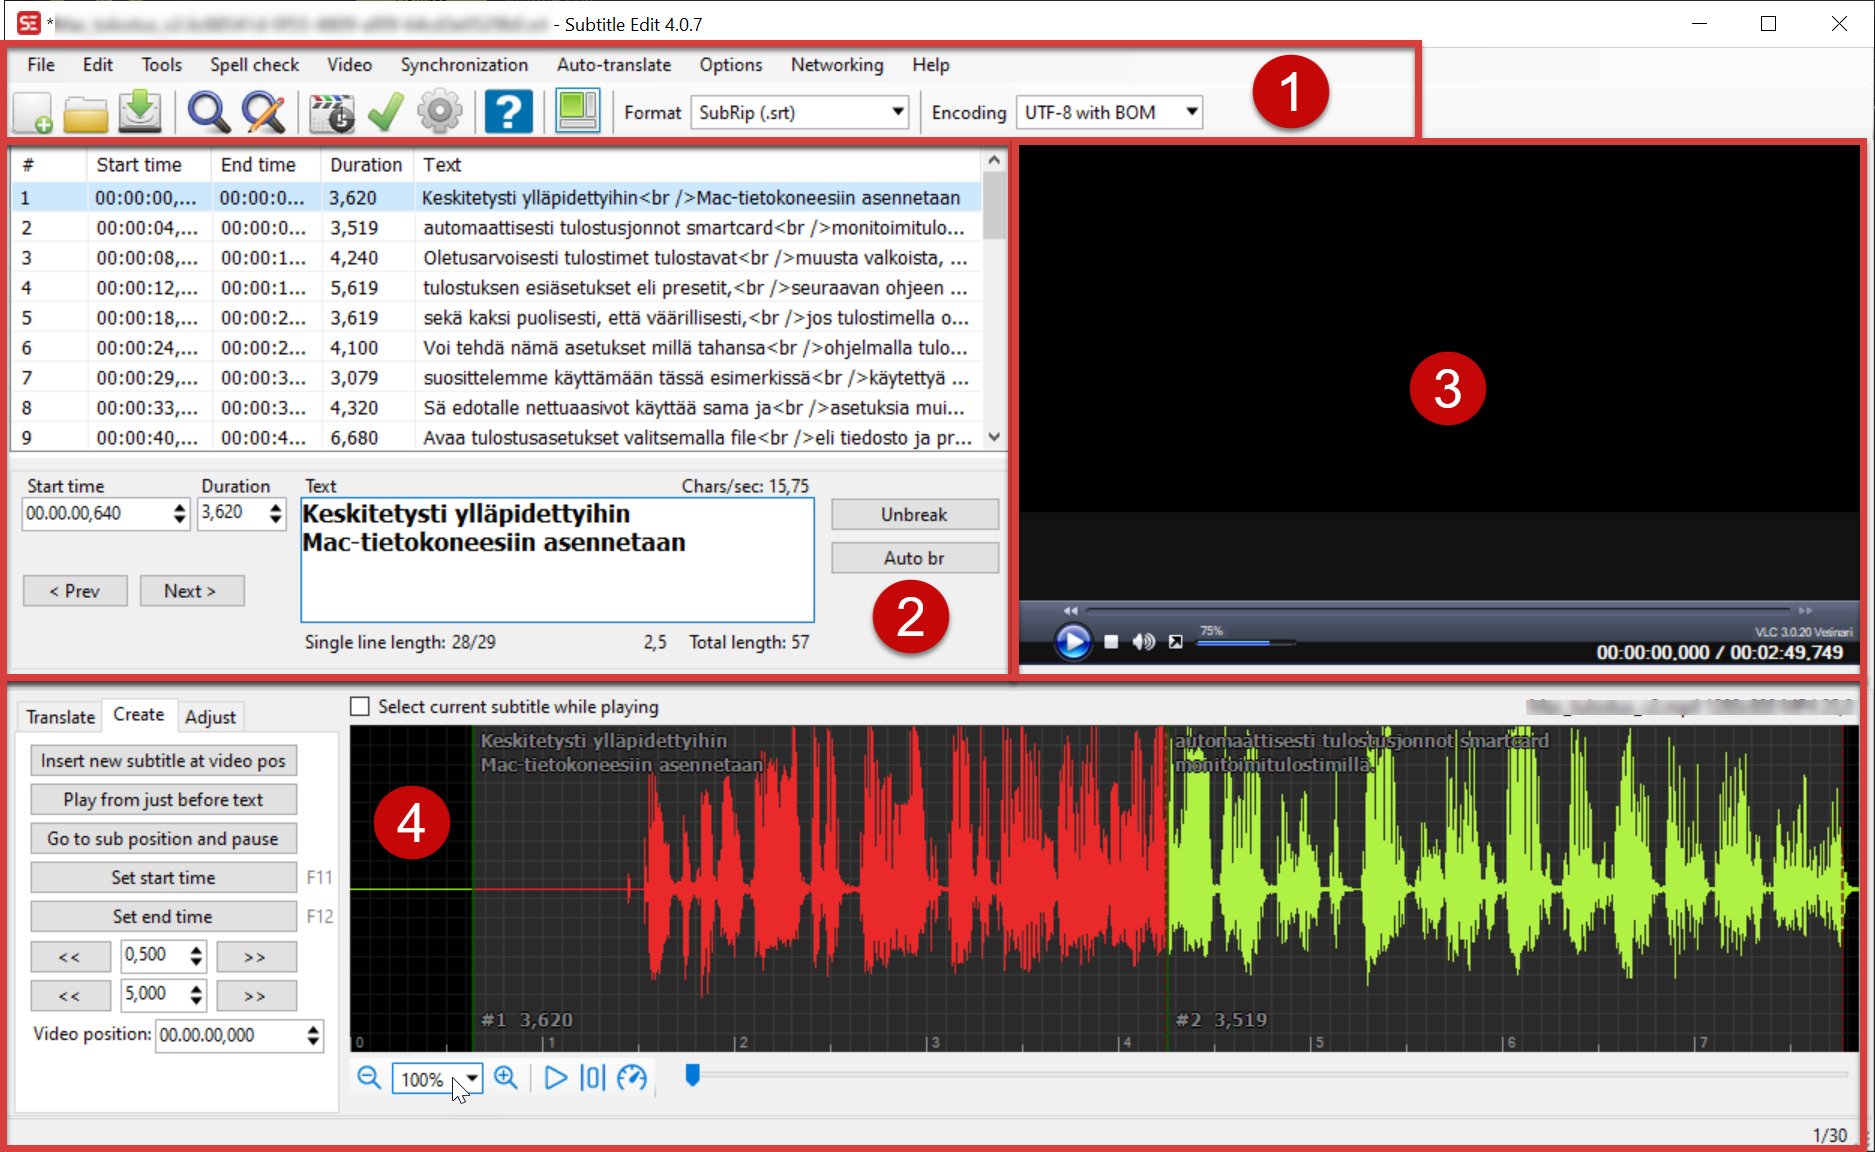
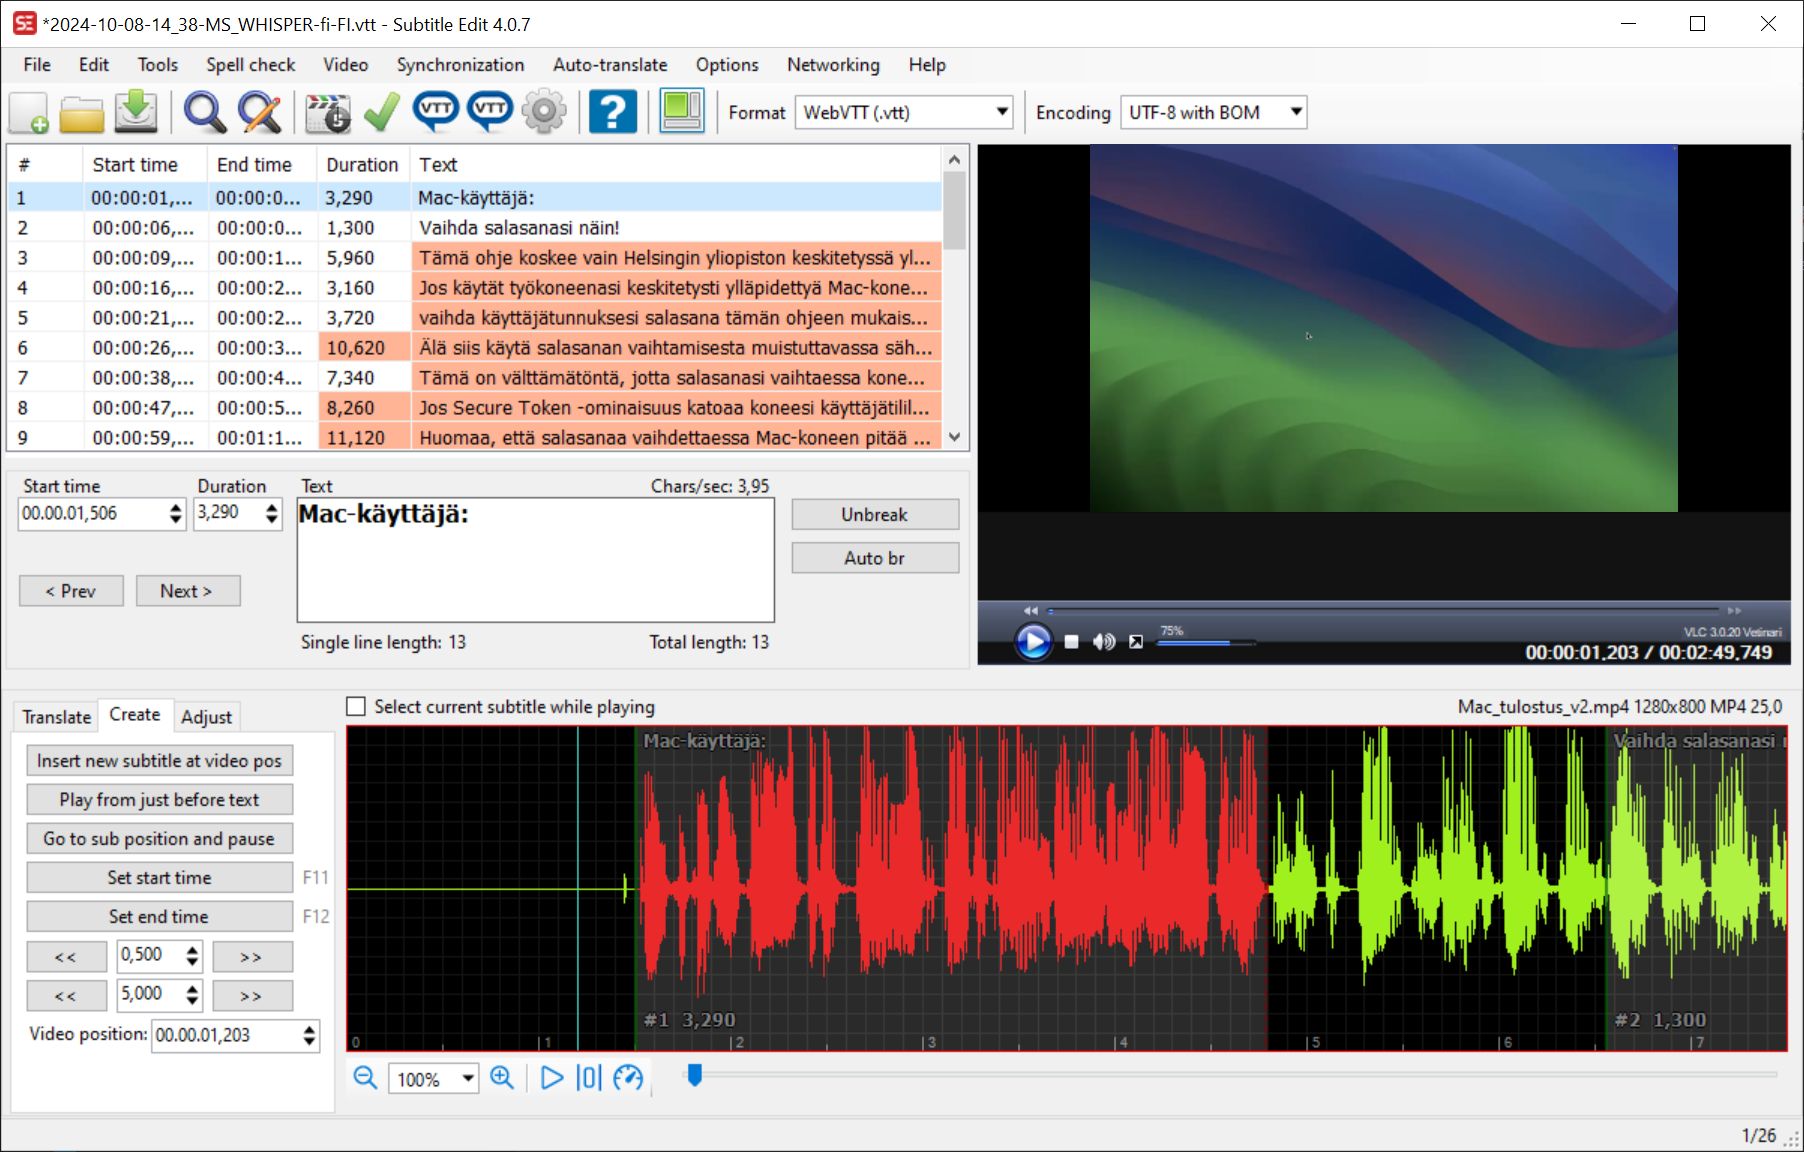
- In the Tools menu (1), you will find the most important functions related to files, such as file creation ("New") and opening ("Open") and saving ("Save") files. The Tools menu also contains other settings and search functions for files.
- In the text editor (2), you can create, edit and delete lines of subtitles.
- In the video window (3), you can see a preview of the video and subtitles.
- In the audio window (4), you can see the visual waveform of the audio and select the start and end of the subtitles according to the audio track. If the audio track is not displayed after opening the video, click on the audio window.
Creating subtitles using a pre-made text file (e.g. manuscript)
You can provide Subtitle Edit with a text file based on your video manuscript, for example. Subtitle Edit will line up the text automatically, but you may need to edit the lines and adjust the start and end times of the subtitles manually.
NB. The file must be entered in .txt format, i.e. the .docx format used by Word is not valid.
- Open the video to be subtitled first as explained above. Open the file to be subtitled by selecting "File" -> "Open (keep video)…".
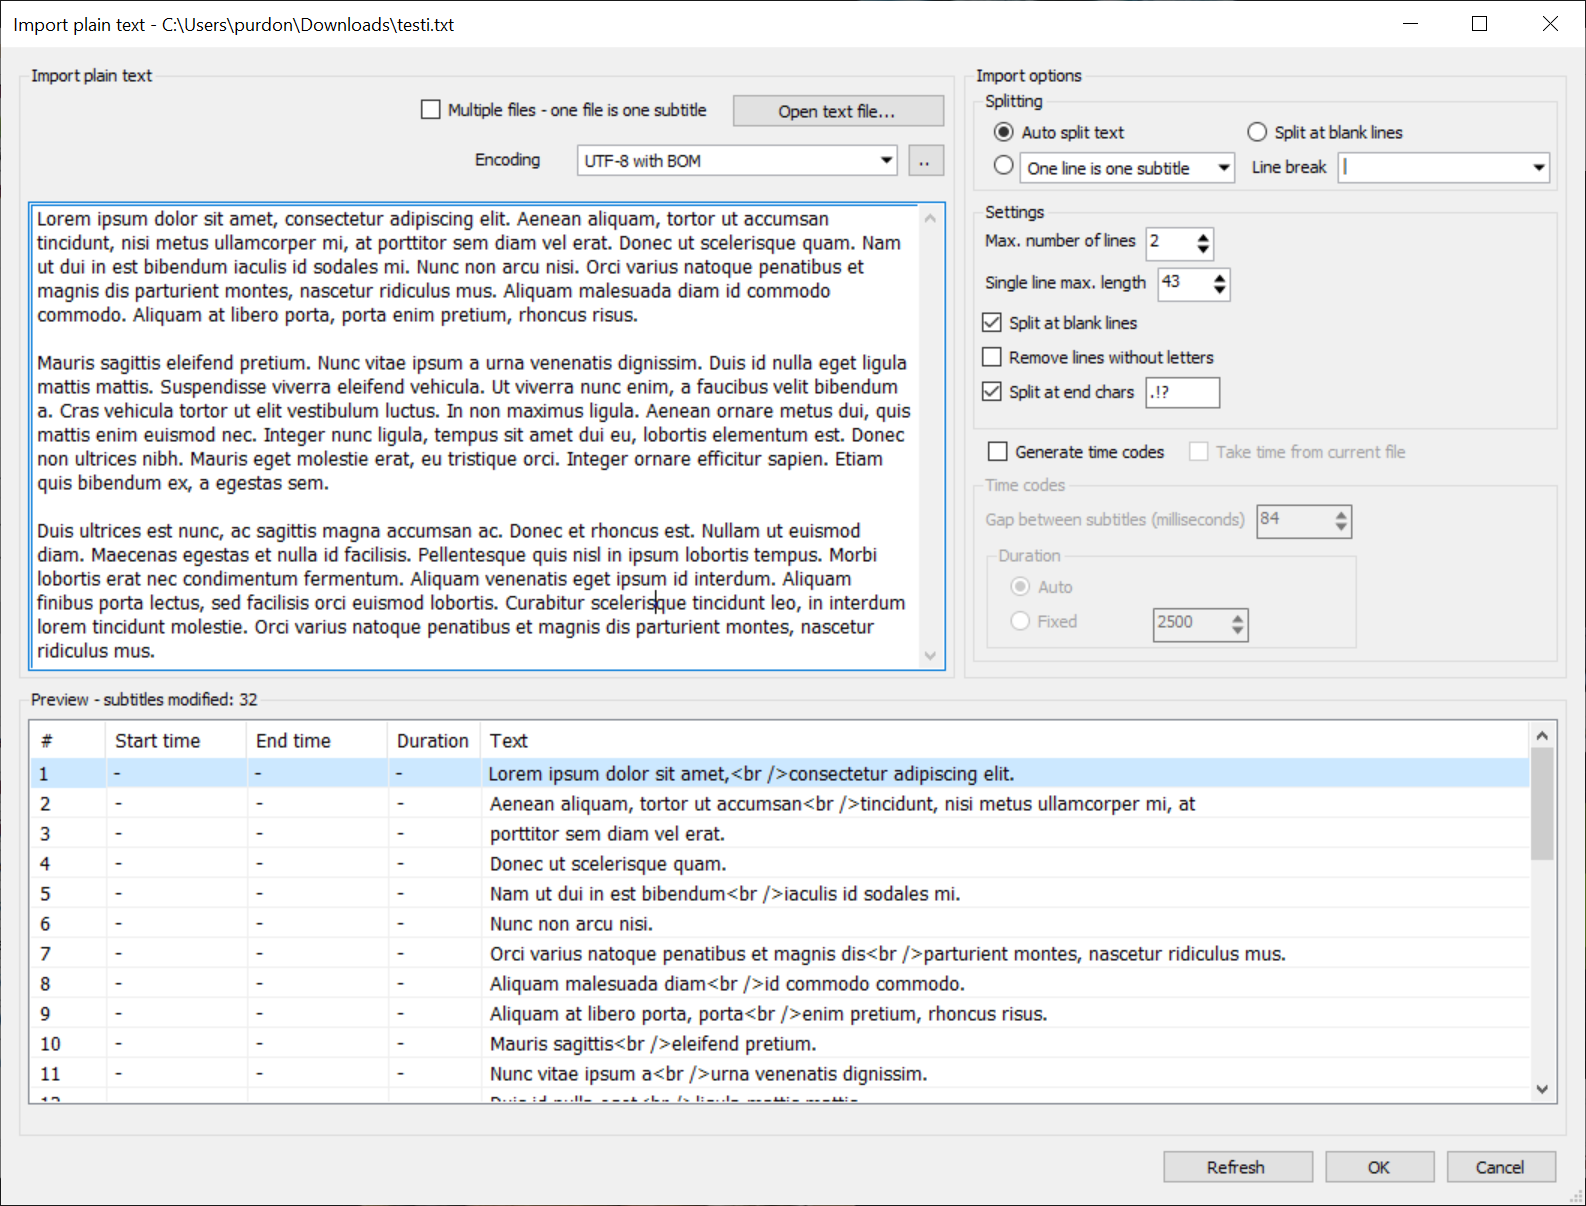
- A separate "Import plain text" window will open. In this view, you can edit your text, change the subtitle settings and check where the subtitles are distributed for the video. However, please note that the start and end times must be set manually. When the text is ready to be added to the video subtitles, select "OK".
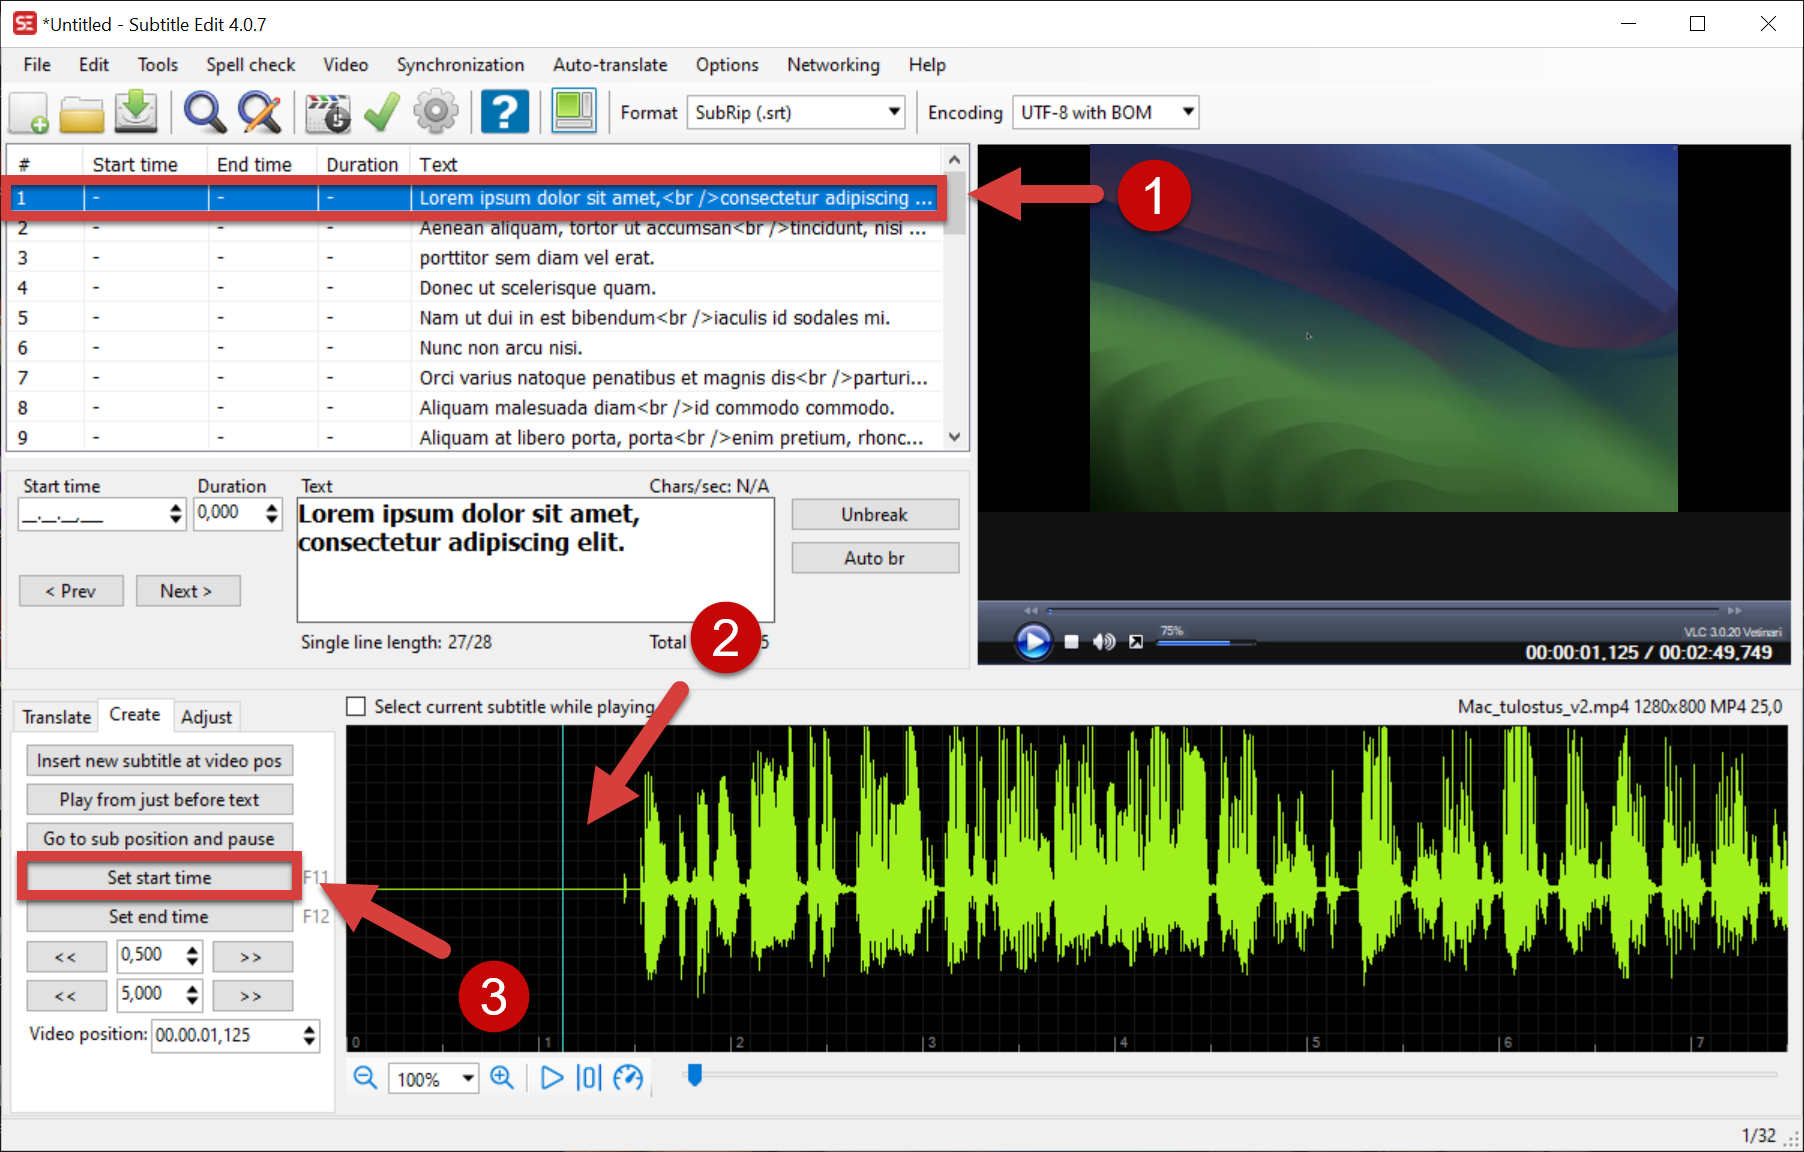
- The text will be imported from your text file without any time stamps. Add time stamps for the text line by line (1) by selecting the line in the text editor. Then (2) select the point on the audio track where you want the subtitle line to start and (3) click "Create" -> "Set start time".
- The program will give you a default length for each subtitle line, but you can change the length of the subtitle sections for the video by dragging the end or start of the selected area in the audio view.
Text editor functions
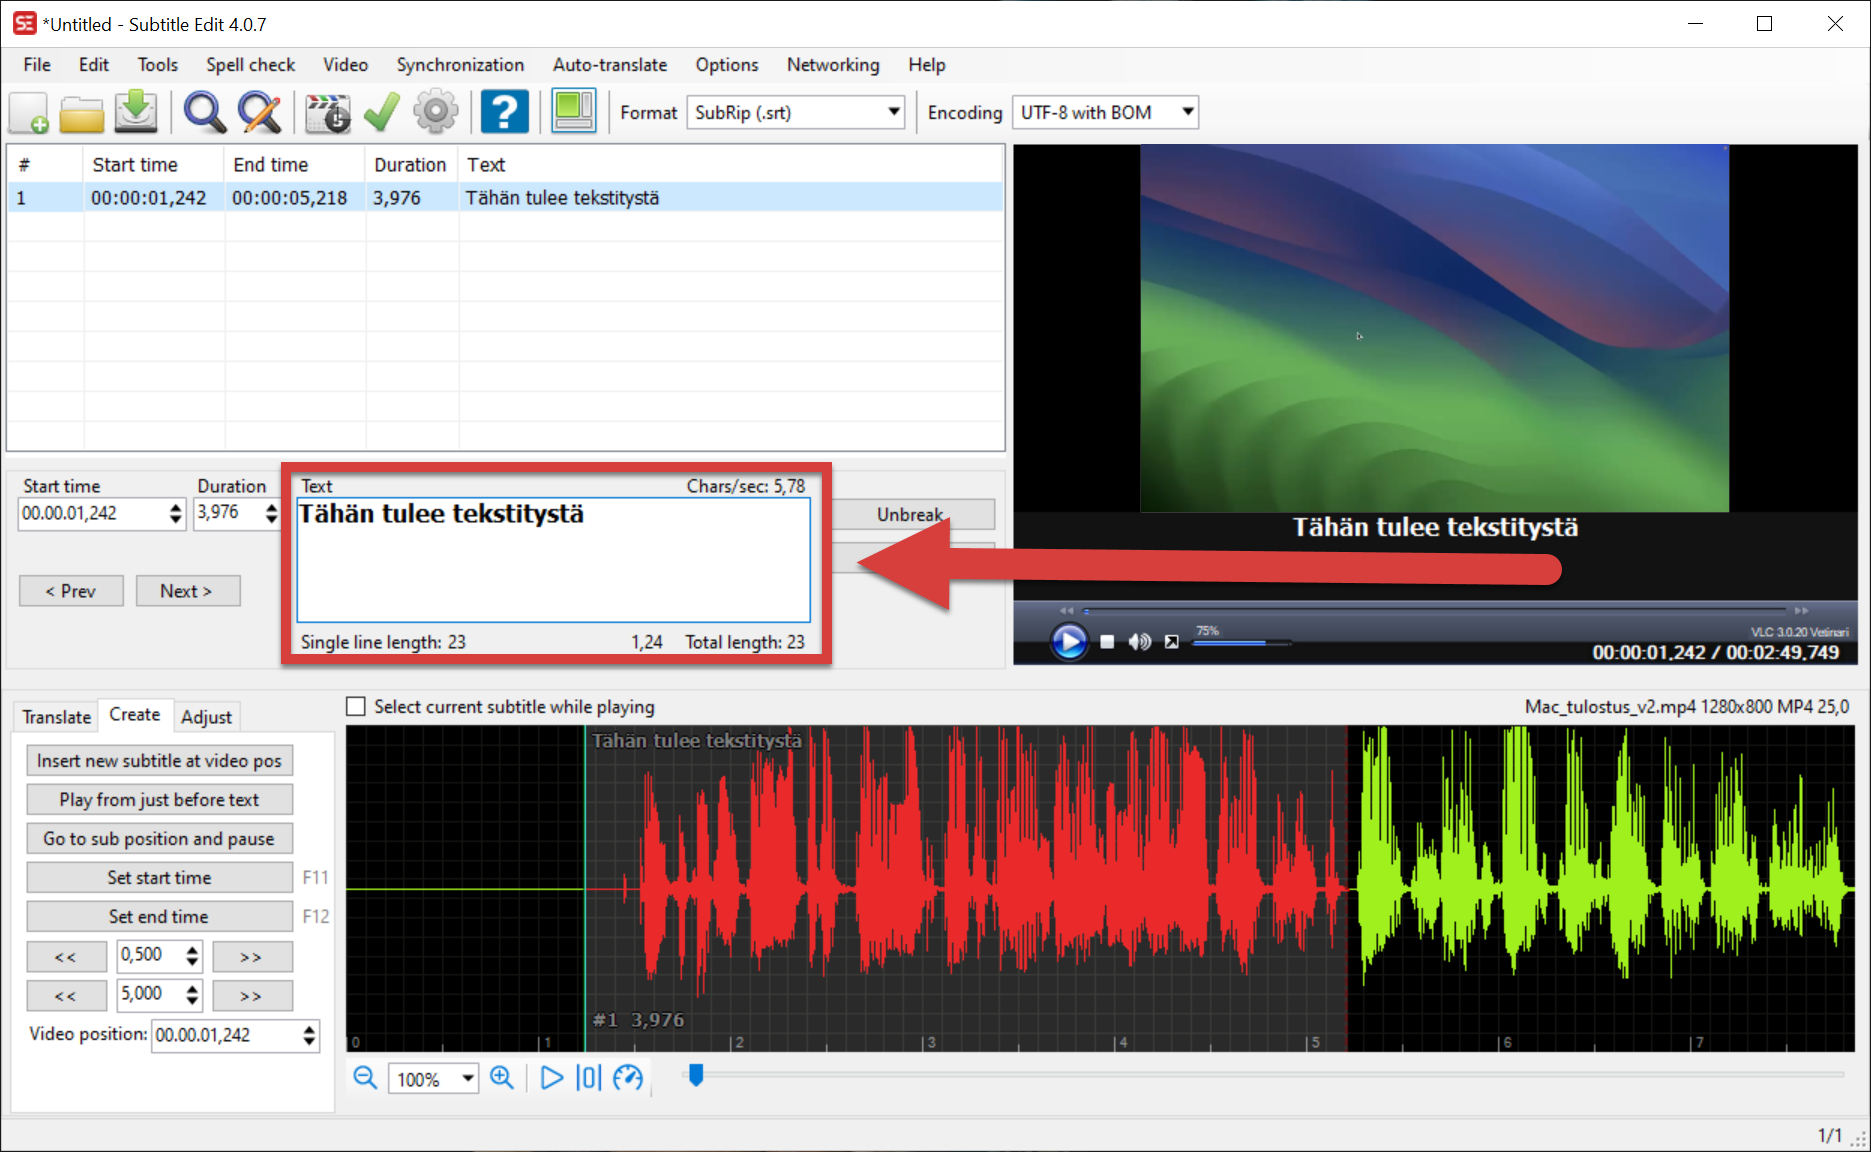
- "Start time" = The time in the video at which the selected section of the subtitles starts.
- "Duration" = The duration of the selected subtitled section on the screen.
- "Prev"/ "Next" = Select the previous or next line of subtitles.
- "Text" = Subtitles for the selected section.
- "Chars/sec" = Number of characters per second for the selected subtitle section.
- "Single line length" = Number of characters for the selected text section.
- "Total length" = The total number of characters for the selected text section.
- "Unbreak" = This button removes line breaks from the selected subtitle section.
- "Auto br" = This button creates an automatic line break for the selected subtitle section.
Finnish subtitles may show more red lines in the text editor or other red-marked warnings, as Finnish often has longer texts compared to Germanic languages. However, you do not need to worry about this if the text flows normally in the preview.
Correction of a pre-made subtitle file
For example, you can edit Unitube Uploader’s automatic subtitling function by using a pre-made subtitling file in Subtitle Edit.
- Open the subtitle file by clicking Open and selecting the file. The subtitles along with the start and end points will open in the text editor.
- If you want to add a video for the subtitles that you can follow while editing the subtitles, open the video downloaded on your computer by selecting "Video" -> "Open video file…", or "Open video from URL..." if you want to subtitle the video directly from its URL.
- The program will now include pre-made subtitles, the video file to be subtitled and the audio track for the video.
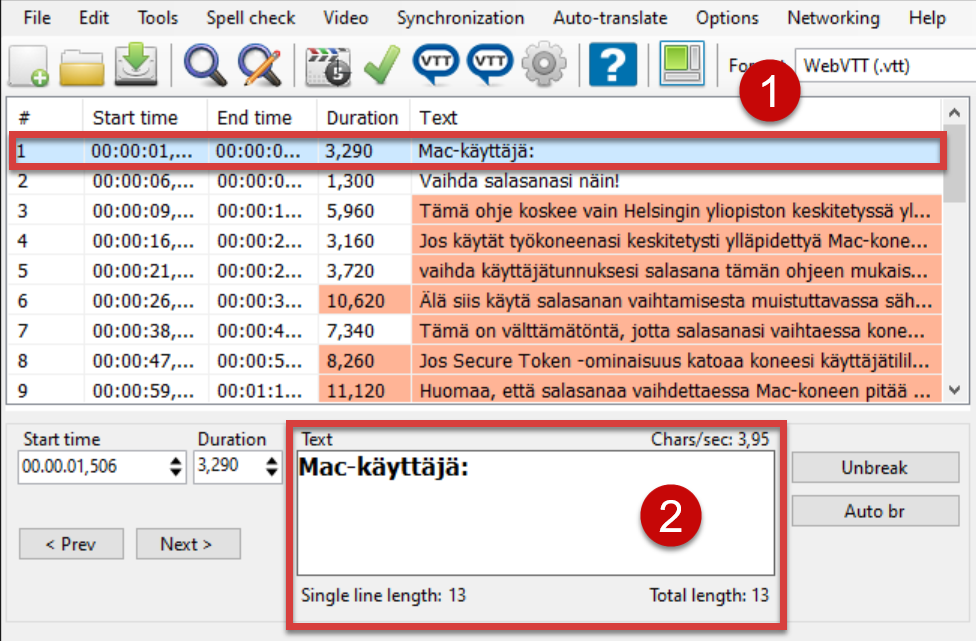
- To edit the text or the start and end times, (1) select the desired line by clicking on it. The text will open (2) in the text editor, where it can be edited.
- You can adjust the start and end times of a text line by changing the values in the fields in the text editor under "Start time" (the start time of the text line in the video) and "Duration" (how long the subtitle line stays on screen).
- You can also edit the start and end times in the audio window, where the selected line’s subtitled section is highlighted in red. Move the start and end times of the selected text section by dragging the vertical bar at the beginning or end of the section in red.
Automatic subtitles ("audio to text")
You can use the "audio to text" function in Subtitle Edit to create automatic subtitles based on a video or audio file.
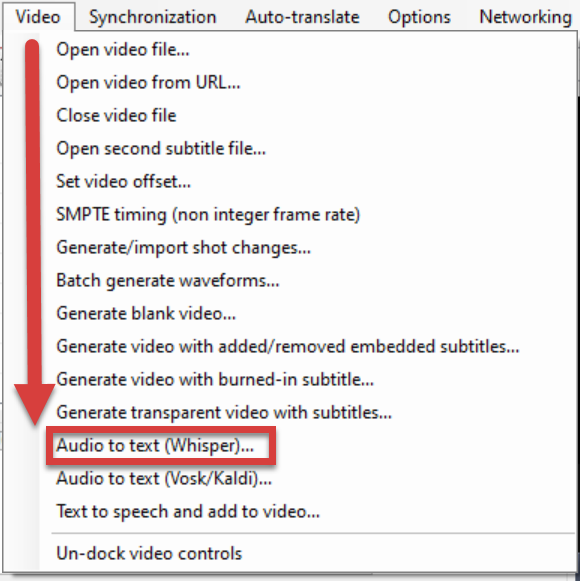
- Select "Video" -> "Audio to text (Whisper)…"
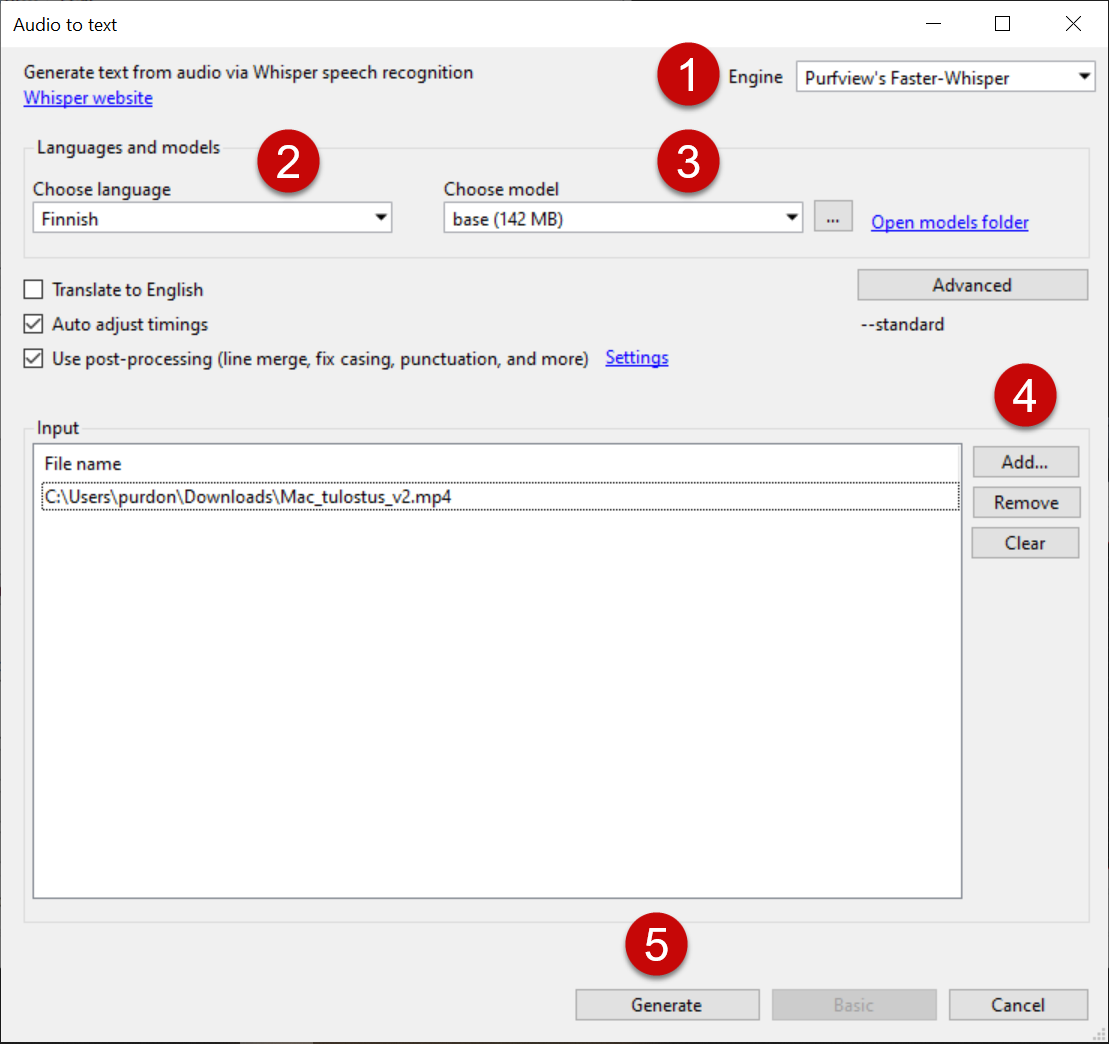
- In the next box (2), select the language spoken in the recording ("Choose language") for the (1) language engine ("Engine") Purfview’s Faster-Whisper, and (3) for the language model, base (142 MB), if you are using Finnish, Swedish or English. Add (4) a video or audio file under "Add..." to be used as the basis for the automatic subtitles. Select (5) "Generate...", and the program will use a language engine to create automatic subtitles from your source file. Always remember to check the transcript generated by the automatic subtitles for errors.
- The program will tell you where it has saved the automatically generated subtitle file. You can open it like any other subtitle file you have created previously and correct the subtitles as explained above.
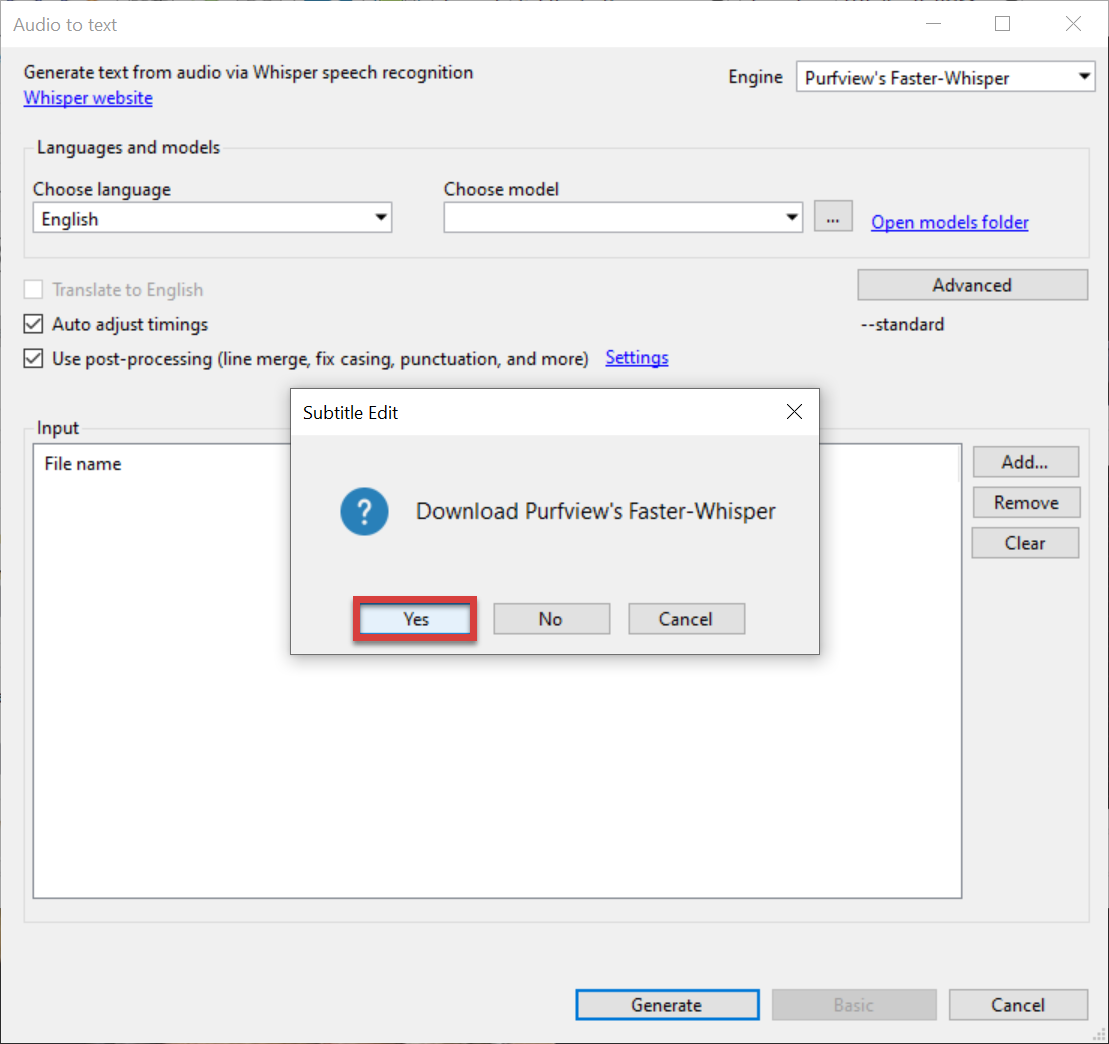
- When using the "Audio to text" function for the first time, the program may ask permission to install Purfview’s Faster-Whisper language engine. Select "Yes".
Manual subtitling
- Open the video you want to subtitle by selecting Video -> Open video file…, or Open video from URL… if you want to subtitle the video directly from its URL.
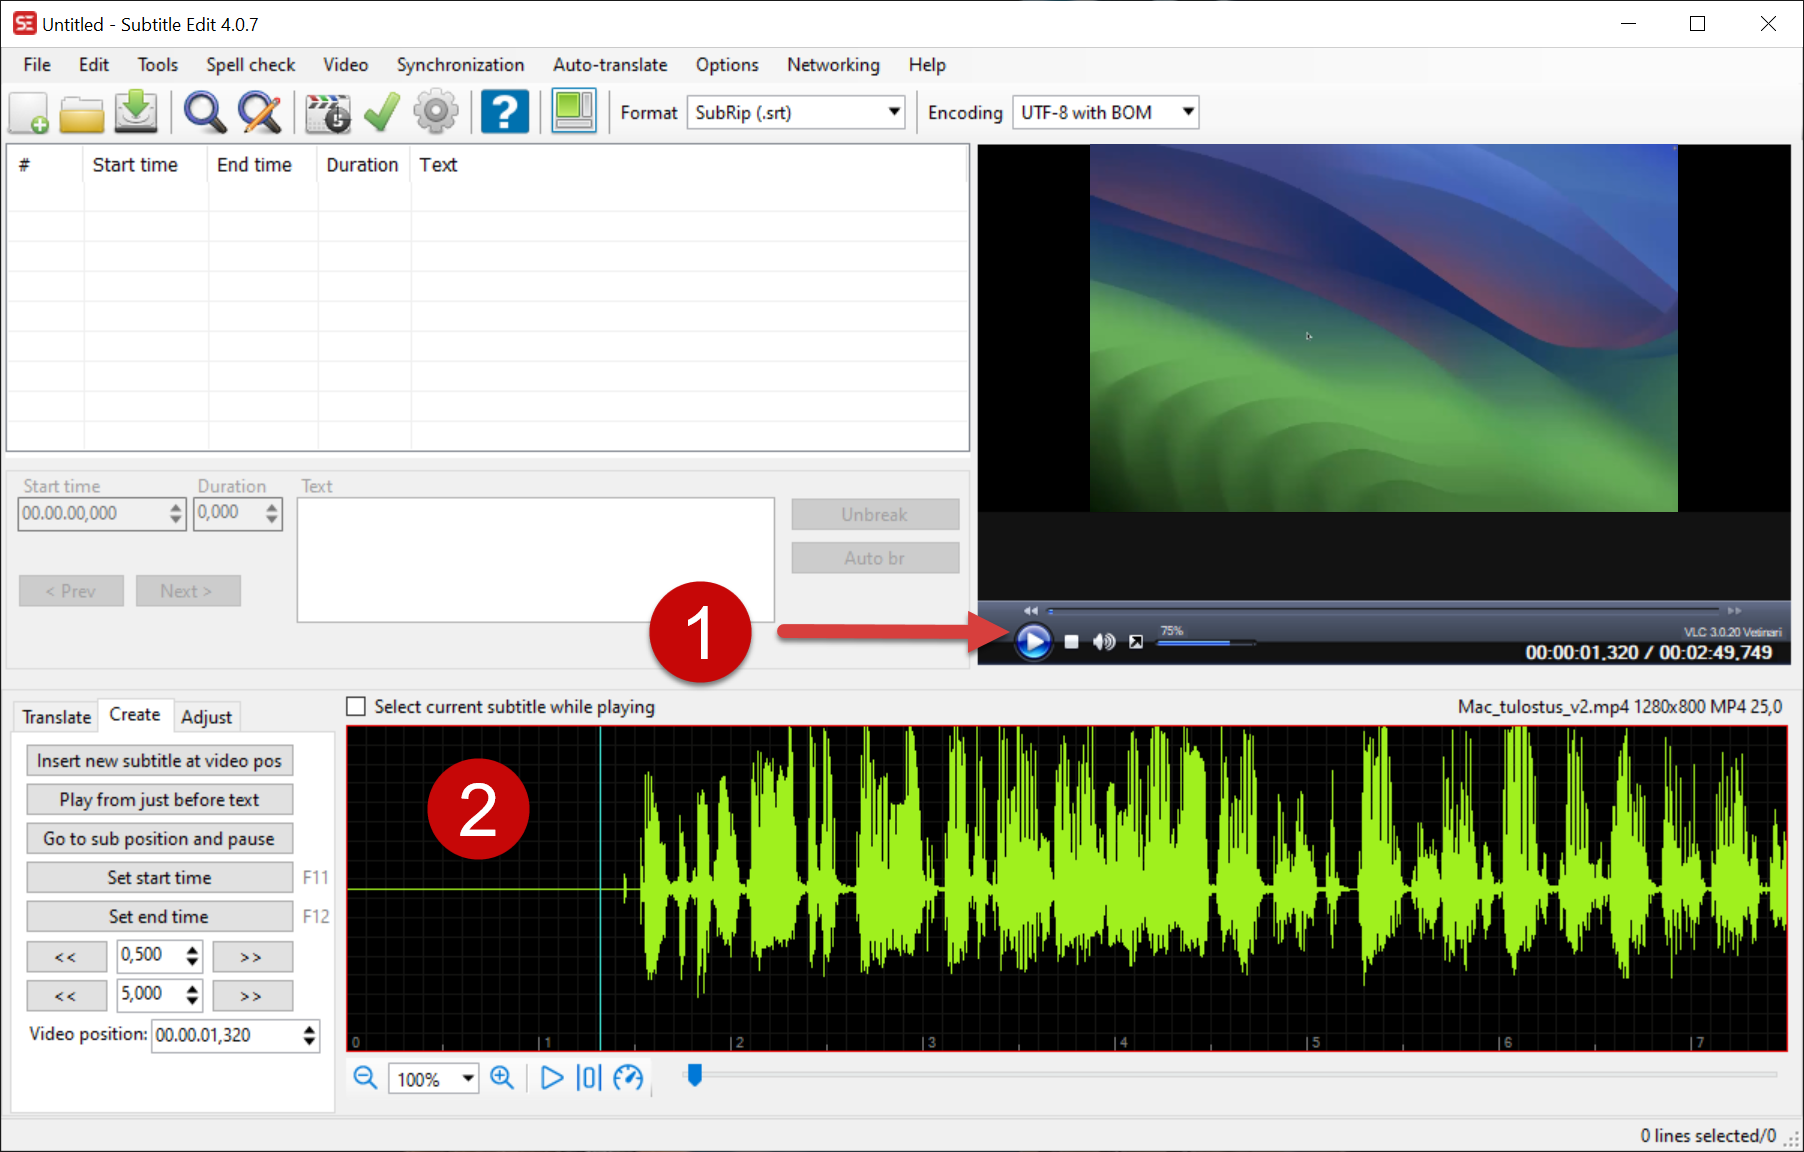
- The video will open in the video window. Press the (1) Play button to let the video play until the subtitles start. Alternatively, you can look at the (2) audio window, where you can see the visual waveform of the audio and easily find where the speech starts. The turquoise vertical line indicates where the video and subtitles are on the audio track.
- Click with the mouse on a section in the audio that is right before a spoken section to be subtitled. Make sure that "Create" has been selected in the (1) side menu. Next, click on (2) "Insert new subtitle at video pos".
- The program will automatically create a standard-length subtitle line, but you can edit this section yourself by dragging the start or end of the section marked in red on the audio track.
- The text editor automatically displays the start and end points of the selected section in the form of time stamps. You can enter subtitles by clicking on "Text" and entering the desired subtitles in the window.
Video instruction
Give feedback
The instructions site of the University of Helsinki's IT Helpdesk helps you with IT-related issues related to your work. Let us know how we can improve our instructions. We greatly appreciate your feedback!
How would you improve these instructions?
