
Separate instructions have been prepared for editing the basic OWA settings. The instructions explain how to change the language and profile picture, for example.
Are you looking for instructions on how to use the Outlook calendar? You can find them here!
Quick help
Detailed help
Table of contents
- Basic calendar use
- Basic calendar settings
- Making a calendar entry
- Editing a calendar entry
- Sharing a calendar
- Browsing others’ calendars
- Finding a shared meeting time and sending an invitation
- Replies to the invitation
- Booking a meeting room
- Replying to a calendar invitation
- Tracking the replies of attendees
Basic calendar use
- Log in at https://office365.helsinki.fi/
- Open the calendar by clicking on the calendar icon in the bottom left-hand corner. (You can also open the calendar directly at https://outlook.office.com/calendar/)
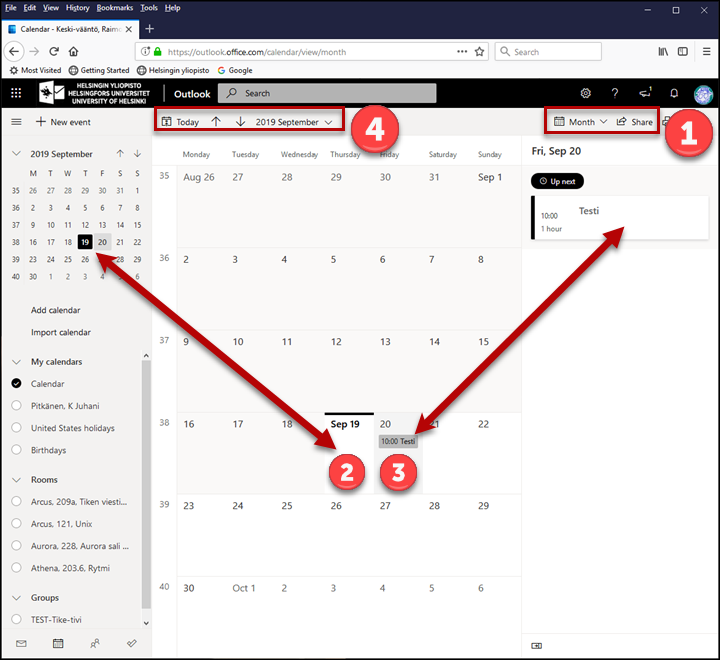
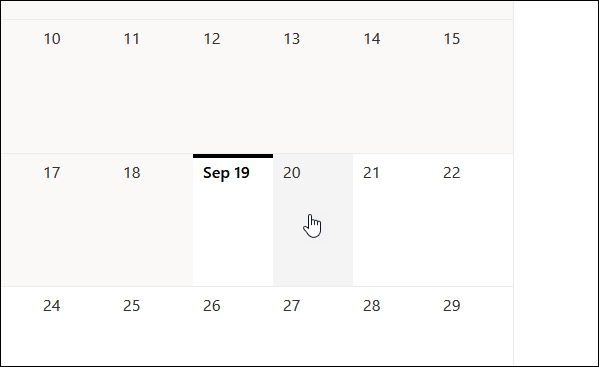
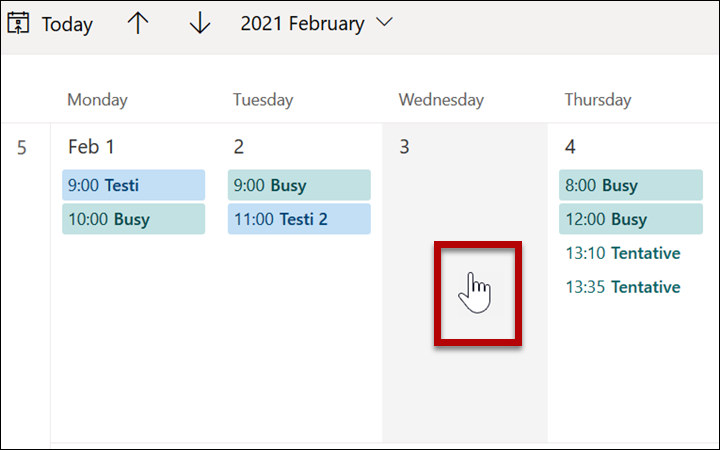
- In this example, the calendar is opened in the monthly view. You can switch to daily or weekly view at (1). Today’s date is 19 September (2). The next day is selected as active (3). There is one calendar entry for the day. Its information is shown in more detail on the right side of the window. Use the top bar links to navigate in the calendar (4).

Basic calendar settings
You can edit the calendar according to your preference by, for example, changing the presentation format of the date, the start and end time of your workday, event reminders and many other features.
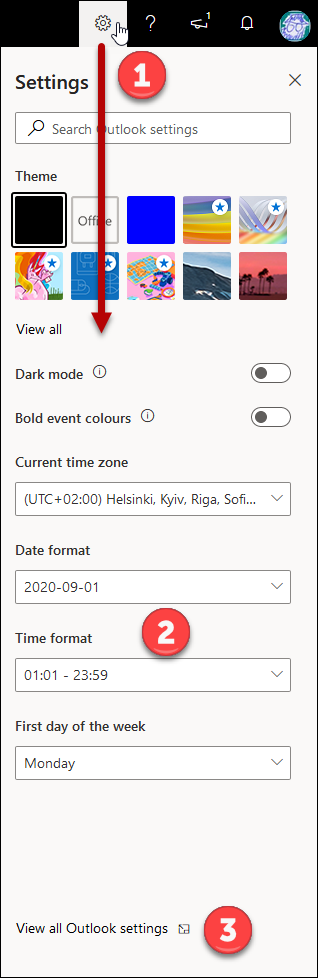
- Click on the cog icon (1) in the top right corner. Some settings can be edited in the middle of the new window (2). Access all the settings by clicking View all Outlook settings below (3).
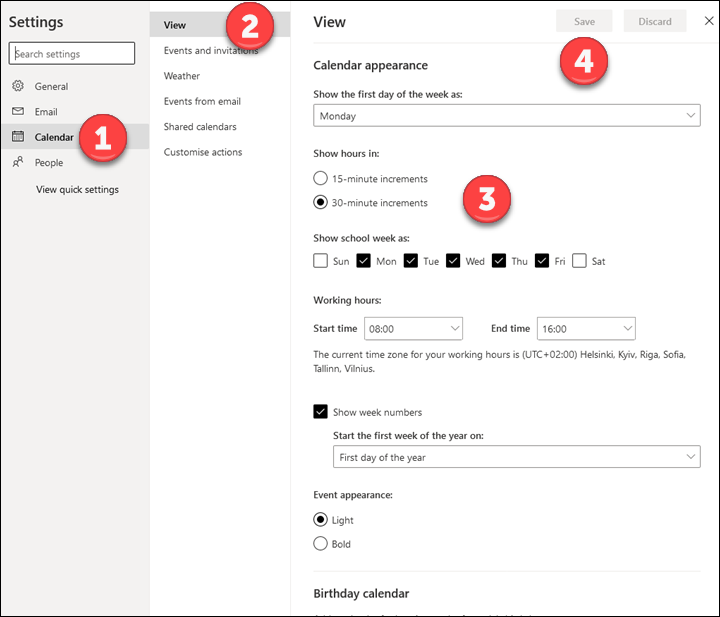
- The setup window opens on the calendar’s (1) View tab (2). In the right-hand side menus (3), you can, among other things, select whether to present hours in 15- or 30-minute sections and set the start and end time of your workday. Remember to save your changes by clicking Save (4).
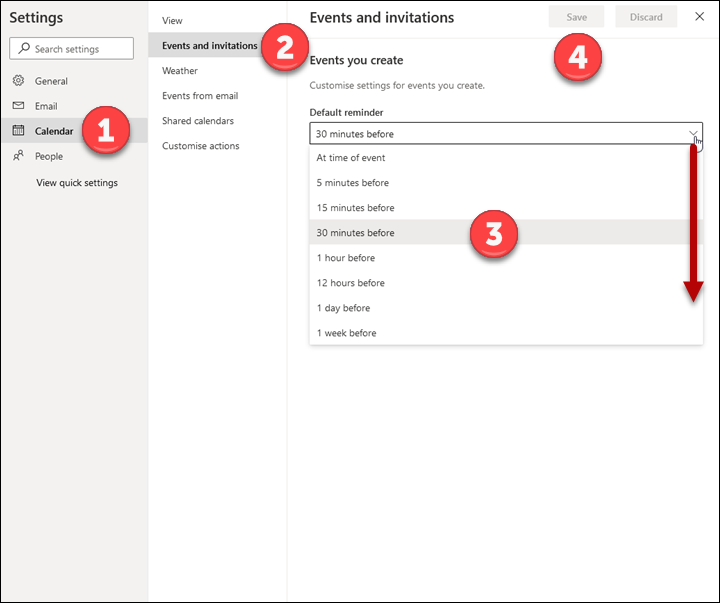
- In the Events and invitations tab (2), you can use the drop-down menu (3) to edit the timing of reminders before events. Remember to save your changes by clicking Save (4).
Making a calendar entry
Do you need to organise a meeting, book a meeting room and invite attendees? Learn more below
Finding common time for a meeting and sending invitations
You can also find separate instructions on booking a meeting room here.
- In the calendar, double-click the day for which you want to make an entry.
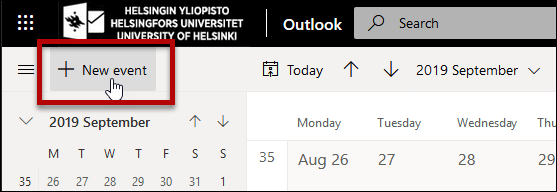
- Alternatively, you can click the New event link in the top left corner.
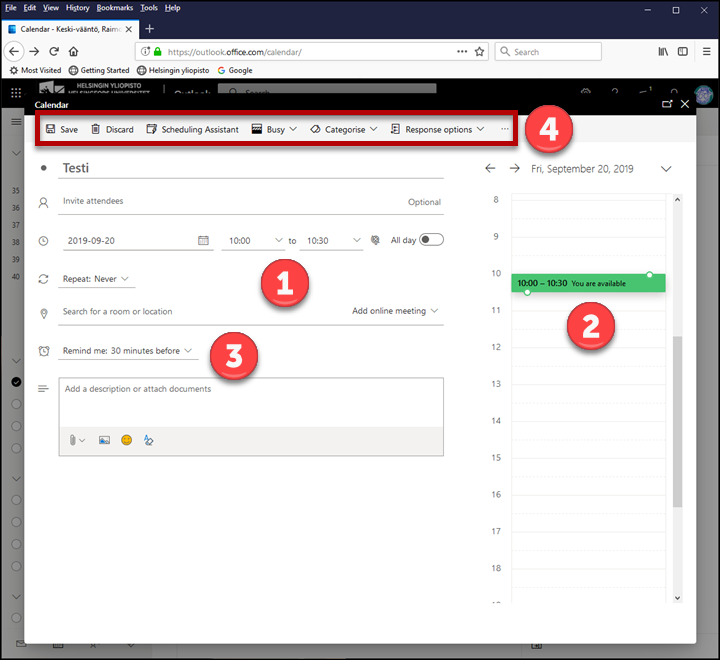
- Fill in the information of the event in the new window (1).
- The right-hand column (2) shows the entries recorded for the date in question. The application will warn you if you try to book overlapping events.
- You can also set a reminder of the event (3).
- Remember to save the event by clicking Save in the top bar (4). The bar also includes a Scheduling Assistant; find instructions for using the assistant here.
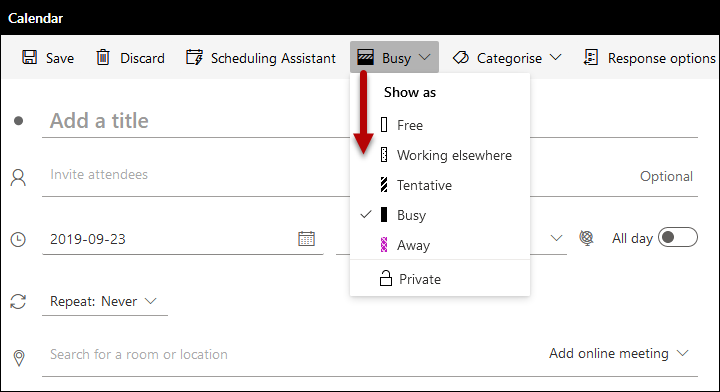
- In the top bar, you can also select how the booking appears to others. By marking the event as Private, you can hide the details from others, even if you are otherwise sharing your calendar.
-
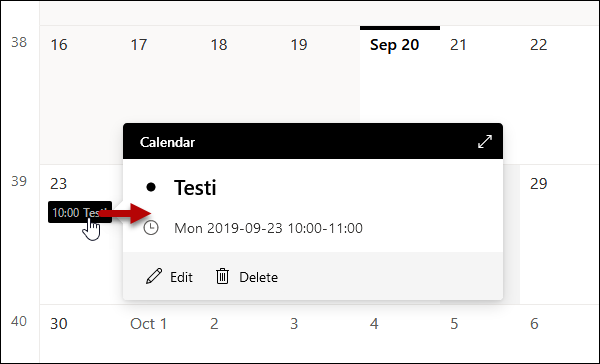
The event has now been added to the day in question in your calendar. Choose the day in question to see the detailed information for the events in the right side of the window.
Sharing a calendar
The university’s calendar system contains default settings which allow all users to see the availability information of other users. If you want to grant more permissions to others, follow these instructions.
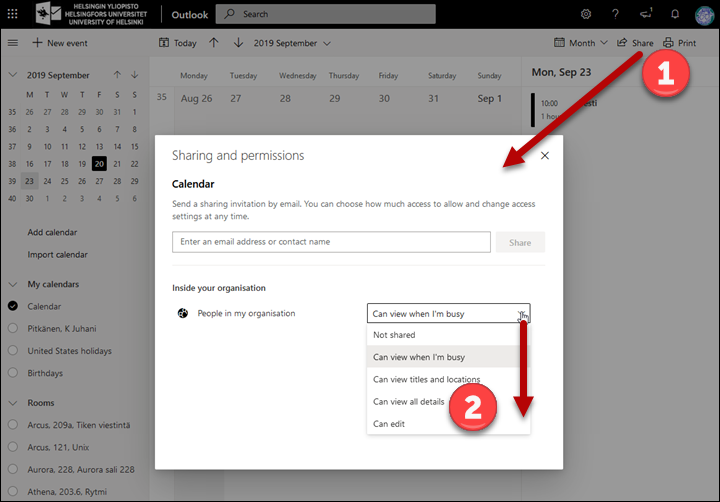
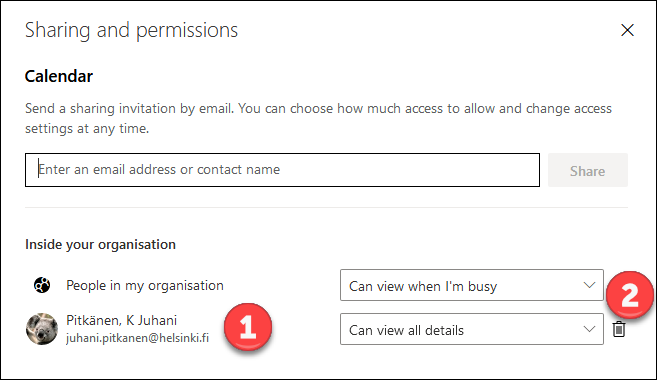
- Click the Share link in the top right corner of the calendar. By default, members of the University of Helsinki have the permission Can view when I'm busy. You can change the default value in the drop-down menu People in my organisation (2).
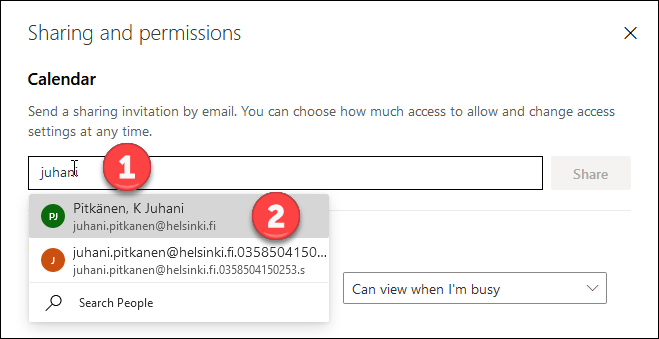
- You can also share permissions individually. In the text field (1), enter the name of the person you want to allow to view your calendar. The application automatically searches for people when you start typing the name. Click the name of the correct person (2).
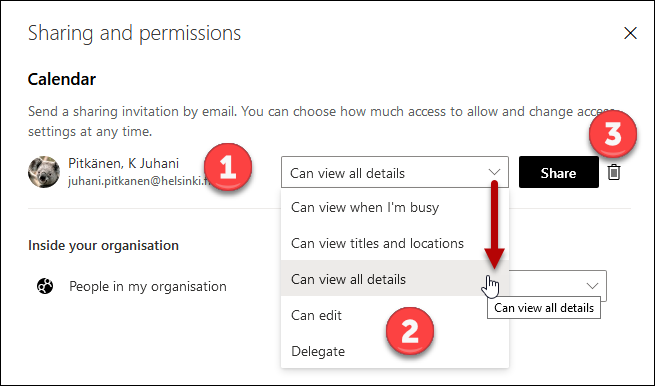
- Once you find the correct person (1), choose the information you want to share in the drop-down menu (2).
- Click Share (3).
- The selected persons receive an invitation by e-mail and will be displayed on the list (1). You can remove the permissions by clicking on the recycle bin icon (2).
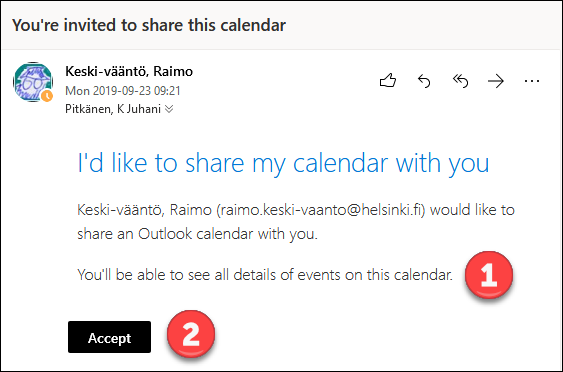
- The invited person receives an e-mail as pictured below. Item (1) indicates the shared level of permissions. Accept the invitation by clicking Accept (2).
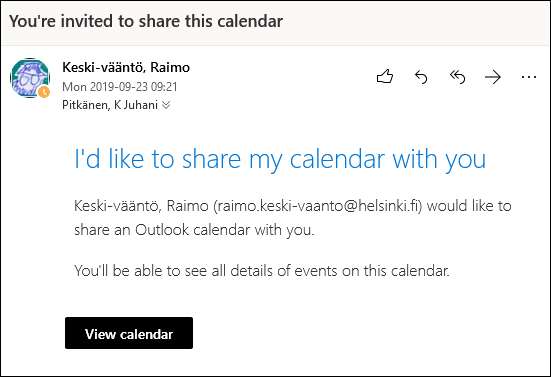
- You can open the calendar by clicking View calendar.
Browsing others’ calendars
By default, the settings of the university calendar system give everyone the permission to view other users’ availability data. You can access others’ calendars by following these instructions.
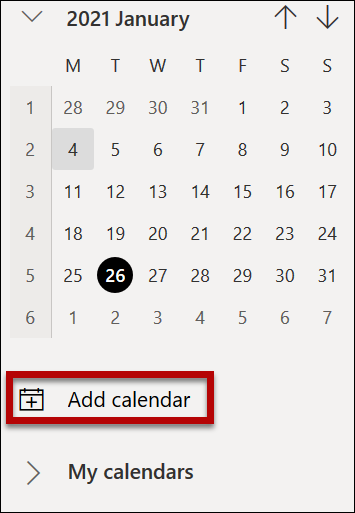
- Click Add calendar on the left-hand side in the calendar view.
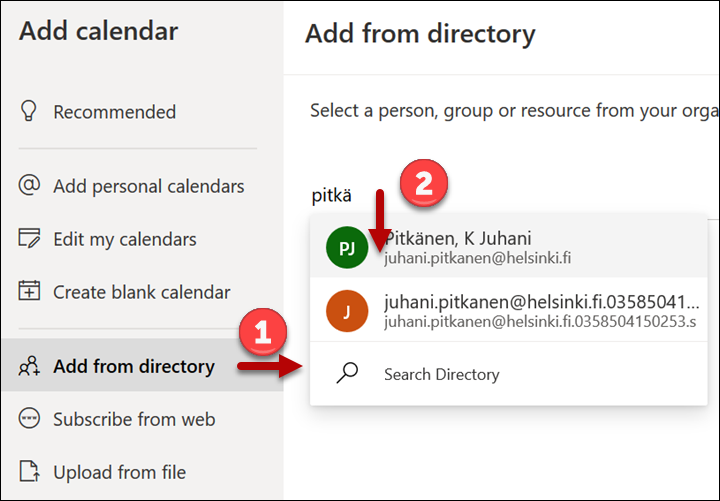
- Click Add from directory (1). In the text field (2), type the name of the person you are searching for. OWA will suggest suitable names as you type. You can select a person from the suggestions by clicking their name.
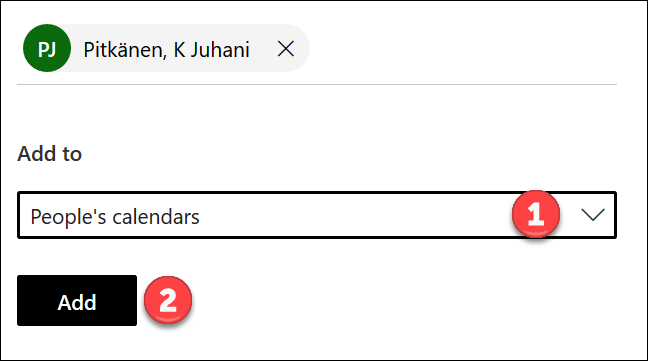
- Select the group from the dropdown menu (1) to which the calendar is added. Click Add.
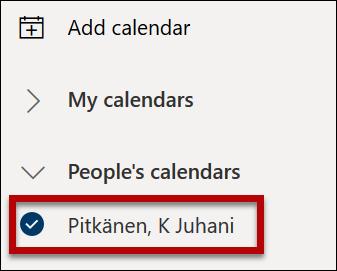
- The calendar has now been added to the list after other calendars. In this example, Raimo’s calendar is shown green, which makes it easier to distinguish it from the entries of your own calendar.
-
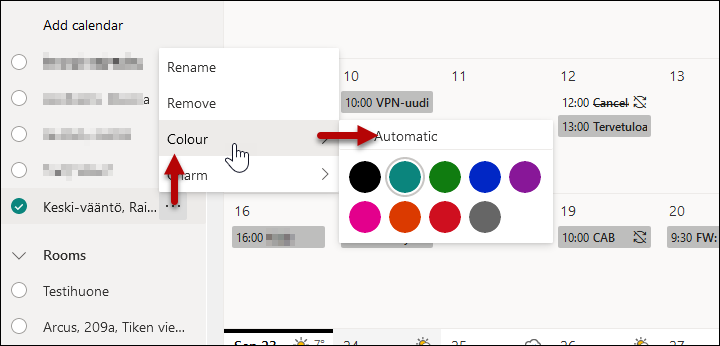
You can select the colours of different calendars by clicking the three dots after the name. First click the Colour menu and then select the colour.
Finding a shared meeting time and sending an invitation
- These instructions show a quick, simple way to arrange a meeting. If you want to book a meeting room and invite several attendees, read the instructions here.
- Double-click the day in the calendar on which you want to arrange a meeting.
- Fill in the necessary information.
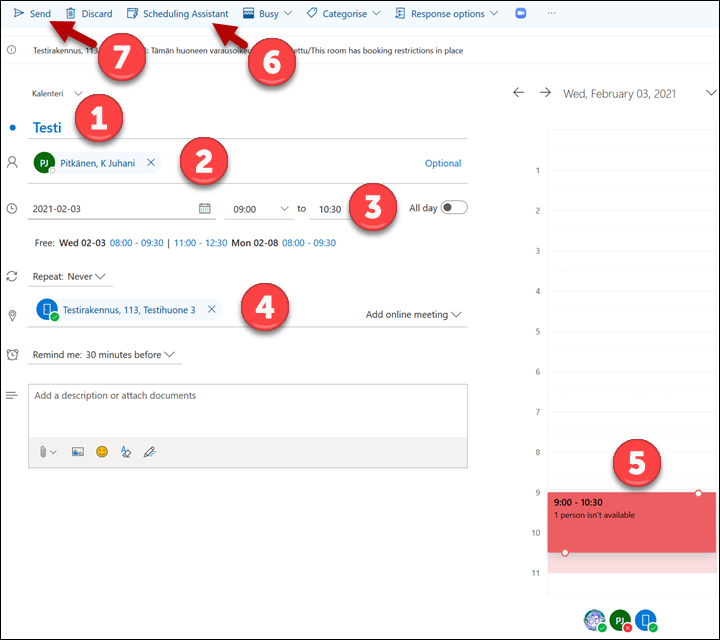
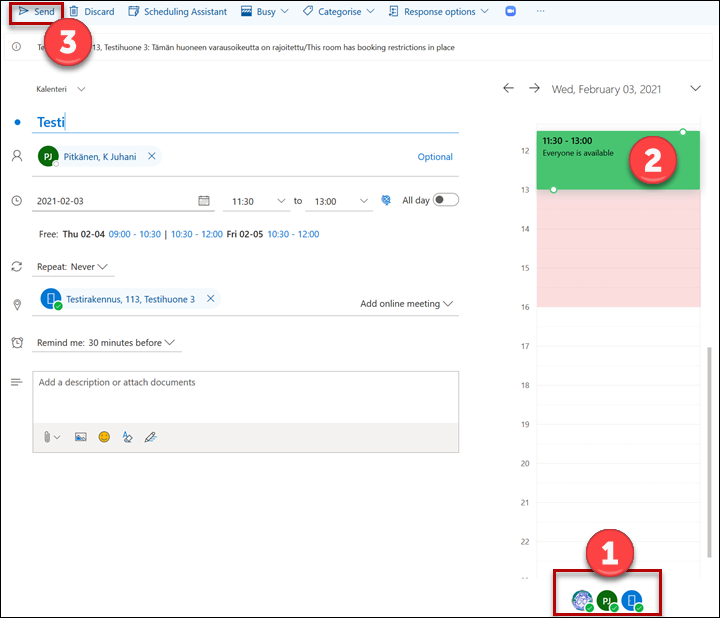
- Give the event a descriptive name (1).
- You can add attendees at (2) Invite attendees.
- You can change the time of the meeting at (3). The right-hand column (5) is updated automatically and shows whether the attendees are available. In this example, one of them is busy between 9 a.m. and 10.30 a.m.
- You can book a meeting room at (4).
- It is good idea to enter information describing the meeting in the lowermost text field unless the attendees already know the topic of the meeting.
- If there are more than just a few attendees or you wish to book a meeting room, it is a good idea to use the Scheduling Assistant (6). See the following section for more information on the use of the Scheduling Assistant.
- Send the invitation by clicking Send (7).
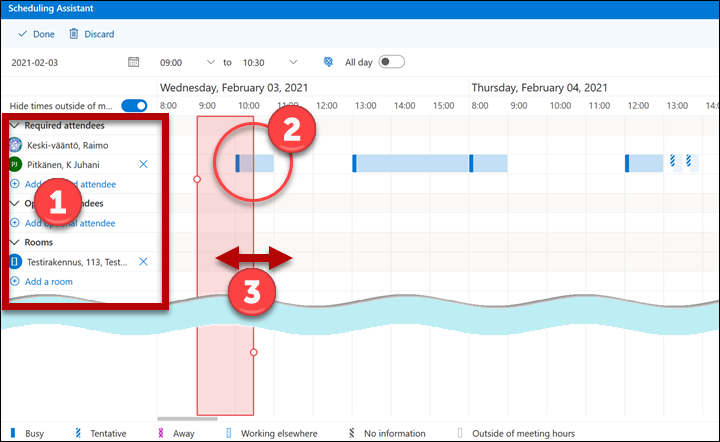
- In the Scheduling Assistant view, you can easily choose a meeting time that suits everyone. The attendees and possible meeting room are listed on the left-hand side (1). Section (2) shows you the situation of the attendees at the selected point in time. The blue column shows the attendees’ booking situation. The meeting time you have selected is shown as a vertical column. The red colour indicates that there are overlapping times during the booking. You can change the time by dragging the column from its edges (3).
- The meeting time has been changed in the next picture. The green colour shows that the time suits all invited attendees (1). Click Done (2).
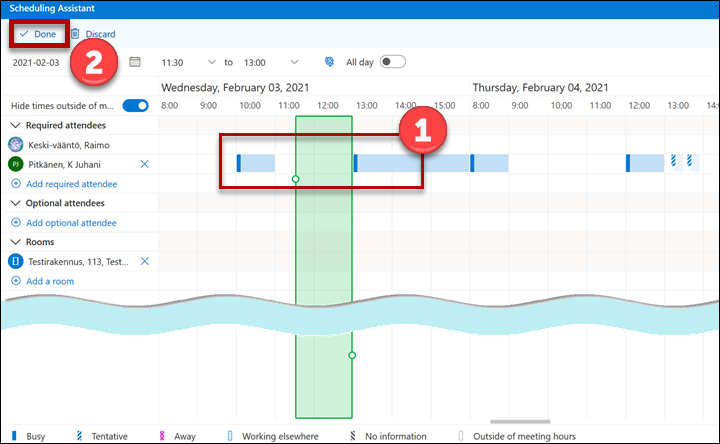
- Attendees are shown at (1) and the calendar view at (2). The green colour shows that all invited attendees are available during that time. Send the invitation by clicking Send (3).
Replies to the invitation
- Click on the calendar entry. Item (1) shows the received replies. The room also always sends a response (2)!
Learn more in these instructions.

Booking a meeting room
The bookings of some meeting rooms have been transferred to Outlook. Not all meeting rooms can be booked via Outlook. You can book a meeting room when you send the meeting invitation:
Replying to a calendar invitation
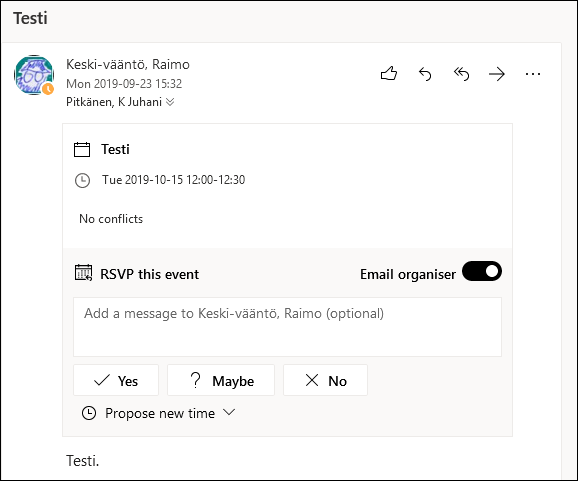
When someone sends you an invitation to attend a meeting, you receive an e-mail.
- You can accept the invitation by clicking Yes, accept it tentatively by clicking Maybe or reject it by clicking No.
- Once you accept an invitation, it creates an automatic entry in your calendar and the e-mail disappears.
Tracking the replies of attendees
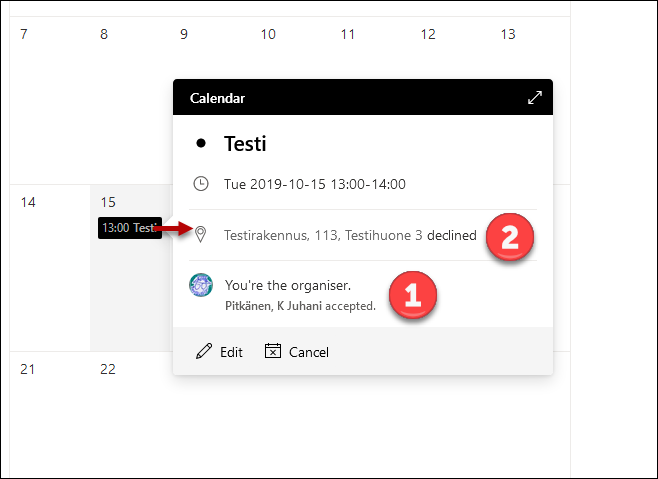
- As the organiser of the event, you can check the status of invitations by clicking on the calendar item. In this example, attendee Pitkänen, K Juhani (1) has accepted the invitation but the planned meeting room (2) has declined. If you are booking a room, remember that it always sends a response!
Video instruction
Give feedback
The instructions site of the University of Helsinki's IT Helpdesk helps you with IT-related issues related to your work. Let us know how we can improve our instructions. We greatly appreciate your feedback!
How would you improve these instructions?