
The use of University of Helsinki's Flamma workgroups service (workgroups.helsinki.fi) will end on 23.11.2026. The workgroup spaces will be moved to the new platform on the XWiki service.
It is up to the owners or administrators of the workgroup space to decide whether to move it to XWiki or archive it.
Note! Unmarked pages and content will not be moved to XWiki at all.
Quick help
What should the workgroup owner do?
Workgroup spaces are transferred to XWiki centrally by the Centre for Information Technology.
However, as the owner of a workgroup space, you must mark the workgroup space for transfer. You will also need to go through the content of your workgroup space and make any necessary corrections in XWiki after the transfer.
How to mark a workgroup space for transfer or archiving
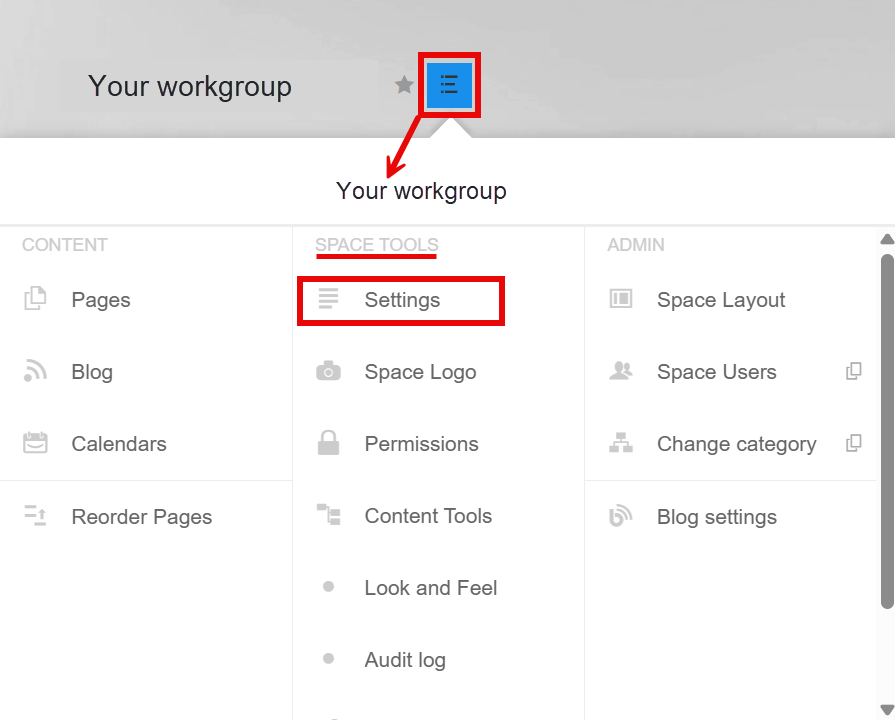
- Go to the homepage of your workgroup.
- Select Settings under the Space Tools section of the workgroup space menu.
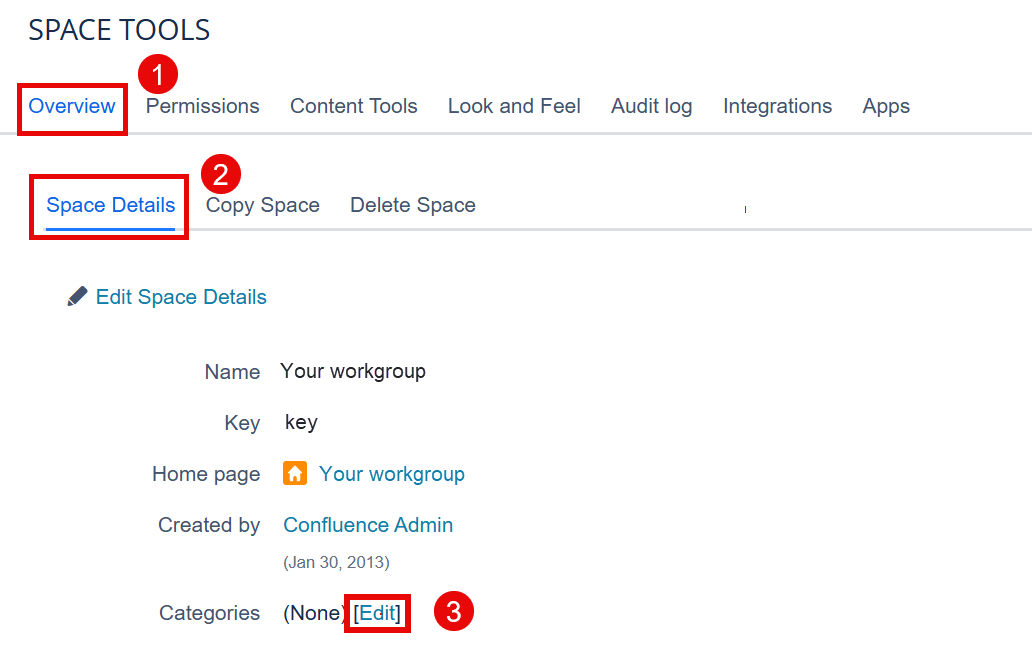
- From the Overview tab (1), choose Space Details (2).
- Select Edit (3) in the Categories field.
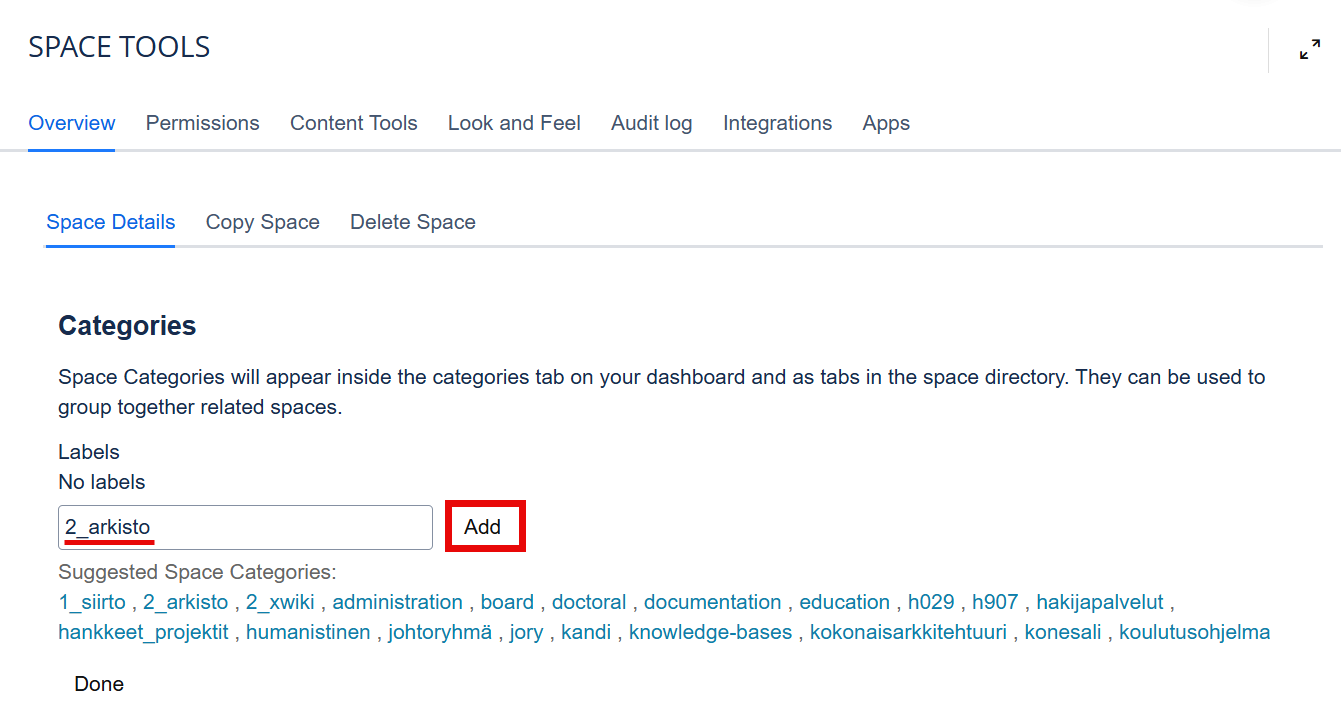
- In the Categories field, enter your choice (or select an item from the Suggested Space Categories list):
- 1_siirto (transfer) or
- 2_arkisto (archive)
- Finish by clicking Add.

Archiving the workgroup space
If you no longer need a workgroup space, but want to keep the content, you can also mark your space as archived. The Centre for Information Technology specialists will archive the workgroup spaces centrally in November. Once archived, the workgroup space is no longer available.
If you wish, you can save a PDF archive copy of your workgroup space yourself before archiving.
Here are the instructions for creating a PDF archive copy:
Please note that in PDF format, the site’s attachments are not saved in the PDF. You can save the attachments to a separate folder by performing an XML export and saving the Attachments folder from there.
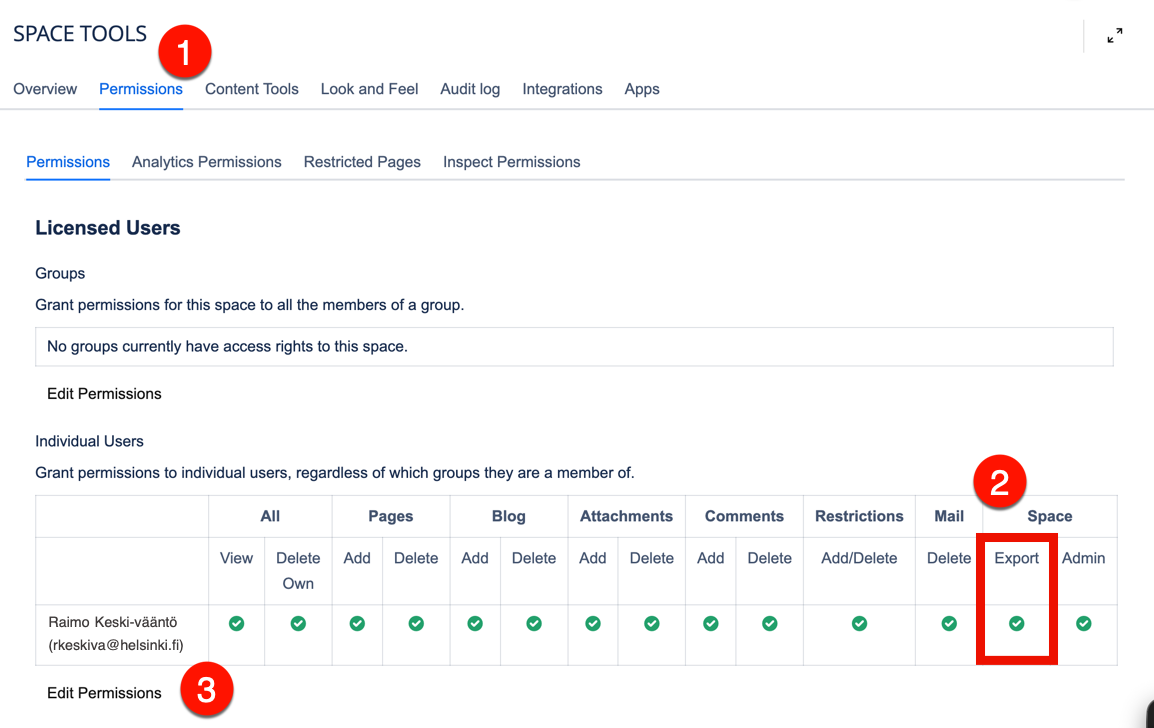
First, ensure that you have Export permissions for the space.
- You can check your Export permissions under (1) Space Tools > Permissions > Individual Users, in the table under (2) Space > Export.
- If the required user does not have these permissions, the group administrators can grant the necessary permissions under (3) Edit Permissions.
On the Content Tools page, select the Export tab > PDF.
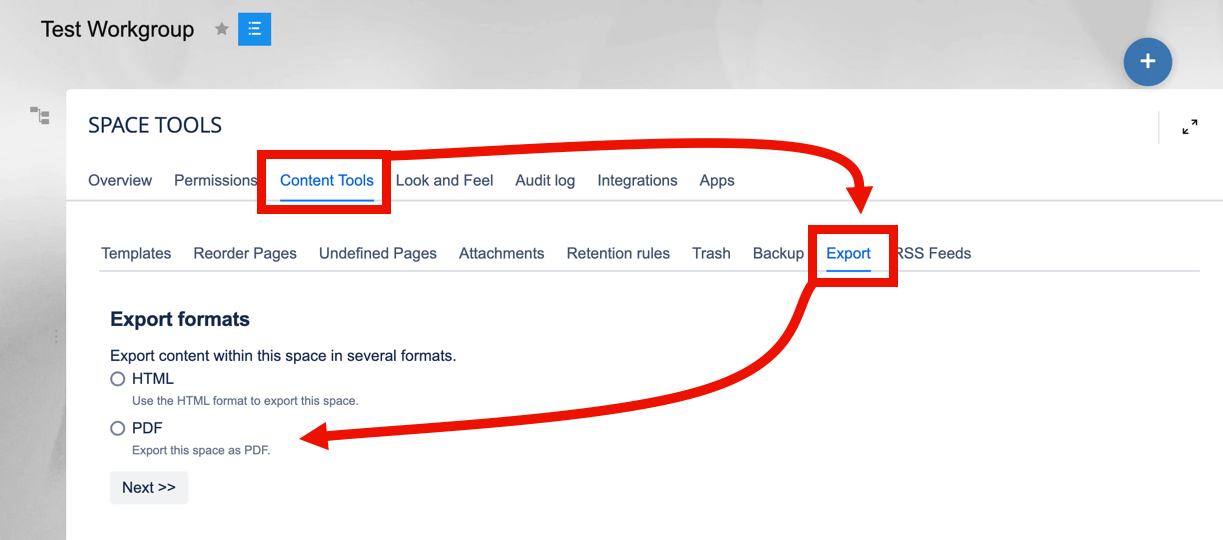
Click Next.
Select your PDF export options:
- Normal Export exports all pages
- Custom Export exports selected pages
- If you wish, you can tick the Include Page Numbers box
- Click Export

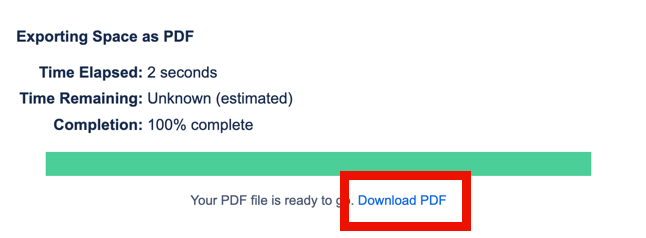
It may take a moment to generate the PDF file. Once the file or package is ready, a download link will appear at the bottom of the window.
- Click the Download PDF link.
- Save the file to your chosen folder.
Detailed help
Video instruction
Give feedback
The instructions site of the University of Helsinki's IT Helpdesk helps you with IT-related issues related to your work. Let us know how we can improve our instructions. We greatly appreciate your feedback!
How would you improve these instructions?