
Quick help
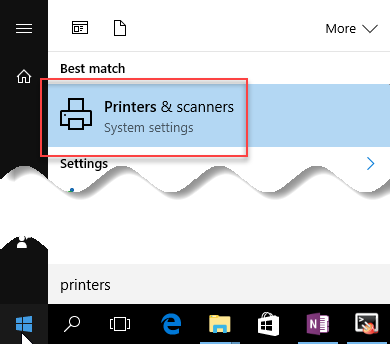
- Open the Start menu and find Printers & Scanners.
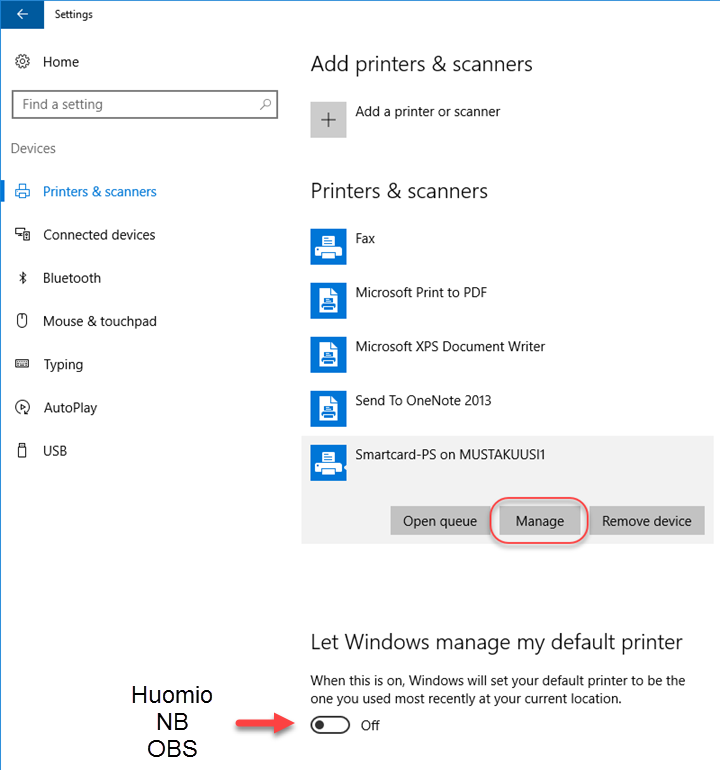
- A window will open containing a list of all installed printers. The default printer is marked with the grey text Default under it. If you wish to change the default printer, find the printer you want to use on the list, click its name and select Manage.
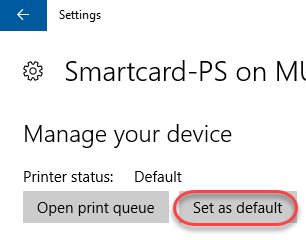
- Select Set as default in the new window that opens.
- Now you can close the settings window by clicking the X in the top right corner of the window.
Detailed help
Video instruction
Give feedback
The instructions site of the University of Helsinki's IT Helpdesk helps you with IT-related issues related to your work. Let us know how we can improve our instructions. We greatly appreciate your feedback!
How would you improve these instructions?