
The uses of GnuPG are not limited to e-mail encryption and signing. It can also be used to encrypt and sign just about any electronic resources.
Quick help
For Windows:
The GPG4Win package for Windows contains a small utility program called GpgEX, which facilitates file management using GnuPG considerably. By using the program you can encrypt, sign, decrypt, check signatures and calculate checksums for files. GpgEX also requires that either Kleopatra or GPA, programs providing a graphical user interface for GnuPG, is installed on the computer. Kleopatra is the better choice, because GPA does not support all functions provided by GpgEX.
See the detailed help for this.
For Linux:
Cubbli doesn't carry GnuPG by default, but if you wish to start using it, please check these excellent instructions:
https://www.wikihow.com/Set-Up-and-Use-GPG-for-Ubuntu
However, you won't to install that for encrypted email. The Thunderbird has OpenPGP in it now. Please check:
https://www.howtogeek.com/706402/how-to-use-openpgp-encryption-for-emails-in-thunderbird/
Detailed help
The GPG4Win package for Windows contains a small utility program called GpgEX, which facilitates file management using GnuPG considerably. By using the program you can encrypt, sign, decrypt, check signatures and calculate checksums for files. GpgEX also requires that either Kleopatra or GPA, programs providing a graphical user interface for GnuPG, is installed on the computer. Kleopatra is the better choice, because GPA does not support all functions provided by GpgEX.
Encrypting and signing files
In order to encrypt data, you need to have the recipient's public key in your keyring (instructions for importing keys to your keyring >>)
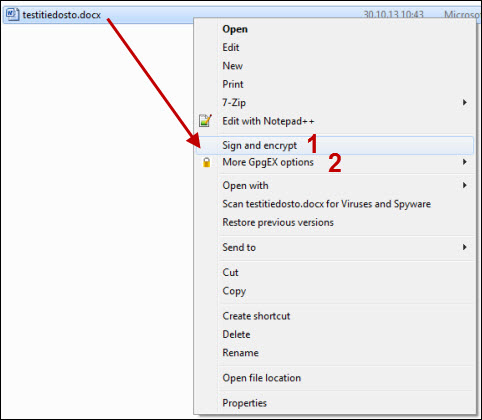
- In the folder, select the file (or files) that you want to encrypt or sign. Right-click on the file and select the desired command in the menu. By default, GpgEX offers Sign and encrypt (1), and you can find other options under the More GpgEX options (2) menu.
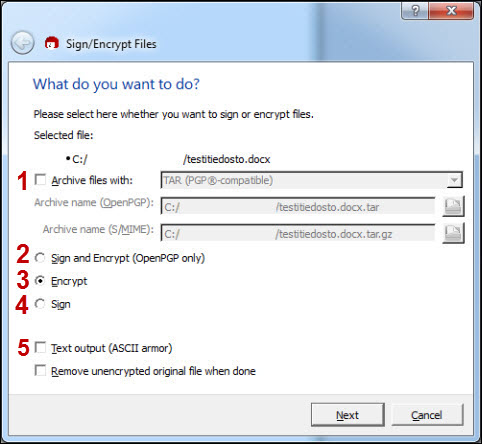
- The next step is to define what you want to do with the file. If you have chosen multiple files, it is easier to manage them if you archive them before encryption. You do this by checking Archive files with: (1). Select one of the three alternatives in the middle:
- Encrypt (3) encrypts the file with the recipient's public key so that only they can decrypt the file.
- Sign (4) signs the file using your private key so that the recipient can be sure that you have signed the file, and that is has not changed in any way after it was signed.
- Sign and encrypt (2) does both of the above.
- By checking Text output (5), the program converts the selected files into a text file. This may be useful if, for some reason, you wish to transfer data through a channel that only allows text.
- When you have selected the desired settings, click Next.
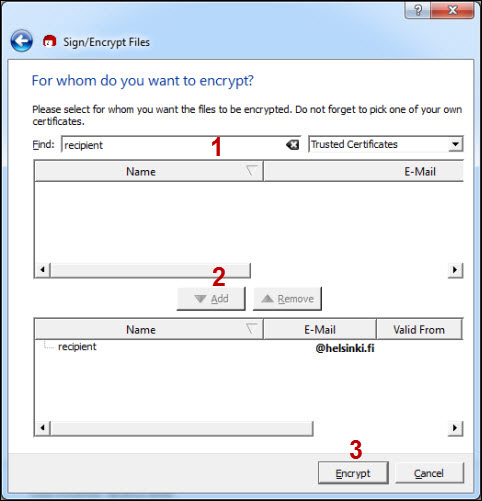
If you are encrypting files, the program asks you whose keys to use for the encryption. Find the recipients in the list (1) and select them by clicking Add (2).
- There may be several recipients. If you do not add yourself as a recipient, you will not be able to decrypt the files. After you have selected the recipients, click Encrypt or Next (3).
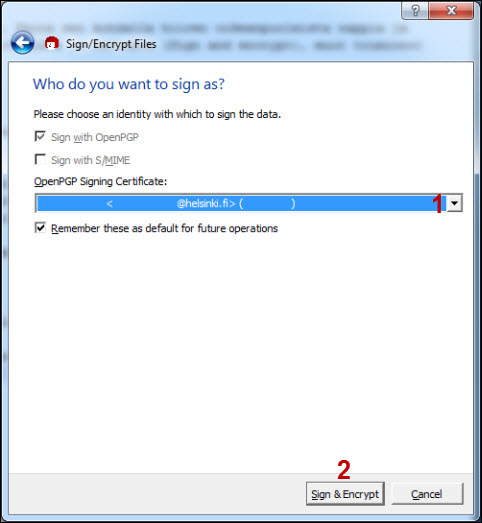
If you have selected Sign, the program asks you which private key you want to use for signing.
- Select your private key in the drop-down menu (1) and click Sign or Sign and encrypt (2).
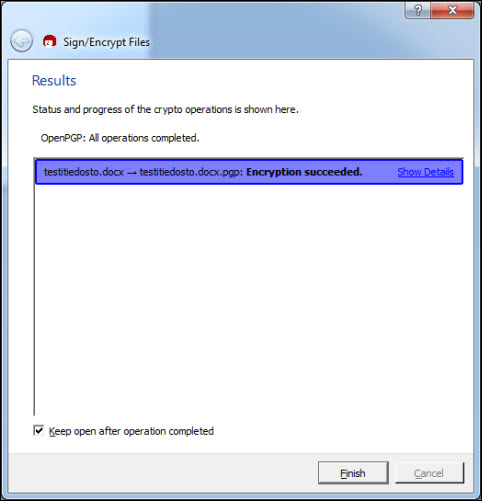
Finally, the program gives you a notification whether the encryption and/or signature was successful and shows you the name of the created file.
Video instruction
Give feedback
The instructions site of the University of Helsinki's IT Helpdesk helps you with IT-related issues related to your work. Let us know how we can improve our instructions. We greatly appreciate your feedback!
How would you improve these instructions?