
EduVPN is a modern and secure VPN connection.
- EduVPN is automatically installed on university Windows, Mac, and Cubbli computers, as well as iOS devices.
- For home computers, you can download eduVPN by following the instructions on the eduVPN page.
- For mobile devices, download it via the device’s app store (Apple Store / Play Store).
These instructions, including images, were created on a Windows 11 computer, but the process is similar across all operating systems.
Quick help
Settings and connecting
Note: On university Windows computers, the settings are pre-configured.
Adjusting Settings
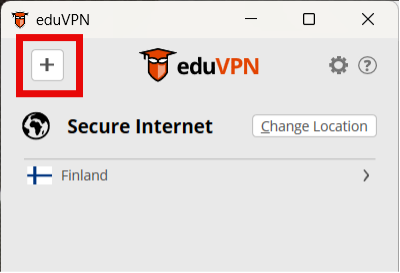
- Launch the eduVPN application.
- Click the Add icon (+).
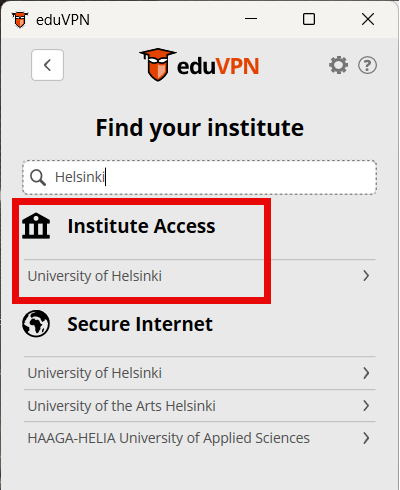
- Start typing your home organization’s name in the search field, e.g., University of Helsinki.
- Important: Select Institute Access > University of Helsinki.
- Now the settings are configured, and you can proceed to connect.
Connecting
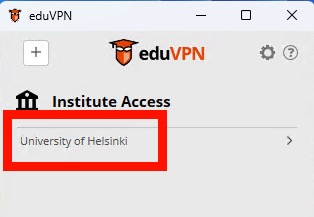
- Open eduVPN.
- Select Institute Access > University of Helsinki.
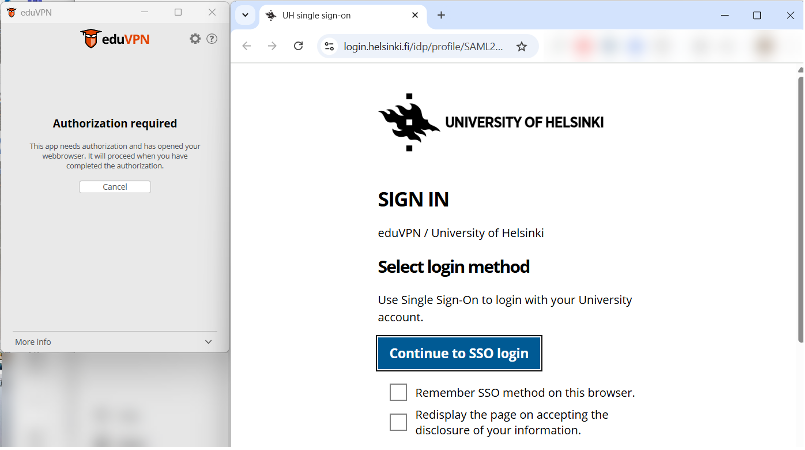
- The application will automatically open a browser window for authentication. Log in with your university credentials.
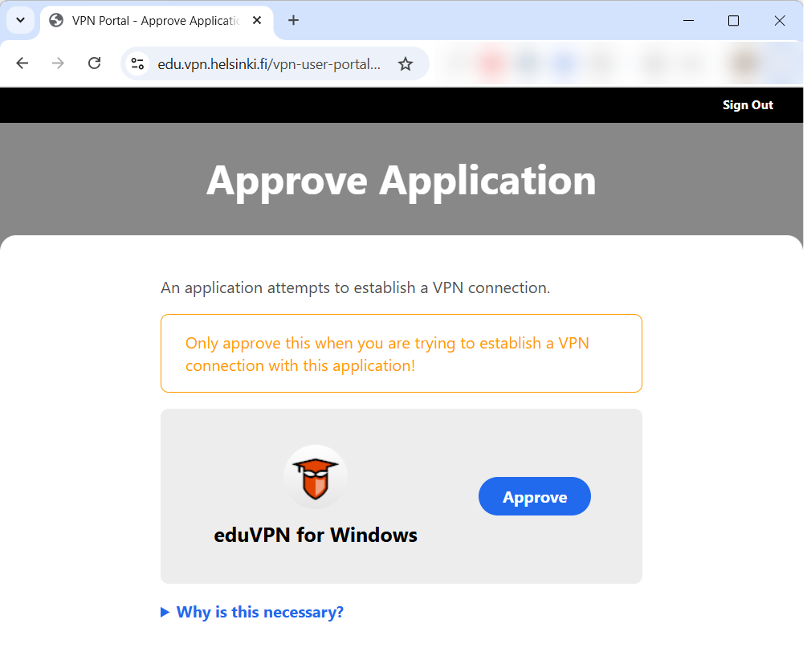
- After logging in, you must approve the VPN connection. Click Approve.
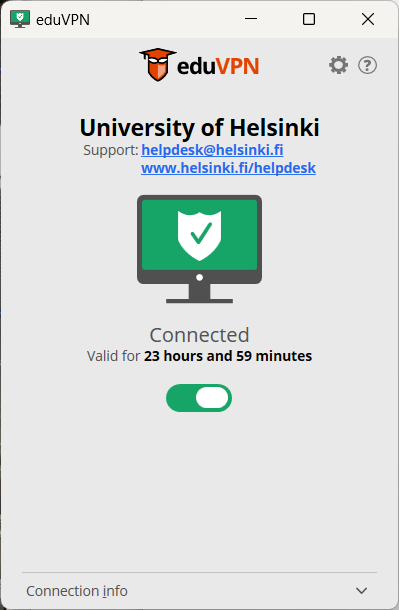
- Once logged in successfully, the connection is established.
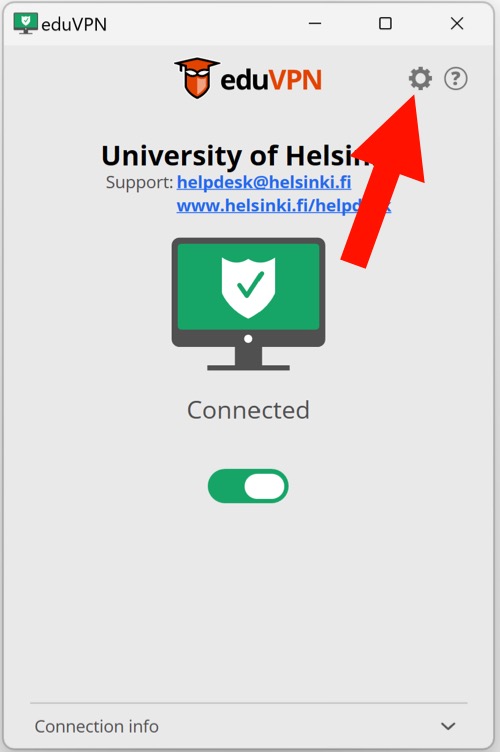
- In the future, you can start the connection directly using the toggle switch.
The connection is valid for 72 hours. After that, you must log in again (Renew Session).
Types of connections
Detailed help
Adjust Settings on First Launch
Note: On university Windows computers, settings are pre-configured. You can skip to the connection section.
- Launch the eduVPN application.
- Click the Add icon (+).
- A selection page will open where you can search for your organization’s settings.
- Start typing your home organization’s name in the search field, e.g., University of Helsinki.
- Important: Select Institute Access > University of Helsinki.
- The application will automatically open a browser window for authentication. Log in with your University credentials.
- After logging in, you’ll be redirected to edu.vpn.helsinki.fi to approve the VPN connection. Click Approve.
- The settings will now be saved to your computer.
- Once the connection is approved, you can close the browser window.

- You’ll return to the eduVPN application. A secure connection to the University network is now active.
Connecting and Disconnecting
When you have completed the setup for the first launch of the application, you can proceed directly to connect afterwards.
Connecting
- Open the eduVPN application.
- Select Institute Access > University of Helsinki.
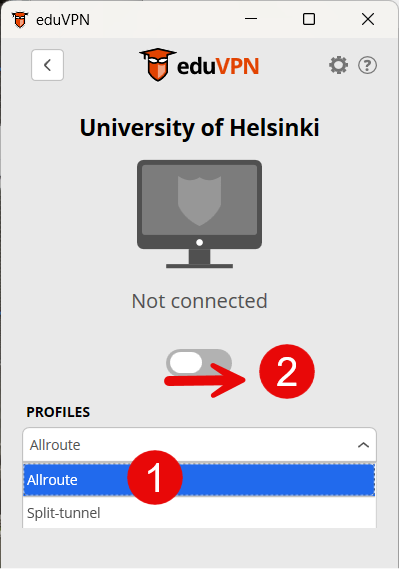
- From the Profiles dropdown (1), you can switch between allroute and split-tunnel VPN types. See the section Connection Options for more details.
- Toggle the switch (2) to connect.
- A browser window will open. After logging in, you’ll be redirected to edu.vpn.helsinki.fi to approve the VPN connection.
- Click Approve.
- Once approved, you can close the browser window.
- You’ll return to the eduVPN application. The connection is now active.
The connection is valid for 72 hours. After that, a new login is required ("Renew Session").
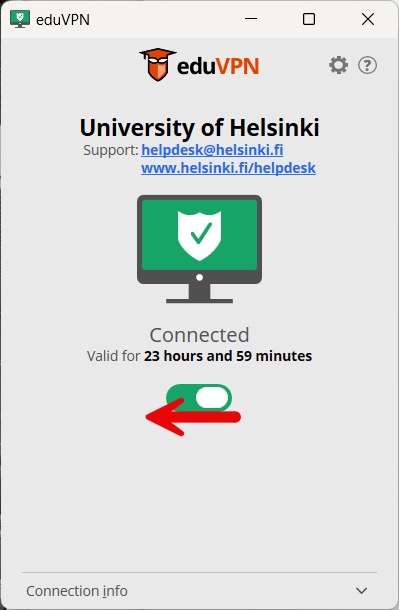
Disconnecting
- Go to the eduVPN application and toggle the switch to disconnect.
Types of connections
You can choose between two types of connections:
Installing the eduVPN application (home computers & mobile devices)
- You can install eduVPN on home computer from https://www.eduvpn.org.
- For mobile devices, install it via the device’s app store (Apple Store / Play Store).
- Note: For centrally administered UH Android devices, eduVPN must be installed manually from the Play Store. It will be installed in the personal profile.
Settings for home computers can be configured according to the Adjust Settings section.
Allowing traffic to outside networks
This is a supplementary instruction for a Windows workstation under central administration to allow traffic to the university network.
If your machine cannot access the external network (e.g. www.google.com) or you have problems with network disks, the settings are set to block traffic to the external network.
A fix for this problem has already been made for new installations, but for existing installations this fix will not work, and the fix will have to be made manually.
Follow this guide to fix the problem:
- Launch the eduVPN application. Select the appropriate connection type, either all-route or split-tunnel, and connect.
- Click on the route button in the eduVPN application to edit the settings.
- In the Settings window, find Wireguard > Block traffic outside VPN.
- Make sure that this option is not selected. If the checkbox is ticked, then
uncheck the box.
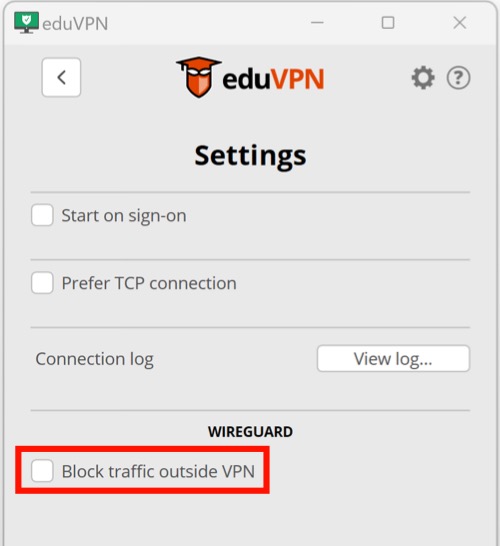
You can then close the EduVPN app and continue working as usual.
Video instruction
Give feedback
The instructions site of the University of Helsinki's IT Helpdesk helps you with IT-related issues related to your work. Let us know how we can improve our instructions. We greatly appreciate your feedback!
How would you improve these instructions?