
You can share an individual file or an entire folder with another user.
Saving a file to OneDrive and inviting users to view or edit it is an easy way to collaborate on content. Anyone with editing rights can update the file’s content, and others will see the latest version at the same time.
If you want to share a file, you can:
- save the file to OneDrive and share it from there. An email will be sent to the recipients.
- share a link directly from the file, which you can copy into, for example, a Teams conversation, Moodle or even a workgroup page.
Quick help
File sharing options
You can share a single file or an entire folder with another user on OneDrive.
- Sign in to Outlook Web App and go to OneDrive via the app launcher.
- Find the file (or folder) you want to share in OneDrive and click the share icon next to the document.
- In the window that opens, you can share the file or folder and view the file’s sharing settings.
You can share the file directly as a link from Microsoft programs, e.g. Word. You can paste the copied link into a Teams conversation or an email message. You can also use this link to share the file as a link on a wiki site or in Moodle, for example.
Note! By default, permissions are granted to users in your organisation with view-only access. Remember to check and add the necessary permissions, e.g. editing rights, when sharing.
Please see Detailed help Tab for instructions with pictures.
Detailed help
Sharing a file via OneDrive
You may share an individual file or an entire folder with another user.
- Log into Outlook Web App and go to OneDrive through the app launcher.
- Locate the file (or folder) to share in the OneDrive list and click the share icon next to the document.

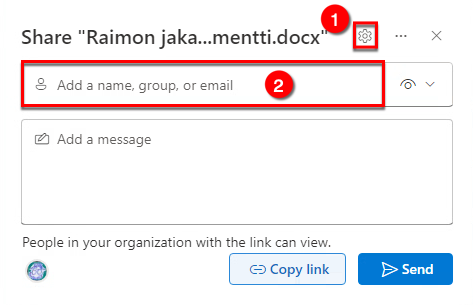
- A window opens where you can share a file or folder and view the file’s sharing settings (1).
- Type the name of the person you want to share the file (or folder) (2) with.
- Specify whether the person should only have read access (Can read) or write access as well (Can edit) (3).
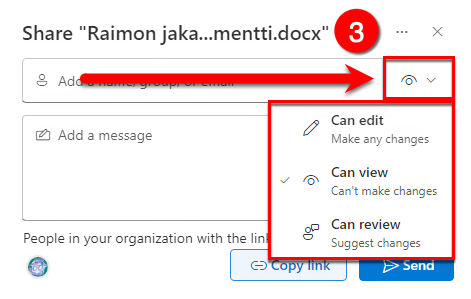
- Click Send (4) to finish.
- The recipient will receive an email containing a link to the shared file or folder.
Sharing a file link
You can share the file directly as a link and paste the link into a Teams conversation or email message. You can also use this link to share the file on a wiki site or in Moodle, for example.
Note! By default, permissions are granted to users in your organisation with view-only access. Remember to check and add the necessary permissions, e.g. editing permissions, when assigning them.
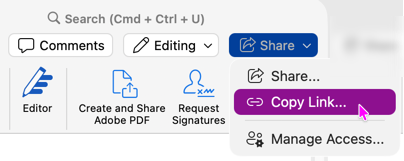
- You can share a Microsoft file directly from the document.
- Open the document you want to share. Select Share > Copy Link.
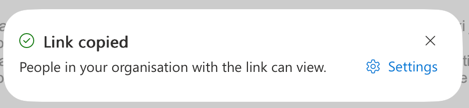
- The link will be copied, and you will receive a notification. The notification will show you the permissions associated with the link.
- By default, the link is shared with users in your organization with view-only permissions. If you want to adjust the permissions — for example, to add editing permissions — click Settings.
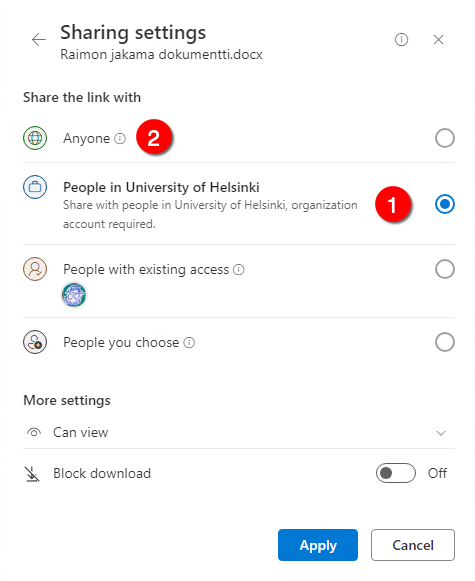
- The Sharing settings window opens.
- In the Sharing settings, you can specify who can open the file after receiving the link.
- By default, files can only be shared with people who have a University of Helsinki user account (People in the University of Helsinki) (1). If you wish, you can also share the file with anyone outside the University of Helsinki (Anyone) (2).
With whom has the file been shared?
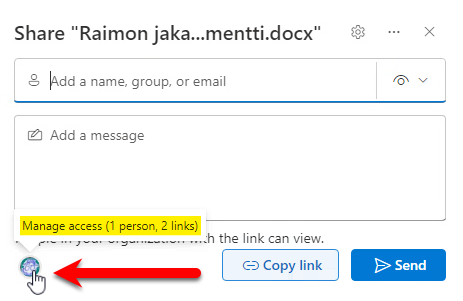
- To see who the file has been shared with, click the Manage access icon (1).
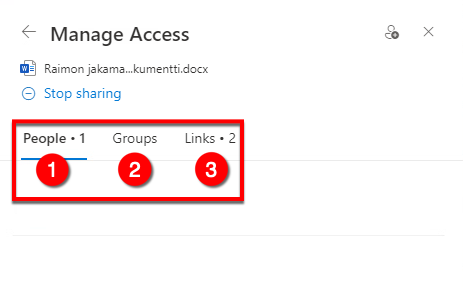
- In the window that opens, you can check and edit the permissions and the people (1) (“People”) and groups (2) (“Groups”) with whom the file has been shared, and (3) what permissions are granted to those who have received a link to the file (“Links”).
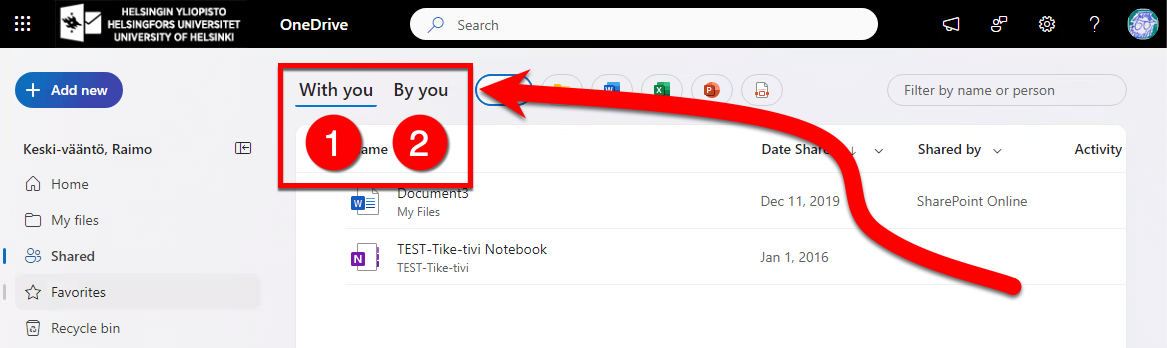
How to find files shared with you
If you want to view the files or folders that have been shared with you, select Shared from the side menu in the OneDrive web interface.
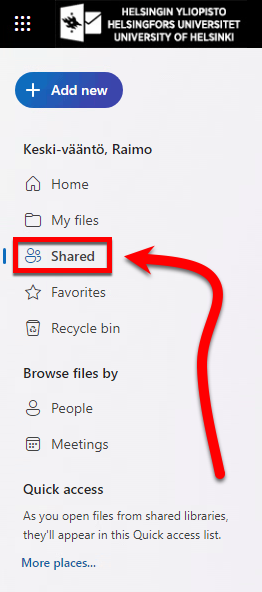
Here you can view files or folders shared with you (“With you”) (1) or files or folders you have shared yourself (“By you”)(2).
Video instruction
Give feedback
The instructions site of the University of Helsinki's IT Helpdesk helps you with IT-related issues related to your work. Let us know how we can improve our instructions. We greatly appreciate your feedback!
How would you improve these instructions?