These instructions are intended for the participants of Zoom video meetings. If you want to arrange and host meetings, read the more comprehensive instructions here. The extensive instructions give more details on how to make settings that are useful to a basic user as well.
You can use Zoom on your browser or on separately installed client software. They have slightly different features. In practice, you can use either to attend meetings, but the comfort of using them may vary in some situations.
- We recommend using the Zoom application for participating in meetings. You can, however, also participate in a Zoom meeting using the browser without the Zoom application. You should note, however, that the browser version of Zoom has limited functionalities and that it works best in Google Chrome. You can also download the ZOOM Cloud Meetings mobile application that allows you to participate in Zoom meetings using your mobile device. The application is available in Google Play and in Apple Store.
- Zoom’s instructions site has a table comparing the different client software versions (computers, mobile devices, browser version).
Zoom is installed on all Windows and Cubbli computers in the university’s centralised administration. You can install it on Mac computers yourself from the Managed Software Center (see the instructions). You can install the Zoom client software on your personal computer or mobile device at https://zoom.us/download.
Quick help
If you have not used Zoom yet, you should test it at https://zoom.us/test. Use the Test Speak & Microphone in the test room to test the sound and that the microphone is working.
To participate in the actual meeting, click the participation link you have received. The link opens a browser window that allows you to open the meeting by clicking Open Zoom. If you have not downloaded the application in advance, the browser suggests that you download the application.
If you participate using the browser version, open the link in Google Chrome. You will see a page suggesting that you download the Zoom application, but you can join the meeting with the browser by clicking the Join from your browser link at the bottom of the window. Accept the terms of use, type your full name as the name of participant and then click Join. If you are a logged in to Zoom as a user, you do not need to enter your name separately.
To join the meeting, click Join audio at the bottom of the screen and then click Join with computer audio in the window that opens. You can adjust your audio and video using the buttons at the bottom left corner. You can click the Mute/Unmute and Start/Stop video buttons in the bottom left corner to switch them on.
Detailed help
Testing your own equipment
You can check if your hardware is suitable for Zoom meetings at https://zoom.us/test.
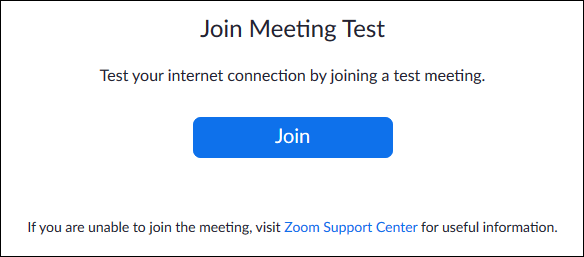
- Click Join.
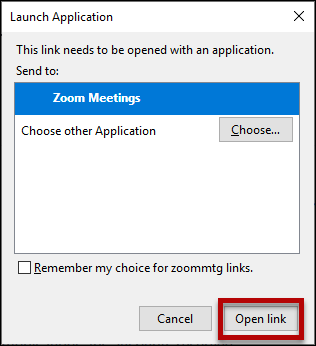
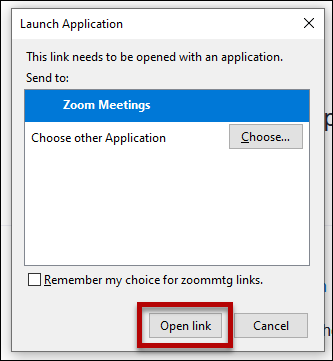
- Click Open link.
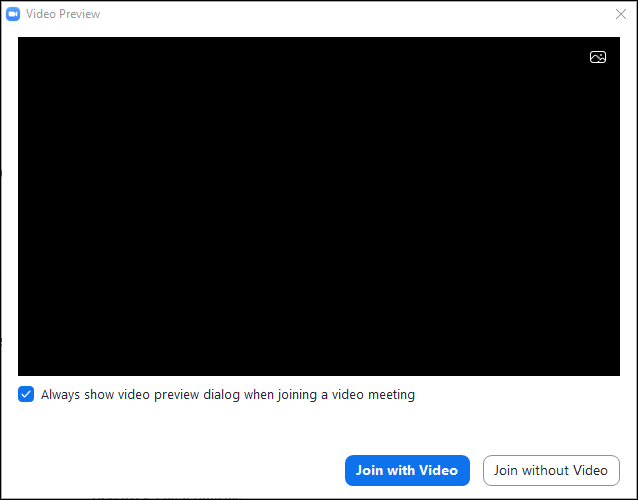
- Click Join with Video tai Join without Video.
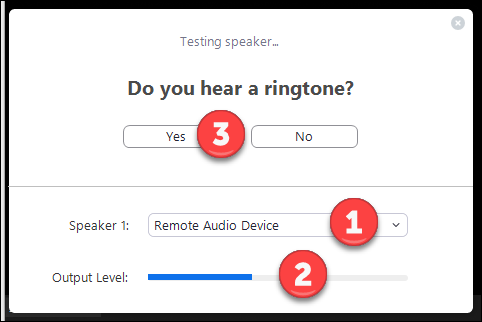
- Zoom tests the operation of the speakers or headphones. Check that you have selected the correct device (1). The bar at Output Level (2) must move. Click Yes (3) when the sound is ok
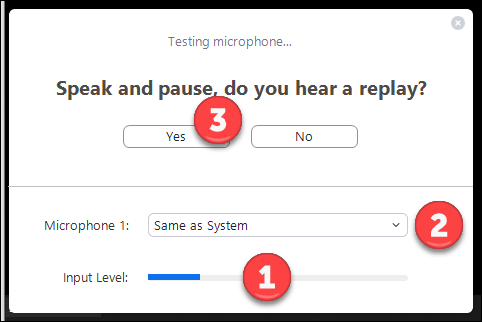
- You can then test the microphone. Speak into the microphone. The Input Level bar (1) shows the sound volume. If the bar does not move, check that you have selected the correct microphone (2). When you stop speaking, Zoom will repeat what you have said. Click Yes (3) when the microphone is working.
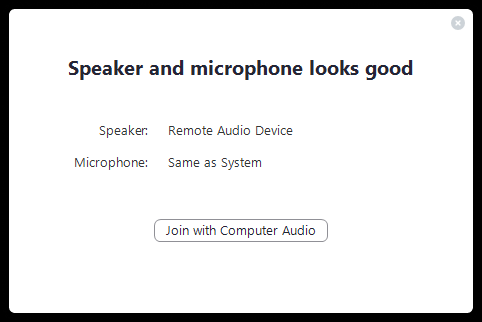
- Zoom gives a notification when the settings are in order.
Joining a meeting using the e-mail link
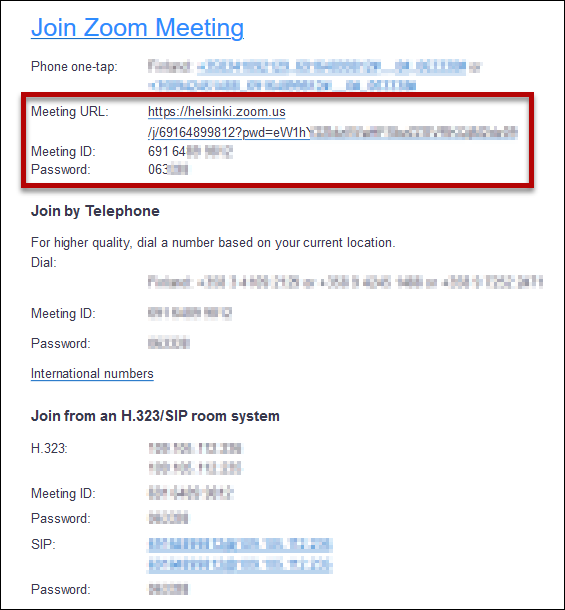
- If you have been invited by e-mail, click the Meeting URL link in the message.
Joining a meeting using the Meeting ID number
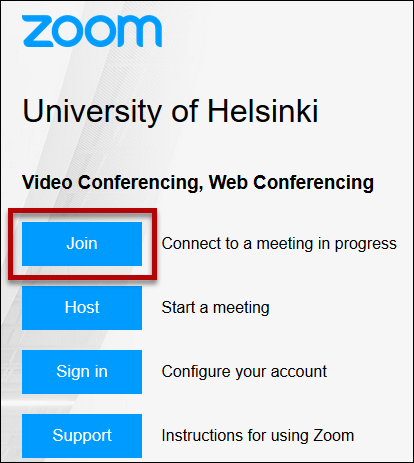
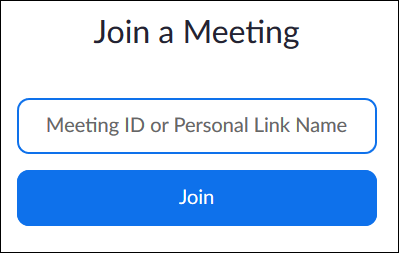
- Access Zoom on Chrome at www.helsinki.fi/zoom
- Click Join
- Write the meeting room ID in the Meeting ID or Personal Link Name field
- Click Join
- Click Open Link
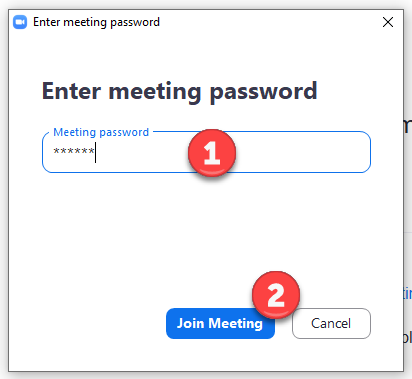
- Enter the meeting’s password in the Meeting password field (1).
- Click Join Meeting (2).
Actions during the meeting
Waiting room
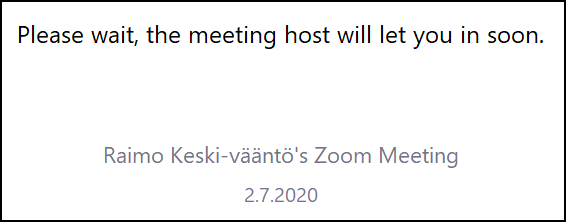
- The meeting host may have started to use the waiting room. You cannot enter the meeting room directly in such a case. Just wait, the host will let you into the meeting room when the event starts.
General view
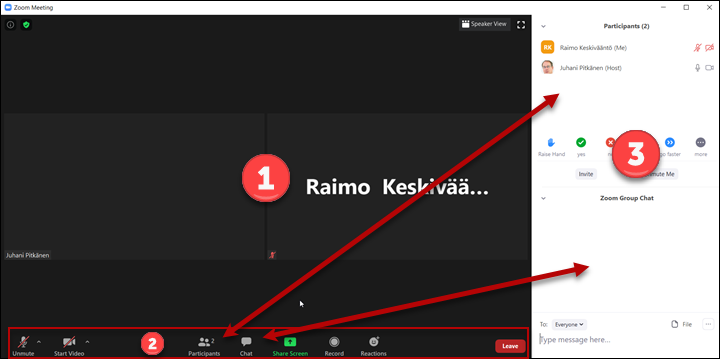
- The main window (1) takes up most of the Zoom window. It may show information about the participants, or someone may share documents from their own computer. There are control buttons (2) below the main window. If the buttons are not shown, move the mouse over the Zoom window. Click Participants or Chat to open or close the respective windows at the right side of Zoom (3).
Microphone and camera
Remember that the host can always mute the participants’ microphone and camera.
The audio and video controls are located in the bottom left corner.
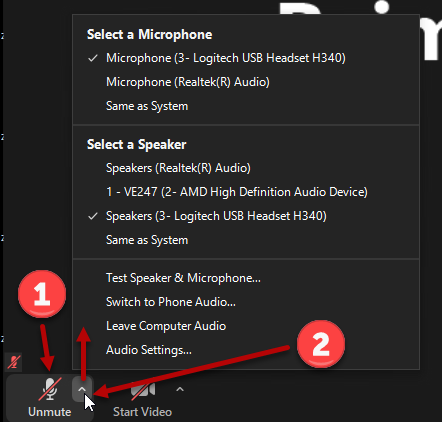
- Click the microphone symbol (1) to open or mute the microphone. Click the arrow next to it (2) to open the microphone settings. Note that you may be using several sources of sound.. See above for how to test the equipment.
Corresponding settings for the video camera are located next to the microphone button.
Asking for permission to speak
If the meeting only has a couple of participants, everyone can keep their microphone open and speak freely. If there are lots of participants, it’s a good idea to keep your microphone muted and ask the meeting host for permission to speak before speaking.
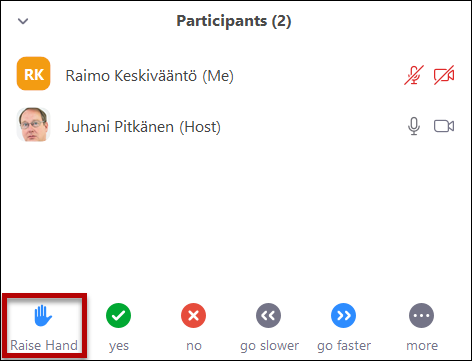
- Click Raise Hand icon..
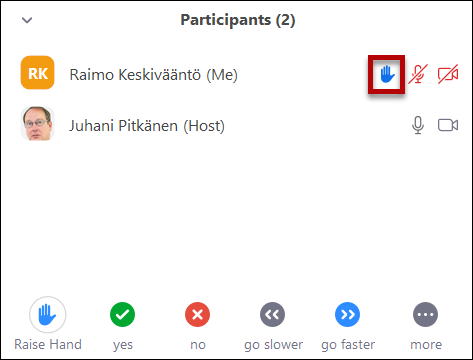
- The request to speak is shown in the list of participants.
Chat
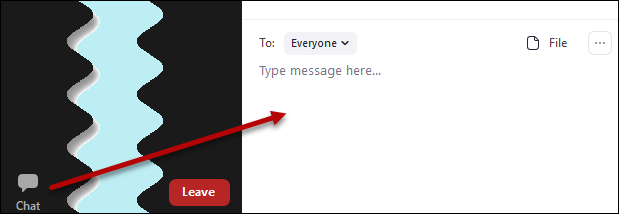
- You can open and close the chat window by clicking the icon at the bottom.
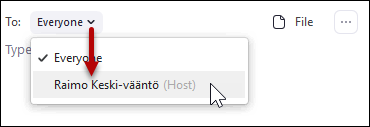
- By default, your message is shown to all. To chat privately, choose someone from the drop-down menu.
Reactions
Zoom allows reactions to what others say also by means of smilies.
- Click the Reactions button at the bottom of the window.
- The smilie is shown for a while.
Leaving a Meeting
-
To leave the meeting, click Leave in the bottom right corner.
-
Confirm by clicking Leave Meeting.
Video instruction
Give feedback
The instructions site of the University of Helsinki's IT Helpdesk helps you with IT-related issues related to your work. Let us know how we can improve our instructions. We greatly appreciate your feedback!
How would you improve these instructions?
