
In order to use the IT services available at the University of Helsinki, you must first activate your user account.
Please note that you need a Finnish e-banking account or an electronic user ID and reader in order to activate your account online!
You can activate your user account once your information is recorded in the student register. The student register will inform you by email when your information has been recorded. The activating service will also inform you when your information has been recorded in the student register.
If you have problems with the activation service, please contact IT Helpdesk. In most issues concerning usernames, Helpdesk must first be able to reliably identify the caller. The matter can be solved with the ID Point service.
Quick help
To interrupt the process select Log out and a user account will not be created. You can start again from the beginning later.
In case there's an error in your personal information, for example a typo in your name, please interrupt the process by selecting Log out and contact the student services to get the error corrected.
See Detailed help for illustrated instructions and more information.
Detailed help
Table of contents
- 1. Activating your University of Helsinki user account and managing your personal information
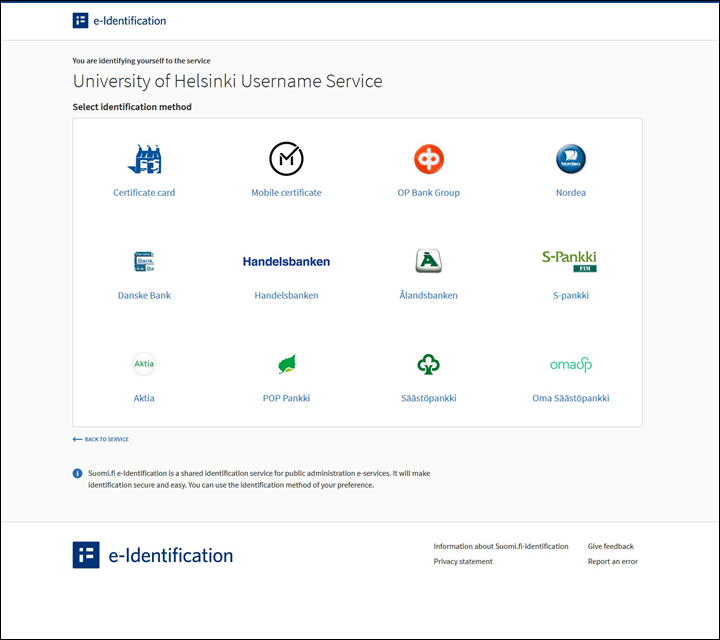
- 2. Select the identification method: a certificate card, a mobile certificate or bank.
- 6. After identification you can return to the university site by clicking Jatka palveluun (Continue to service).
- 3. Managing your user information: Welcome to the service!
- 4. Managing your user information: Verify your personal information.
- 5. Managing your user information: Accepting the user license agreement
- 6. Managing your user information
- 7. Managing your user information: Choose your user name
- 8. Managing your user information
- 9. Managing your user information: Type in your contact e-mail outside the university
- 11. Managing your user information: Summary
- 12. Managing your user information
- 13. How to verify your account has been created
You can exit the service at any time by clicking log out. This aborts your account activation process, and no account is generated for you. You can resume later by starting over.
If any of your personal information listed in the service contain errors (e.g. your name is misspelled), cancel your account activation by clicking on log out. Please contact the Student services to correct any errors.
1. Activating your University of Helsinki user account and managing your personal information

- Click on Start.
2. Select the identification method: a certificate card, a mobile certificate or bank.
6. After identification you can return to the university site by clicking Jatka palveluun (Continue to service).
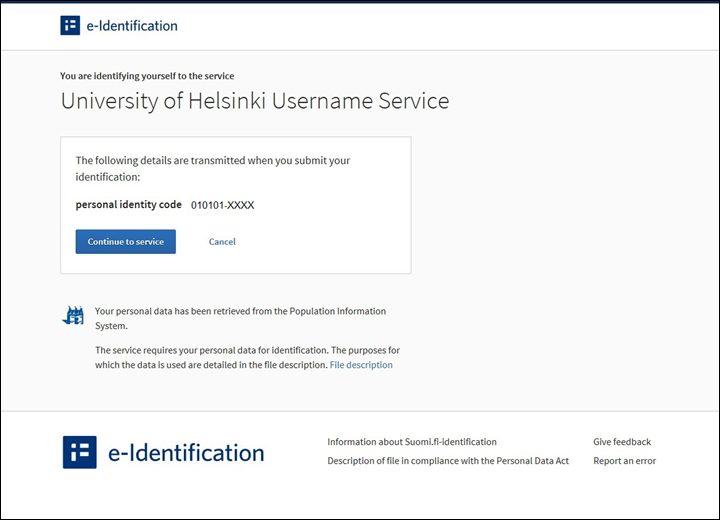
- Click on Continue to the service.
3. Managing your user information: Welcome to the service!

- On this page, you only need to click Proceed to verify your personal information.
4. Managing your user information: Verify your personal information.
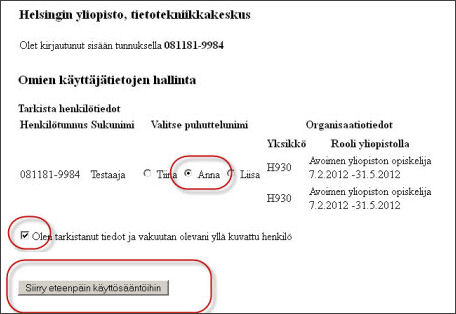
- Check to see that your personal information is shown correctly.
- Choose your first name by clicking the radio button next to it.
- Check the box I have verified the information and affirm to be the person described above. Please note that you cannot proceed before accepting this.
- Click Proceed to rules and regulations.
5. Managing your user information: Accepting the user license agreement
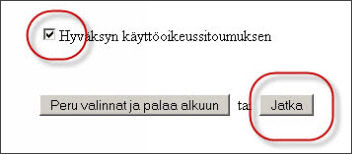
- Read the rules of use. If you accept them, tick the box I accept the user license agreement. Please note, that you cannot obtain a user account to the UH IT services without accepting these rules.
- Click Continue.
6. Managing your user information
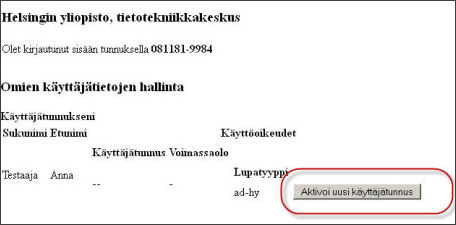
- The next page only displays your name if you do not already have another user account with UH.
- Click Activate a new user account.
- If you already have a user account at the University of Helsinki, the button reads Return to use.
If you have had a university user account previously, the button says “Palauta käyttöön” (Restore to use)”. Click the button even in this case and continue according to these instructions
7. Managing your user information: Choose your user name
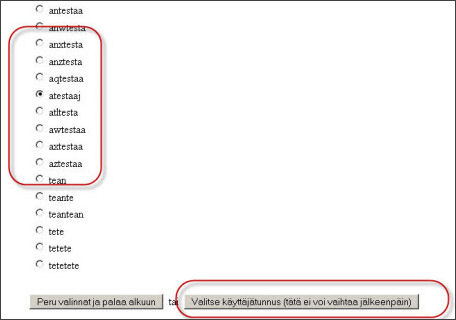
Select the user name you would like to use from the list displayed on the screen. Please note that there is no way to change your user name afterwards. Your user name remains the same for the duration of your stay at UH – even if your name changes.
After choosing your user name, click the button Choose this user account (you cannot change it afterwards).
8. Managing your user information
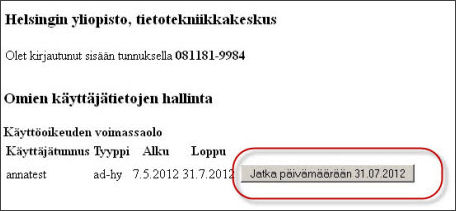
- The following page displays your user name and its term of validity. Click on the button Extend until the date DD.MM.YYYY (=default date of expiry for the account, which varies depending on the user).
9. Managing your user information: Type in your contact e-mail outside the university
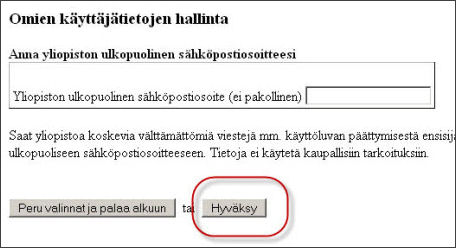
- If you have an e-mail address outside the university, you can type it in the following screen. Giving an external e-mail address is not mandatory.
- NB! Using some systems, such as Moodle, necessitates an e-mail address. Users who do not receive a University of Helsinki e-mail address, are advised to type in another address here.
- Click Accept to proceed to the next stage.
- Verify the choices listed by the service are correct. The account creation process is nearly finished. Once you confirm the information shown on this screen, you can no longer alter them or abort the account activation process.
- Click Confirm choices: you can no longer return after this.
11. Managing your user information: Summary
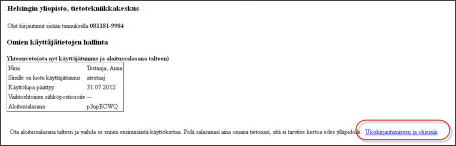
- Your user account has now been activated. Memorize your user name together with the temporary password generated for you.
- Click Proceed to log out and instructions.
12. Managing your user information
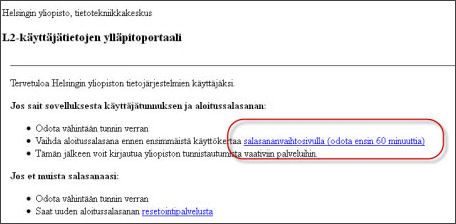
Your user account has now been activated. Once the account has been activated, you are able to log in to all of Helsinki University's services.
Please note that the password you were given is a temporary one. Before you can start using the university's IT services, you must first change it to another one here: www.helsinki.fi/password.
- Due to how information is passed inside the university's IT systems, you can only change your password one hour after you activate your account. You can also change your password later, but you must change it before you start using any UH services that require logging in (e.g. Flamma, Sisu).
13. How to verify your account has been created
To verify your user account was successfully created please login at our user account details information site.
Video instruction
Give feedback
The instructions site of the University of Helsinki's IT Helpdesk helps you with IT-related issues related to your work. Let us know how we can improve our instructions. We greatly appreciate your feedback!
How would you improve these instructions?