
ScreenPal (formerly Screencast-O-Matic) software is used for creating and editing screen capture videos.
The instructions provided by Helpdesk are for the software version 2.3.12.
Some details in the more recent versions and ScreenPal’s own instructions may differ slightly from those presented in this document.
Information security
Pay attention to information security when you save and share videos created with ScreenPal. It is subject to the same rules and guidelines as other tools, such as your email. Read more about information security in Flamma.
Quick help
Download the software on your
- Windows computer from Software Center
- Mac computer from Managed Software Center
- Download the software on your home computer at https://screencast-o-matic.com/download
Training videos available:
Educational technology services has produced training videos, which are available on Unitube
The supplier’s website also has several video tutorials for various situations.
Instructions for making videos are available in the section P.6 Videos on Student's Digital Skills.
Detailed illustrated instruction are available under the Detailed help tab.
Detailed help
Deployment
You can install ScreenPal on University Windows computers via Software Center (Instructions for using Software Center can be found here) or Managed Software Center (Mac).
Download the software on your home computer at https://screenpal.com/download
Installation on Windows computers
- Install ScreenPal via Software Center.
-
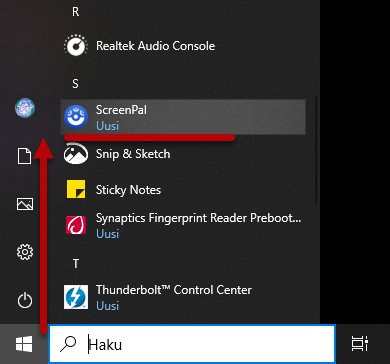
Start ScreenPal (Start > ScreenPal).
-
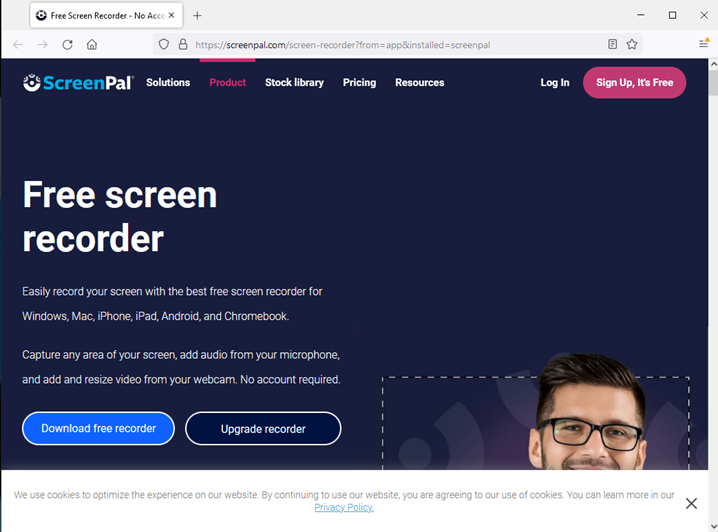
ScreenPal opens a browser at https://screenpal.com/screen-recorder?from=app&installed=screenpal.
- Change the address in the address bar to https://screenpal.com/helsinki and select Enter (1). If ScreenPal does not open the browser automatically, open the browser yourself and copy the address into the address bar.
- NB! Always make the same address change after updating ScreenPal.
- Section (2) still shows the old name of ScreenPal, Screencast-o-Matic.
- Tick I agree to the Terms of Service (3).
-
Select an action from the bottom row. In this example, Open the Video Editor was selected (4).
-
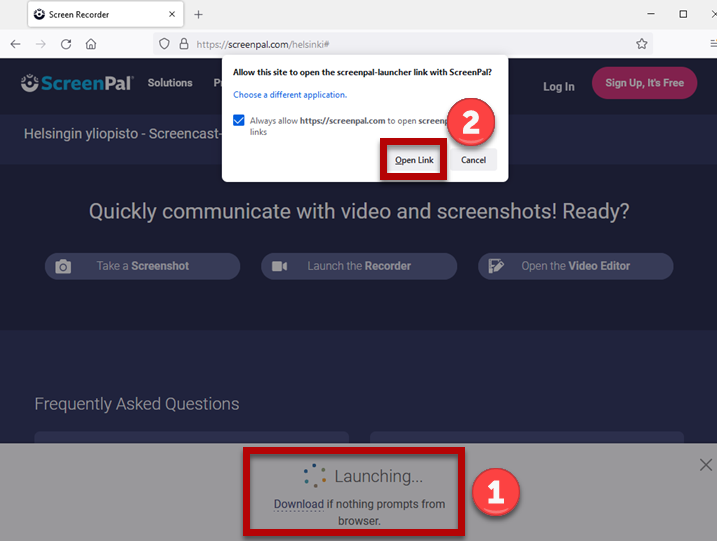
ScreenPal starts up (1). Tick Always allow https://screenpal to open ... and select Open Link (2).
-
The video editor is launched and you can start working.

Launching the software for the first time
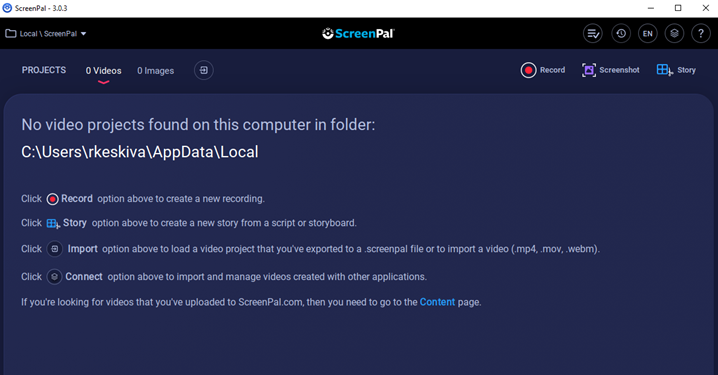
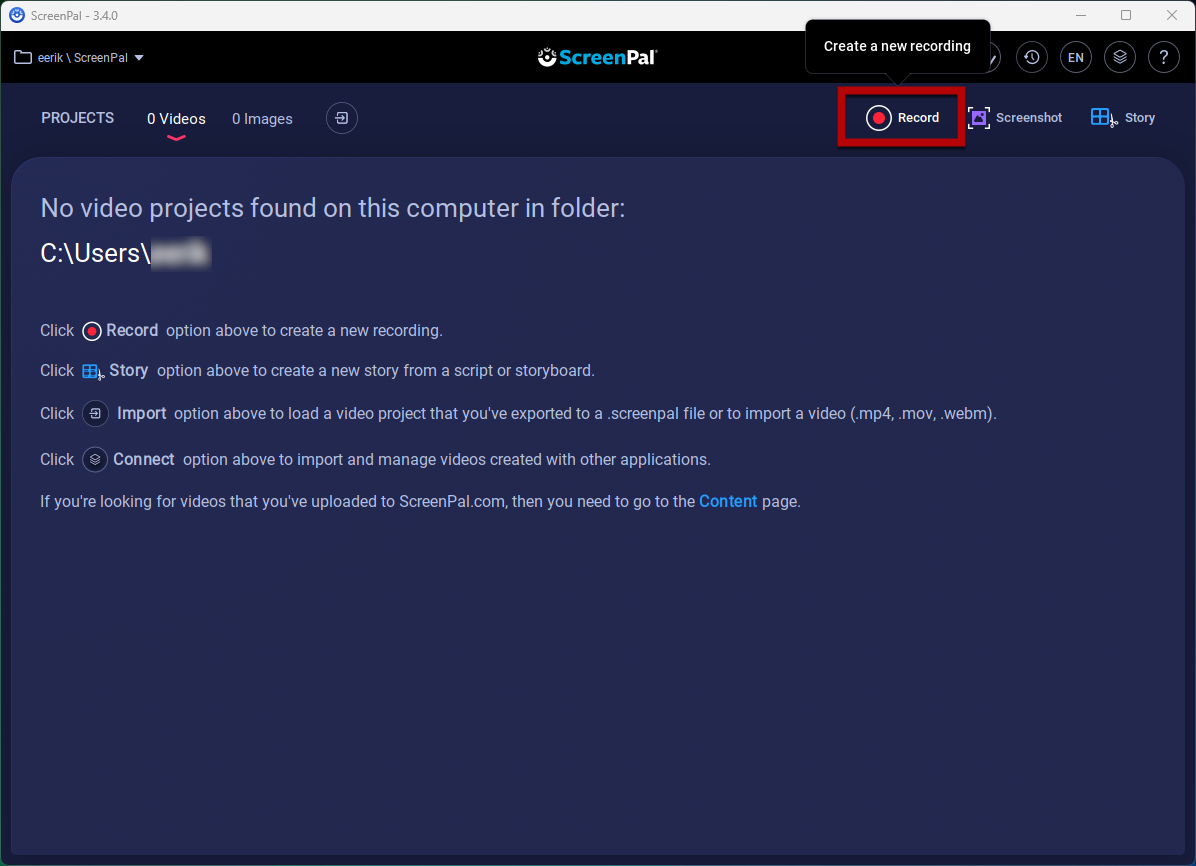
You have no recordings. The software indicates the folder in which the recordings are saved (1). Section (2) provides instructions on using the software. The actual function buttons are in the top right corner in section (3).

Recording videos
Select Record in the top right corner to start recording.
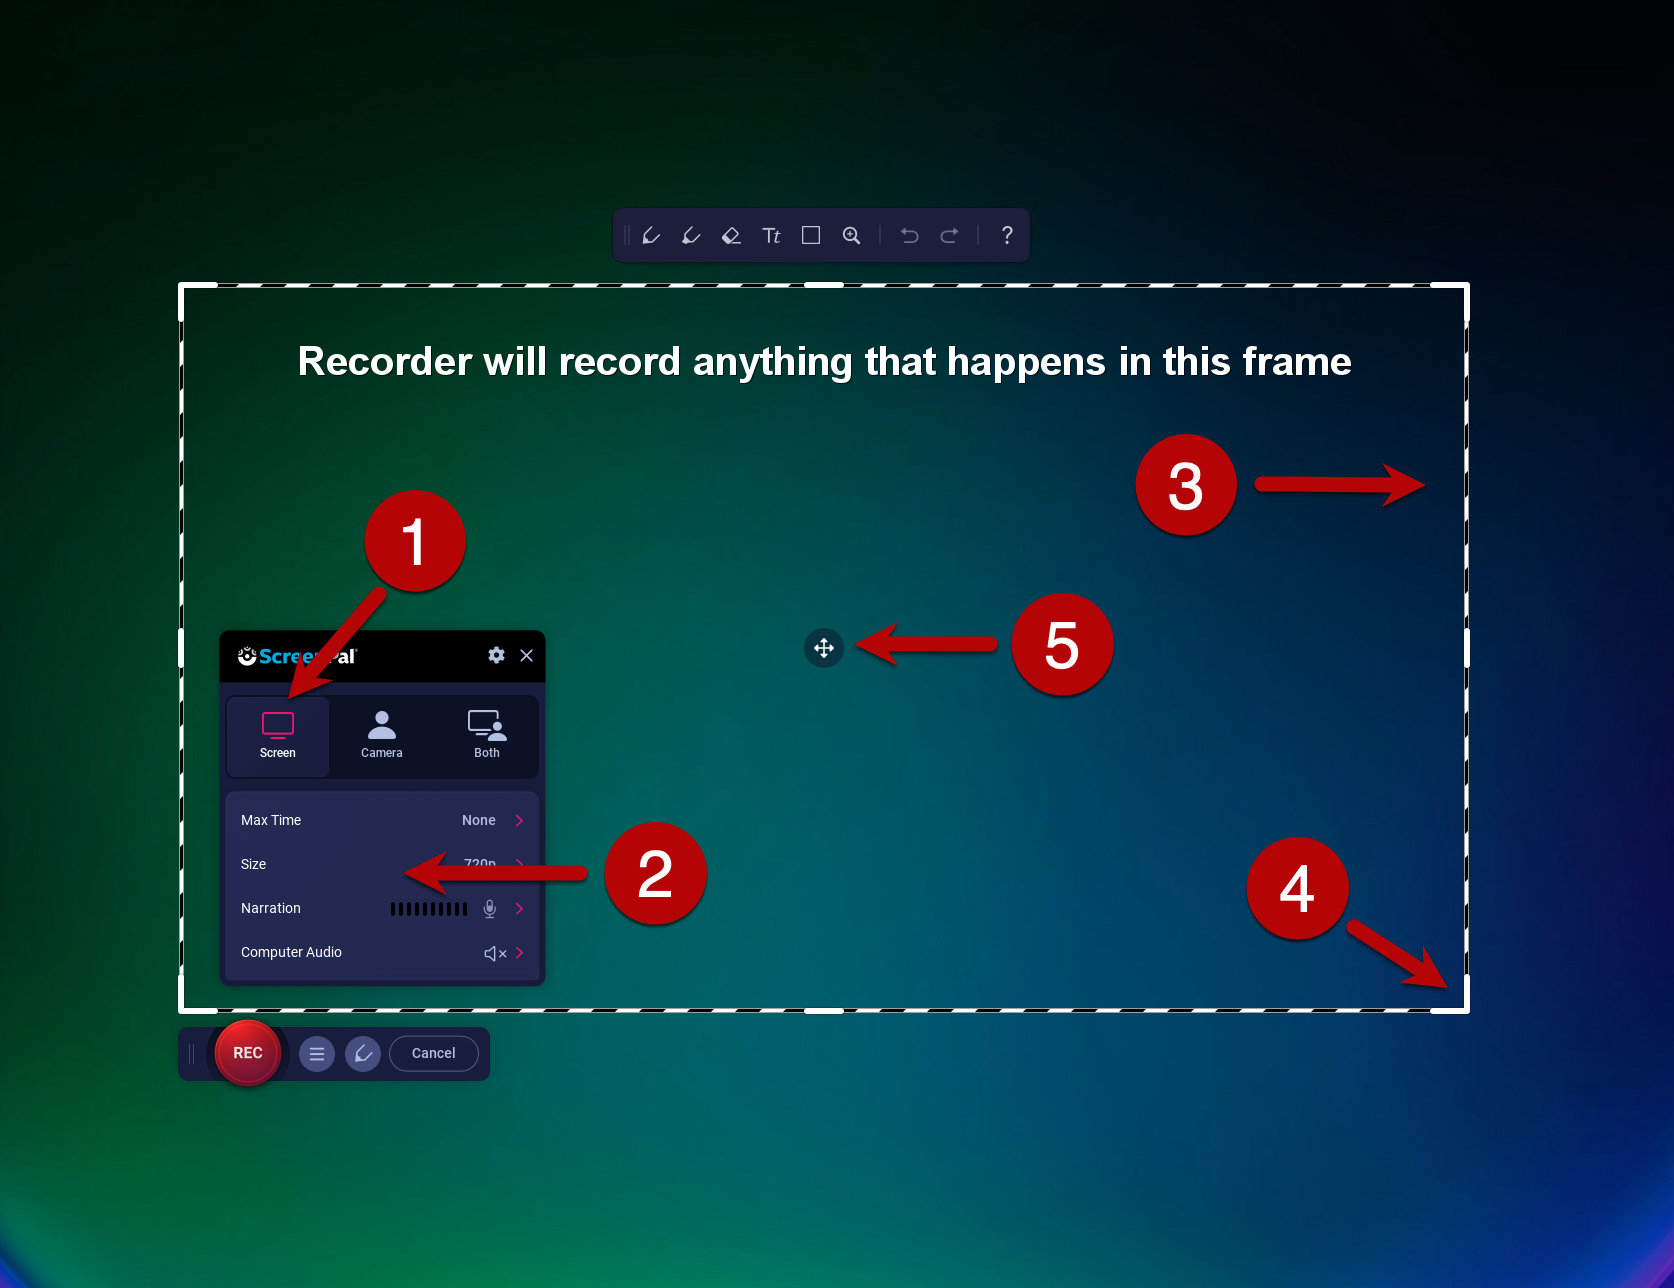
You can record events on the screen, a webcam or both at the same time (1). Some of the settings can be changed in the lower section. For example, you can select a standard resolution for the recording or define whether an active window or the entire screen is recorded (2). The software displays the frame (3) within which content is recorded. You can freely resize the frame by dragging one of the corner handles (4). To move the entire frame, drag the handle in the centre of the frame (5).
NB! Unlike many other programs, ScreenPal DOES NOT display all the open windows in the selection list. First, select an application to activate it and then select the active window as the recording area.
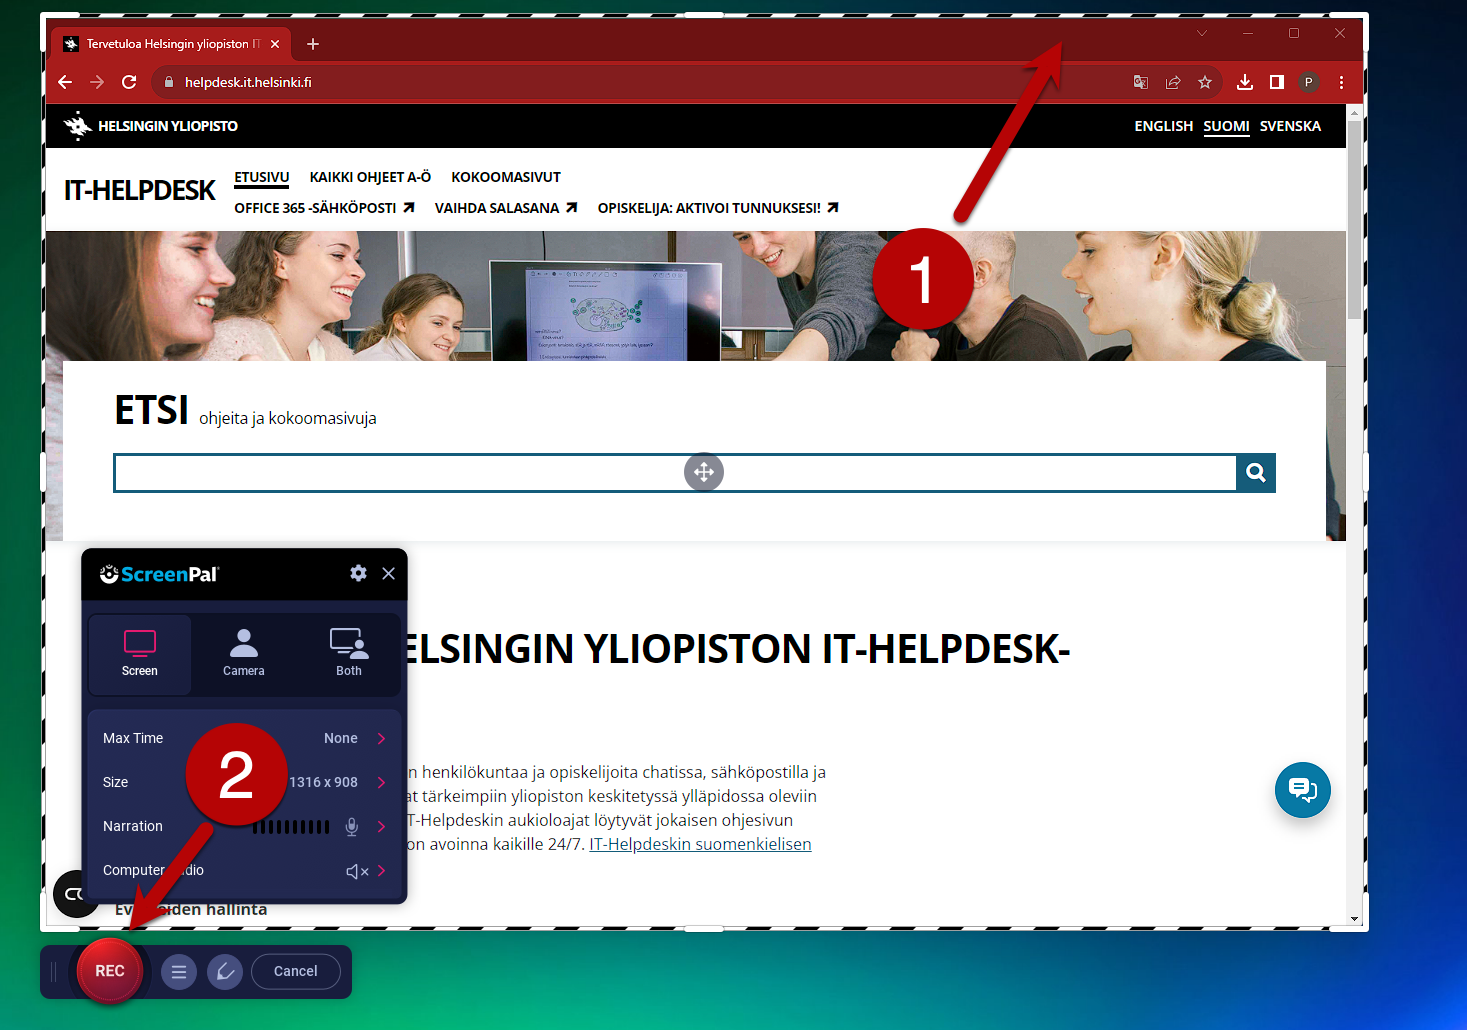
In this example, the active window has been selected for recording. The dashed line (1) indicates the area within which events are recorded. Click Rec (2) to start recording.
When you want to stop recording, first click Pause to stop recording.
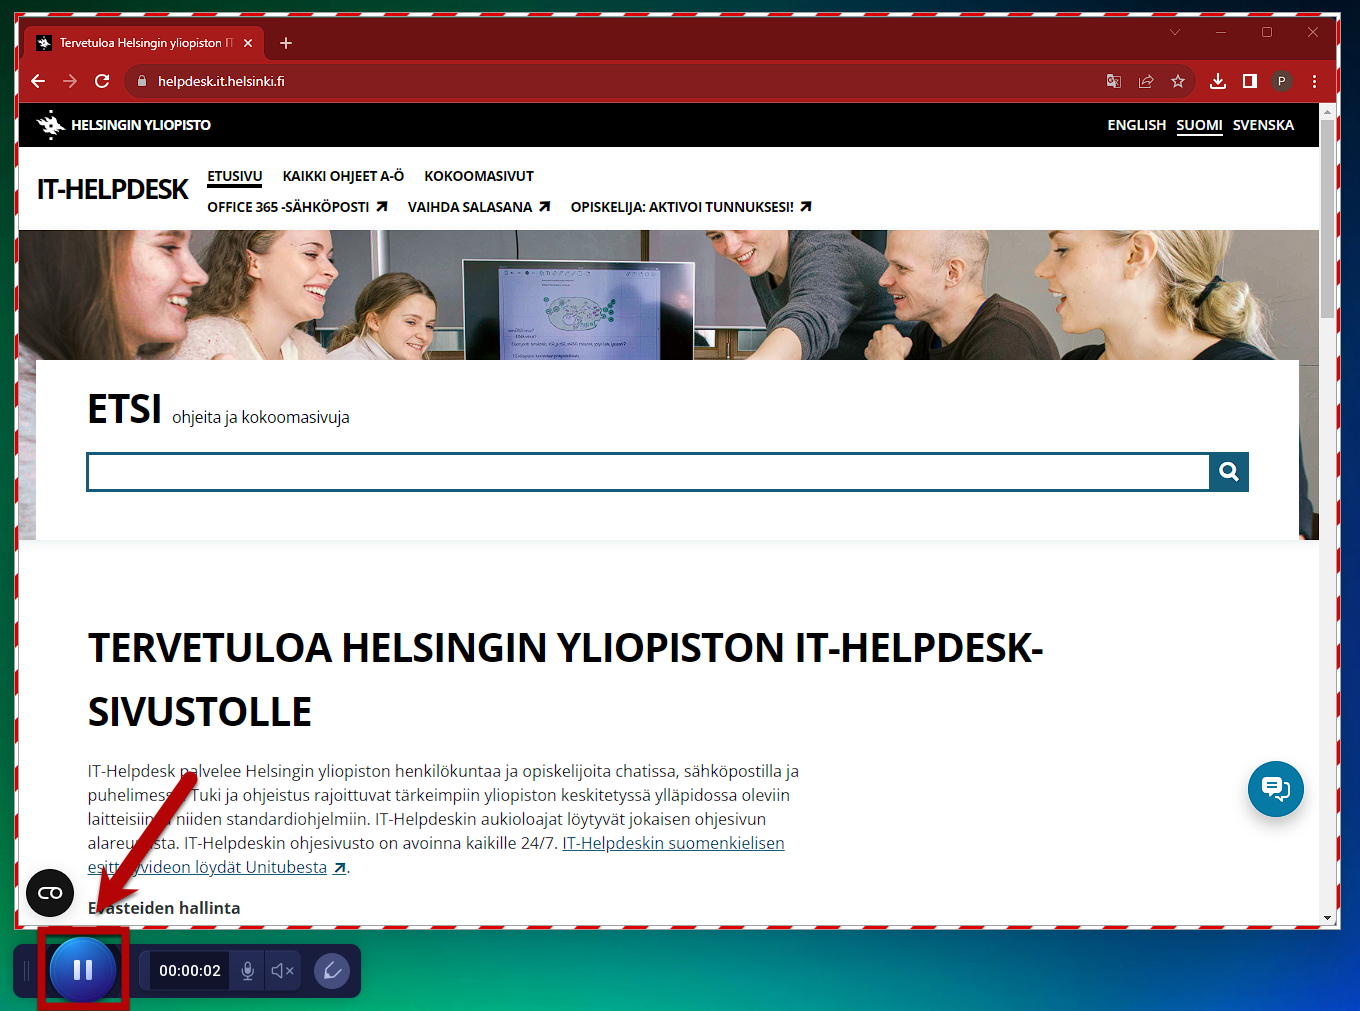
Select Done.
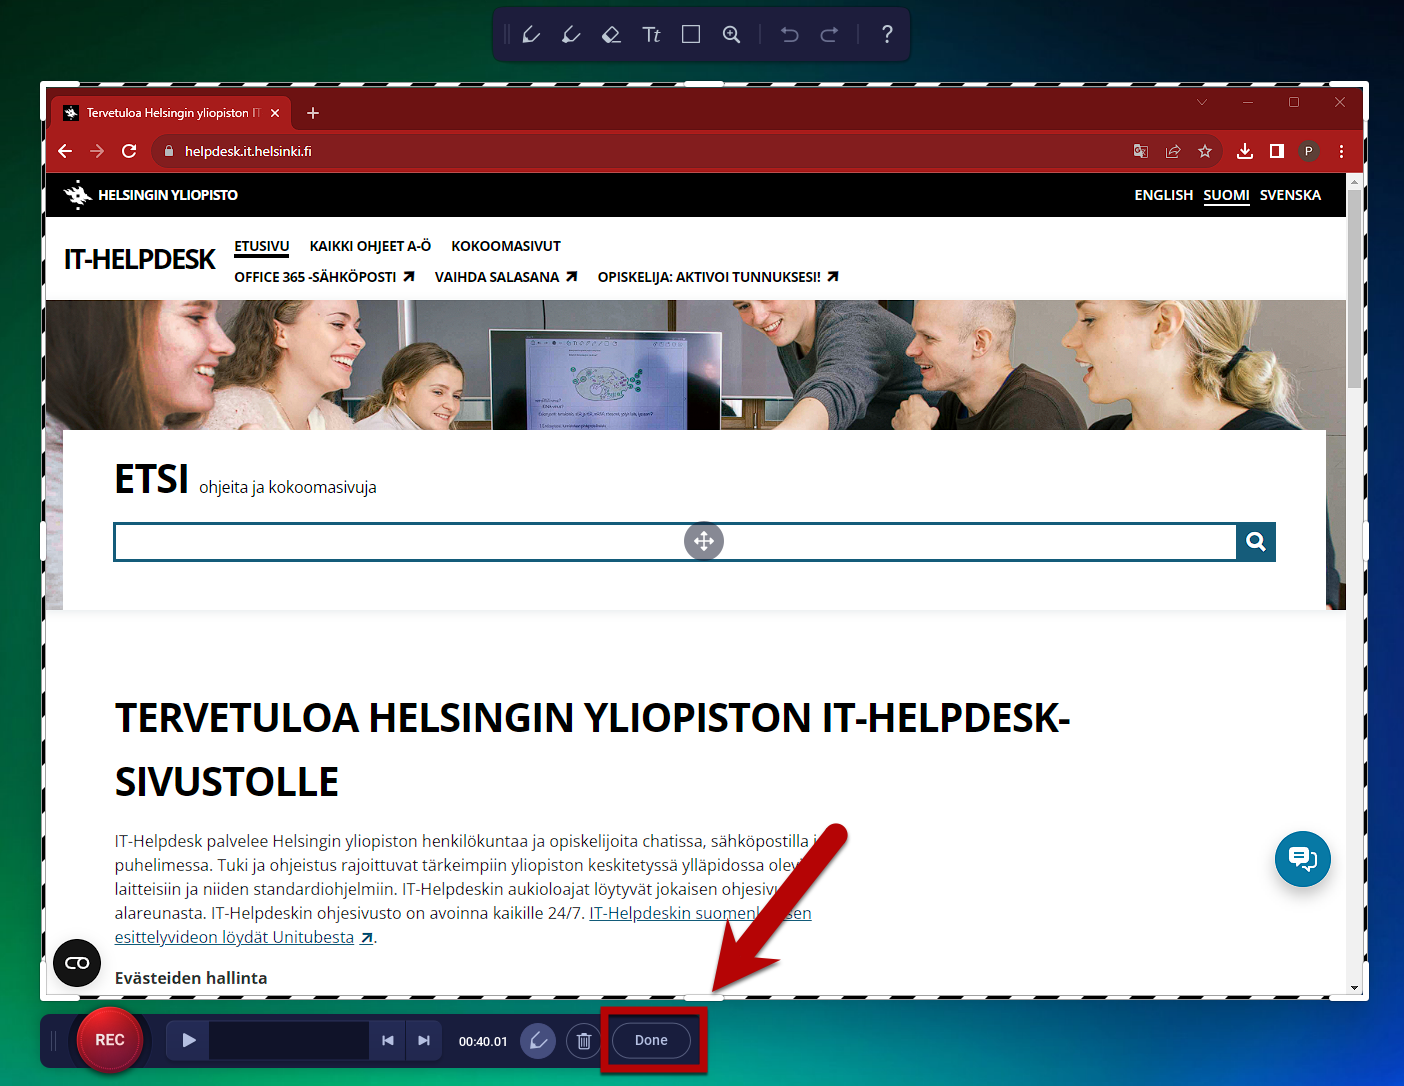
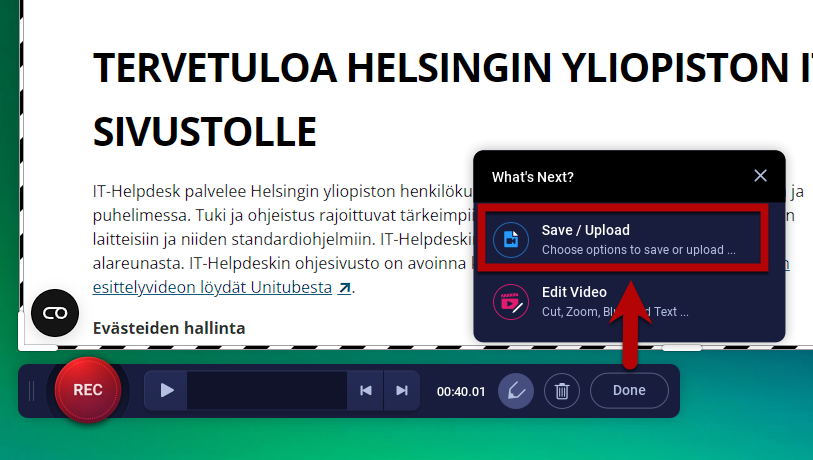
You can either edit the video immediately (Edit Video) or save it (Save / Upload).
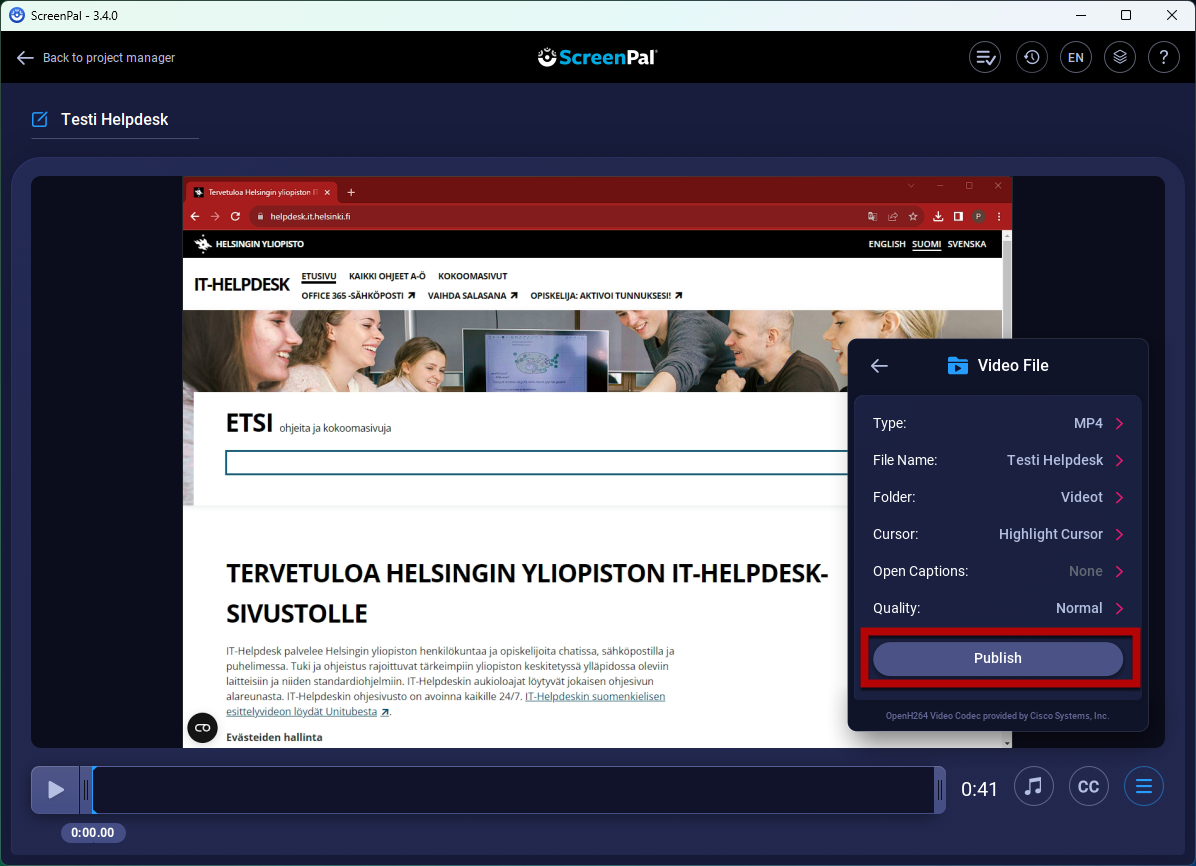
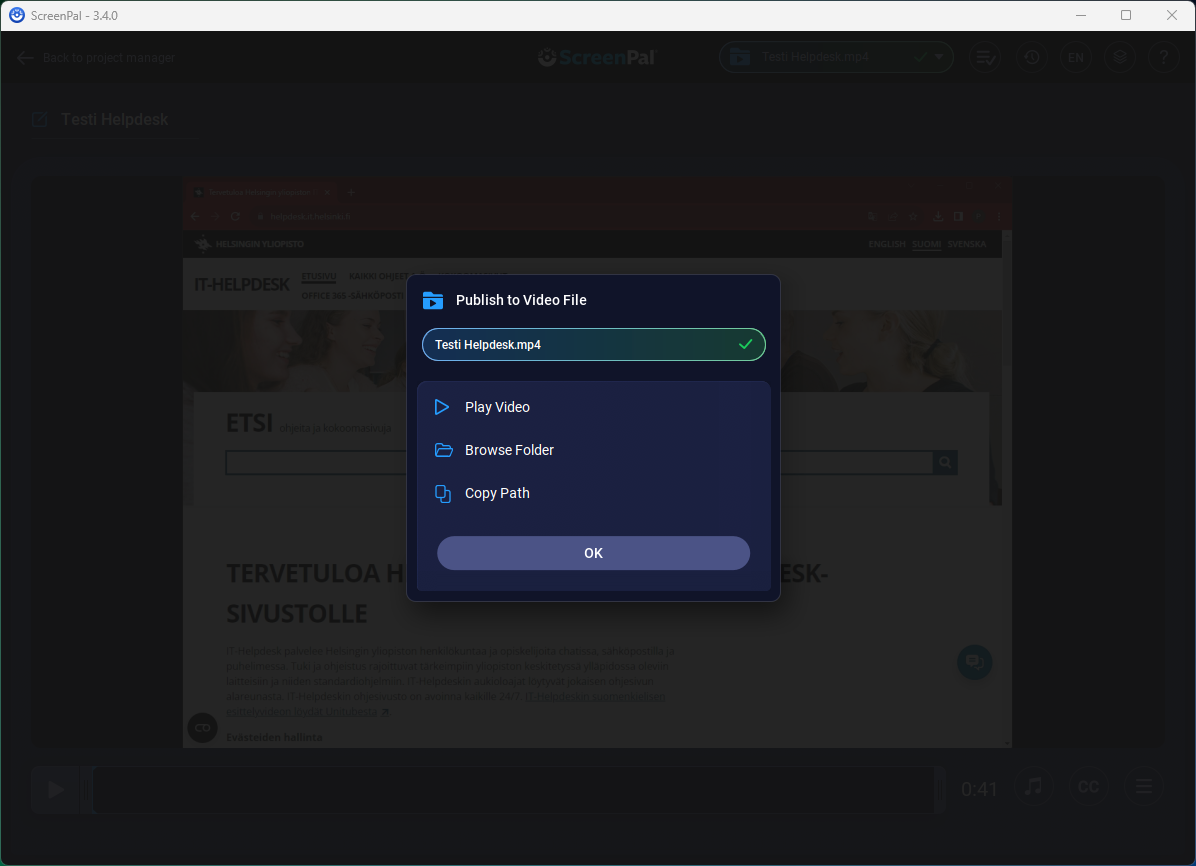
Name your recording (1) and select Save As Video File (2).

Select Publish.
The file conversion may take a while.
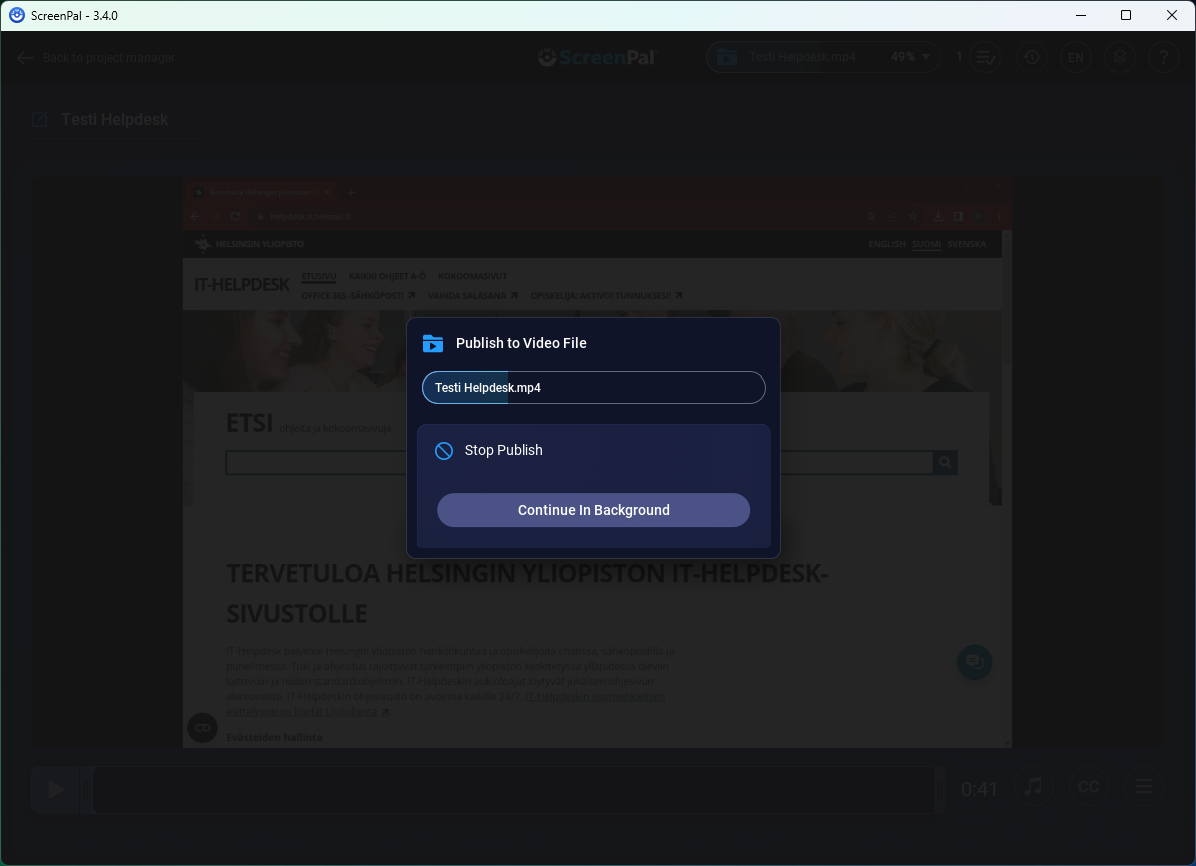
Select OK.
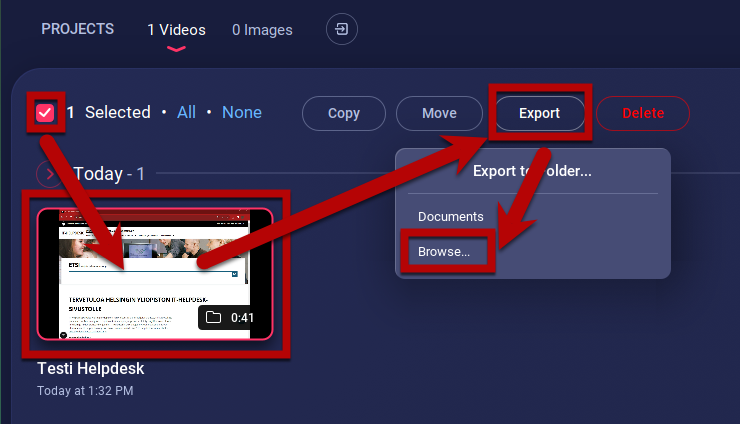
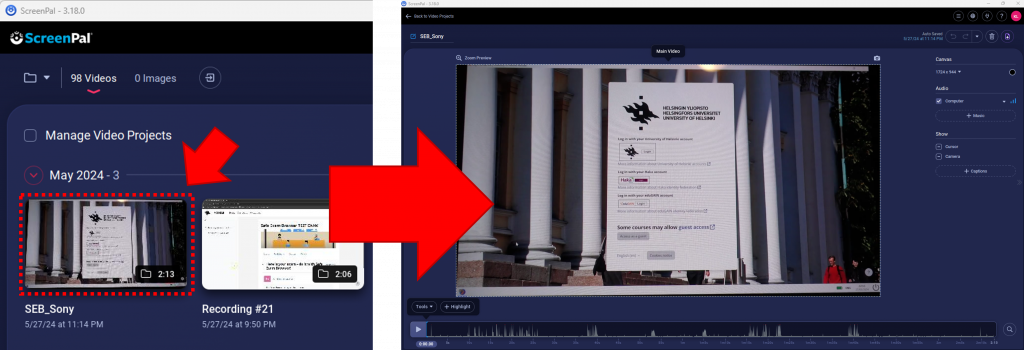
Recordings are saved in chronological order by default (1). Click the thumbnail preview to edit videos. To move, copy, delete or otherwise process the recordings, first select the Manage Recordings (2) checkbox.
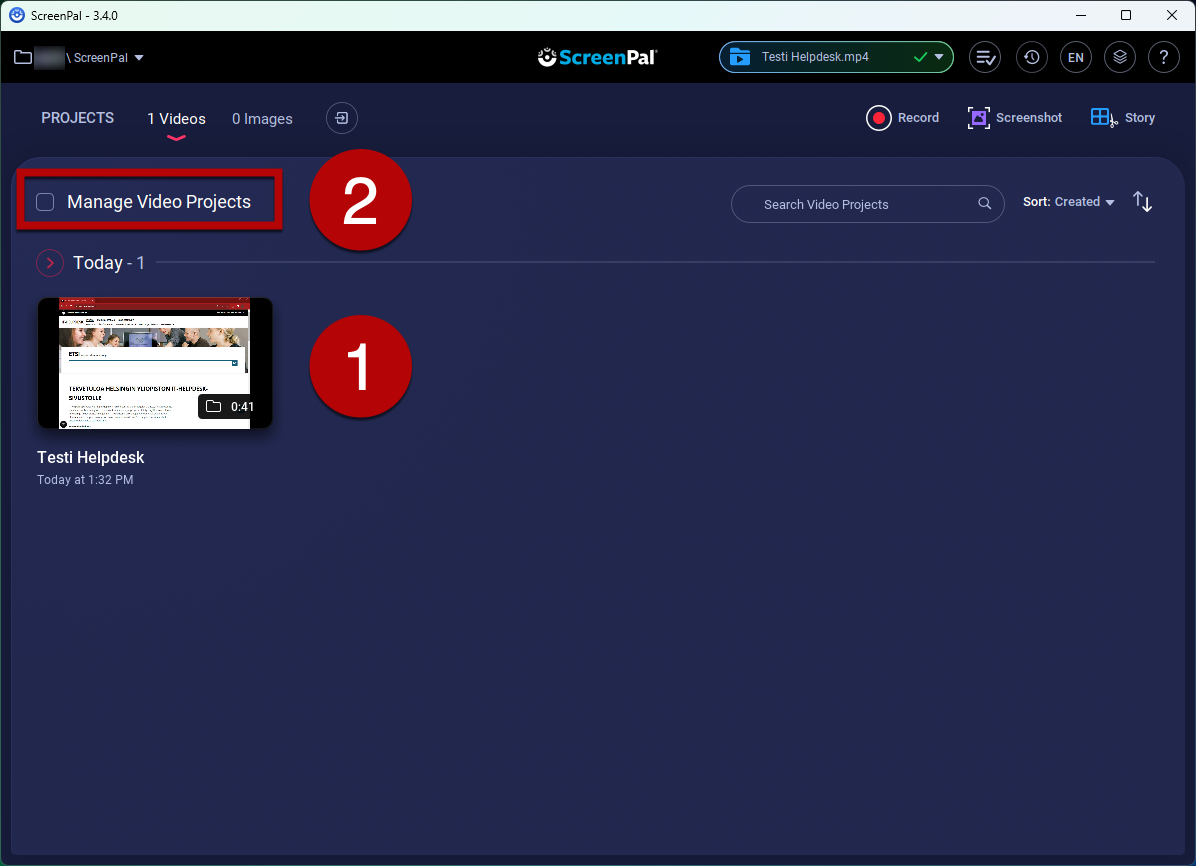
Then select the recording and the action you want to perform.
Editing videos
Cutting the video
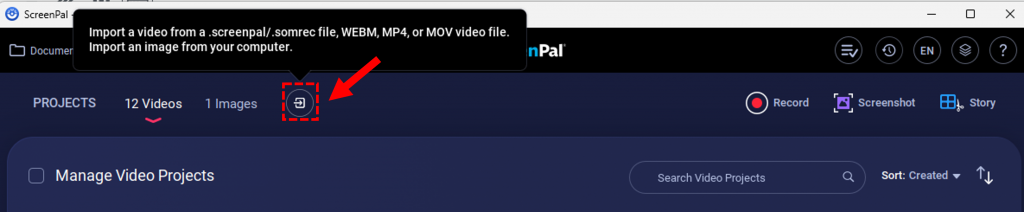
Use the Import-button on the front page to add a video from your computer
Select the recording you want to edit.
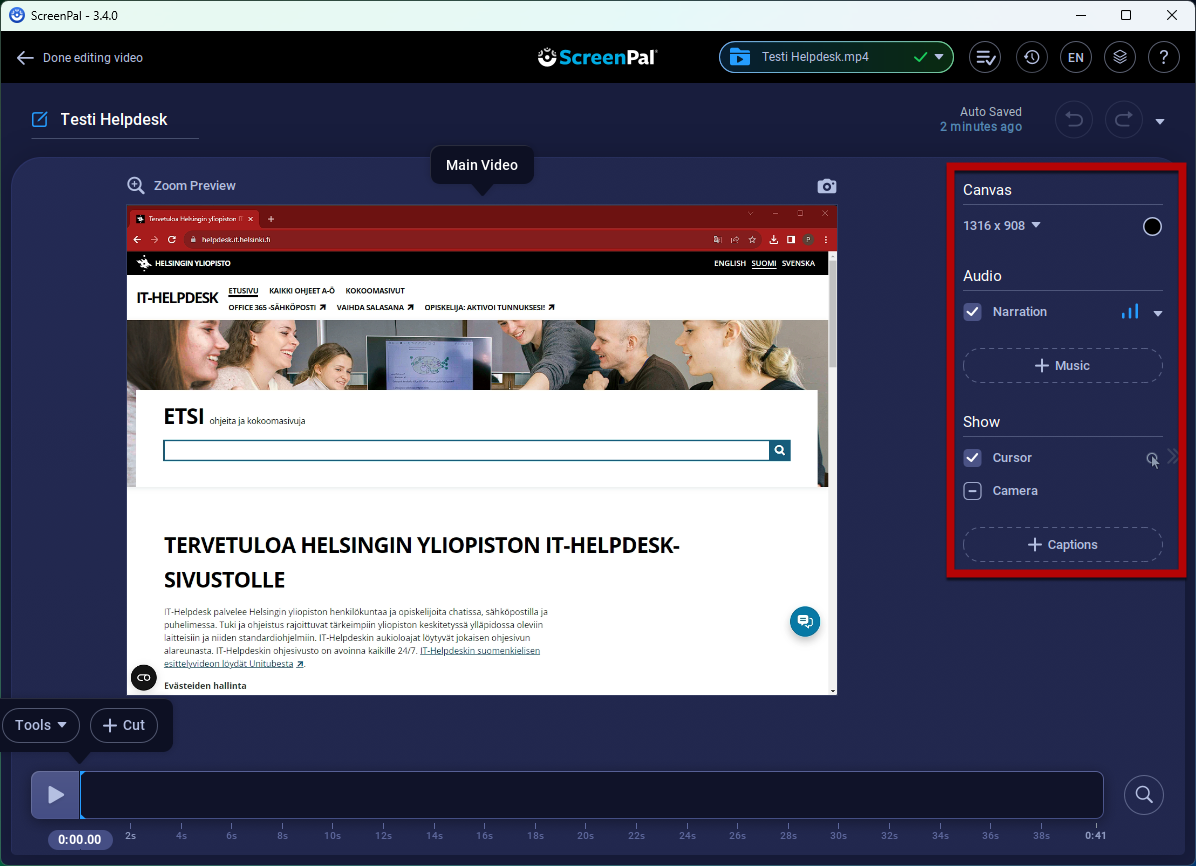
A tool window is displayed on the right. In the Audio section, you can add narration or music to the video. In the Show section, you can define whether the pointer movements are shown on the video, display or hide the webcam image and add captions.
Timeline
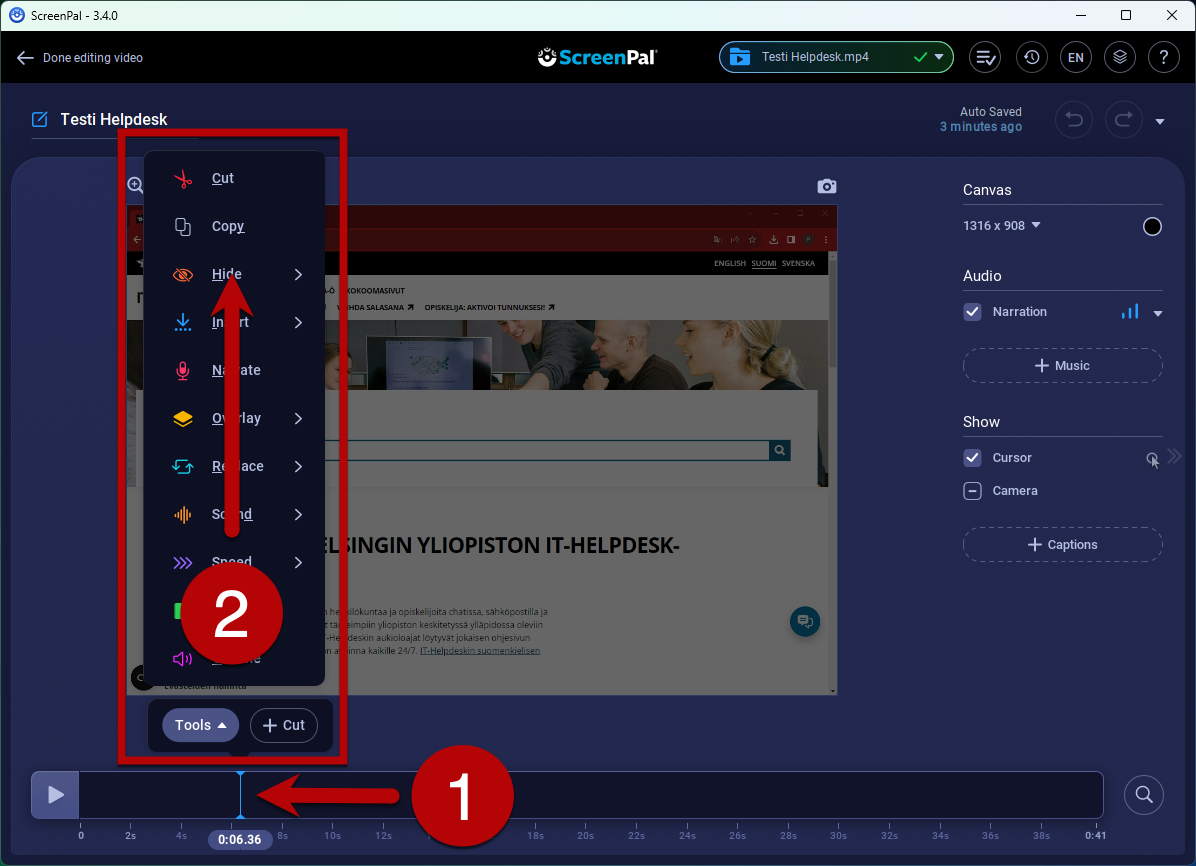
A timeline is displayed at the bottom of the window. Drag the pointer (1) to go to the video section that you want to edit. Select Tools (2) to open the tools menu.
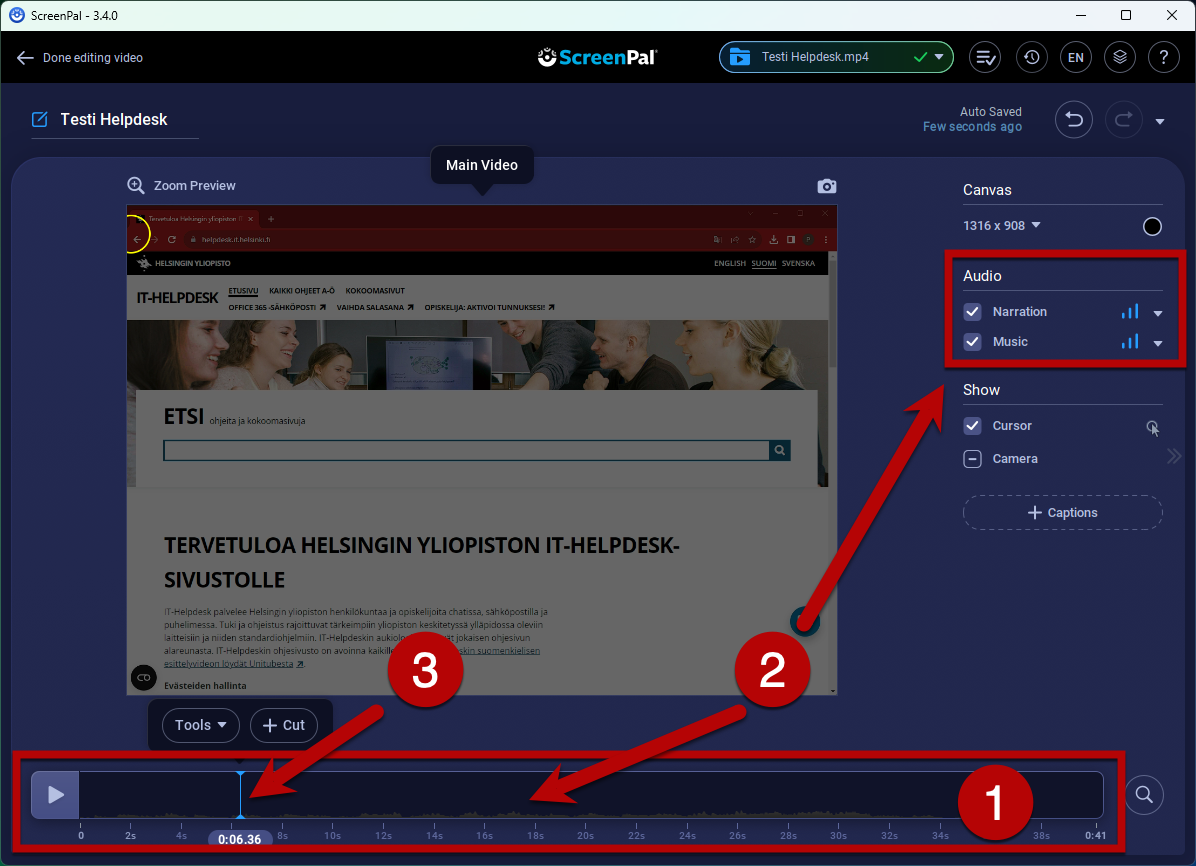
In the next picture, the timeline (1) displays an audio track (2). Use the Audio menu on the right to add narration or music to your video. All the audio and video tracks are displayed on top of each other on the same timeline. The pointer (3) indicates where in the video you are.
You can annotate your video. Place the pointer at the point to which you want to add a highlight or insert text, images or other elements. Use the Tools menu to add video clips or narration or otherwise edit the video.
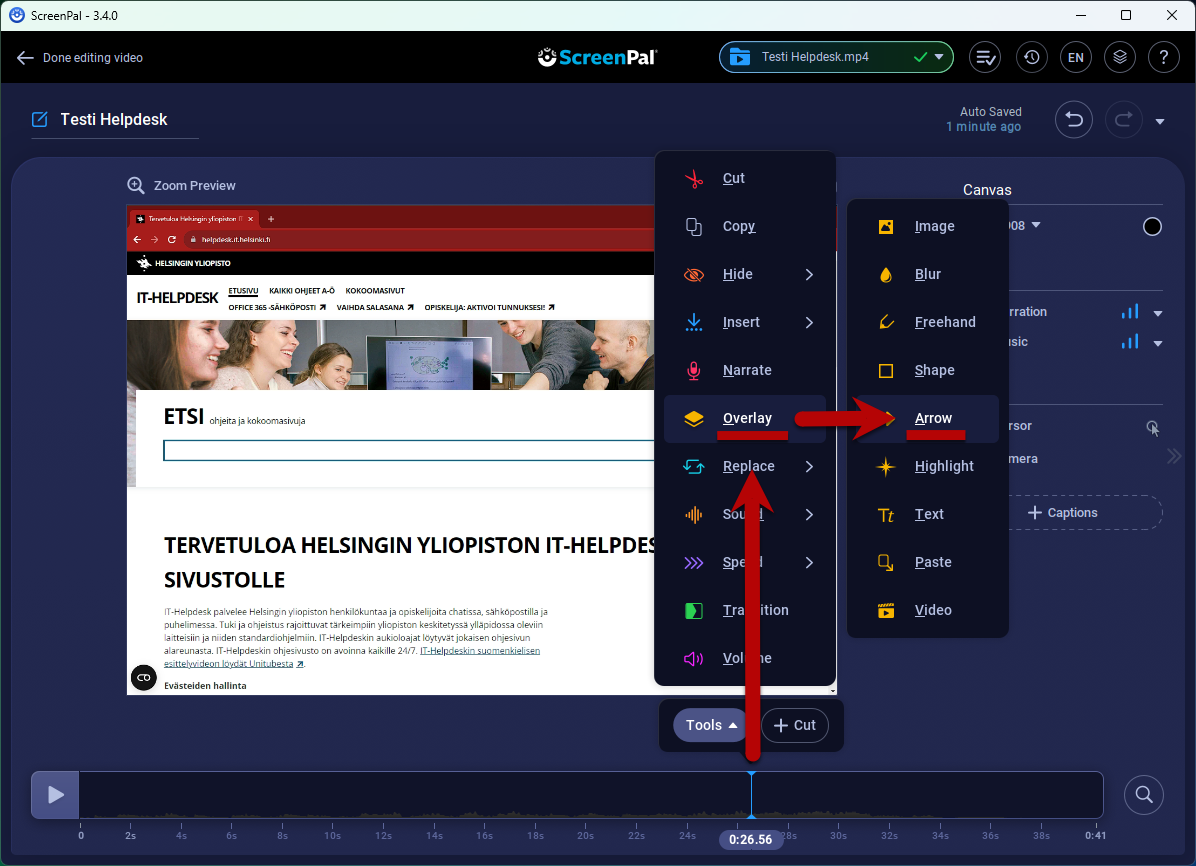
In this example, an arrow is added to the video. Click Tools > Overlay > Arrow.
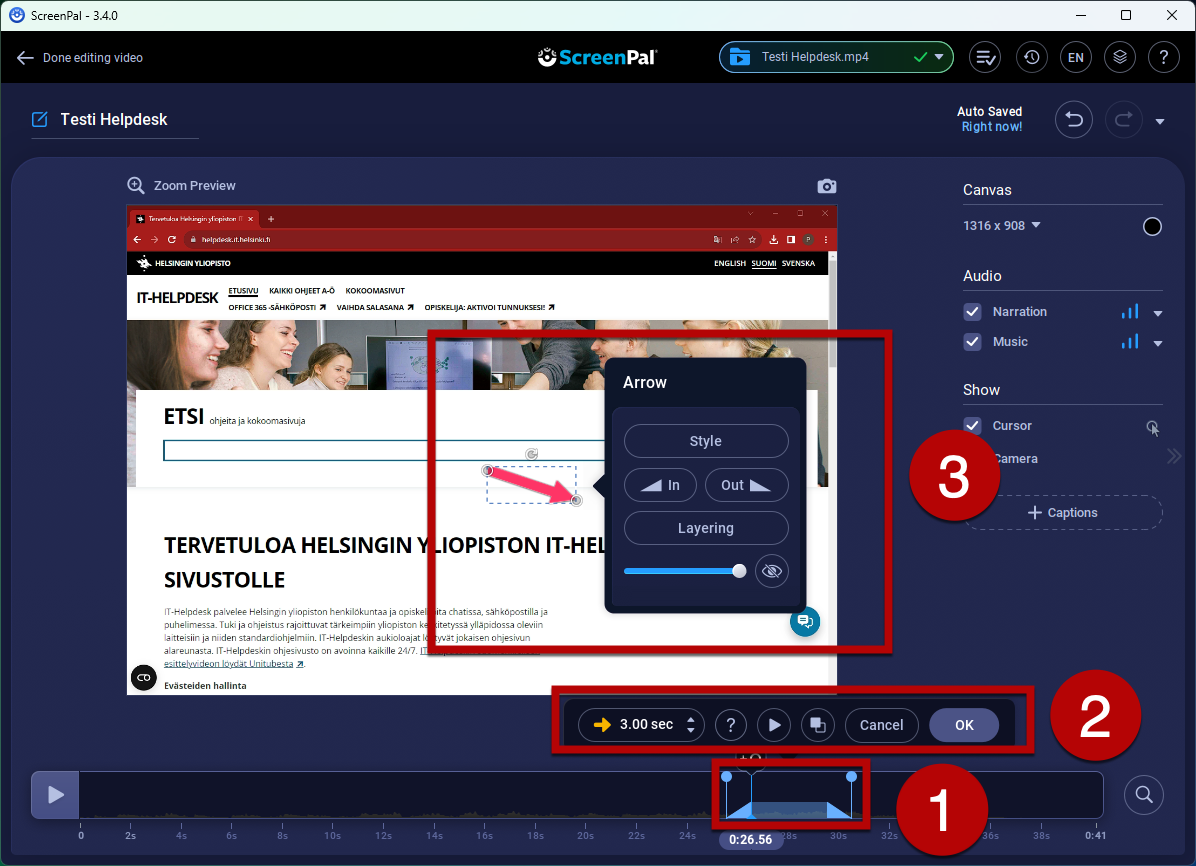
The location and duration of the added element is indicated on the timeline in blue (1). You can change the location and increase or decrease the duration by dragging the blue pins. Use the functions displayed above the timeline (2) to preview the annotation you added (click Play) and to accept or cancel it. Select the question mark to open the video tutorial provided by ScreenPal. The preview in section (3) displays the arrow that was added, with the controls for editing it displayed next to it on a blue background. You can move or resize the arrow and change its position by dragging it with the mouse. Select OK in section (2) when you are happy with the result.
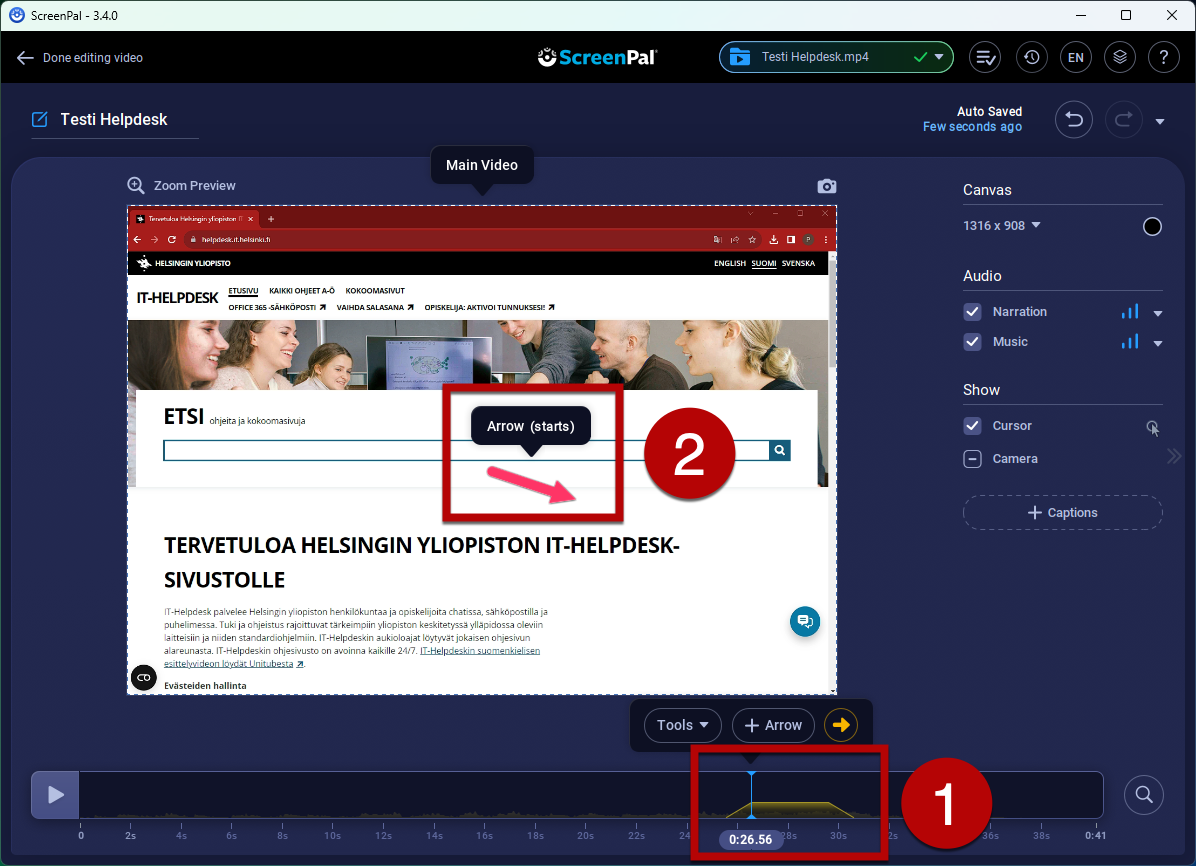
The point at which the arrow was added is now displayed in yellow on the timeline (1). To edit or remove the arrow, click the arrow (2). The tools displayed in the previous picture are now available to you.
Combining several videos with the Insert-tool
We previously used the Tools > Cut -function for editing the video. Another important function in the Tools-menu is Insert, that you use for combining multiple videos.
1. Click on the Tools-button at the point on the timeline where you want to add another video.
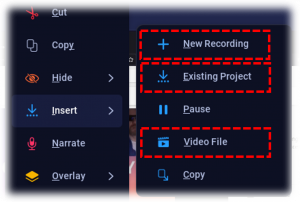
2. Choose Insert and then you may further select the type of video you want to add, for example:
- New Recording: create a whole new screen capture video at this point (see the previous chapter)
- Existing Project: use another ScreenPal project from the front page – that may contain its own edits already! – and it will be added to the project here. This enables you to edit video clips separately and then combine them later into one big project.
- Video File: choose any video from your computer and insert it on the timeline
These simple examples showed you how to cut parts of the video and combine multiple videos in ScreenPal, but the Tools-menu has a lot of other functions too.
Adding captions
Adding audio
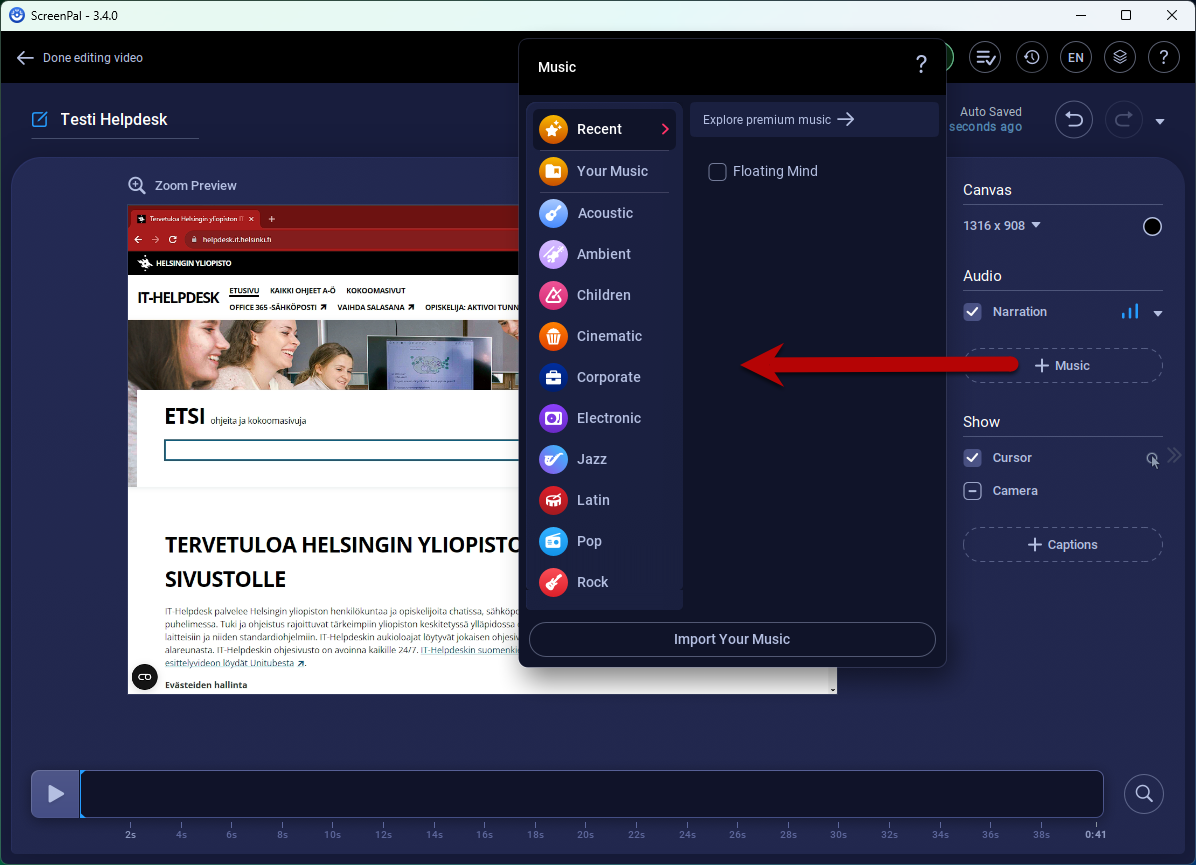
You can add audio and music to your videos. Select the note icon in the bottom right corner. In the window that is displayed, you can add existing archived clips or an audio file from your computer by selecting Import Music. You can install the Audacity program from Software Center to easily record and edit audio files.
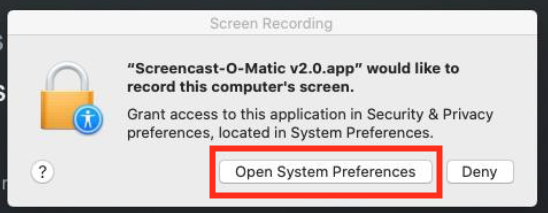
Adding system permissions on Mac
If the program has not been previously used, the Mac system requests additional permissions during the first time of use. Select Open System Preferences.
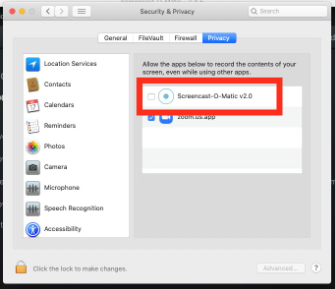
The System Preferences window opens. Check the box in front of the ScreenPal text.
The system will ask you to close the program (ScreenPal). Select Quit now.
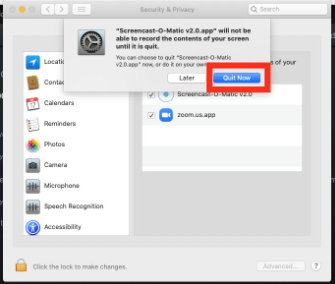
You can then close the System Preferences window and open ScreenPal. It should now be fully functional.
Image and video library
- The software includes a free image, music and video library from which you can add material to your videos.
- To add images, select Edit > Tools > Overlay > Image > Stock Library.
- To add videos, select Edit > Tools > Insert > Video > Stock Library.
- To add music, select Edit > Music > Stock Music.
Selecting the storage folder
We recommend selecting a local drive as the work and storage folder. Using the software with network drives may result in unusual behaviour and crashes. However, when choosing the storage location, keep in mind that not everything is backed up. Read more under Saving files on a workstation. Make sure to back up your material.
To change the storage location used by ScreenPal, follow these steps:
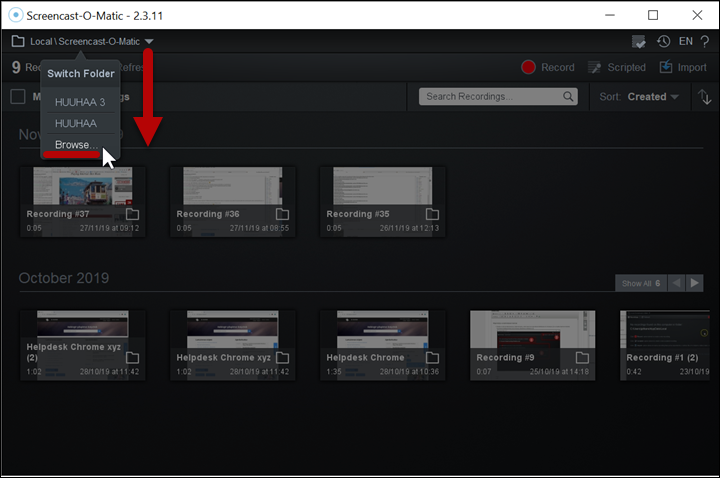
- Select the down arrow at the end of the folder path. Select Browse.
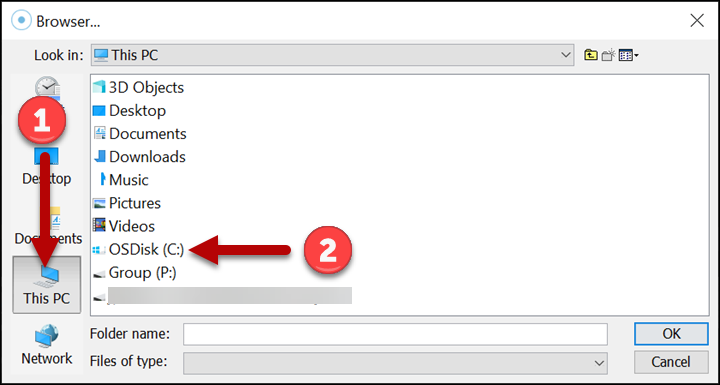
- Open This PC (1) and double-click on OSDisk (C:) (2).
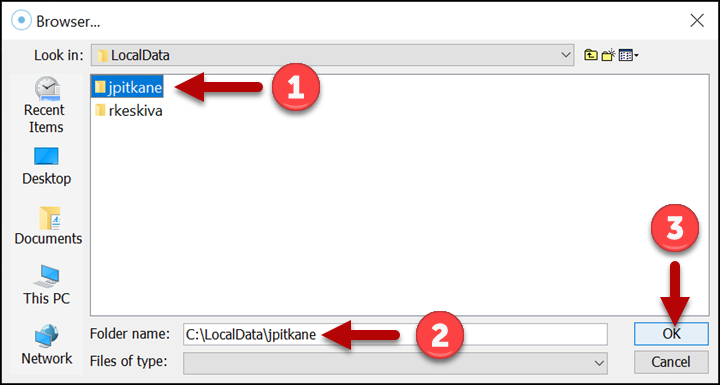
- Double-click on LocalData.

- The LocalData folder may contain several subfolders. Select the folder displaying your username (1). The full folder path is displayed in the Folder name field (2). Select OK (3).
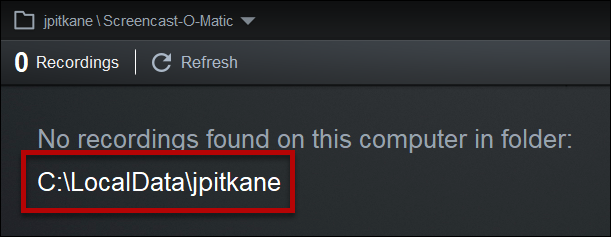
- The storage folder has now been changed.
Installation on your home computer (Win 11)
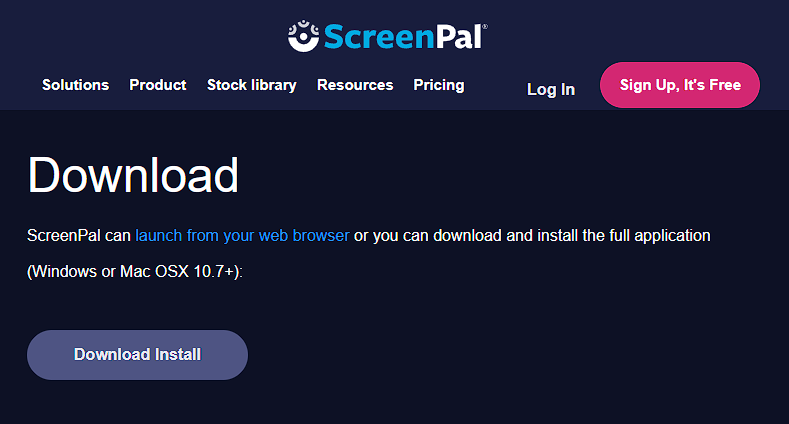
Log in at https://screenpal.com/download
Select Download Install.
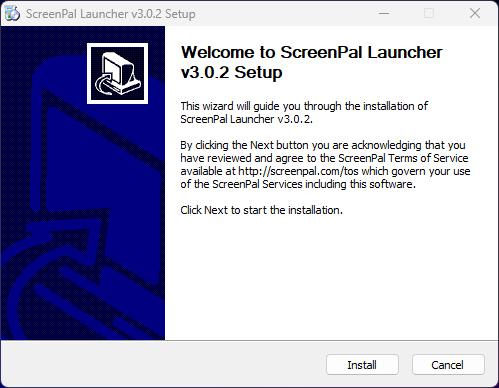
Locate the file on your computer and double-click on it.
Click Install.
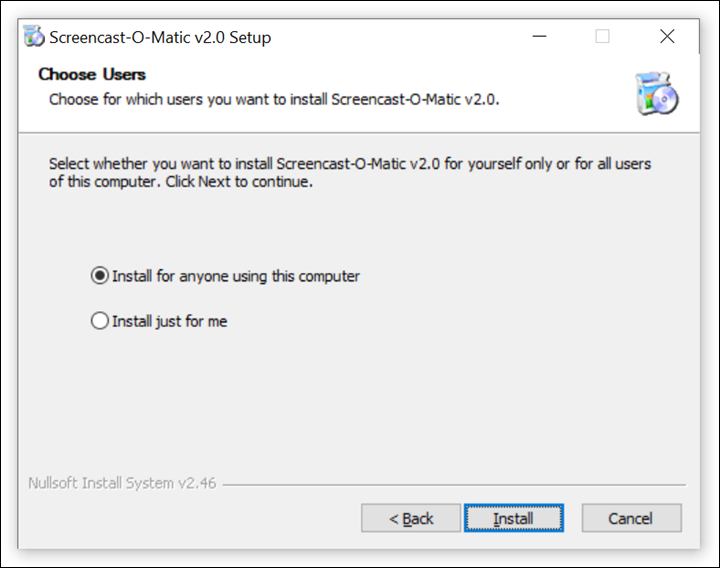
If your computer is used by several people, you can select either Install for anyone using this computer or Install just for me. Select Install.
If you want to quickly access the software from your desktop, check the box Create Desktop Shortcut. Select Finish.
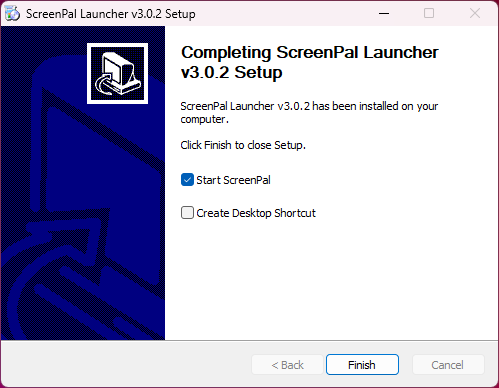
The software will start up.
Continue setting up the software as you would on University computers by following these instructions. (Under Click I have a Team Plan)
Video instruction
Editing and adding captions with ScreenPal
The video is in finnish, but captions are also in english.
Give feedback
The instructions site of the University of Helsinki's IT Helpdesk helps you with IT-related issues related to your work. Let us know how we can improve our instructions. We greatly appreciate your feedback!
How would you improve these instructions?