Miro is a versatile whiteboard tool that can be used both for remote facilitation and as a virtual whiteboard in group work. The service is the recommended whiteboard tool at the University. The University of Helsinki’s enterprise licence allows a single user (whether a student or an employee) to have a practically unlimited number of boards and participants. There are hundreds of different free templates available that are ready to use.
Note! Like most other whiteboards, Miro does not meet all accessibility requirements, so please ensure the accessibility needs of the participants in advance and provide additional assistance, if necessary.
Quick help
Signing up and logging in with the University email address
You can find Miro at https://miro.com.
When using the University’s licence, you can log in to Miro using your University user account. However, do not enter your University password on Miro.com! Follow these steps:
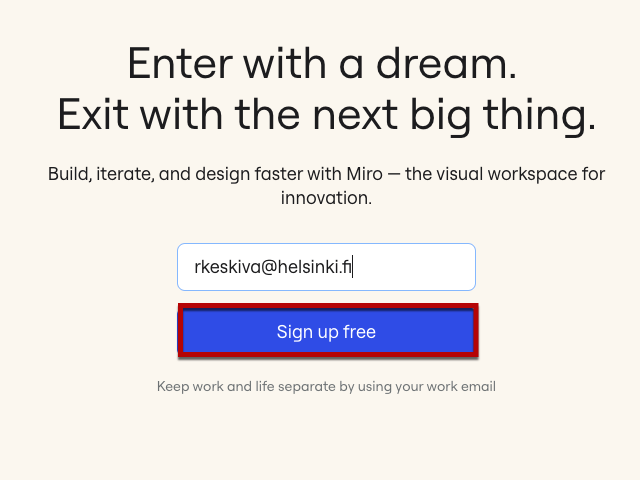
- Go to miro.com and enter your University email address or username in the "Enter your work email" field in its short form username@helsinki.fi (e.g. rkeskiva@helsinki.fi) and click Sign up free.
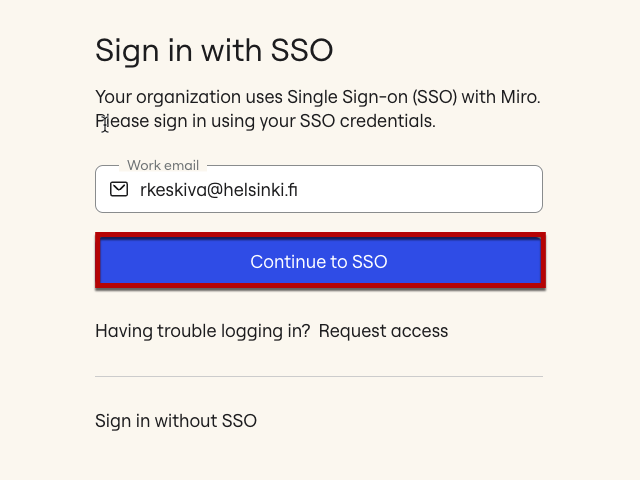
- You will land on a page telling you that your organisation is using a single sign-on (SSO). If you previously entered your email address, please update your login to username@helsinki.fi at this point and click Continue to SSO.
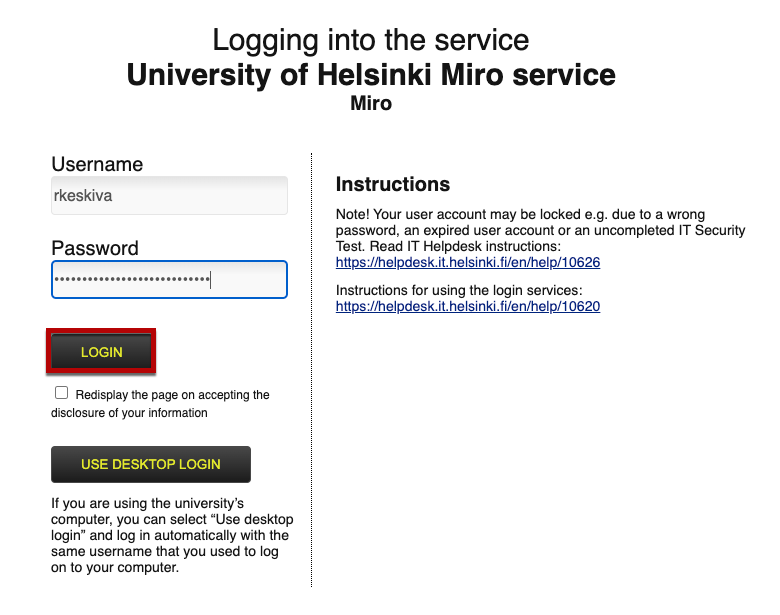
- Then, the familiar University login window will open. Log in, and after a successful login you will be able to access the service.
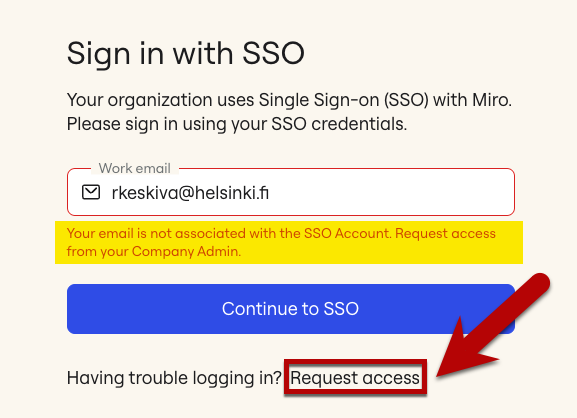
If the SSO login is not successful, select "Request access" under "Having trouble logging in?". In this case, the administrator of the University of Helsinki grants permission to your username and you will be able to log in using SSO.
See the detailed illustrated instructions for logging in and read more about using the Miro on the Detailed help tab!
Detailed help
Signing up with the University email address
You can find Miro at https://miro.com.
When using the University’s licence, you can log in to Miro using your University user account. Follow these steps:
-
Go to miro.com and enter your University email address or username in the "Enter your work email" field in its short form username@helsinki.fi (e.g. rkeskiva@helsinki.fi) and click "Sign up free" and follow the instructions starting from step 2 onwards.
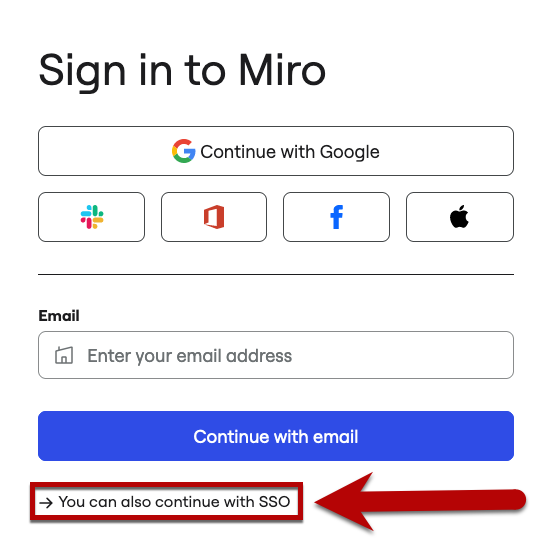
You can also log in by clicking the "Login" button on the page navigation bar. When using this route, click on the login options "You can also continue with SSO" and proceed from there according to step 2 of the instructions.
-
You will land on a page telling you that your organisation is using a single sign-on (SSO). If you previously entered your email address in full, please update your login to username@helsinki.fi at this point and click "Continue to SSO".
-
Then, the familiar University login window will open. Log in, and after a successful login you will be able to access the service.
If the SSO login is not successful, select "Request access" under "Having trouble logging in?". In this case, the administrator of the University of Helsinki grants permission to your username and you will be able to log in using SSO.
I’ve been using Miro in the past
These "old" user accounts are also automatically converted to members of the University of Helsinki’s organisation and team in connection with single sign-on, if they are registered with an email address in the form of firstname.lastname@helsinki.fi.
Those registered with other email addresses are not automatically included in the University of Helsinki’s organisation, but need to create a new user account.
Tip: share a team from another account to helsinki.fi and access your existing boards.
Using Miro
Browser version
You can use Miro with a browser at https://miro.com. The browser version works smoothly and is suitable for both occasional and power users.
Use your email address to log in and access your profile easily via the University login in the future (select Sign in with Single Sign On). Do not enter your University password on Miro.com!
Desktop version
Miro can also be installed as a desktop application.
- On the University Windows computers, the application can be installed from Software Center.
- On the University Mac computers, the application can be installed from the Managed Software Center.
- The application can also be installed on a personal computer from, for example, the MS Store and Miro’s own website.
Notes
- Creating a user account is necessary at least for the facilitator, usually also for participants (see Licence levels below).
Licence levels
Registered user (University of Helsinki’s enterprise licence)
See section Signing up with the University email address.
You can create an unlimited number of boards and their visibility settings can be set on a case-by-case basis within the team. The default team is the University of Helsinki.
You can choose to create a project and invite your team members to join. You cannot create new teams yourself, but you can order one, for example, for your own unit, if it is felt necessary for a larger group. Place your order through the IT Helpdesk and it will be forwarded to Miro’s administrators.
Anonymous user
By using the participation link shared by the facilitator, anyone can participate in the use of an individual board anonymously and without registering. Suitable, for example, for visitors outside the University of Helsinki and participants who do not want to create a Miro account for themselves for some reason.
Other instructions
- You can find more information about facilitation in general on the website of the facilitation network.
- On the front page of the tool (the so-called dashboard) is the Learning Center. To open the Learning Center, use this link or click the question mark icon.
- You can find Miro’s own instructions site at help.miro.com
- Miro Academy – online videos and other online material for learning about Miro.
Video instruction
Give feedback
The instructions site of the University of Helsinki's IT Helpdesk helps you with IT-related issues related to your work. Let us know how we can improve our instructions. We greatly appreciate your feedback!
How would you improve these instructions?
