
Funet FileSender is a browser-based web service designed for sharing large files (up to several gigabytes in size). The service is available to all Funet organisations belonging to the Haka user authentication system without separate actions. Even users outside Haka can send files via FileSender. However, this requires them to receive an invitation from a Haka authenticated user, who must first log in to the service and send an invitation to the user. The service is not intended for permanent file storage, as the files are deleted after a set period.
You can find the Funet FileSender service here
Please note that even with FileSender, you cannot send confidential material unencrypted. You can follow the instructions on encrypting confidential attachments and substitute sending an email with using FileSender. If you are unsure of the data category of your material, do not use email or FileSender. Read more about data classification at the University of Helsinki in the separate instructions.
Quick help
Sending large attachments
Follow these instructions if you wish to send a large file:
- Go to the page https://filesender.funet.fi/
- Click Login
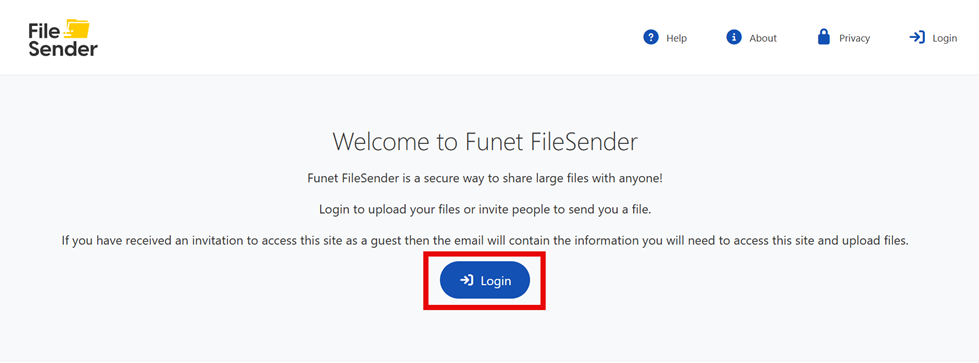
- Select Haka Login as your authentication method.
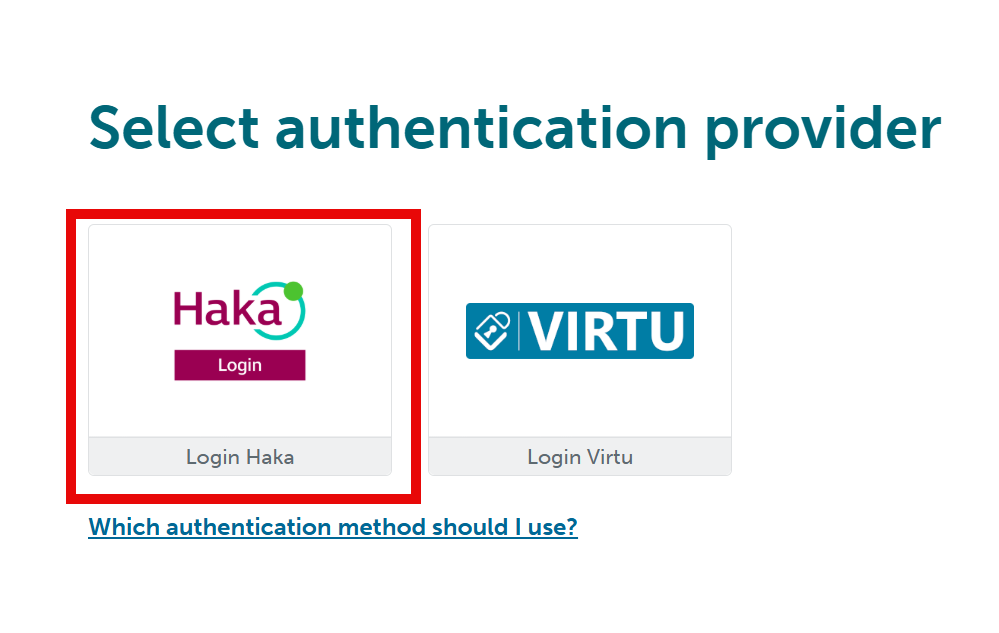
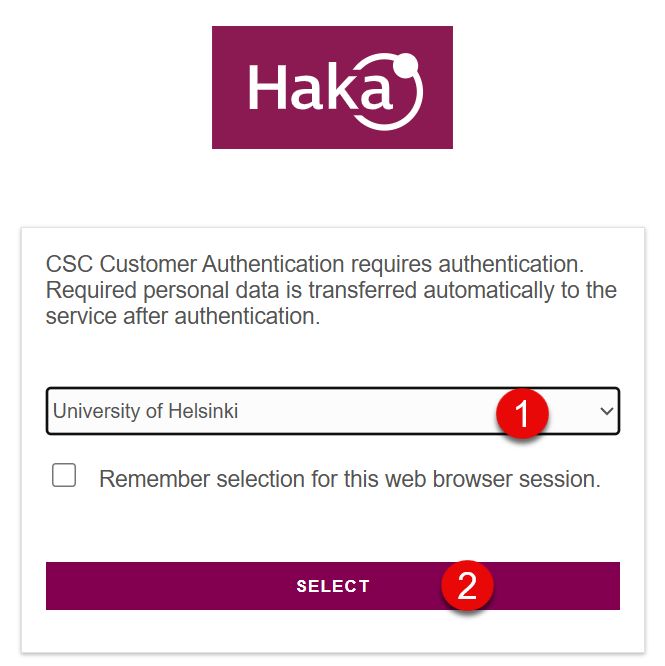
- Find your organisation in the menu (1) and click SELECT (2)
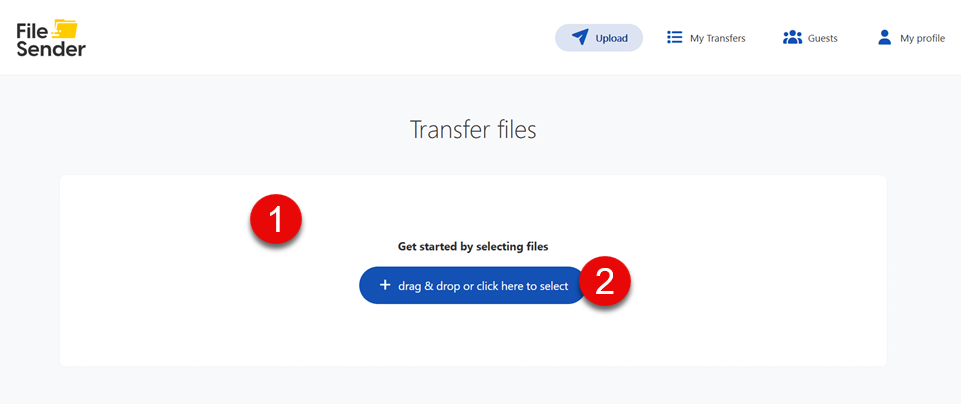
- Drag the files you wish to transfer into the field (1) or select them by clicking the Drag & drop or click here to select button (2).
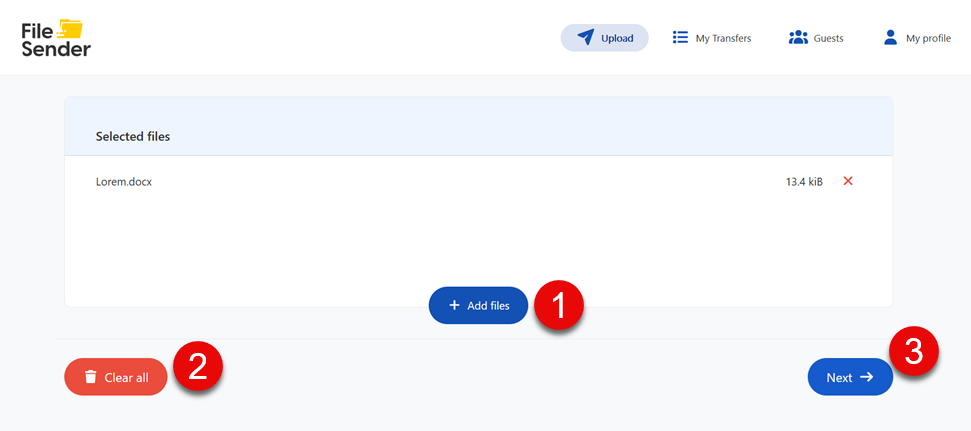
- The file you have selected will appear. If you wish, you can add more files by selecting Add files (1) or remove the selected files by selecting Clear all (2). When you are ready, select Next (3).
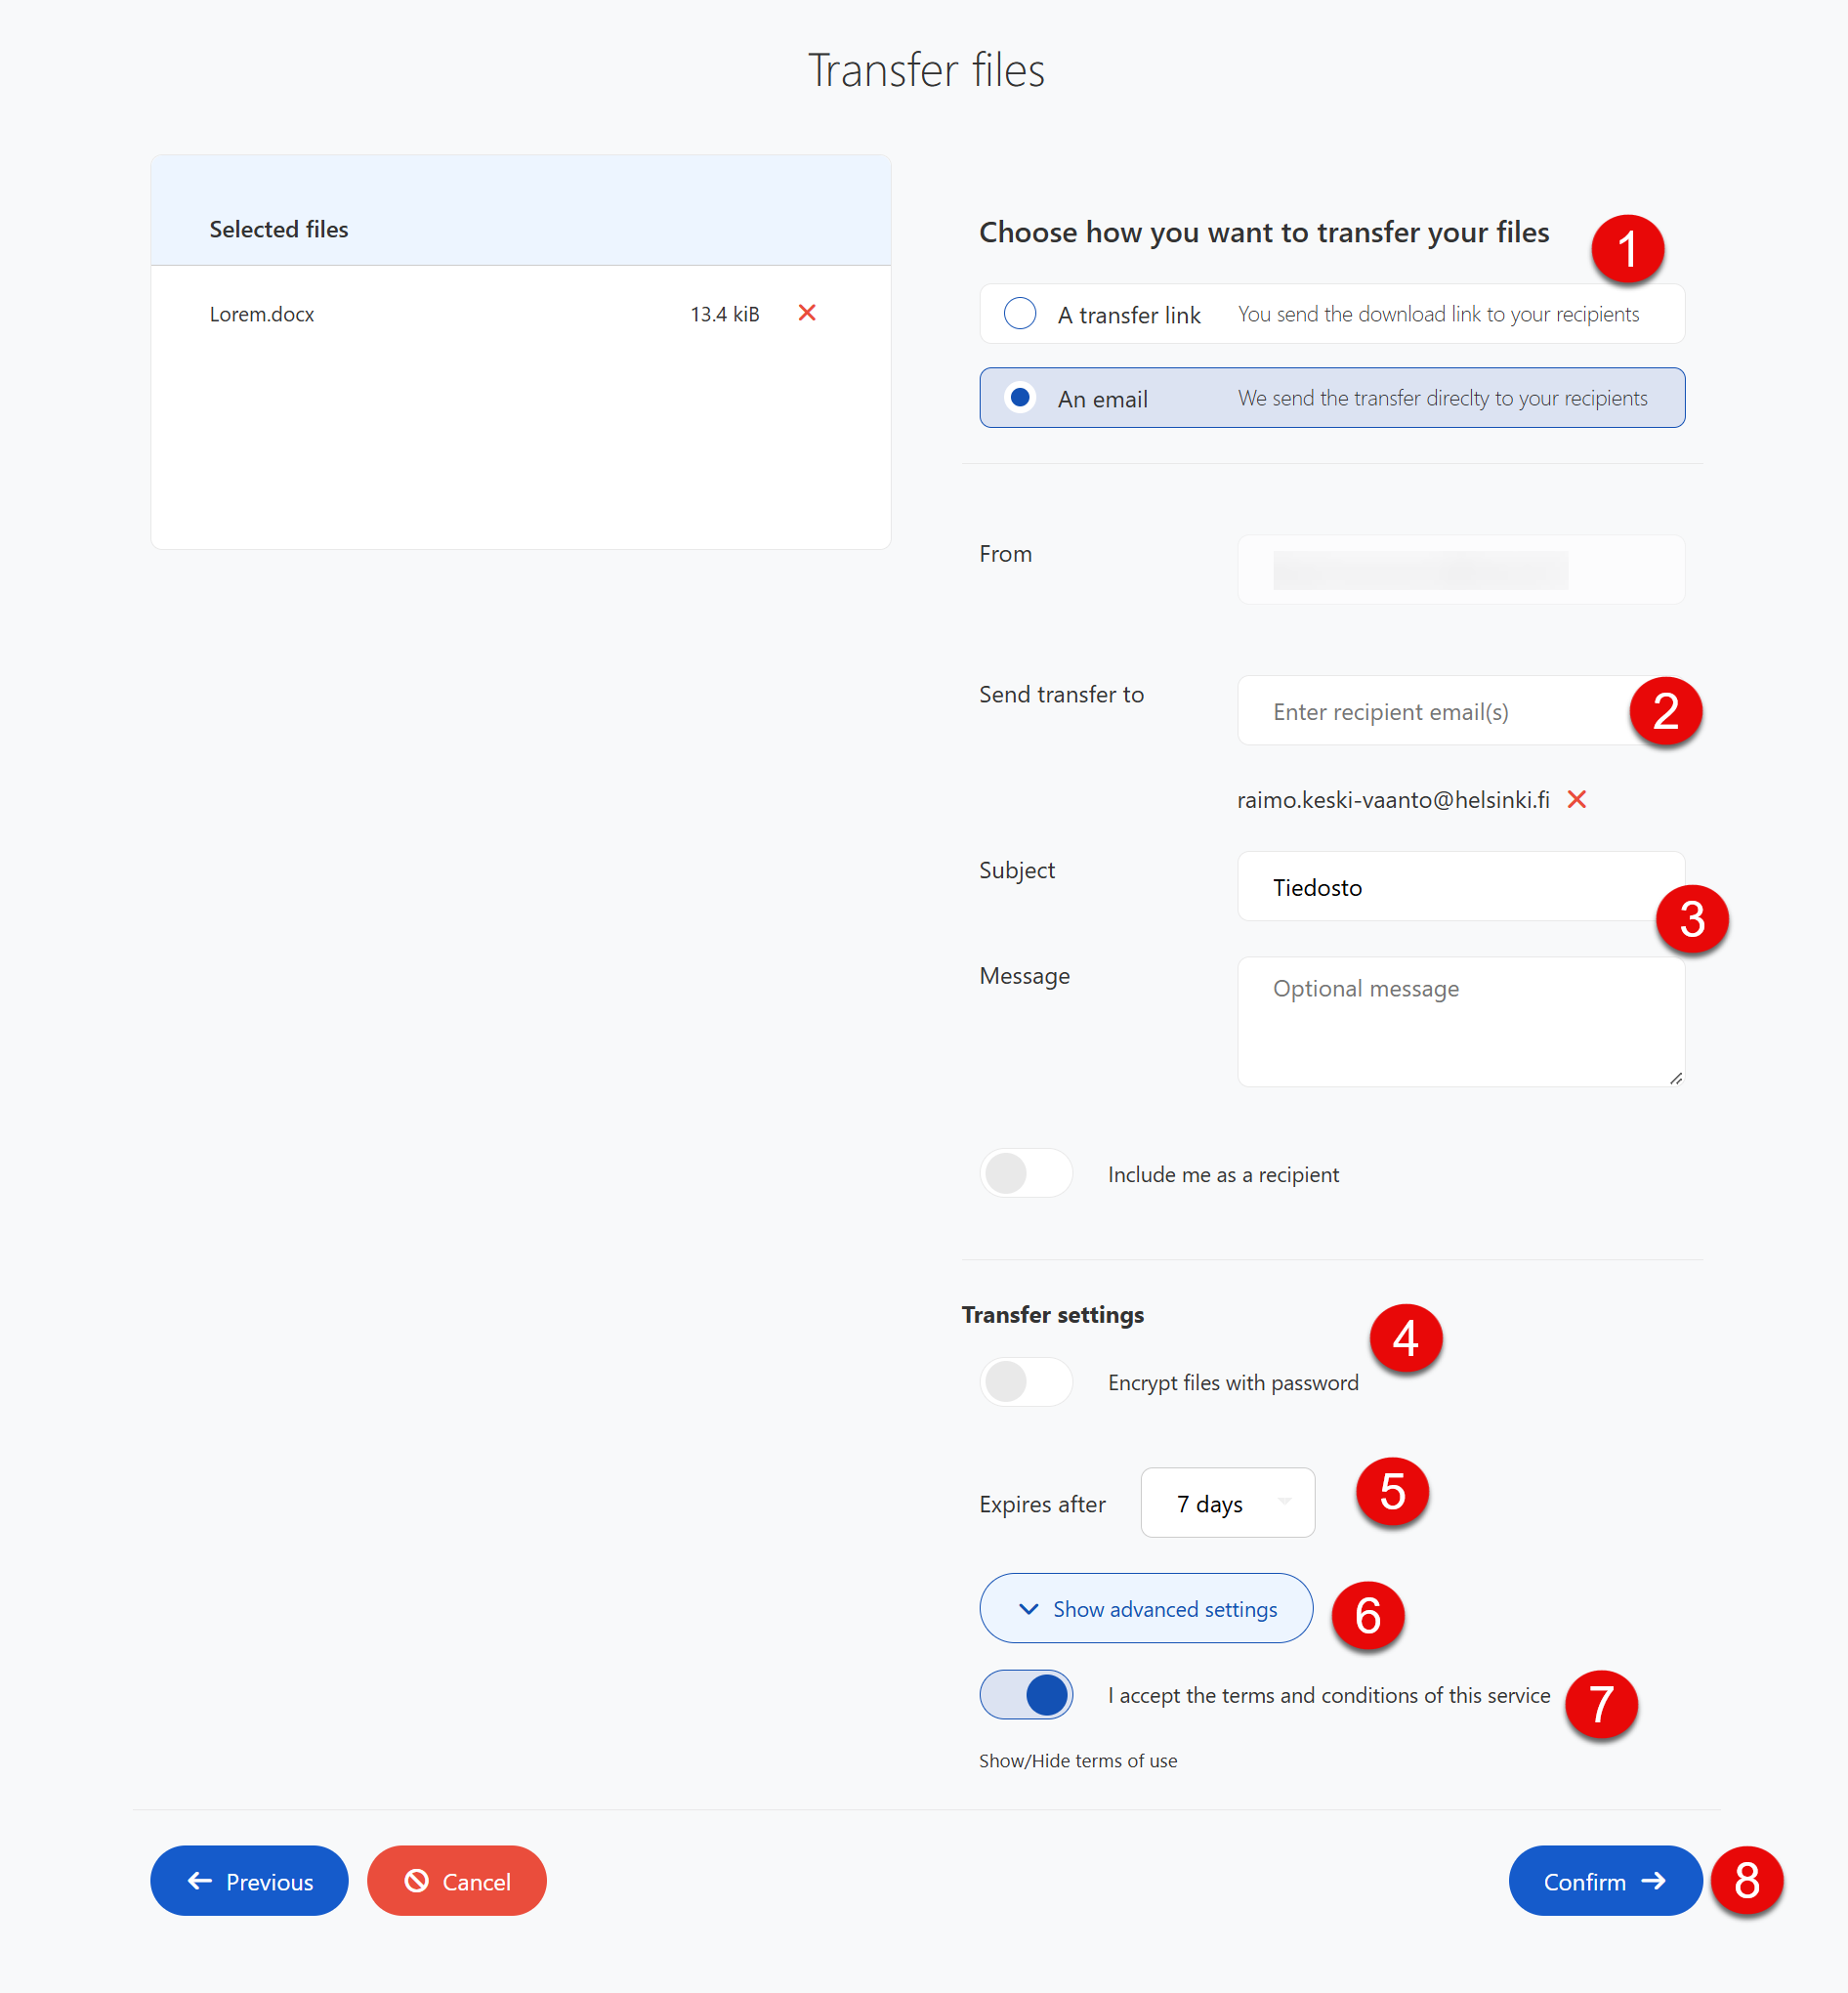
- Choose whether you want to transfer the file via a share link (A transfer link) or by email (An email) (1). If you have chosen to share via email, enter the recipient’s email address (2) as well as the subject line and an optional message (3). Under Encrypt files with password (4), you can protect the files with a password. Please also check the link’s expiration date (5). Click Show advanced settings (6) to view additional settings. Read and accept the terms of use (7). Send the files by clicking Confirm (8).
- See the following sections for further instructions if you wish to protect your files with a password (4) or adjust your settings (6).
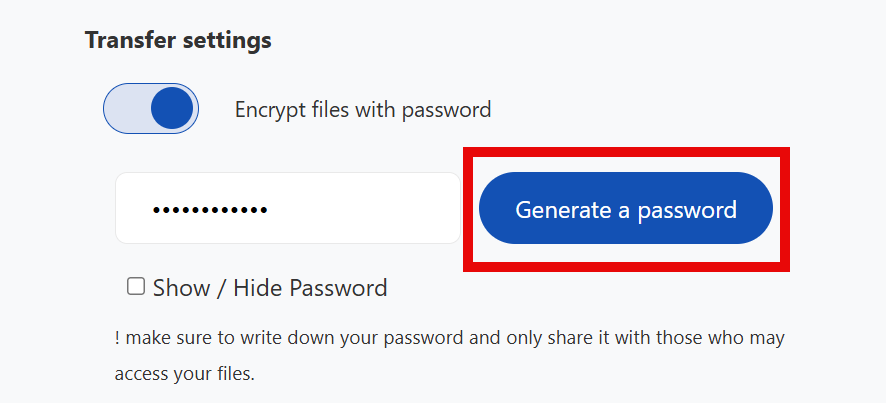
- If necessary, you can set a password for the upload under Encrypt files with password. Enter your chosen password and select Generate a password.
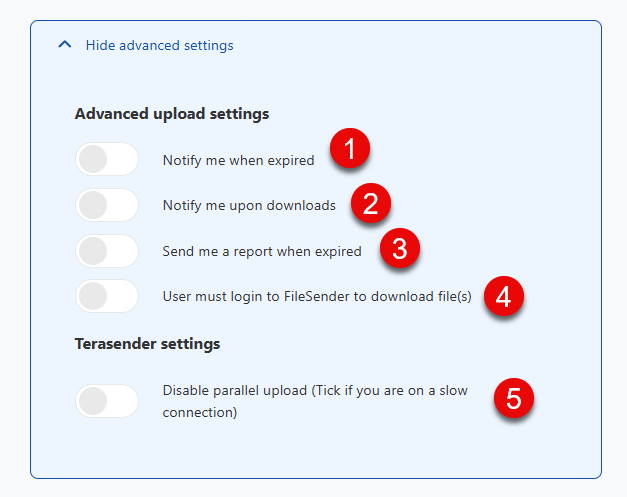
- You can adjust the upload settings under Show advanced settings. You can receive notifications when a upload expires (1) and when a file is downloaded (2), receive a report when a file has expired (3) or specify that a user must log in to FileSender in order to download the file (4). If your internet connection is slow, you can also disable the setting that uploads files to FileSender simultaneously (5).
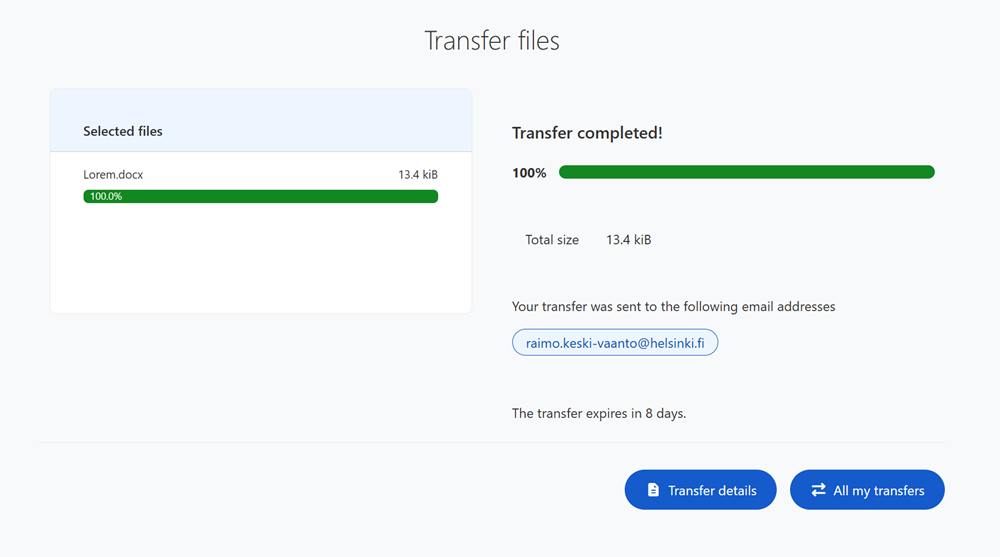
- You will receive a notification when the files have been successfully uploaded to the service.
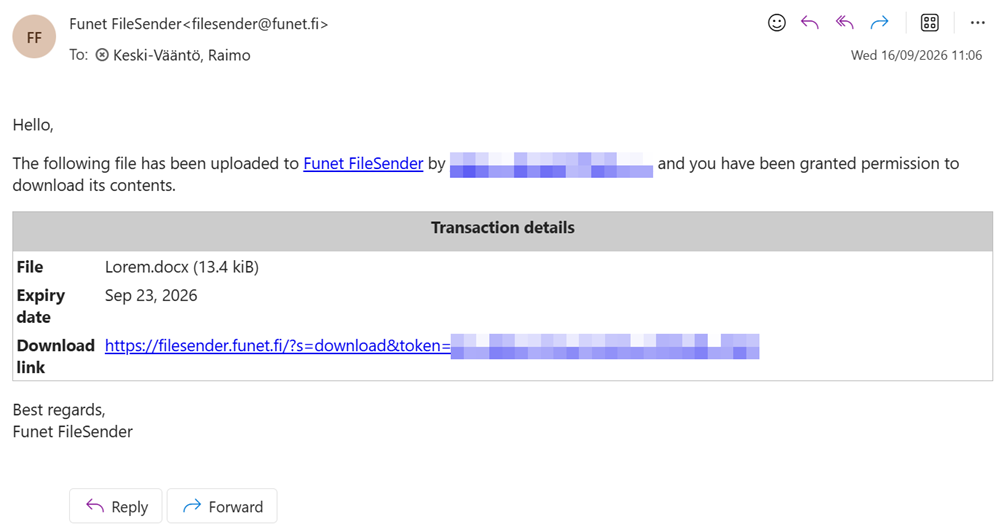
- The recipient will receive a link in their email from which they can download the files.
Inviting an external user to FileSender
Even users who are not members of Haka can send files via FileSender if you grant them permission to do so first.
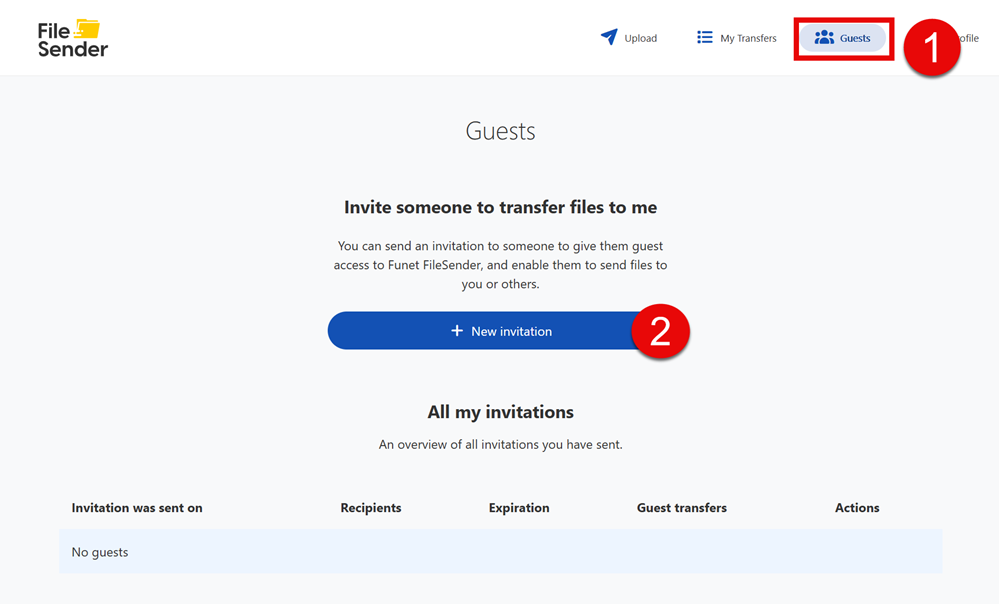
- Open the Guests tab (1) and click New invitation (2).
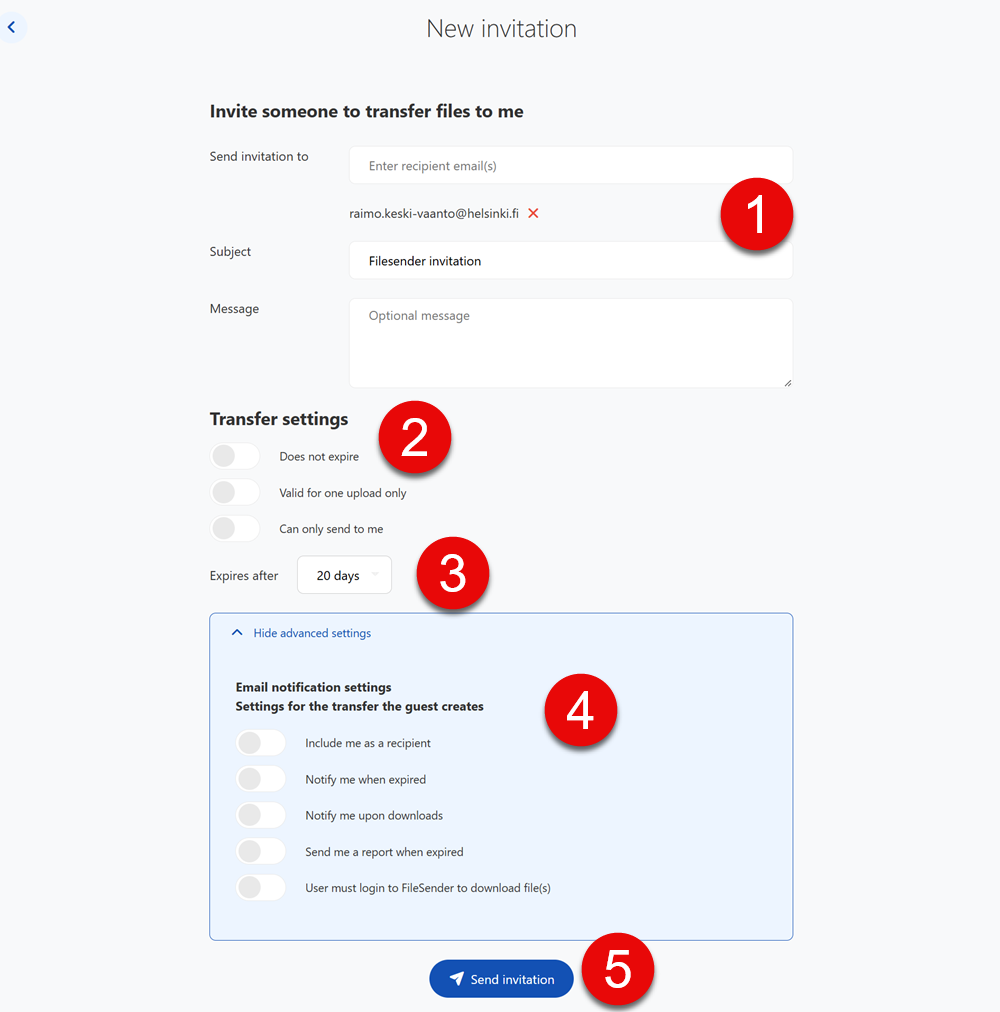
- Fill in the recipient’s details and an optional message (1). Also set any restrictions on the use of the invitation (2) and its expiration date (3). You can also adjust the email notification settings (4). Click Send invitation (5) once the details are correct.
Further information about the service
Detailed help
Video instruction
Give feedback
The instructions site of the University of Helsinki's IT Helpdesk helps you with IT-related issues related to your work. Let us know how we can improve our instructions. We greatly appreciate your feedback!
How would you improve these instructions?