
These instructions apply only to Mac computers covered by the University of Helsinki’s centralised administration. Print queues to Ricoh multi-function printers are automatically installed on centrally administered Mac computers. Instructions for adjusting printing settings, such as colour printing and double-sided printing, can be found in the Detailed help tab.
Quick help
How to print with a SmartCard multi-function printer
- In the program in which you want to print, select the printing command and then select “Ricoh Secureprint” as the printer. If you cannot see any printers, click on the HY menu in the menu bar and select Managed Software Center > Updates to check for updates.
- Go to a Ricoh Secureprint printer equipped with a card reader, place the ID card on the card reader and follow the instructions displayed on the printer’s screen.
For more instructions, see the Detailed help tab.
Detailed help
Printing with a Ricoh multi-function printer
- In the program in which you want to print, select the printing command and then select “Ricoh Secureprint” as the printer. If you cannot see any printers, click on the HY menu in the menu bar and select Managed Software Center > Updates to check for updates.
- Go to a Ricoh printer equipped with a card reader, place the ID card on the card reader and follow the instructions displayed on the printer’s screen.
Print settings (colour and double-sided printing)
After adjusting the print presets, you can use both colour and double-sided printing if these features are available on the printer.
The settings can be adjusted in the printing window of any program, but we recommend that you use Microsoft Word, as shown in this example. After saving the settings, you can use them in other programs as well.
Save the settings as follows:
In the example, the user chooses double-sided colour printing. You can also create other settings you need, such as single-sided colour, black-and-white double-sided or landscape printing.
Please note that if you have made the settings below for Canon Smartcard printers previously used on your Mac, it is a good idea to delete the old Canon presets and redo them with Ricoh Secureprint selected as the printer. This will ensure that colour printing and double-sided printing work properly with the new Ricoh printers.
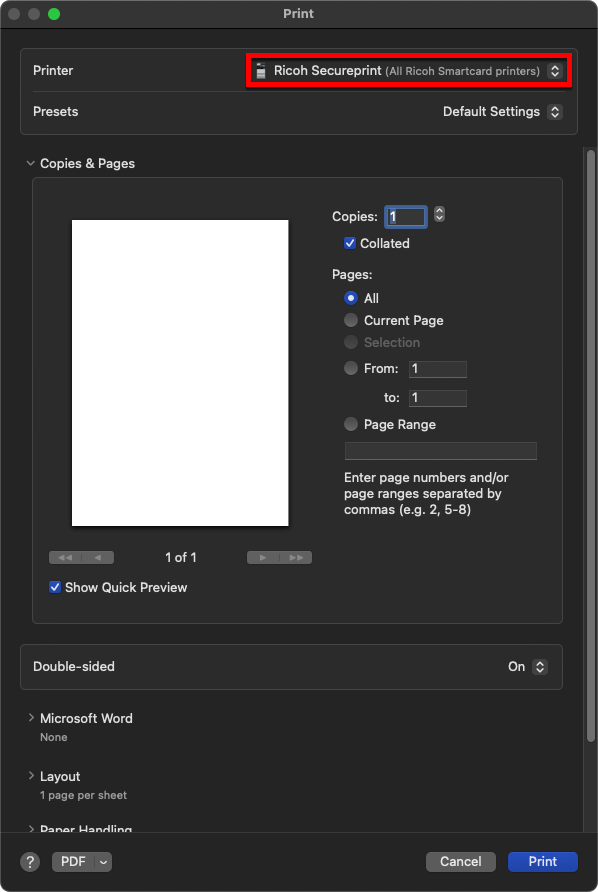
1. Open the printer settings by selecting File > Print... (Print…)
2. A print window will be displayed on the screen. Make sure that Ricoh Secureprint has been selected as the printer.
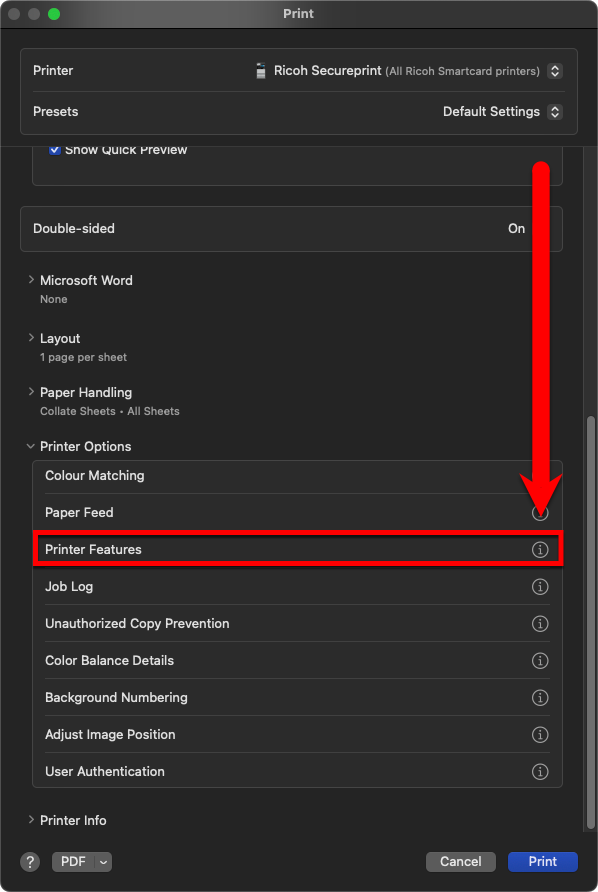
3. Scroll down the window. Find the menu called Printer Options. Select Printer Features.
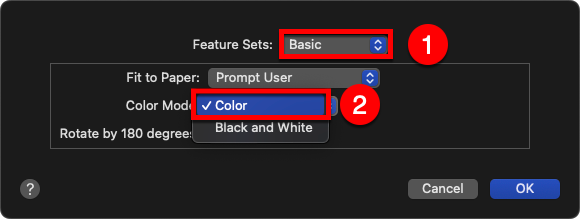
4. The Feature Sets window will be displayed on the screen. Select (1) Basic from the drop-down menu and (2) Color in Color Mode. Finally, click OK.
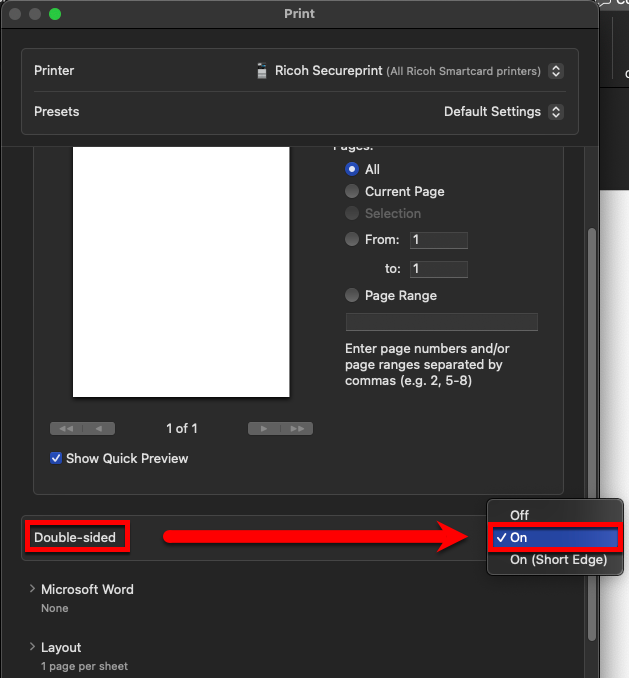
5. In the main menu, locate the Double-sided drop-down menu and select On.
6. To save in the Presets menu, select Save current settings as preset…
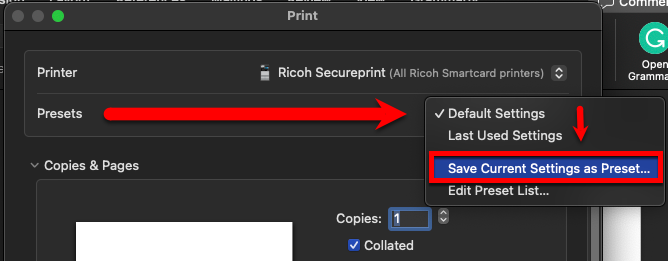
and choose a name, such as “Colour printing, double-sided”. Remember to select All printers to ensure that the settings also work on other printers that offer double-sided colour printing.

NB! You can create multiple presets to suit your printing needs. For example, single-sided colour printing, double-sided black-and-white printing or landscape (horizontal) printing by adjusting the aforementioned settings and other printer settings in the menus.
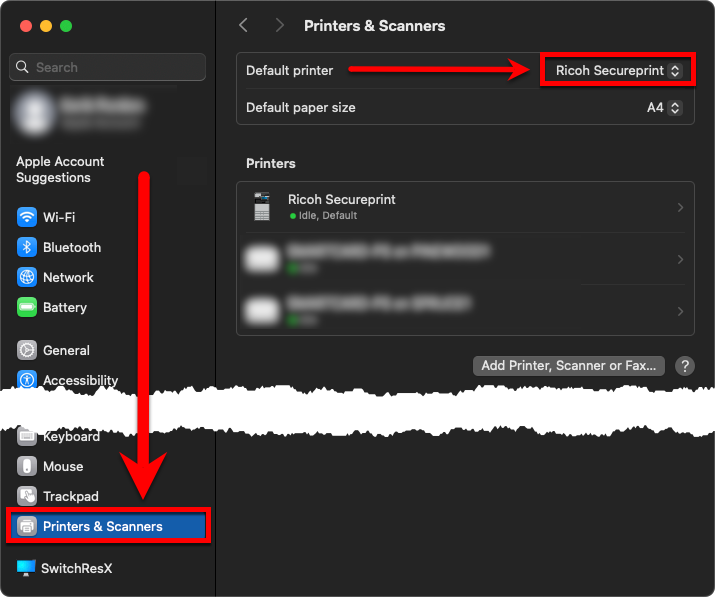
Selecting the default printer
- In the Apple menu, select System Settings -> Printers & Scanners.
- In the Default Printer menu, select the printer you use the most.
Video instruction
Give feedback
The instructions site of the University of Helsinki's IT Helpdesk helps you with IT-related issues related to your work. Let us know how we can improve our instructions. We greatly appreciate your feedback!
How would you improve these instructions?