You can install Add-ins allowed by the Microsoft 365 administration on Windows, macOS or via OWA.
The screenshots are from macOS 10.15, but the instructions are adaptable to other operating systems.
Quick help
In Office programs, add-ins can usually be found under Insert > Get Add-ins... except for Outlook, where the link is in the e-mail Inbox view.
NOTE! The icon Get add-ins is only displayed when the Inbox of an Microsoft 365 account is selected. If you select, for example, the Inbox of a Gmail account, it disappears.
Detailed help
Table of contents
Installing an Add-in
We use installing the Zoom Add-in for Outlook as an example.
The top ribbon of Outlook’s main window has the button Get Add-ins.
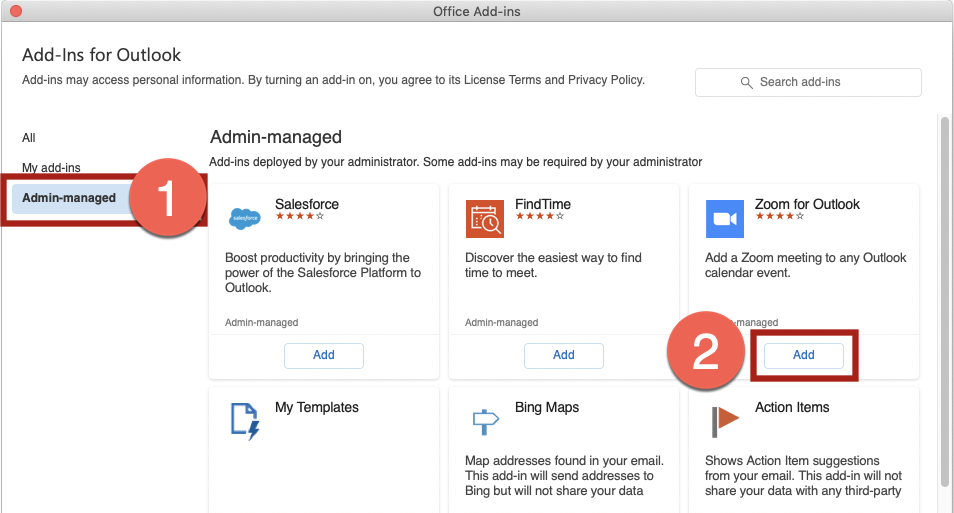
A new window is opened. Select Admin-managed from the menu on the left-hand side. That is where you can find the Microsoft 365 Add-ins approved by the University of Helsinki administration.
Select the desired Add-in (the images show Zoom as an example) and click Add.
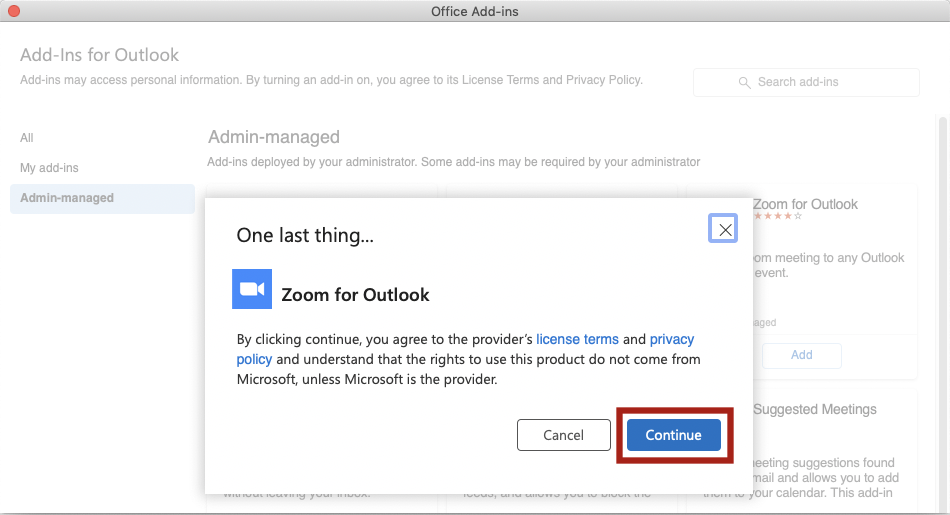
This is followed by a confirmation and accepting the licence terms and the privacy policy by clicking Continue. If you do not wish to accept the terms, click Cancel. The Add-in will not be installed, if you do not accept the terms.
The Add-in has now been installed and you can go create a Zoom meeting. Open Calendar > New Meeting. Now, the top bar of the meeting invitation includes Add a Zoom Meeting
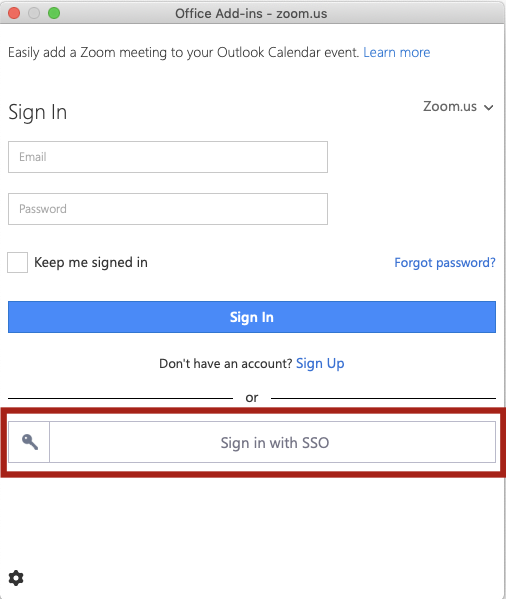
When you click the Zoom Meeting button for the first time, you must log into Zoom. Select Sign in with SSO.
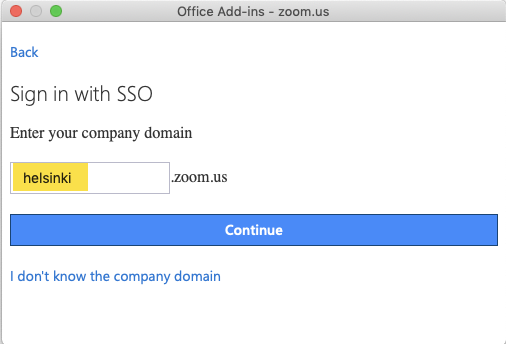
Enter helsinki as the address in the field and click Continue.
Log in with your own username and password and the Add-in is ready to use.
Removing an Add-in
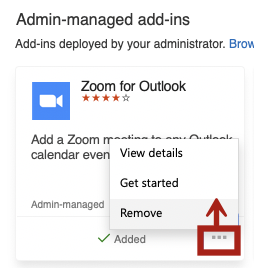
Go to the Add-ins menu. Click the three dots of the Add-in you wish to remove and select Remove.
Video instruction
Give feedback
The instructions site of the University of Helsinki's IT Helpdesk helps you with IT-related issues related to your work. Let us know how we can improve our instructions. We greatly appreciate your feedback!
How would you improve these instructions?


