
The University of Helsinki uses a virtual desktop environment (Virtual Desktop Infrastructure; VDI environment) used with the Omnissa Horizon Client software. You can also run other programs on the remote desktop just as you would on a conventional University workstation. These instructions describe in more detail how you can use the virtual workstation at the University of Helsinki.
The range of computers available varies by user group depending on employment status and any additional licences purchased. By default, both Windows and Linux computers are displayed for those employed by the University, and only Linux computers are displayed for others.
The Omnissa Horizon Client is installed on all University computers. If the Omnissa Horizon Client program cannot be found on the computer, see the separate instructions for installing the program.
The instructions have been prepared for Windows computers, but they can also be applied for Mac and Cubbli. There are separate instructions for Cubbli computers in the Cubbli wiki.
Quick help
The app and the browser versions
On centrally managed computers, please use the Omnissa Horizon Client application installed on the computer.
On university machines, the VDI environment is automatically configured, but on home computers you will need to add the settings the first time by clicking Add Server. In the field that opens, type vdi.helsinki.fi.
If you have only a temporary or occasional need to use a virtual desktop and do not have Omnissa Horizon Client installed on your computer, you can also use virtual desktops in a browser at https://vdi.helsinki.fi
To ensure maximum compatibility, it is always recommended to install Horizon Client as the preferred method of access rather than the browser version. For more information, see the Omnissa Horizon Client Installation Guide.
Logging in
The VDI environment uses single sign-on and you can access the desktop selection directly if the single sign-on session is valid (you are already logged in to Flamma, for example). You can read more about single sign-on in the separate instructions Using login services
Detailed help
Table of contents
- Connecting to the virtual desktop and disconnecting
- Opening a virtual desktop automatically
- Launching a virtual desktop automatically
- Adjust the display settings
- Locked virtual desktop
- The computer has no Horizon Client / home computer / browser use
- Errors
- Resetting
- Transferring files between your home computer and the VDI virtual desktop (Windows, using the client software)
- Transferring files between your home computer and the VDI virtual desktop (Windows, using the browser)
- Printing on a VDI computer
Connecting to the virtual desktop and disconnecting
Two separate logging ins are required when logging in to remote desktops:
- Single sign-on (SSO) is used as the authentication method for virtual desktops in the same way as for the University's other online services.
- After selecting a virtual desktop, log in to the operating system with a password, as you would do when logging in to a University workstation.
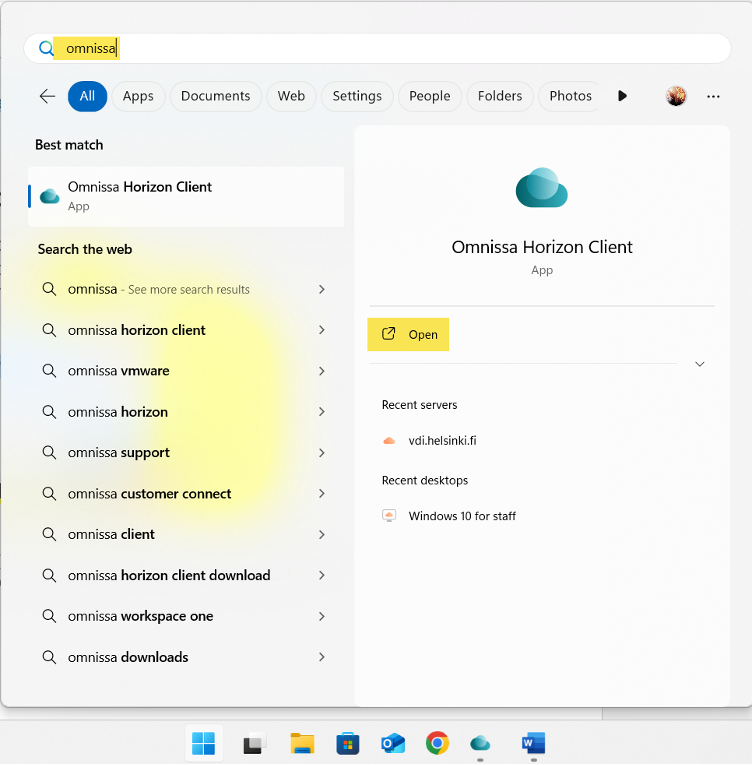
Opening Horizon Client
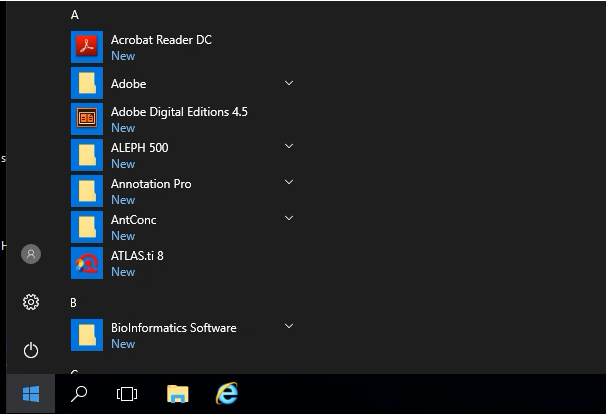
- Click the Start icon on your Windows computer and start typing in the search field Omnissa
- Select Omnissa Horizon Client
Logging in to Horizon Client
The VDI environment uses single sign-on and you can access the desktop selection directly if the single sign-on session is valid (you are already logged in to Flamma, for example). You can read more about single sign-on in the separate instructions Using login services.
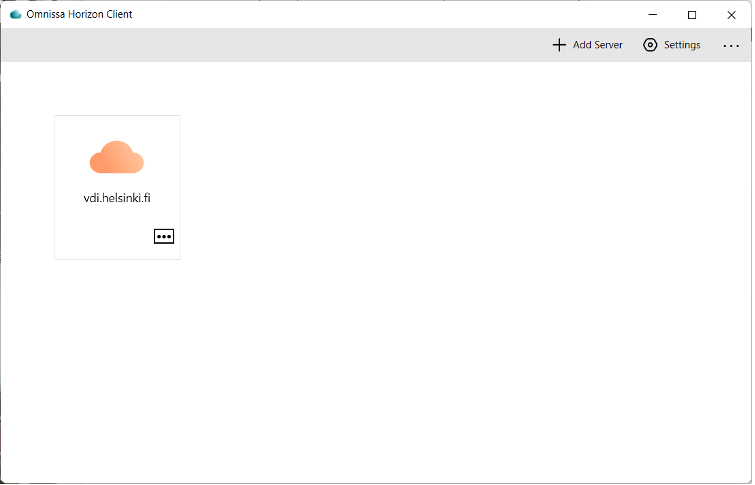
The University’s computers have the VDI environment adjusted automatically, but the first time you use a home computer, you must add the settings by clicking Add Server. Enter vdi.helsinki.fi in the field that opens.
- The window that opens contains the icon for the connection server vdi.helsinki.fi
- Double-click the vdi.helsinki.fi icon.
- When asked to log in, log in with your own username, in the format username@ad.helsinki.fi (e.g. rkeskiva@ad.helsinki.fi).
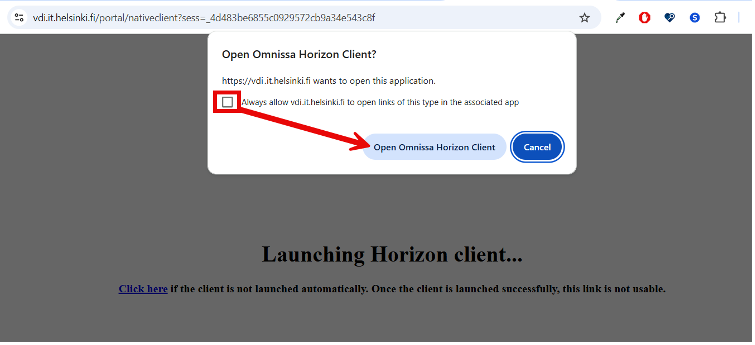
After successful login, the browser attempts to open Horizon Client. You can accept the login automatically in the future by ticking the Always allow vdi.it.helsinki.fi checkbox. You can continue to log in by clicking Open Omnissa Horizon Client, which opens Horizon Client.
Selection of a virtual desktop
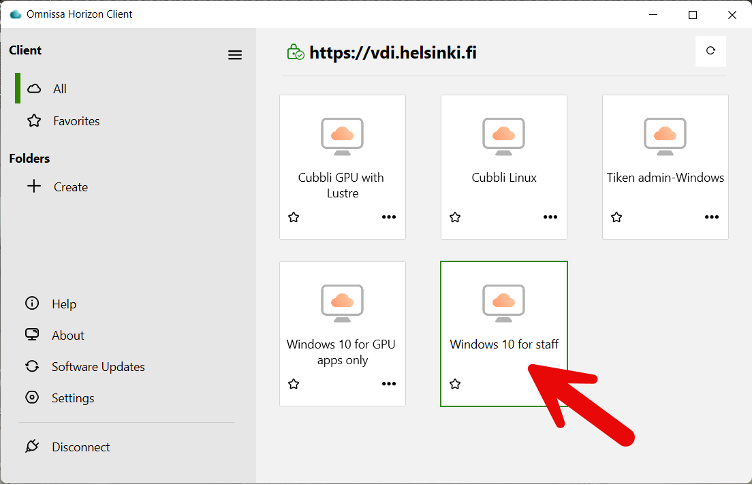
After successful login, you will go to the Horizon Client desktop, which lists the desktops for different purposes to which you have access.
The range of computers available varies by user group depending on employment status and any additional licences purchased. By default, both Windows and Cubbli computers are displayed for those employed by the University, and only Cubbli computers are displayed for others.
- Double-click the icon to select the desired desktop.
- Wait for the virtual desktop to load and the login window to open.
- Log in with your University username (enter the short username, e.g. rkeskiva)
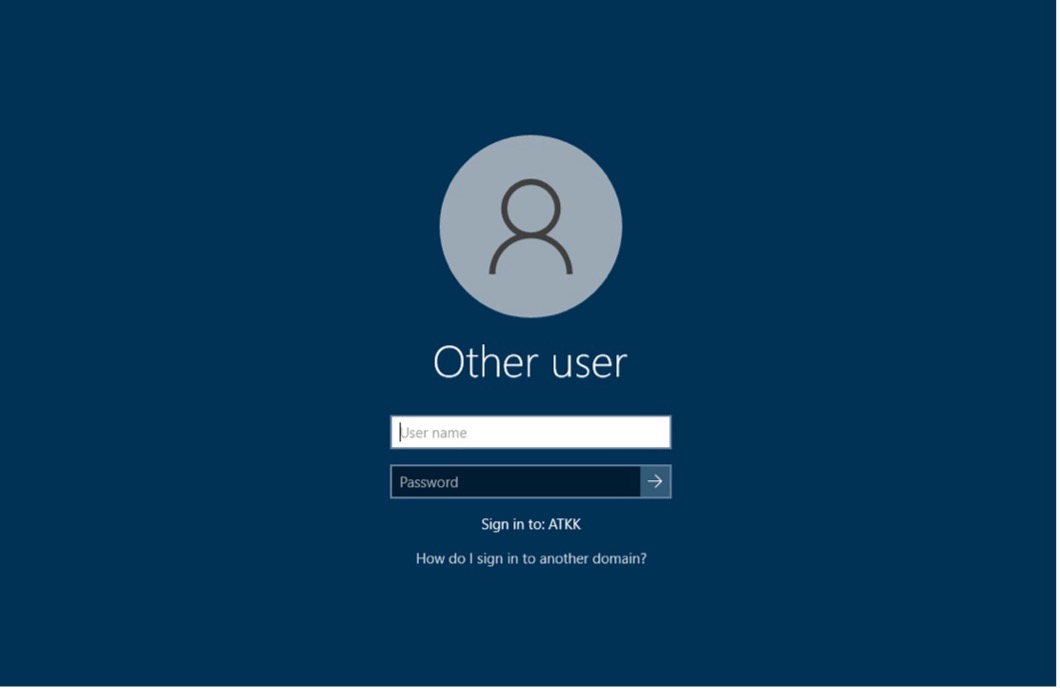
- Once the desktop is loaded, you can use the computer as you would any other computer.
Disconnecting from the virtual computer
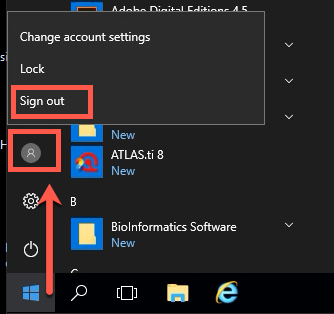
When you want to stop using the virtual desktop, disconnect from the virtual desktop by clicking Start > user icon > Sign out.
Opening a virtual desktop automatically
If you only use one specific virtual desktop, you can select it to open automatically as follows:
- Open Omnissa Horizon Client.
- Right-click the vdi.helsinki.fi icon of the connection server.
- A menu opens. Choose Autoconnect to this Server.
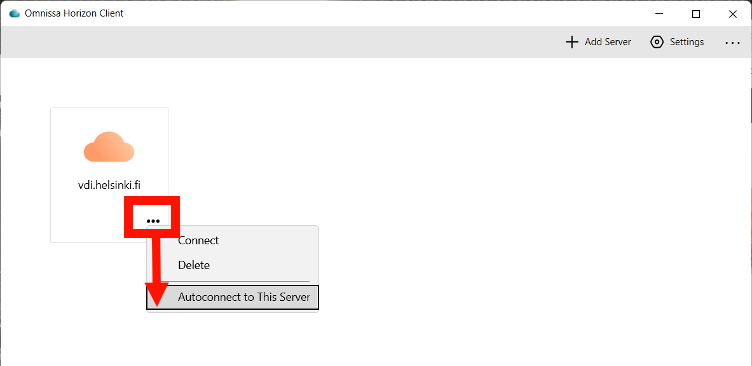
- You can now close the Horizon Client program and restart it.
- The program now automatically opens in the desktop menu.
- If you usually only use a specific desktop (such as Cubbli), you can also specify it to be opened automatically.
- Right-click (1) the icon of the server you want to choose.
- Choose Settings (2) from the menu.
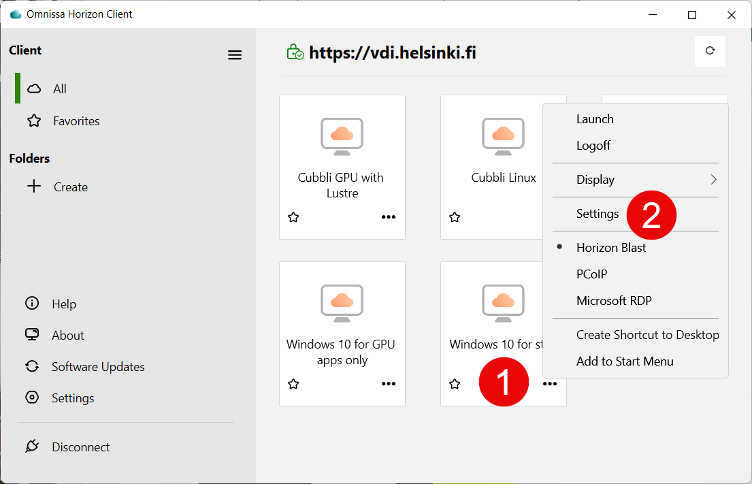
- A new window opens for setting the options of the server.
- Click On under Autoconnect to this Desktop.
- You can now close the window.

- You can now close the Horizon Client software again and restart it.
- The selected desktop now opens automatically.
Launching a virtual desktop automatically
You’ll save time in the future when you create a shortcut for the virtual desktop you often use directly on your own desktop.
Create the shortcut as follows:
- Open Horizon Client as usual.
- Right-click (1) the icon for the desired desktop (such as Cubbli Linux).
- When a menu opens, select Create shortcut to Desktop (2).
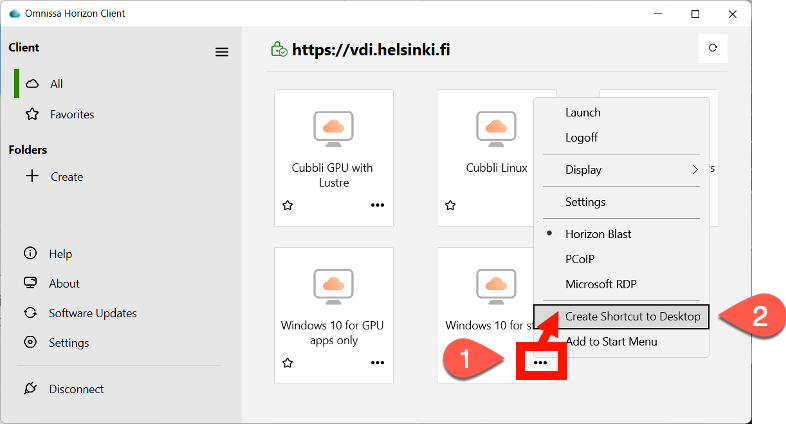
- This will create a shortcut on the desktop.
- You will be able to open the chosen desktop directly using the desktop shortcut the next time.

Adjust the display settings
With the default settings, the virtual desktop takes over all displays (if you are using several displays). The actual desktop is only shown in one display. This means that you cannot see your computer’s desktop at all at the same time, which may make it difficult to work.
You can set the virtual desktop as a ”floating window” as follows:
- Right-click the icon for the desktop to open. When a menu opens, select, for example, Display > Window - Large. (The default setting is All Monitors, which takes over all displays.)
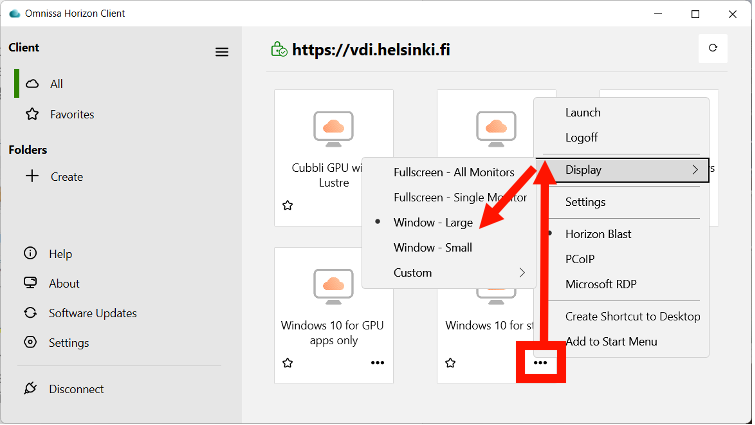
- Next time you open the virtual desktop, it will open in the size you have specified. Please keep in mind that the setting is desktop-specific, which means that you can select different settings for different desktops.
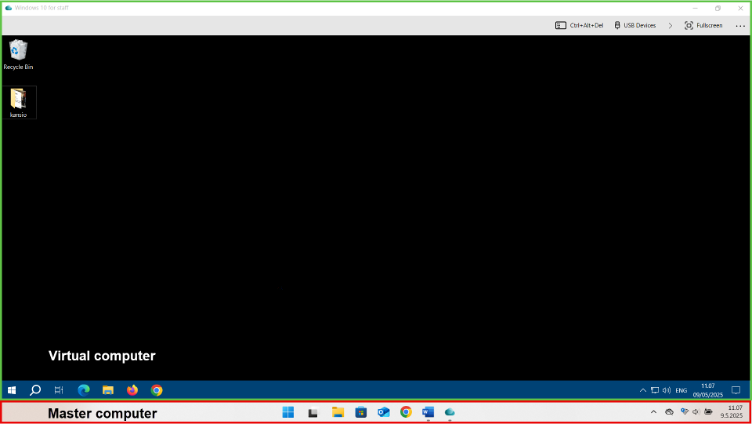
When using Windows’ virtual desktop, you must be careful about which Start menu to click.
Locked virtual desktop
If the virtual desktop asks you to press Control + Alt + Delete, you can use the bar at the top of the desktop window to send the command Send Ctrl-Alt-Delete.

Alternatively, you can press Ctrl + Alt + Insert on the keyboard.
Note that if you press Ctrl + Alt + Del on the keyboard, the command will only be sent to the host computer (=the computer on which you are logged in to the virtual desktop).
The computer has no Horizon Client / home computer / browser use
If you have only a temporary or an occasional need to use a virtual desktop and you do not have the Omnissa Horizon Client installed on your computer, you can also use the virtual desktops within a browser.
However, the preferred option for a VDI environment is always the vendor's own Omnissa Horizon Client application, which is more compatible with the VDI infrastructure than the browser options. To learn more about installing it on your work or home computer, see the Omnissa Horizon Client installation guide.
Near-weekly updates on web browser applications can affect the VDI experience with unexpected connectivity issues, file transfer size, name, etc. limitations, missing or extra keystrokes, cursor visibility or screen scalability issues, etc., until the next browser update, which may or may not resolve the issue.
Using an alternative browser and/or private browser mode ("incognito mode") may help to work around some browser usage problems.
- Navigate to https://vdi.helsinki.fi
- Once the window opens, select Omnissa Horizon HTML Access
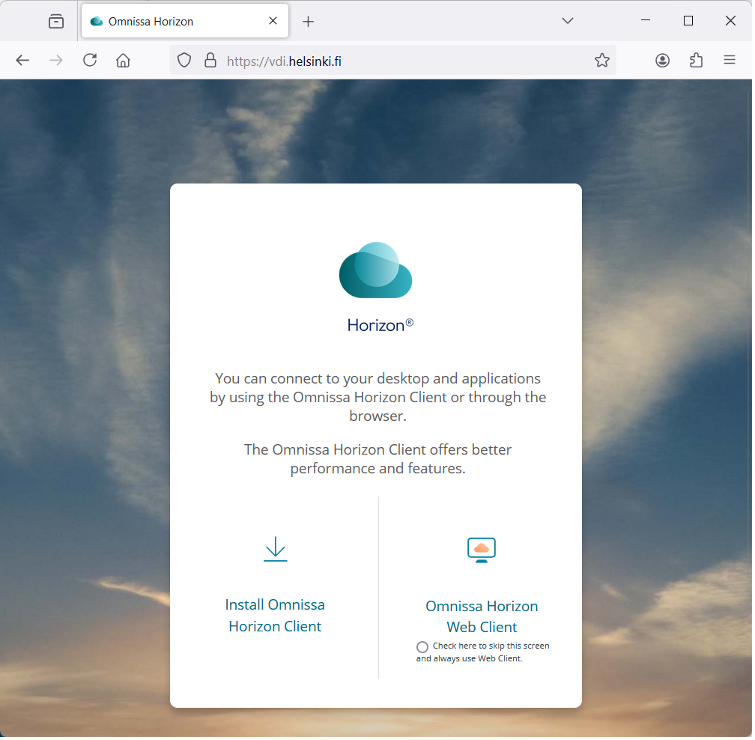
If you want to, you can install Horizon Client on your home computer, for example. To do so, click
Install Omnissa Horizon Client.Note that you need administration permissions for the computer.
- When asked to log in, log in with your own username, in the format username@ad.helsinki.fi (e.g. rkeskiva@ad.helsinki.fi.
- After a successful login, the virtual desktop menu opens.
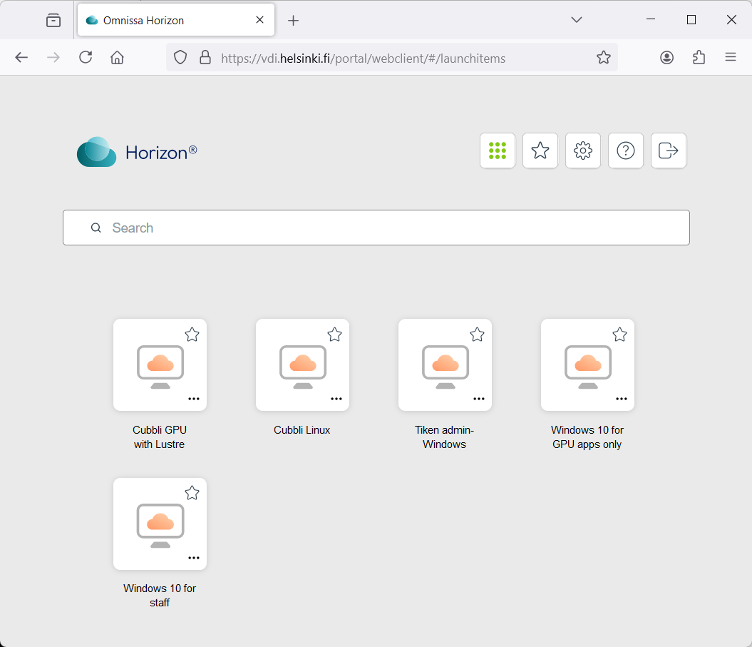
Opening the virtual computer
- Double-click the icon to start the desired virtual computer.
- Wait for the virtual desktop to load and the computer login window to open.
- Log in with your University username (enter the short username, e.g. rkeskiva)
How to disconnect
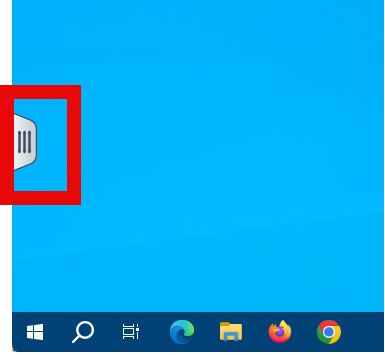
- Click the expand handle in the Settings menu.

- Click the menu button.
- In the menu that opens, choose Log out.
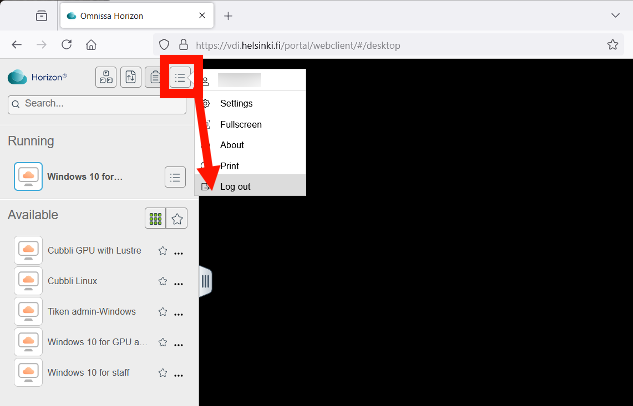
- After a confirmation question, you go back to the home page and can then close Horizon Client.
Resetting
The Omnissa User Environment Manager Self-Support program for easily checking/resetting the settings has been installed on the virtual desktop.
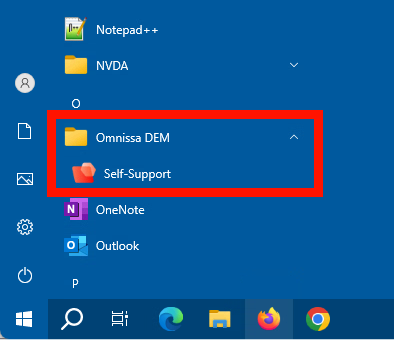
- Launch the program Start > Omnissa DEM > Self-Support
This launches the Omnissa User Environment Manager Self-Support program.
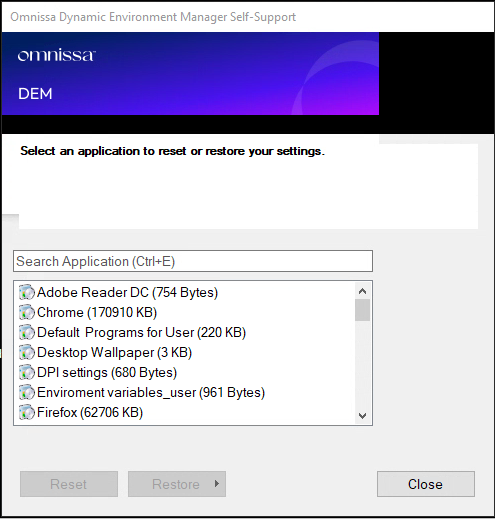
The program displays the settings that you have changed.
- To remove a changed setting, choose the setting and click Reset.
Transferring files between your home computer and the VDI virtual desktop (Windows, using the client software)
The Windows 11 version of VDI desktop prevents the client application from transferring files directly to the VDI desktop for security reasons. If you need to transfer files to the VDI desktop from your computer, it is recommended that you first transfer the files to OneDrive or Z:-drive and then open them via the VDI desktop. With the browser version of Omnissa Horizon Client, you can also transfer a small amount of data from your machine to a Windows 11 VDI desktop (2GB maximum size).
Transferring files to a Cubbli Linux VDI desktop works normally.
These instructions tell you how to transfer files between your home computer and the virtual desktop if you are using the VDI client software. If you are using the virtual desktop via the browser, see the following section.
You can add a drive or folder on your home computer to the virtual desktop. This allows you to easily transfer files between the home computer and the virtual desktop.
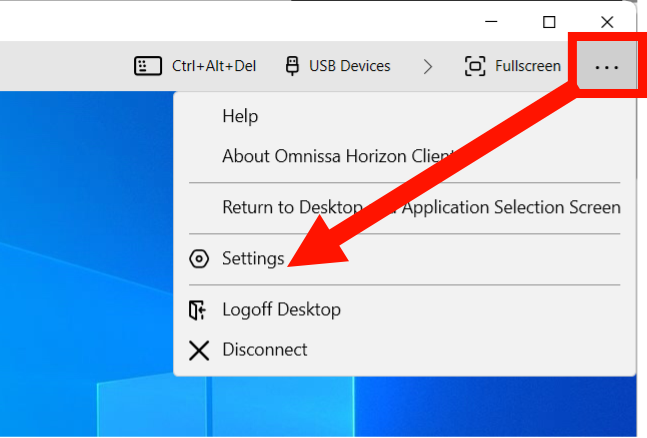
- At the top of the virtual desktop, click the three-dot menu and select Settings.
Open the Drive & Folder Sharing tab and click Add.
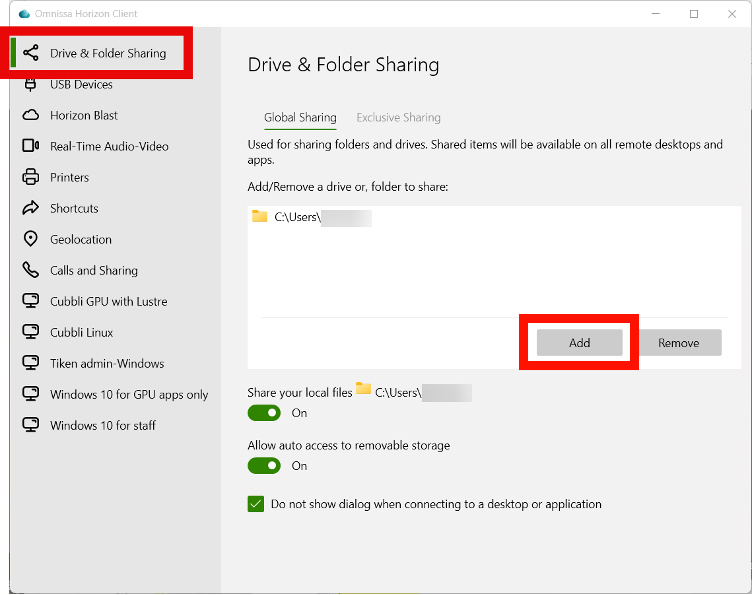
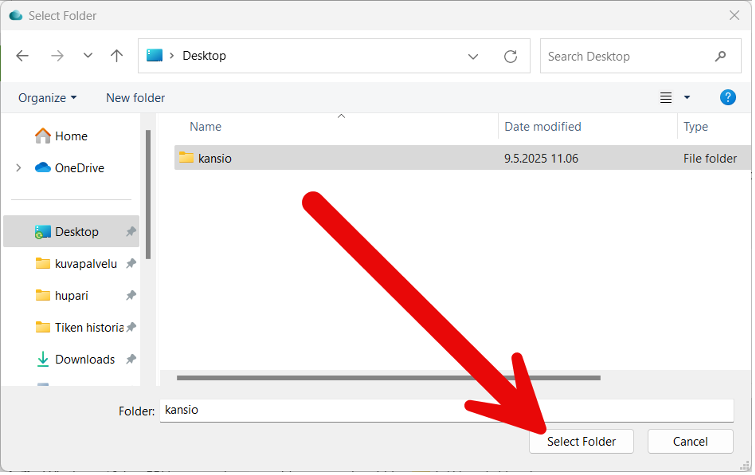
- Find the drive or folder to share on your home computer.
- Select the folder and click the Select folder button.
- The shared folder or drive is now visible on the list.
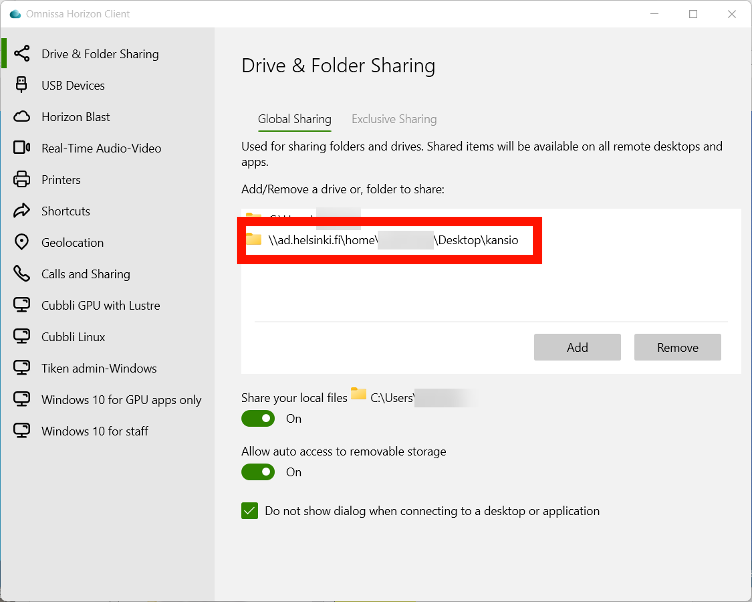
- The shared folder or drive is now shown on the virtual desktop amongst the other drives.
- You can open the folder and process the files either on the virtual desktop or through the file management of your own computer. The changes are reflected both on the virtual desktop and your own computer.
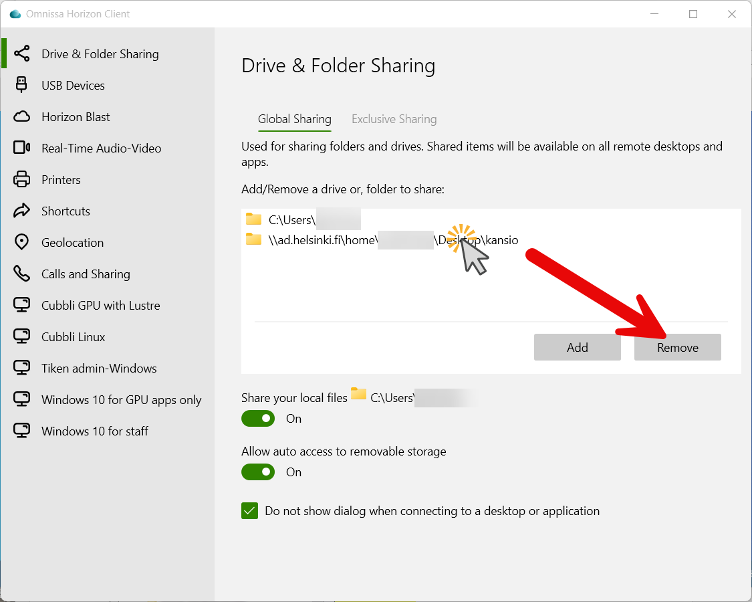
Stopping folder sharing
- To stop sharing, select a folder and click Remove.
Transferring files between your home computer and the VDI virtual desktop (Windows, using the browser)
This section tells you how to transfer files when you are using the virtual desktop with a browser. If you are using the virtual desktop with the client software, see the previous section.
Sometimes you need to transfer files from your home computer to a virtual desktop. For example, if you have photos of receipts that you need to attach to a travel invoice on SAP, you can do this in on a virtual desktop as follows:
Transferring files from your home computer
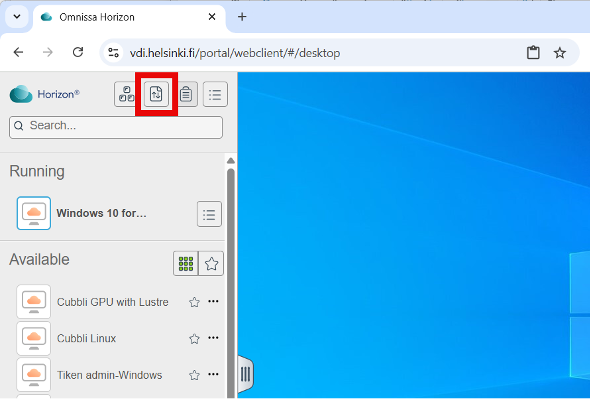
- Click the opening handle of the virtual desktop.
- Click the file transfer icon on the window that opens.
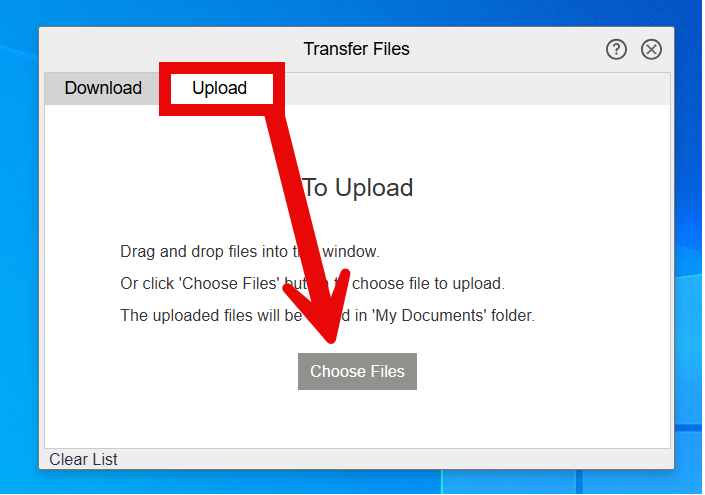
- Open the Upload tab.
- Click Choose Files.
- Locate the file you want to transfer.
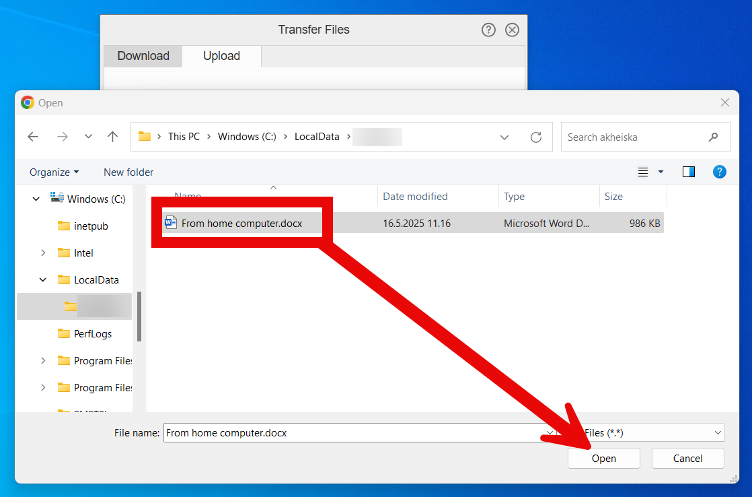
- The file is immediately transferred to the target computer.
- You can add more files by clicking Add more files.
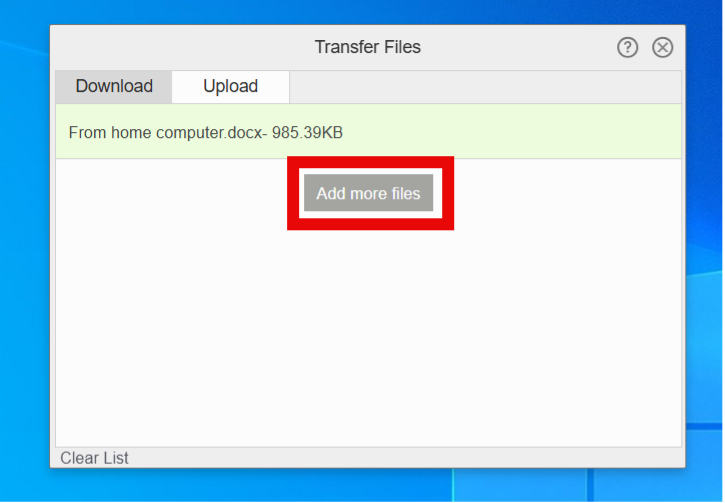
- Your files will be saved on your personal My Documents folder and they can be used on your work computer.
Transferring files to your home computer
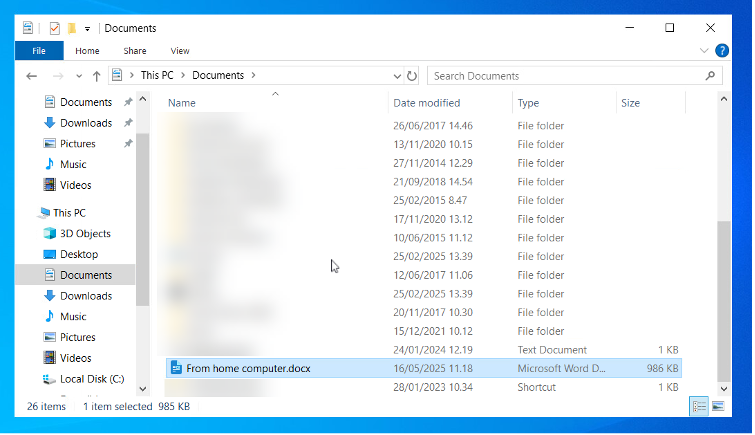
- Open the Download tab.
- Select a file on the virtual desktop (by clicking it once) and press CTRL + c on the keyboard.
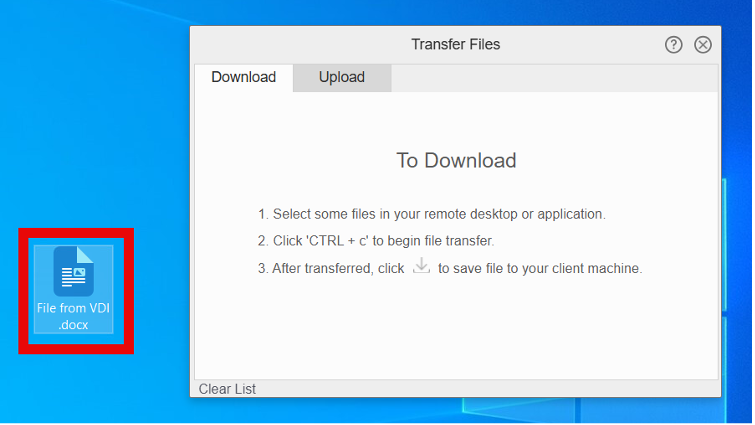
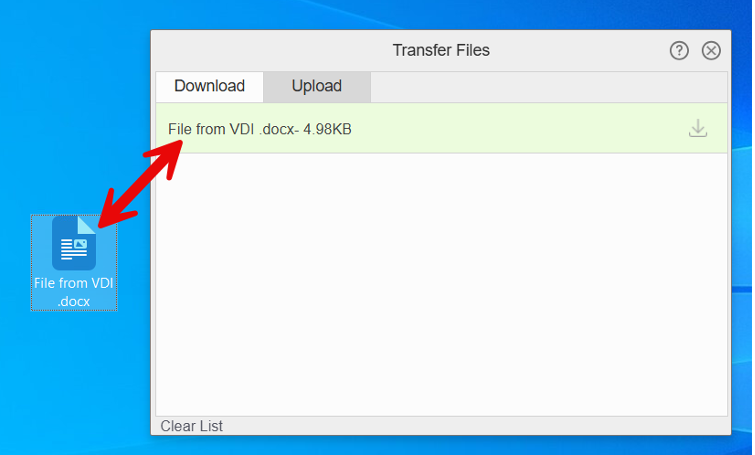
- The file is now visible in the transfer window.
When you have selected all the files to be transferred, click the upload icon.
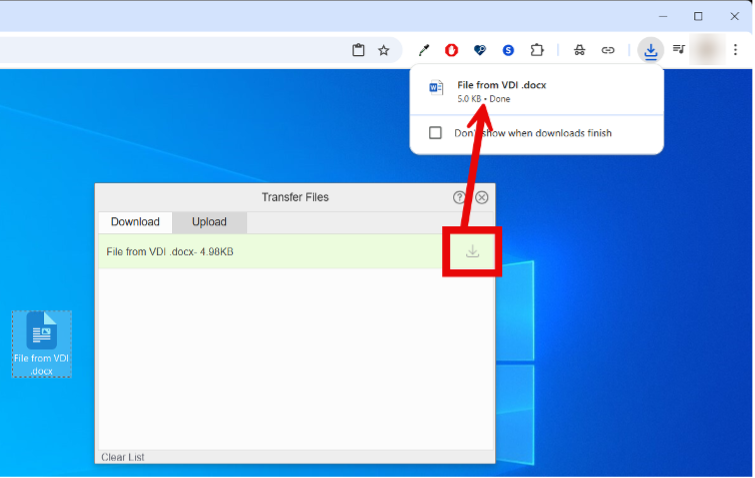
- You can open the file in the folder where the browser saves it. The default storage location is Downloads.
Printing on a VDI computer
A VDI computer has the print queue Ricoh_Secureprint as a local queue and other queues come from the mother computer used (e.g. your home printer). The printers that can be used depend on the network connection of the mother computer at each particular moment.
Read more about printing in the University in the separate instructions.
Video instruction
VMware Horizon program in the browser
You can use virtual desktops with the VMware Horizon program in your browser.
Clipboard
You can use the clipboard to transfer data between a normal computer and a virtual computer.
Give feedback
The instructions site of the University of Helsinki's IT Helpdesk helps you with IT-related issues related to your work. Let us know how we can improve our instructions. We greatly appreciate your feedback!
How would you improve these instructions?