
These instructions cover the Wiki’s main features related to creating, deleting and editing sites and pages. Further information about XWiki’s functionality and tools is available in the XWiki platform instructions.
The University Wiki is available at https://wiki.helsinki.fi
Terms
- Root page = The top page of the wiki hierarchy, which is formed when a wiki site is created
- Macro = A plugin (or extension) that adds extra functionalities to the Wiki
- Child page = A page that has been created or moved under another wiki page (in a “page tree”)
- Page, wiki page = A single page that can have its own settings and administrator
- Template = A page that can be used as a model for new pages and that may contain ready text or macros and so on
- Page tree = A hierarchical entity of parent and child pages in a specific wiki area
- Wiki site = A hierarchical entity of multiple pages
Quick help
How to log in to the Wiki
- Navigate to https://wiki.helsinki.fi/
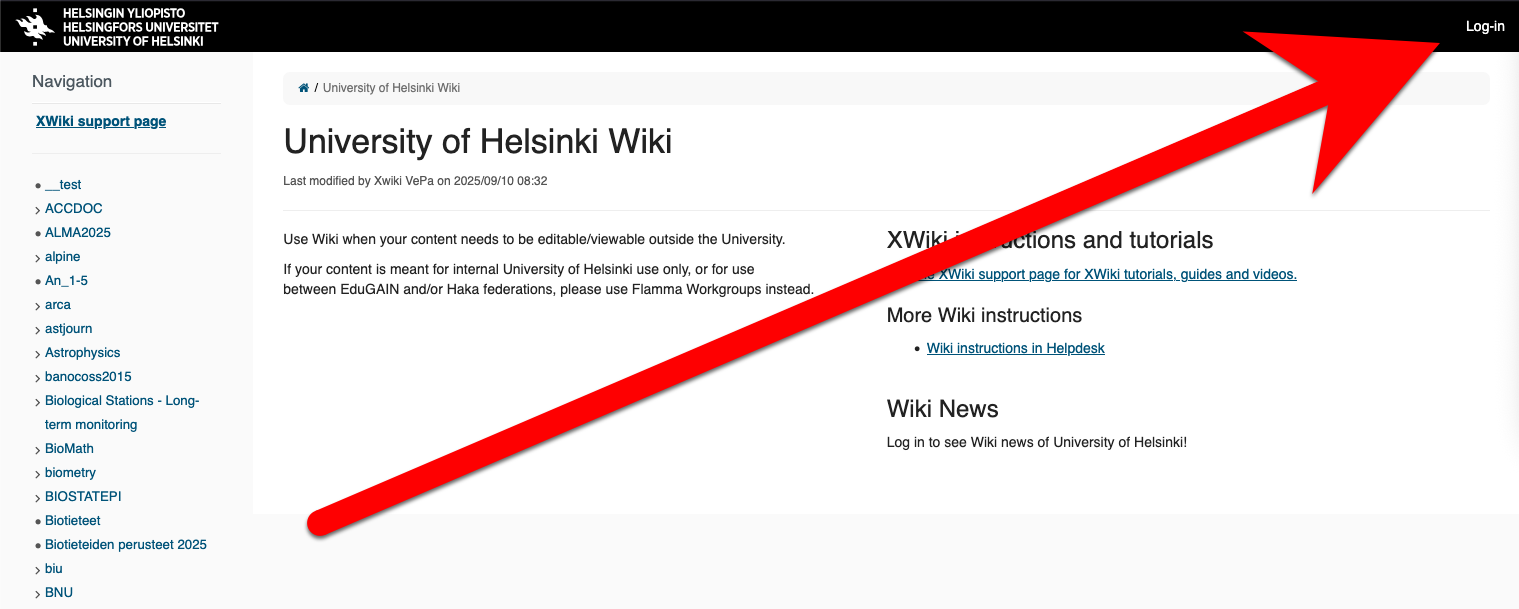
- To log in to the Wiki, click on the Log In icon on the menu bar.
- Select the topmost option, Login with a Helsinki University account.
- Log in to the service using the short form of your University of Helsinki username (e.g. Raimo Keski-Vääntö would be rkeskiva).
How to create a Wiki site in the Wiki
- Log in to the Wiki (see instructions above).
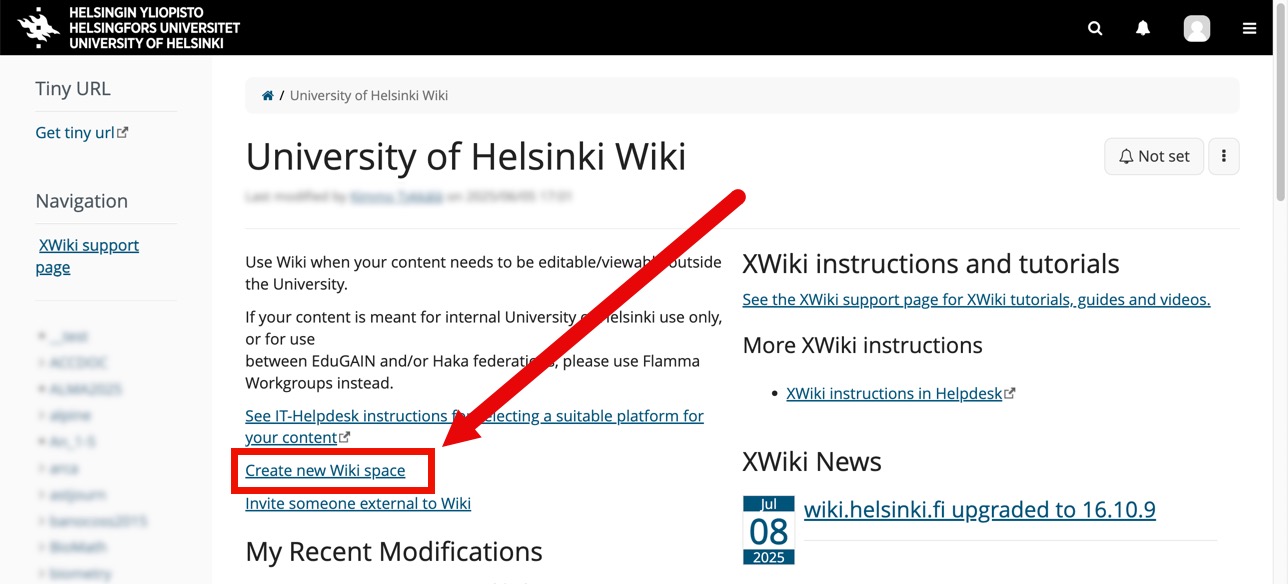
- On the Wiki home page, select Create new Wiki space.
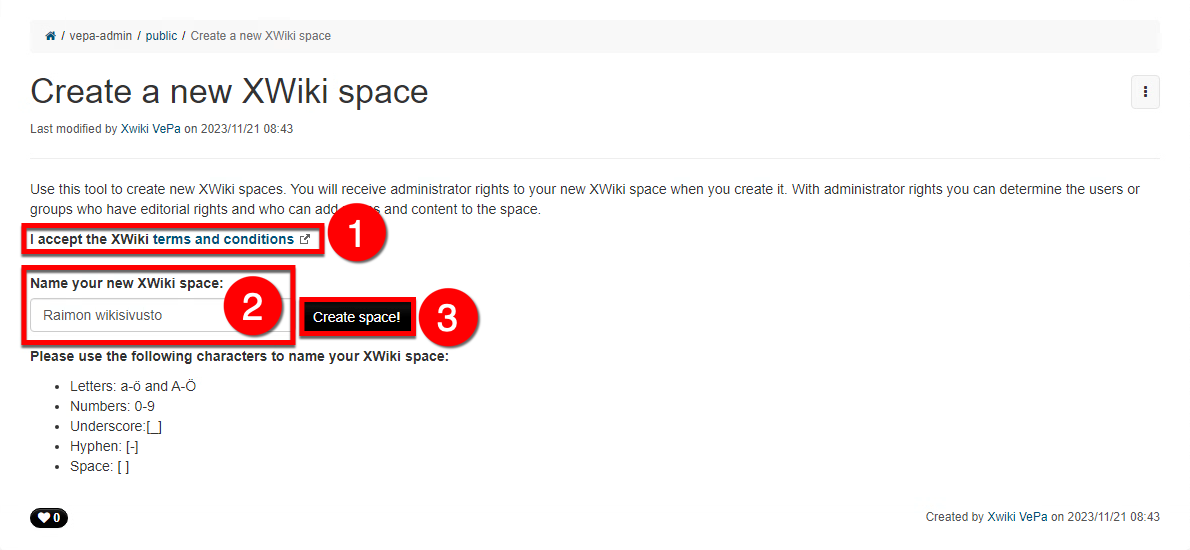
- You are now on the page where you can create your new wiki site. Read the terms of service, enter a name for your wiki site and select Create space!.
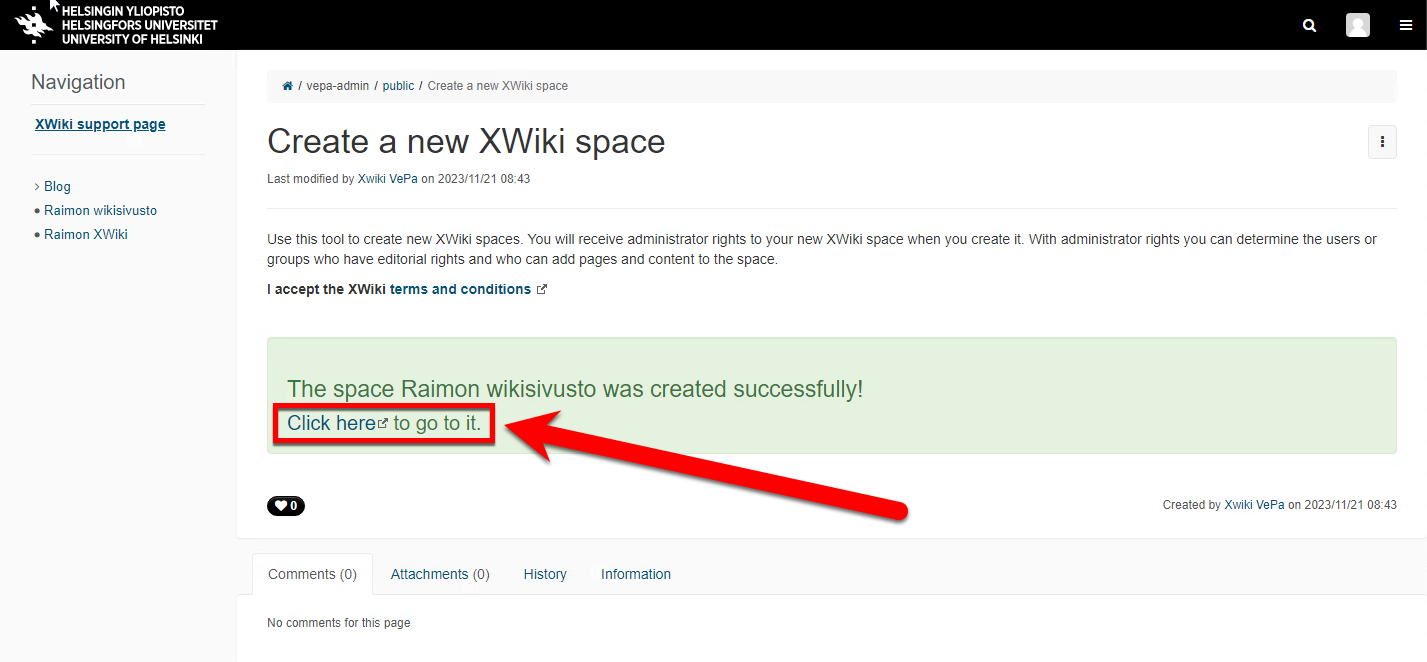
- You have now created your new wiki site. Select the Click here to go to it link to move to the root page of the wiki site you created.
Detailed help
Logging in to the Wiki
Navigate to https://wiki.helsinki.fi/
- To log in to the Wiki, click on the Log In icon.
- Then, select the topmost option, "Log in with a Helsinki University account".
- Log in to the service using your University of Helsinki username in the format username@ad.helsinki.fi (e.g. Raimo Keski-Vääntö would be rkeskiva@ad.helsinki.fi).
-
You can log in to the service by using Haka- or eduGAIN-accounts.
Creating a wiki site
Use this tool to create a new wiki site. The creator of a wiki site acquires administrator rights to the site, which allow them to manage users’ and user groups’ rights to edit the wiki site and add content to it.
- Log in to the Wiki (see instructions above).
-
On the Wiki home page, select Create new Wiki space.
-
You are now on the page where you can create your new wiki site. Read the terms of use of the service (1), enter a name for your wiki site (2) and select Create space! (3).
-
You have now created your new wiki site. Select the Click here to go to it link to move to the root page of the wiki site you created.
- You can now start adding content to your site.
Creating new pages
The site’s root page forms the top level of the page hierarchy. All the pages on your wiki site are in a hierarchy, or in a page tree, under this root page. In addition to the root page, you can create pages at lower hierarchy levels under any other wiki page. The page at the upper level is referred to as the parent page, and the pages at the lower level are referred to as child pages.
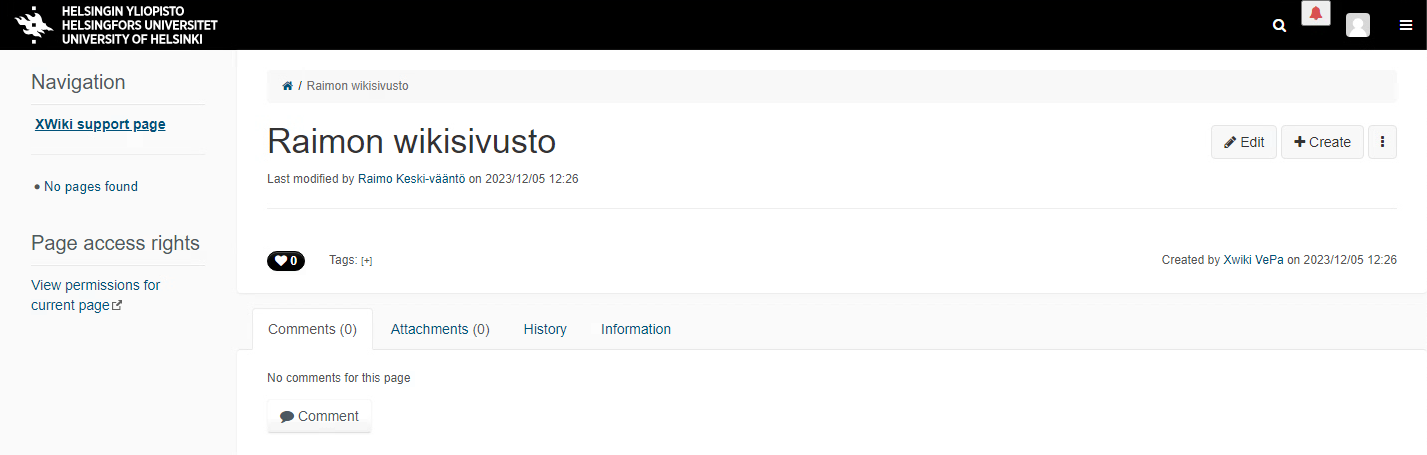
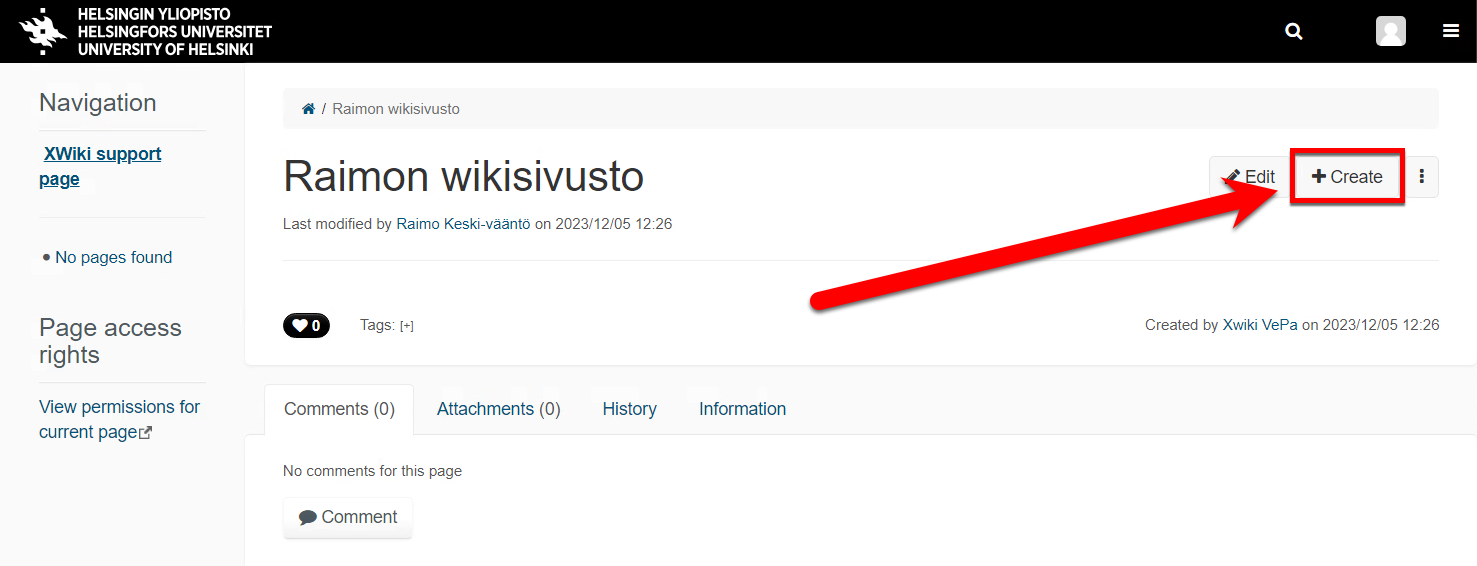
- To create a new page on your wiki site, select Create at the top right of any of the pages on your wiki site.
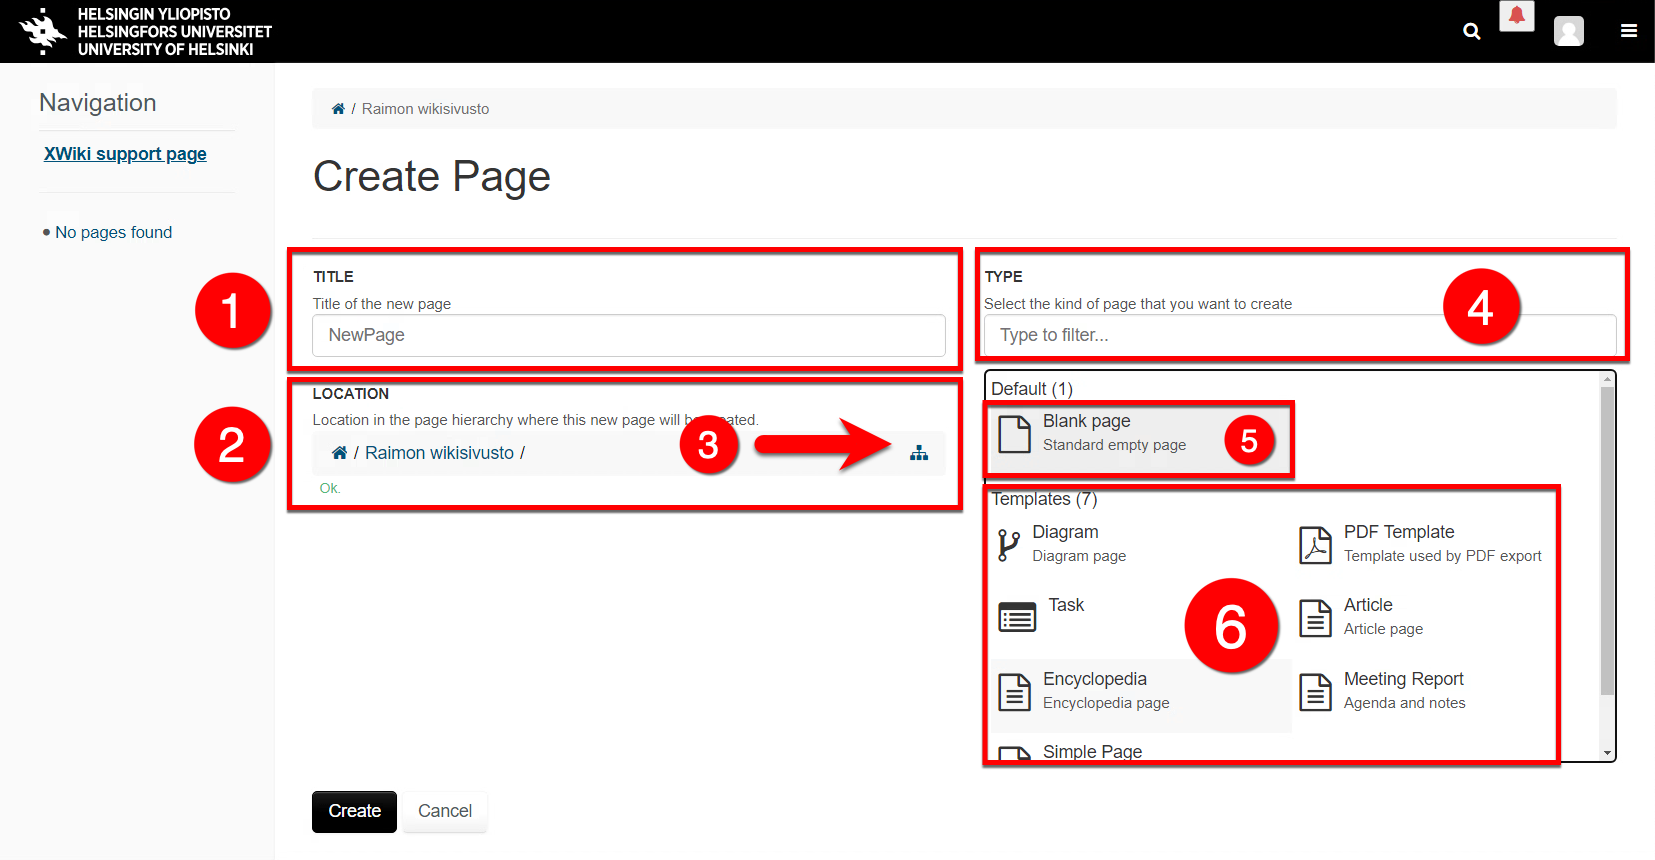
- Under Create Page, you can name your new page, specify the template used and define its position in the page tree.
- Enter the name of your new page under Title (1).
- Under Location (2), you can select the page tree location of your new page by clicking on the page tree icon (3). If you do not select a page, the new page will become a subpage of the page where you selected Create.
- Under Type (4), you can choose whether to create a blank page (5) or use a template (6).
- Your page will become the child page of the page you have selected as its parent page in the page tree.
Deleting a page and site
To delete a wiki page, go to the page you want to delete and, in the top right corner (1) under the three dots, select (2) Delete.

-
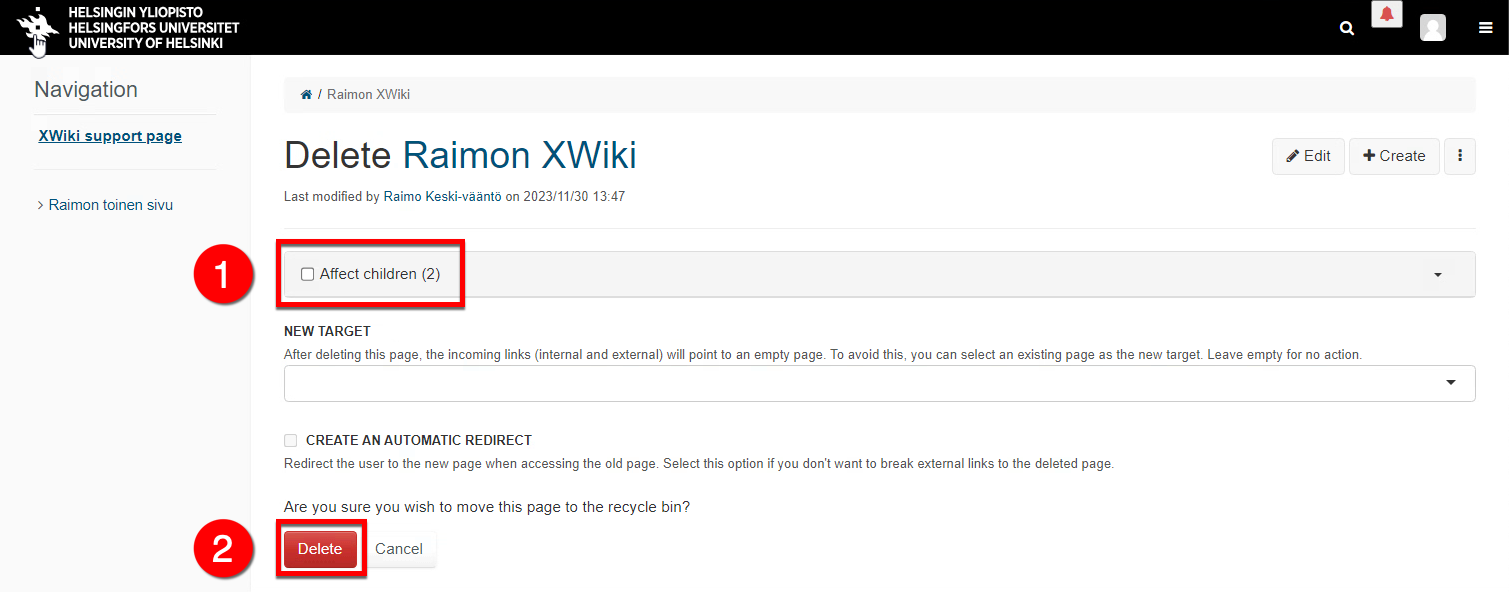
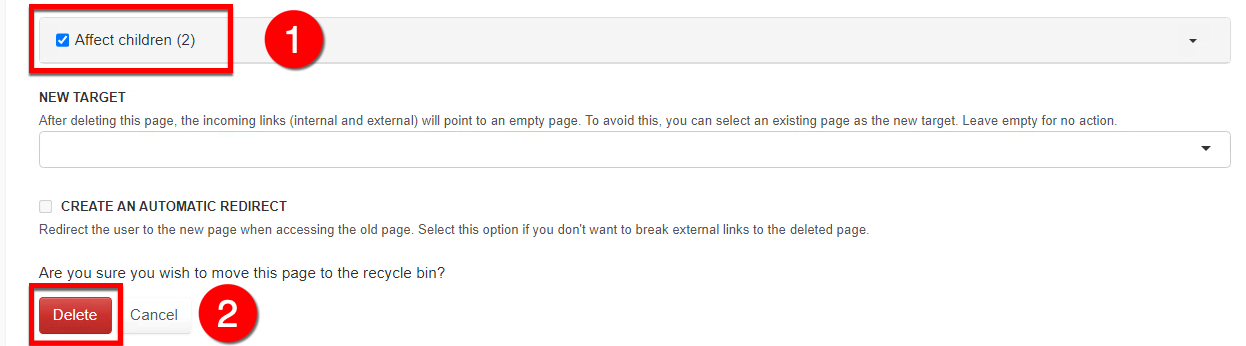
In the next window, you can select whether deleting a page will affect its child pages. Check the Affect children (1) checkbox if you also want to delete all the child pages under the selected page – if not, ensure that the box is blank, as shown in the image. Then, click (2) Delete to delete the page and any child pages you have selected.
-
If you want to delete an entire wiki site, go to the site’s root page and follow the instructions above to delete the page. Select Affect children and Delete to remove all the content on your wiki site.
Adding and editing page content
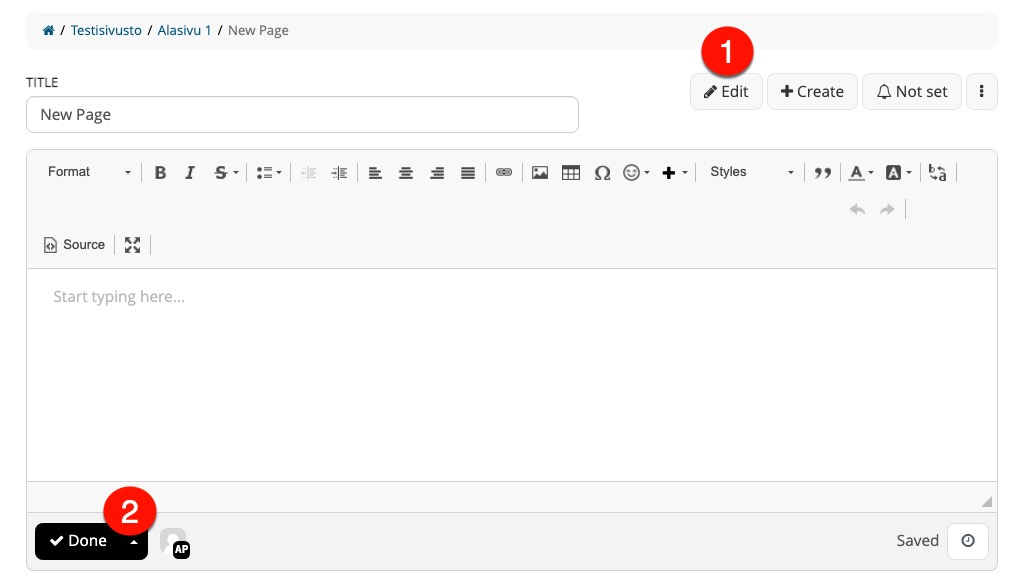
- By clicking the (1) Edit button in the top right corner, you can edit the open page.
- Click the (2) Done button to save your changes and view the page.
NB! The Edit button is visible to you if you are on a wiki site that you created or on a site or page to which you have editing rights. If you need permissions to edit a page or site, ask the person whose name is displayed in the Last Modified By section of the page.
-
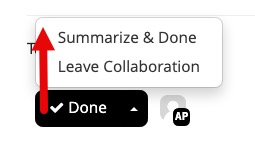
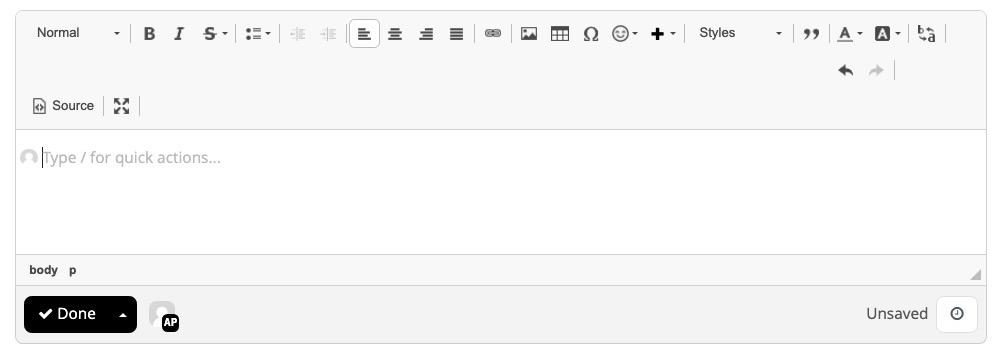
If you click the small arrow of the Done button, you can add metadata about the changes to the save by selecting Summarize & Done.
-
By selecting Leave Collaboration, the page is only locked for editing by the editor and others cannot make edits at the same time.
-
-
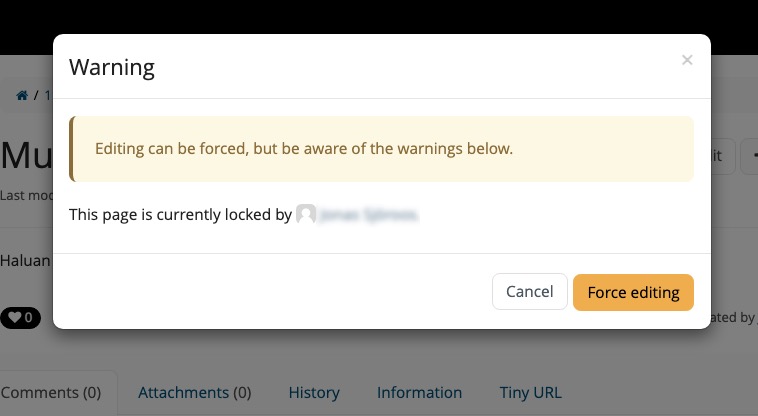
The file lock can be bypassed, but there will be a warning text: Editing can be forced, but be aware of the warnings below. This page is currently locked by X.
It is a good idea to check with the person who has locked the page whether they are currently editing it.
- Click Edit to edit the content of the page. An editing window will also be displayed. You can type and format text here as in any text editor by using the tools in the editing window.
The editing window varies depending on the page template used on the page. For example, the editing window of a diagram page is different from that of a blank page.
- In the drop-down menu (1), you can change the text style to either Normal or to one of the header levels 1–6 (Heading 1–6).
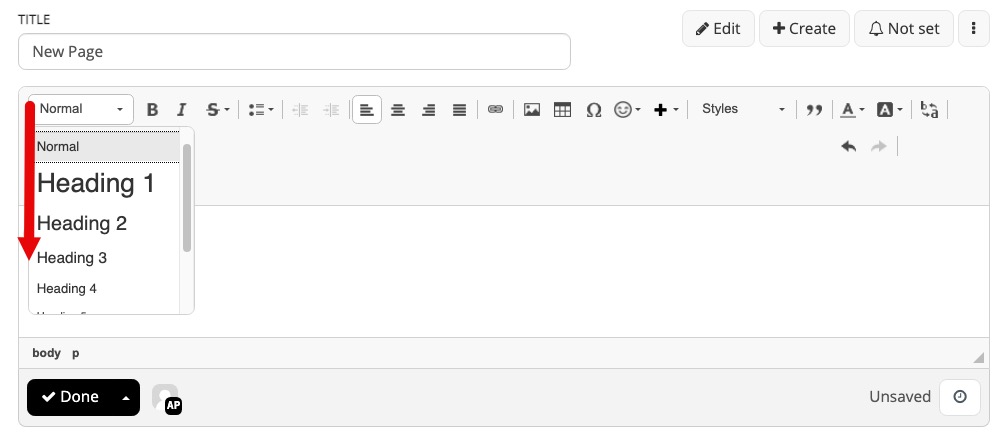
To automatically create a table of contents for a page using the table of contents macro, you must use header levels. You should always use them to structure the content of the page. In addition, accessibility requirements require the use of header levels 1–6.
Creating links on pages
You can create text links to both external pages and other pages on the wiki site.
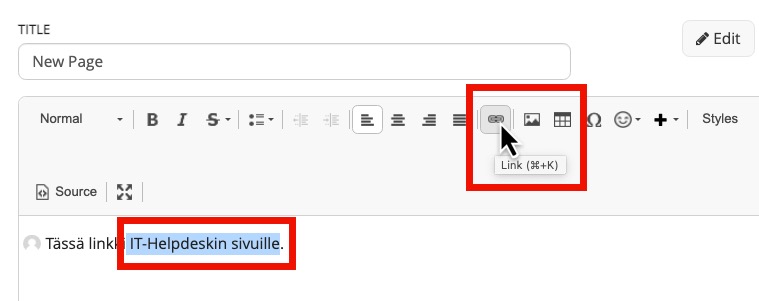
- Select the part of the text (1) that you want to function as a link. Then, click on the link tool (2).
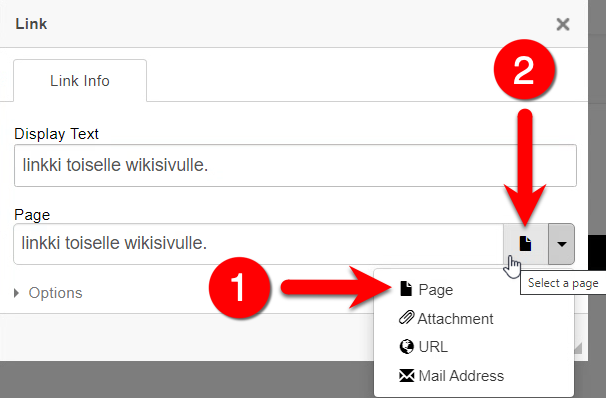
- In the drop-down menu, choose whether the text you select as a link refers to another wiki page (Page) (1), an attachment uploaded to the page (Attachment) (2) , an external web page (URL) (3) or an e-mail address (Mail Address) (4).

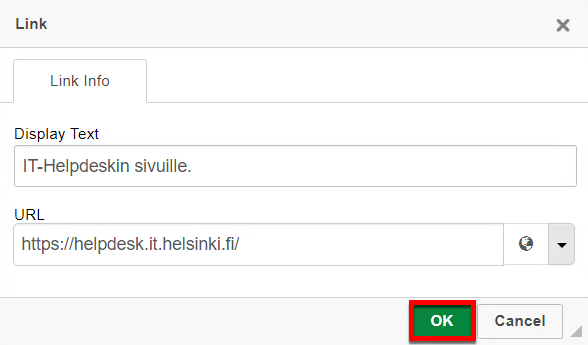
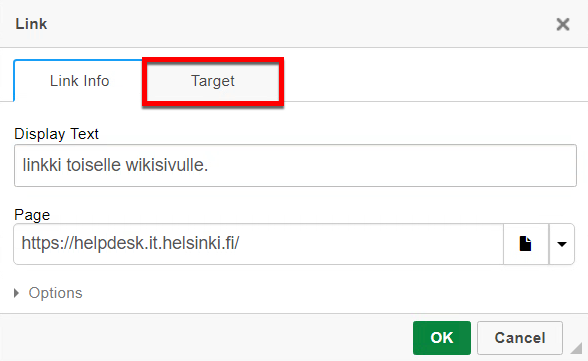
- To create a link to external pages, select URL and, in the address field, enter the address of the page to which you want the text to be linked.
- Select OK to create a link.
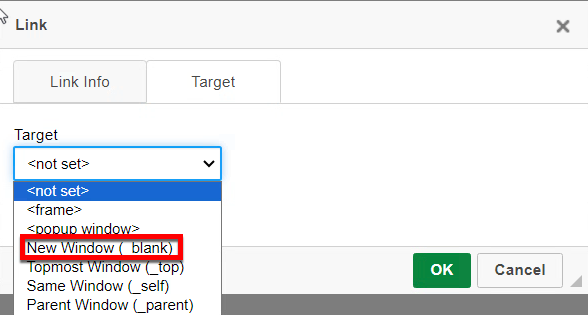
- If you want the link to open in a new tab for the user, open the Target tab in the link window before creating the link.
- Open the Target drop-down menu and select New Window (_blank).
- When creating a link to another wiki page, select Page (1) and then click Select a page (2).
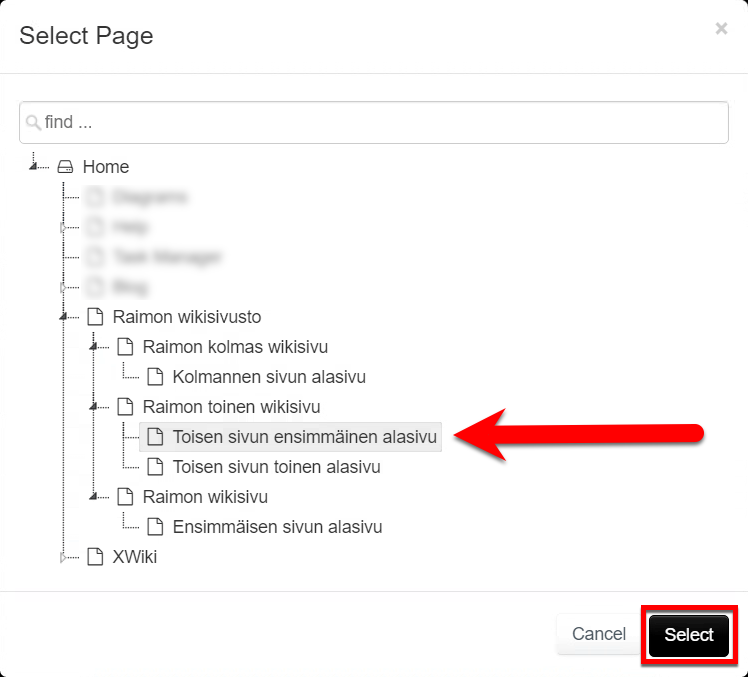
- In the page tree, find and select the page to which you want the link to point.
- Choose Select and then click OK on the link page to create a link.
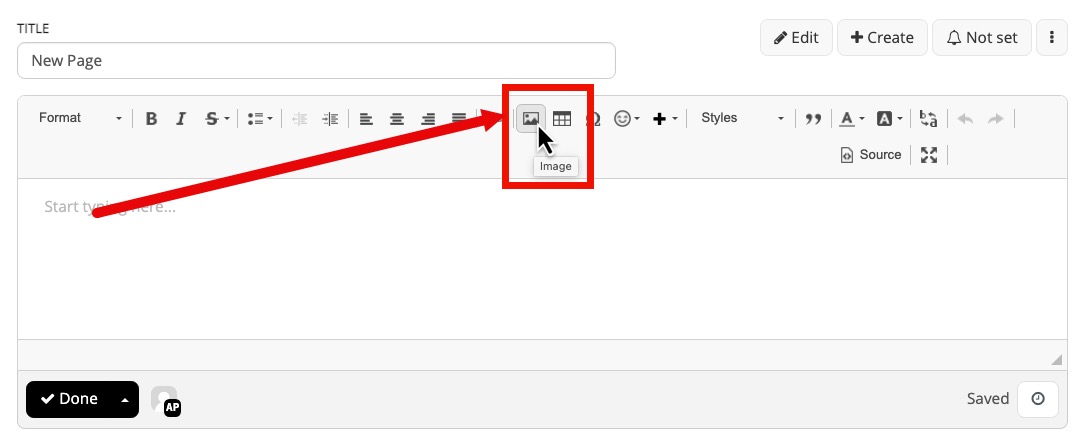
Adding an image to a wiki page
- You can add an image to the page using the Image button in the editing window.
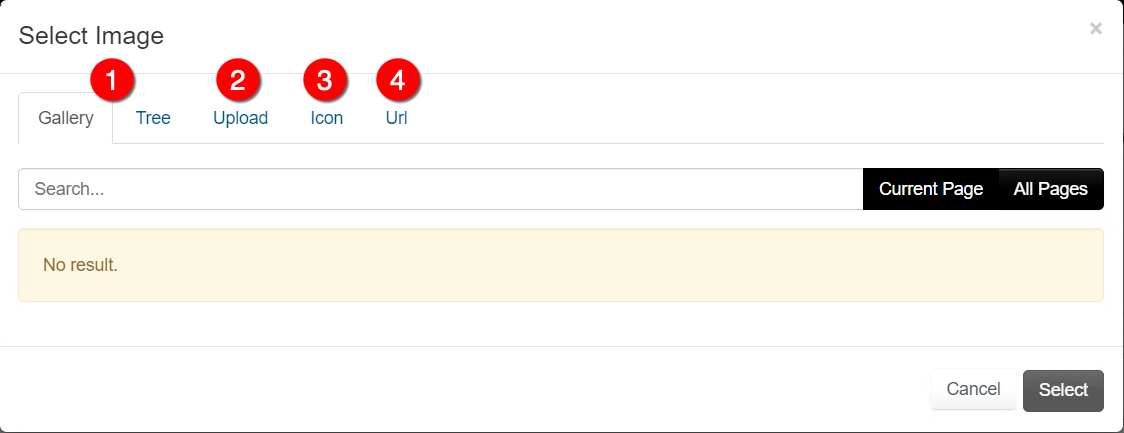
- You can add images already on the wiki site (Gallery and Tree) (1), by uploading them from your computer (Upload) (2), from the icon library (Icon) (3) or by linking to an image elsewhere on the web (Url) (4).
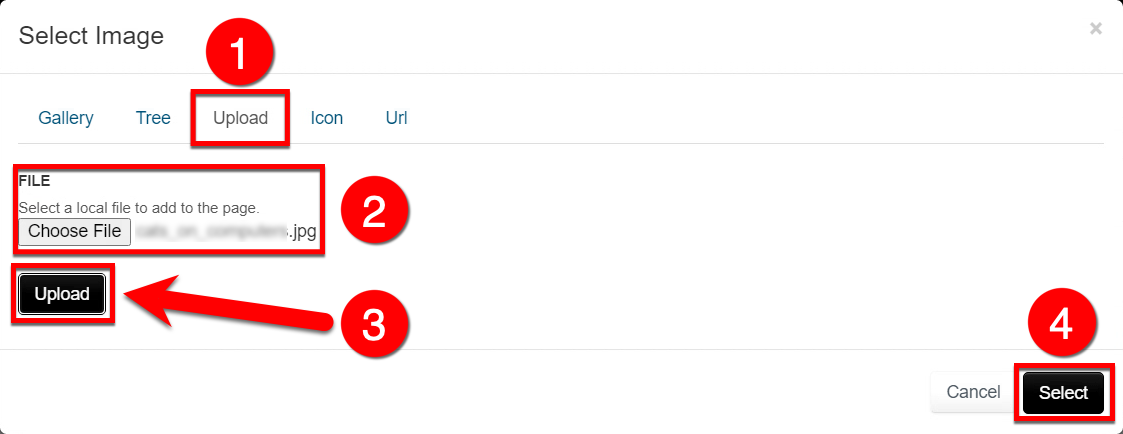
- If you want to upload an image from your own computer, select (1) Upload. Then, select (2) Choose File to select an image on your computer.
- After this, select the other (3) Upload button to upload the image to the Wiki and click (4) Select.
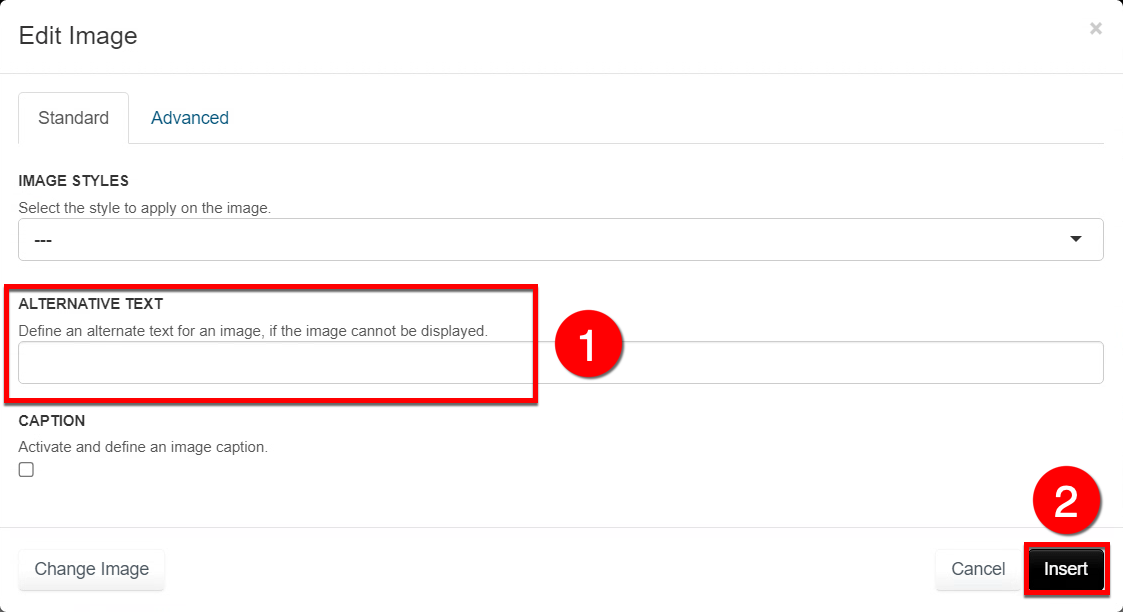
- If you want to add an alternative text that is important for accessibility, you can do so in the (1) Alternative text field.
- Add an image by clicking the (2) Insert button.
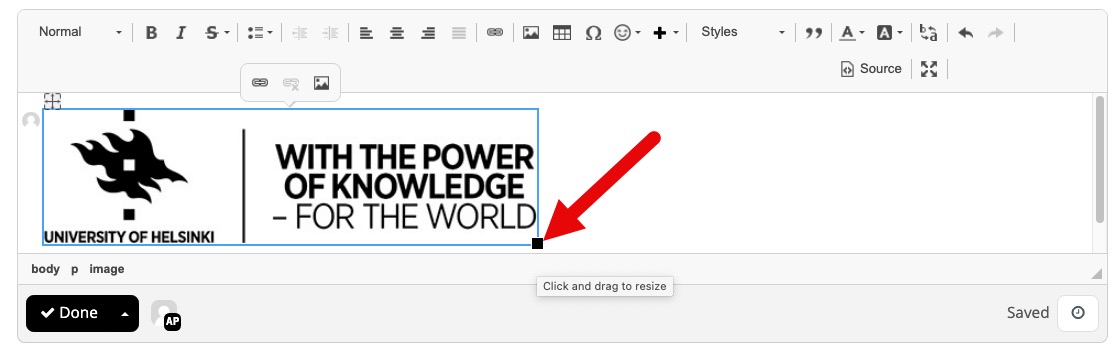
- You can adjust the size of the image by dragging it in the editor by using Click and drag to resize.
Assigning and removing permissions to wiki spaces and wiki pages
You can adjust the read, edit and administration permissions on your Wiki site either for the entire site or separately for its subpages.
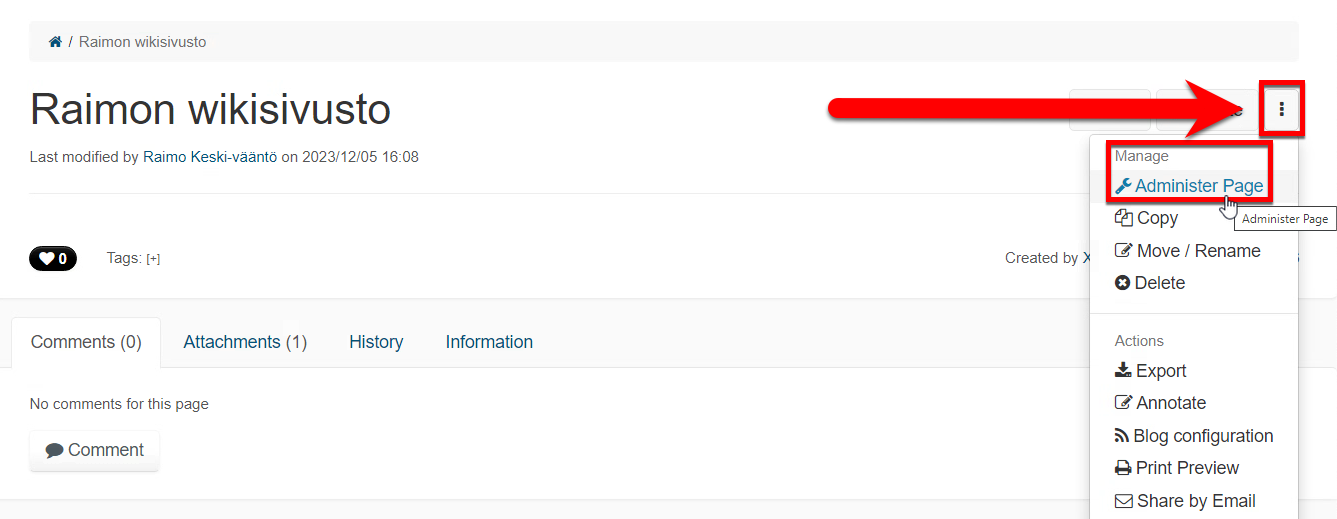
- To assign permissions to your site, select Manage > Administer Page in the More Actions (three dots) menu.
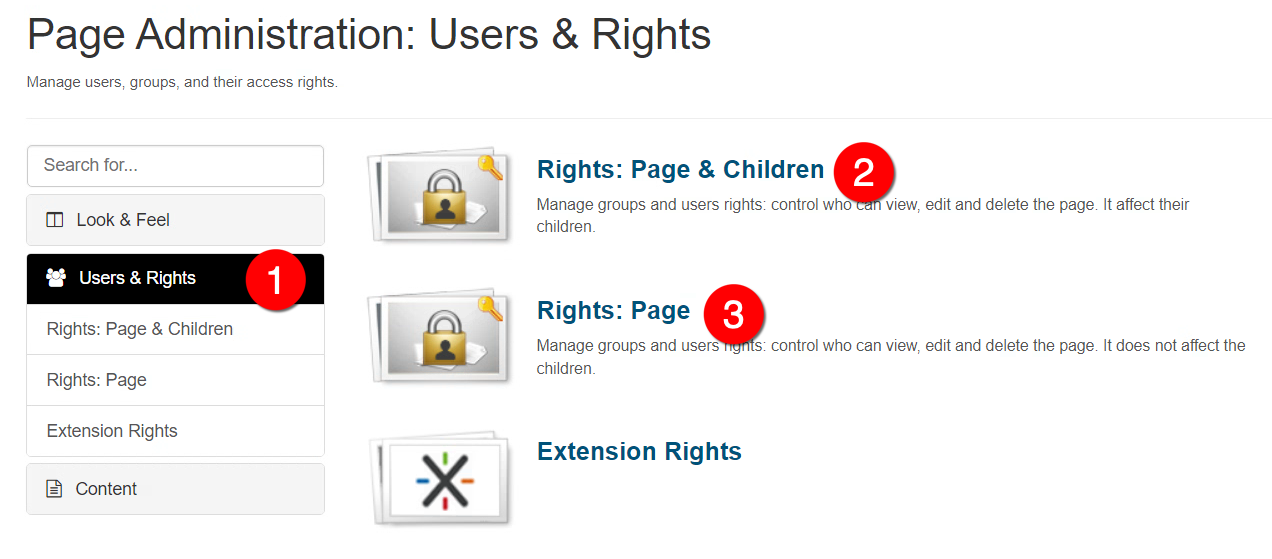
- Then, select (1) Users & Rights in the menu on the left.
- (2) Rights: Page & Children is used to assign access and edit permissions for the page in question and its subpage.
- To adjust permissions for your entire Wiki site, go to the site’s root page and select Rights: Page & Children. To adjust access and edit permissions for only one page, while on the page, select (3) Rights: Page.
- You can adjust access and editing rights for different groups by selecting (1) Groups, or for users, by selecting (2) Users.
- By using the (3) search filter, you can search for the desired user or group.
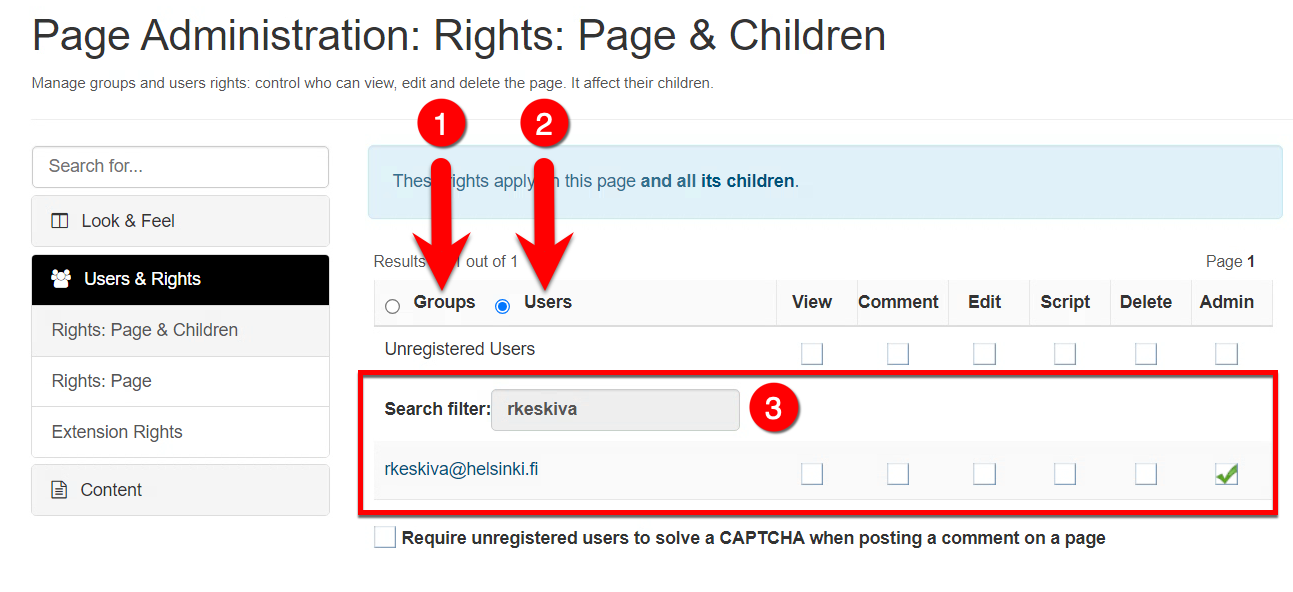
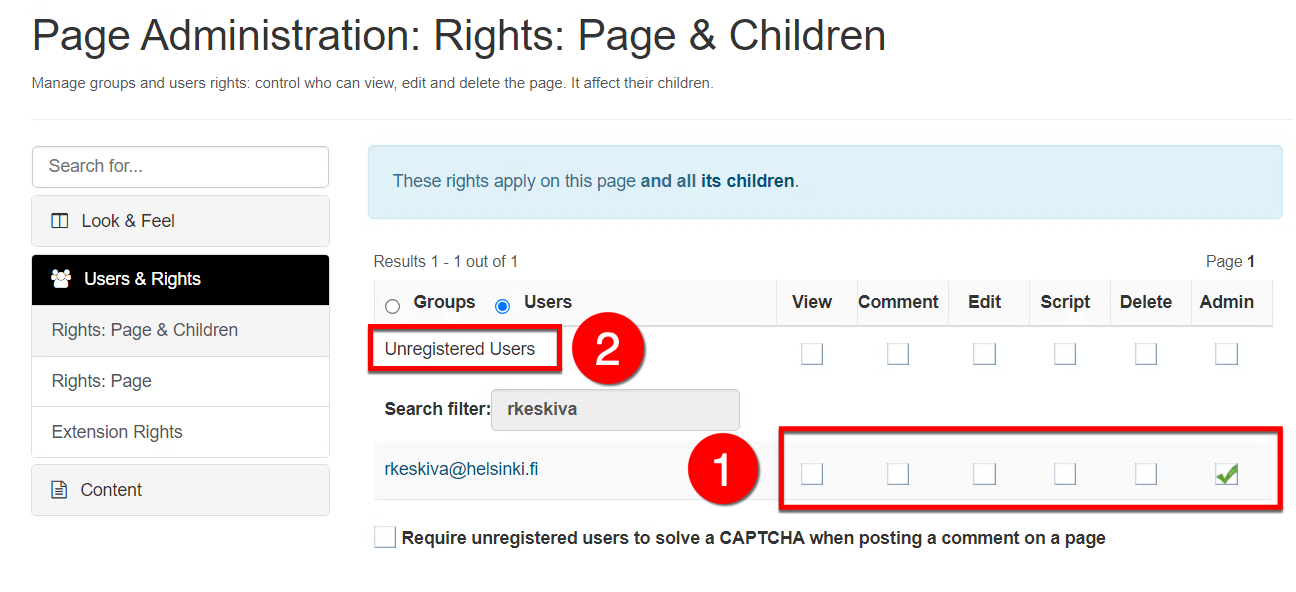
- When you find the group or user ID you are searching for, you can adjust (1) the user’s permissions to view, comment, edit, add script, delete or administer (Admin) a specific page or your entire Wiki site.
- Under (2) Unregistered Users, you can adjust your site’s viewing and editing permissions for persons not registered on the Wiki.
- Ensure you have not checked any of the checkboxes in this section unless you specifically want unregistered users to have read or edit access to your wiki.
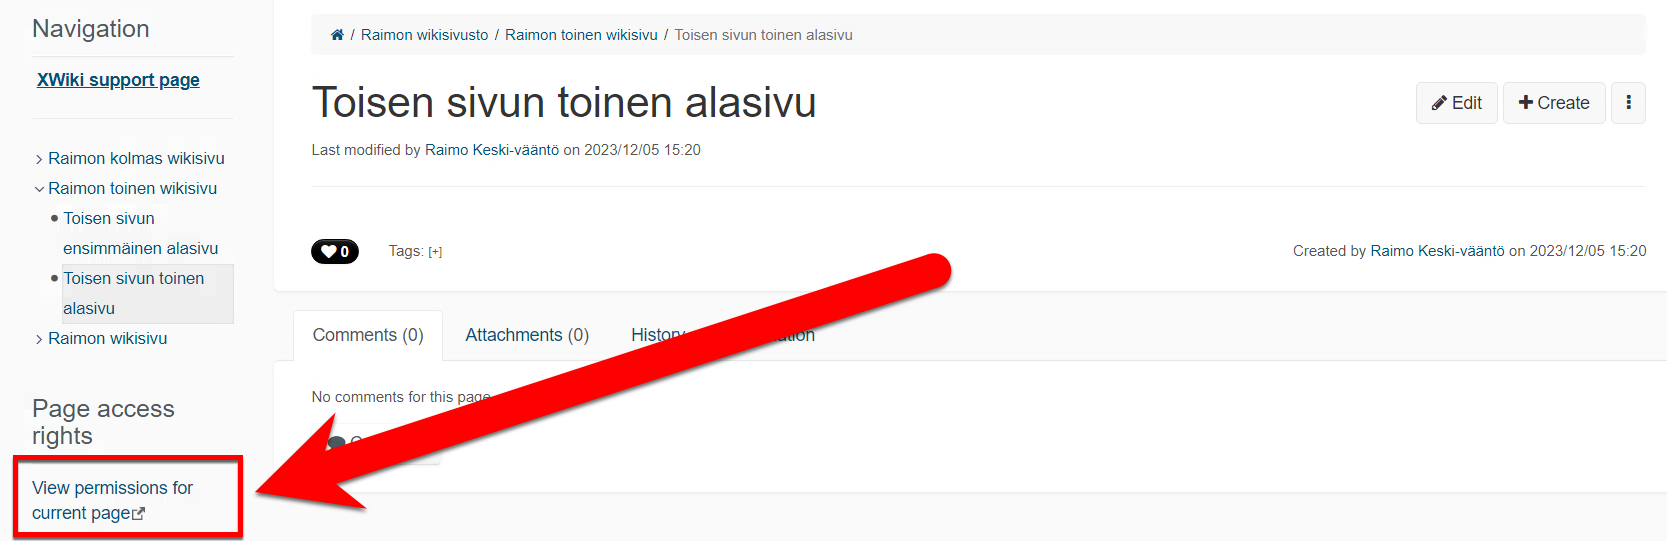
- You can check the access and editing permissions of any page by going to this page and selecting View permissions for current page under Page access rights in the lower left corner of the page. Here, you can see both the editing permissions assigned for the page in question and the permissions inherited based on the page hierarchy.
Creating and managing local usernames
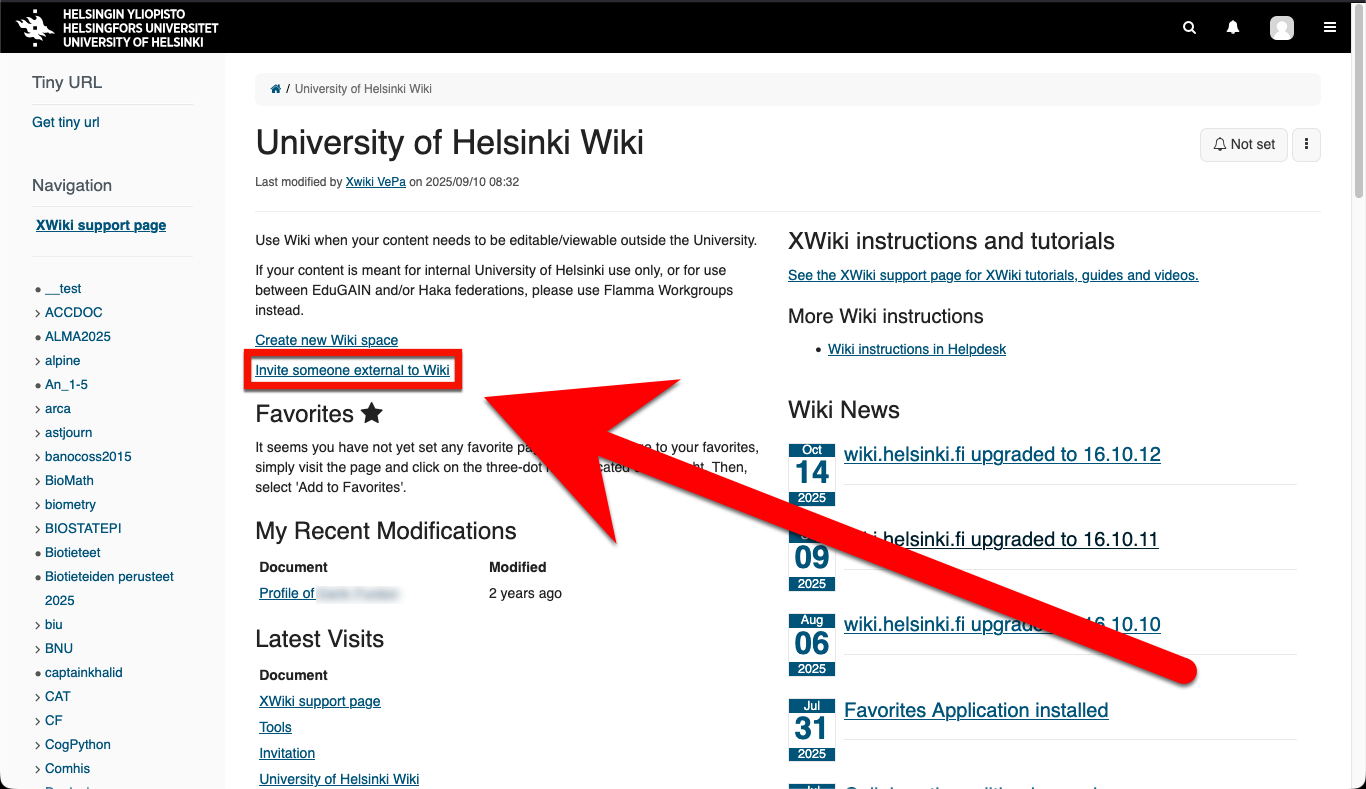
Local wiki usernames are intended for situations where wiki content or pages are shared with users who do not have a University username. You can invite an external user by using the "Invite someone external to Wiki" -link on the front page for the new user. After registering, they provide the username information to the site owner. The person can then be granted the desired permissions for the wiki site in question.
Adding local users
- Invite a local user by choosing ”Invite someone external to Wiki” on the starting page..
- You can access the same page through the link https://wiki.helsinki.fi/xwiki/bin/view/Invitation/
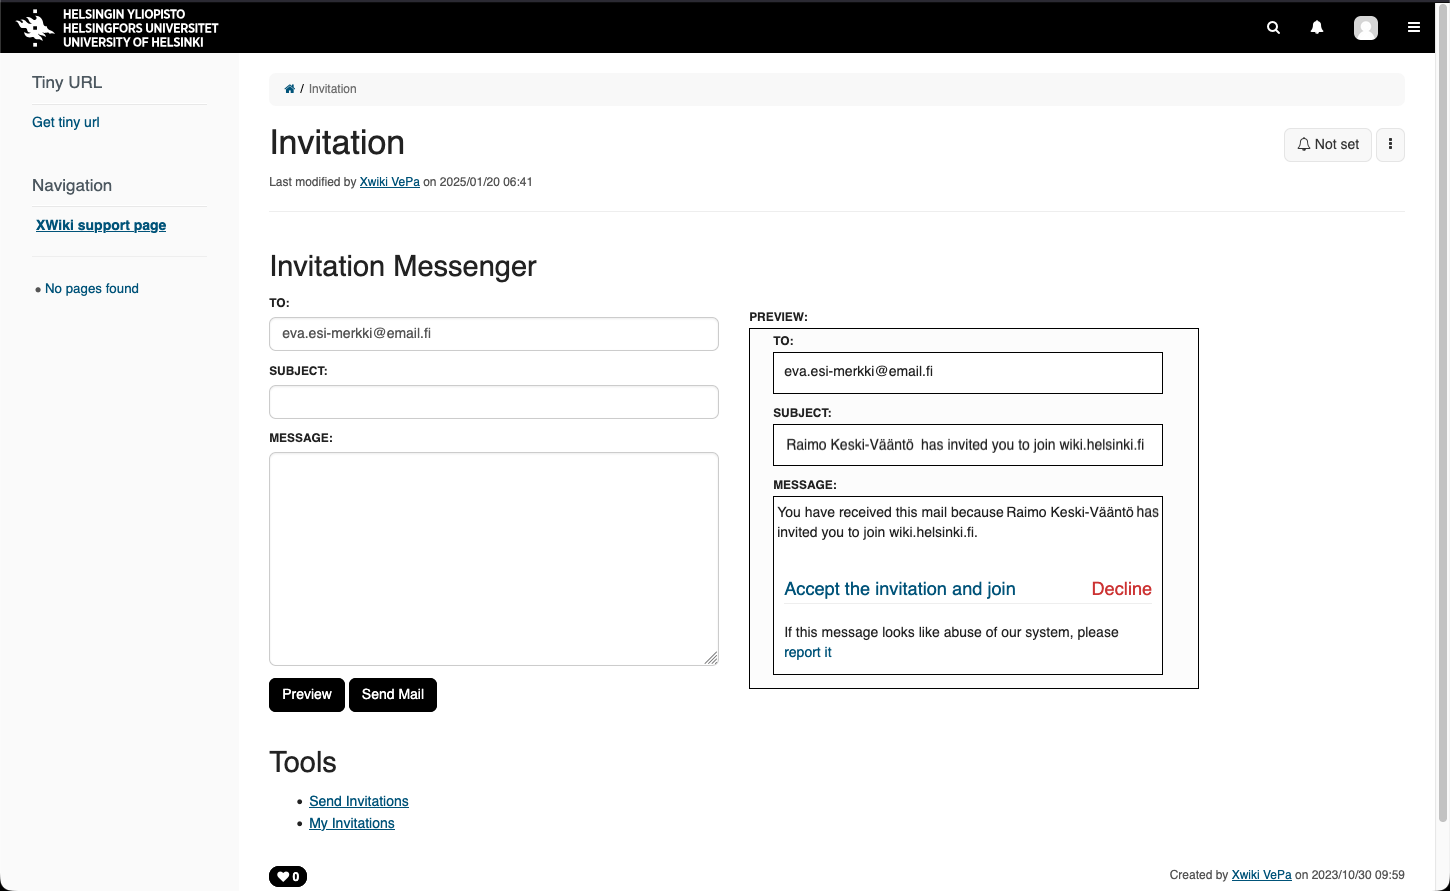
- On the invitation page, enter the e-mail address of the person you want to invite in the "TO:" field and the alternative subject field of the invitation email in the "SUBJECT:" field and the alternative invitation message in the "MESSAGE:" field. If you leave these fields blank, the invitation message will be filled in the default form. Press "Preview" to update the text you have formatted in the preview field and"Send Mail" to send the invitation.
- Under "My Invitations" you can view the invitations you have sent.
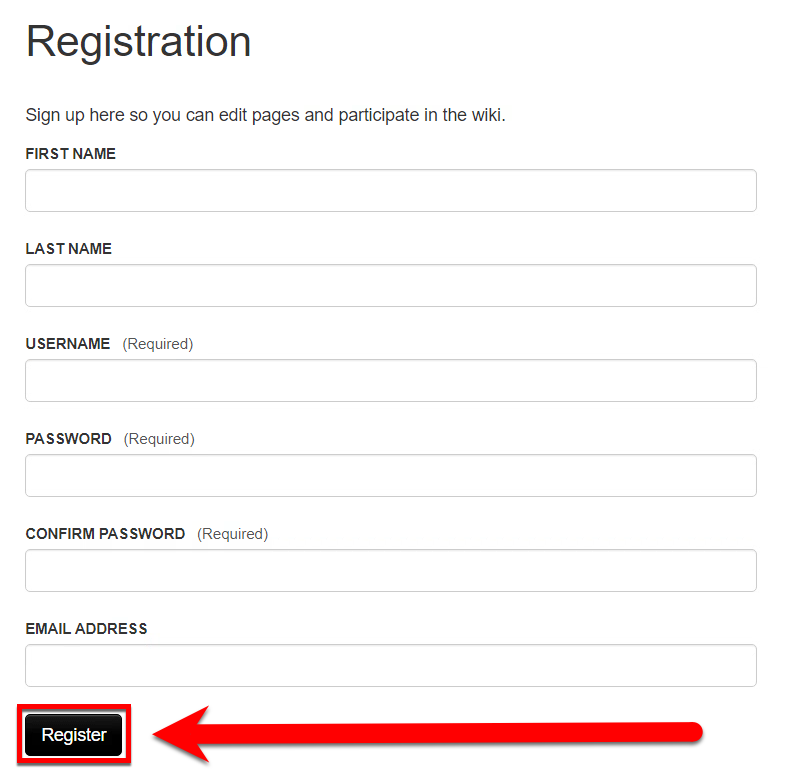
- The user fills in the registration page that appears with his details and finally clicks on"Register". They will then be able to log in normally with the username of their choice and can also be granted access to hidden wiki pages.
Local users can be found in the search by their username and not by their email address. Please ask new users to be careful that they send you the username they registered and not the email address they used to register.
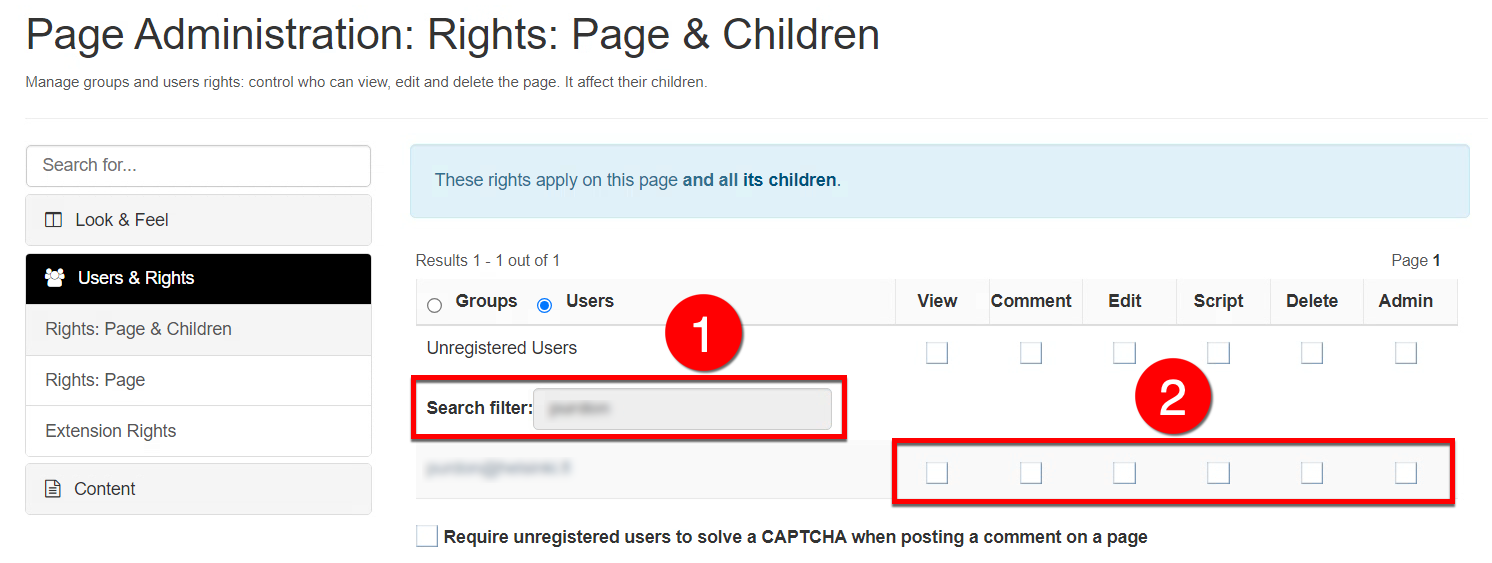
- Once you have received the username used by the new external user to register, add the user to your wiki site with the permissions you want, following the instructions in the section on Sharing and removing wiki space and page permissions in this Wiki Guide. When adding permissions, (1) enter the username sent to you by the new user in the"Search filter" field and (2) select the permissions you want for the user.
Local usernames in migrations
Local Confluence wiki users and their permissions are migrated to the wiki. However, user passwords are not migrated, so users must enter a new password via the "Forgot your password?" function when they first log in to the Wiki. This function sends an email with a link to change the password to the local user's email specified in the Confluence Wiki.
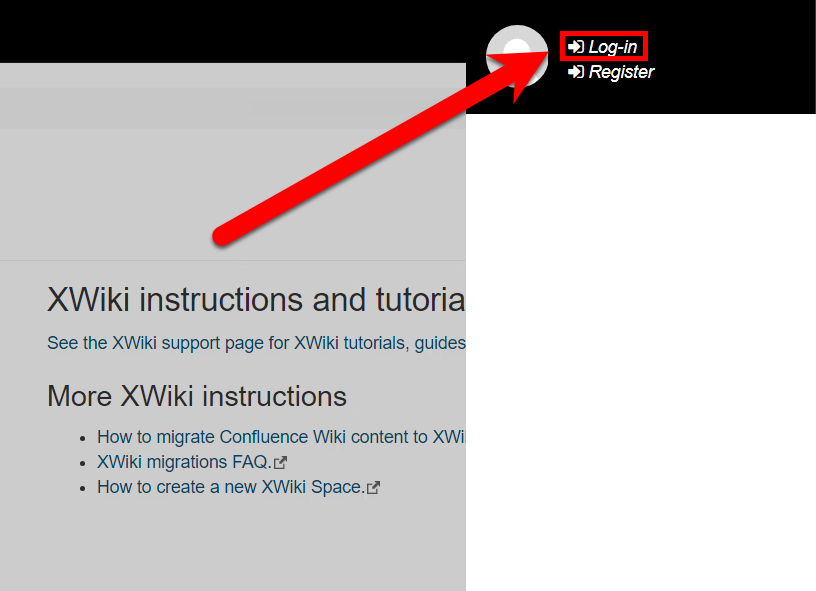
- To log in with a local username migrated from the Confluence wiki, click the Drawer icon marked with three horizontal lines on the menu bar (hamburger menu) and then select Log-in from the login menu that appears.
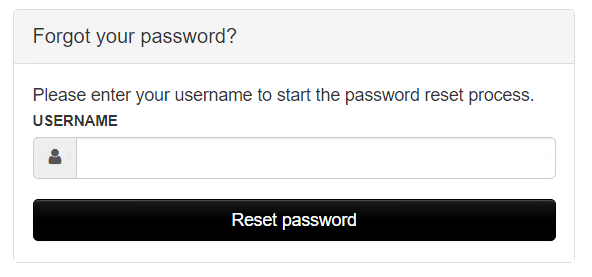
- Under Local login, select Forgot your password?.
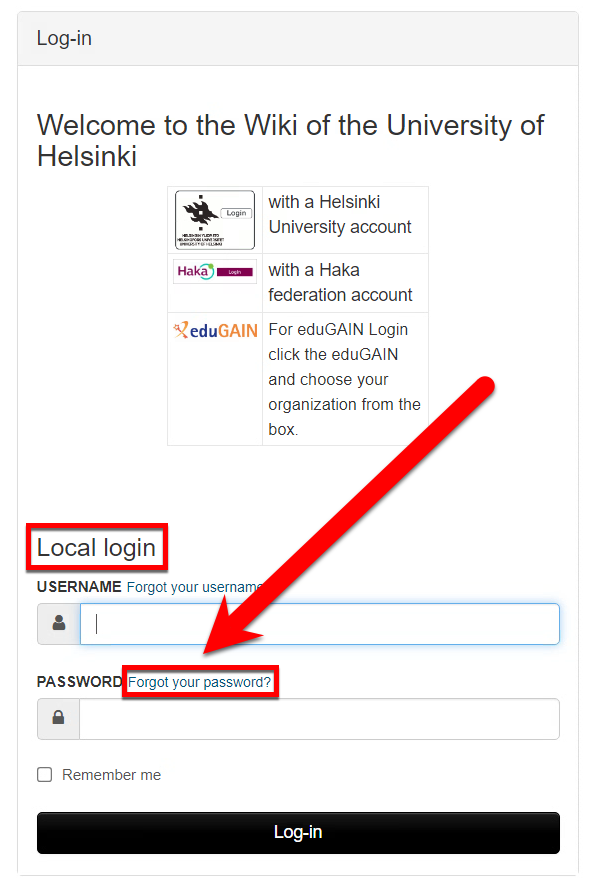
- Enter your Confluence wiki username in USERNAME and click Reset password. However, please note that:
Favorites -list
You can add wiki pages to your favorites list. By clicking on the More actions button (three scrolls on top of each other) of the page you want to add, you will open a menu from which you can select Add to favorites.
- Your Favorites -list will appear on the Wiki home page when you are logged in.
- You can edit the list in your profile (link is on the home page).

Table of contents
A table of contents is the easiest way to hierarchically organise the content of a wiki page under different header levels.
You can automatically create a table of contents for a page by using the XWiki Table of Contents macro.
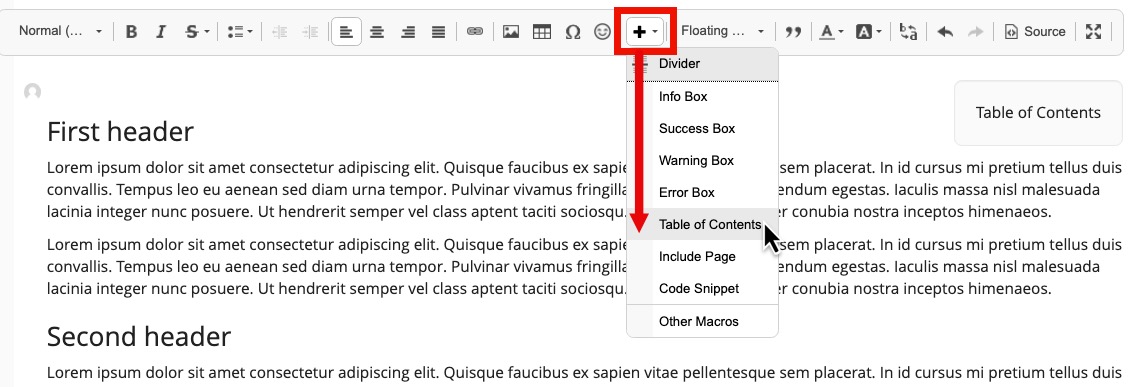
- On your page, in edit mode, move to the spot where you want to place the table of contents. Then, under the Insert tool (1), select Table of Contents (2).
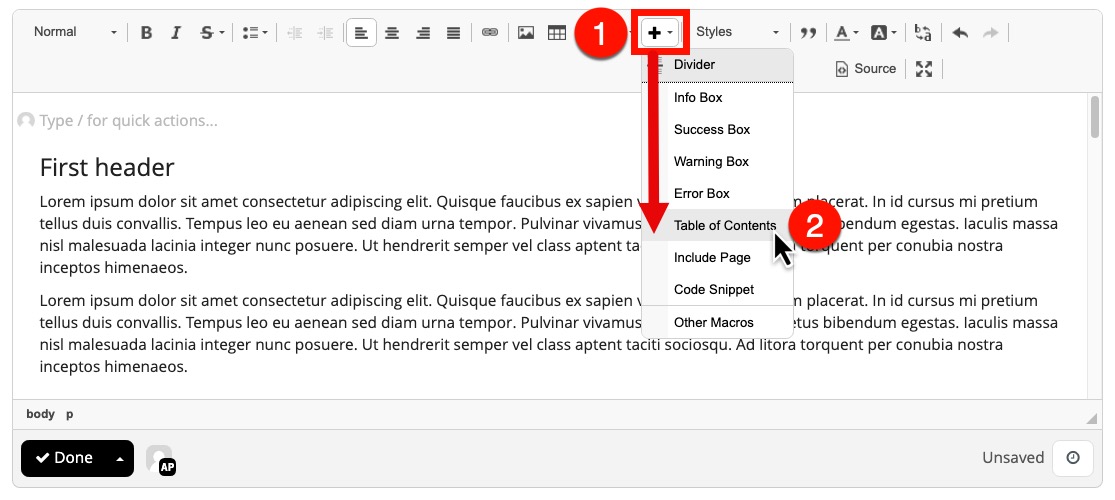
- The Table of Contents macro will now create a table of contents in the spot you selected, based on the different header levels used on your page.
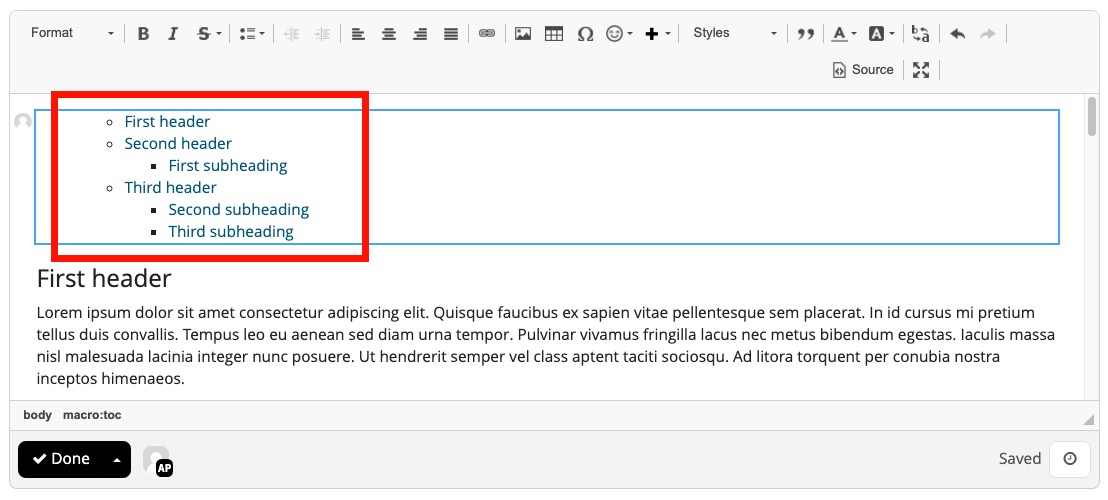
Table of contents in a box
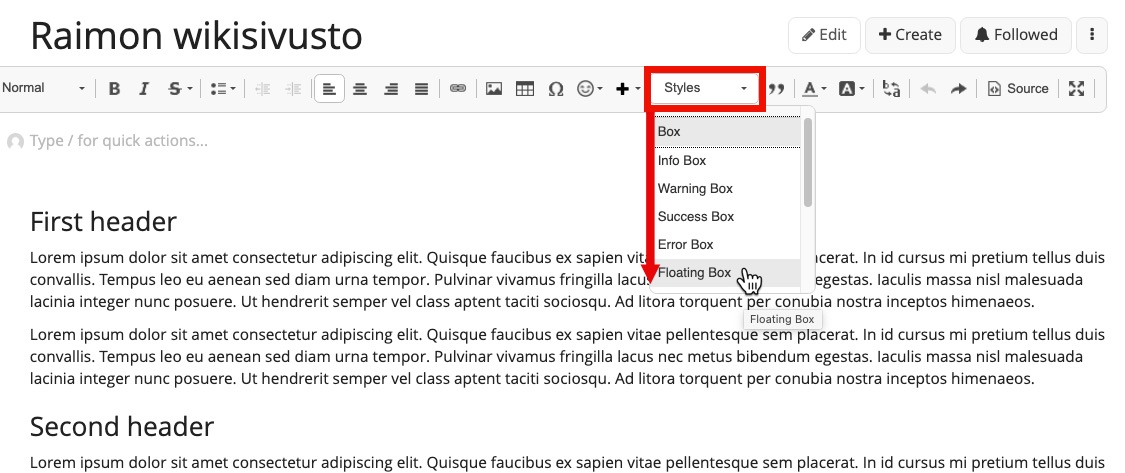
- If you want to create a table of contents in a separate box at the beginning and on the right side of the page, first add a blank unformatted row at the beginning of the page and then, under the Styles menu (1), select Floating Box (2).
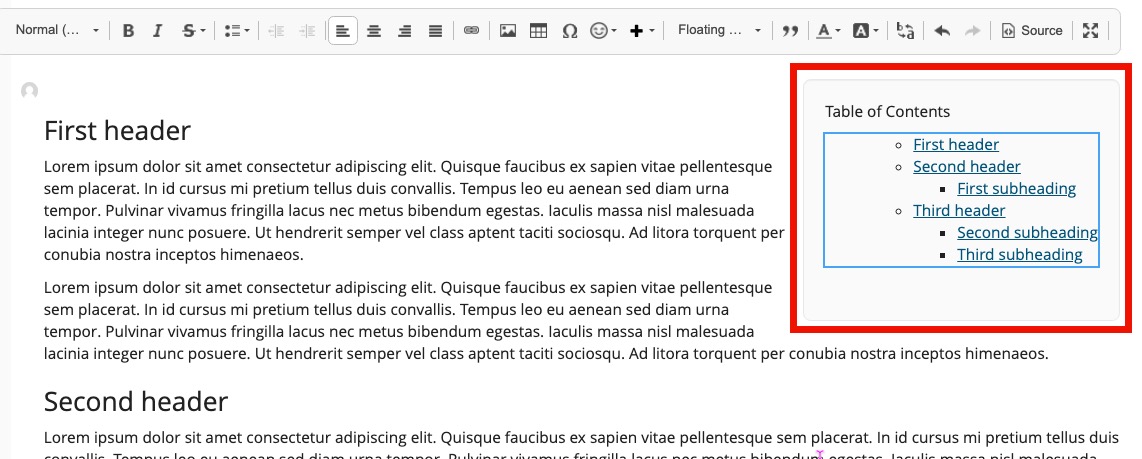
- In the grey box that appears on the page, enter a title for the table of contents, such as “Table of contents” (1). In this example, the Bold tool (2) was used on the title.
- After this, ensure that the cursor is still active in the box and then select the Table of Contents macro under the Insert tool.
- The table of contents macro now inserts a table of contents in the box you created.
Page tree
Using the Page Tree or Document Tree macro is the easiest way to create a table of contents for the entire content of your wiki. This is also the easiest way to create a space-specific search for your wiki site on the Wiki.
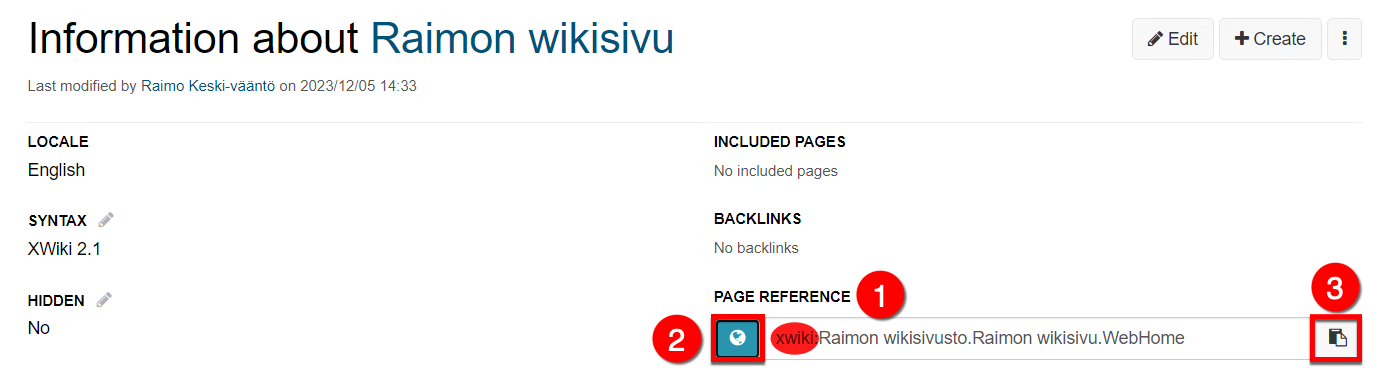
- To find the address of your wiki site’s root page, click on the three dots (More Actions menu) (1) on the root page of your wiki site and select Information (2) in the drop-down menu that opens.
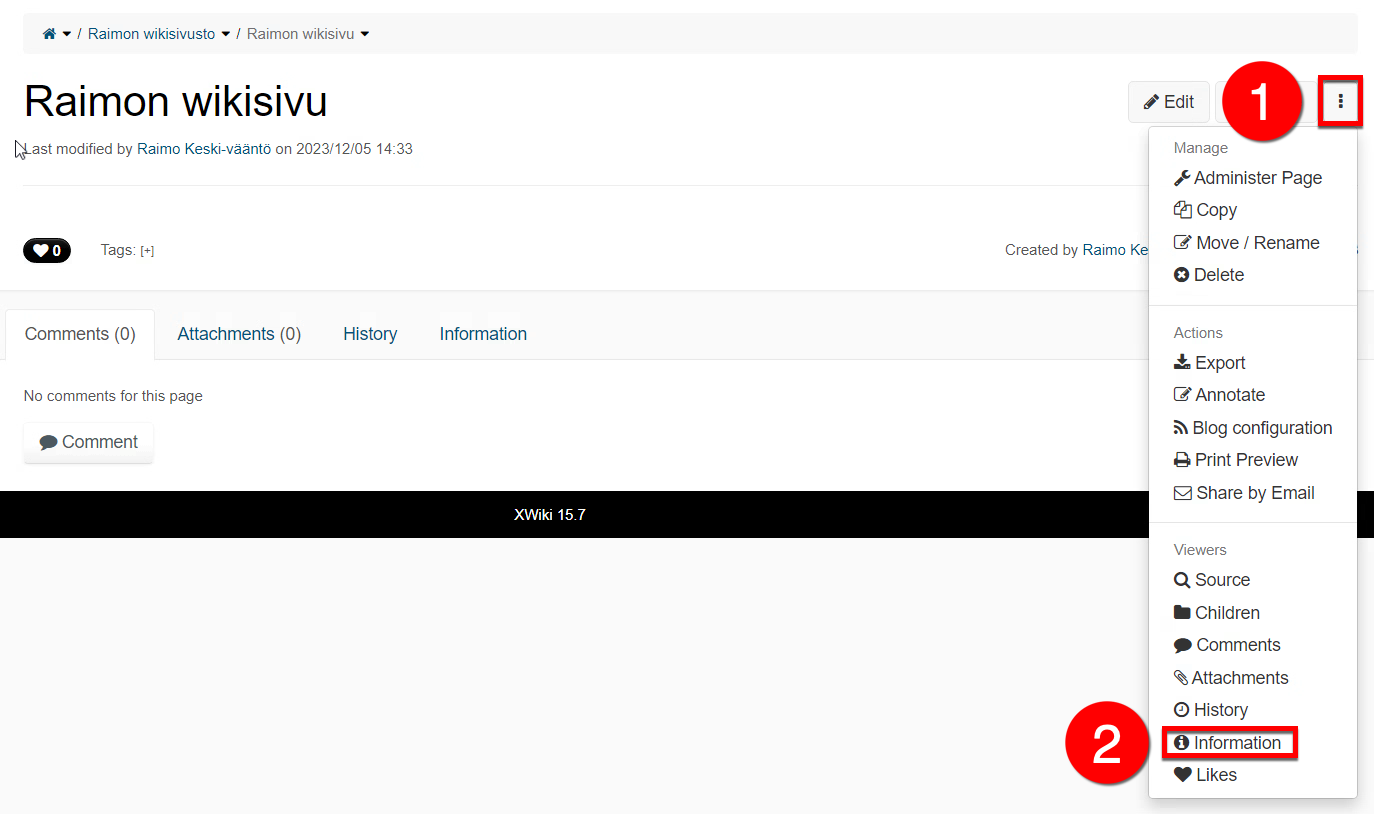
- An Information page about the wiki page will now be displayed.
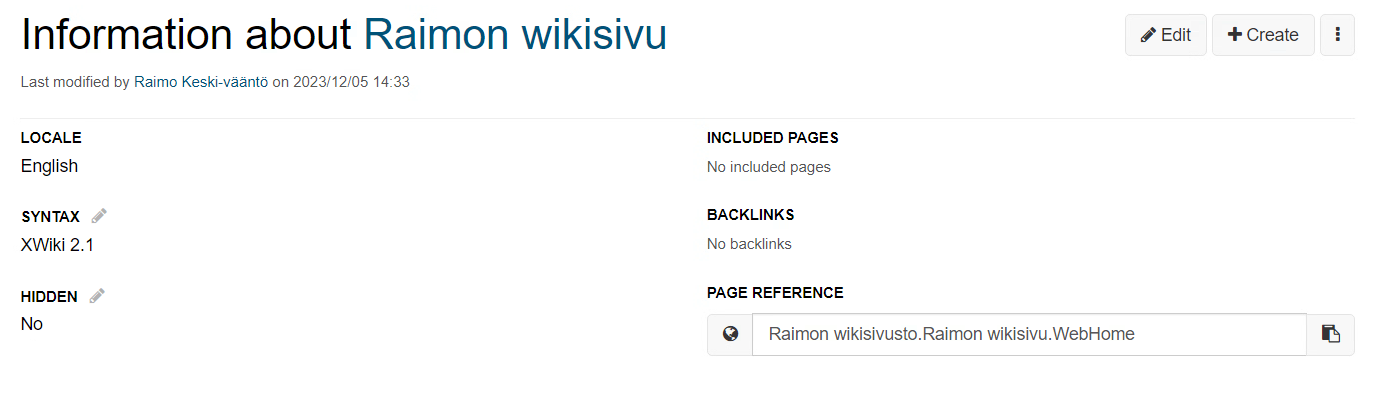
- Under (1) Page Reference, select (2) Display reference for all wikis. The page address should now begin with the “xwiki:” prefix.
- Select (3) Copy the reference to the clipboard to copy your page’s wiki address to the clipboard.
- Return to your root page and select Edit at the top to return to edit mode.
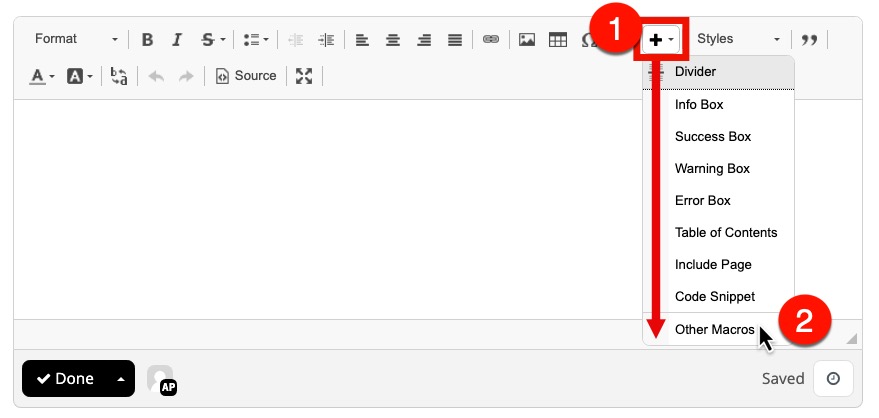
- On your page, select where you want the page tree macro to create an image of your site’s page tree hierarchy and then select Other Macros (2) under the Insert tool (1).
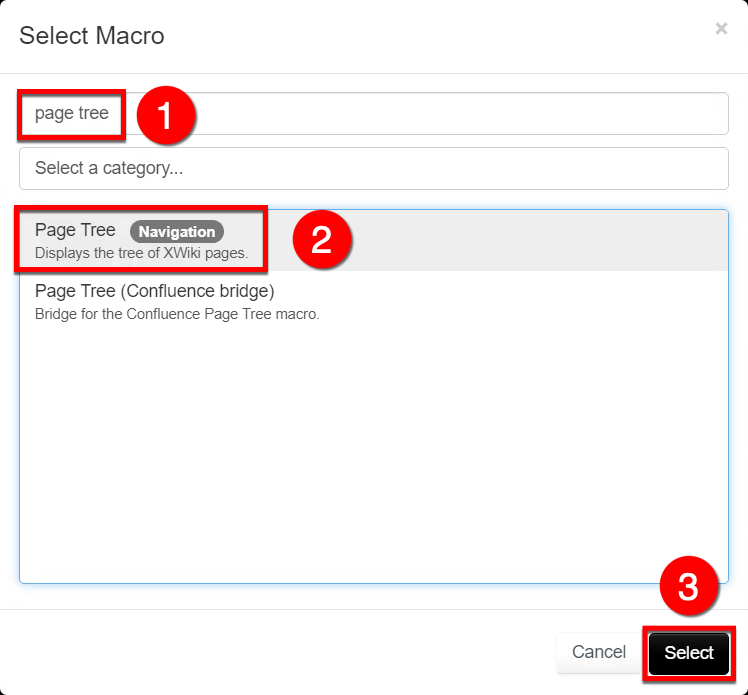
- In the macro search box, type (1) page tree, select it from the macro list (2) and click (3) Select to continue.
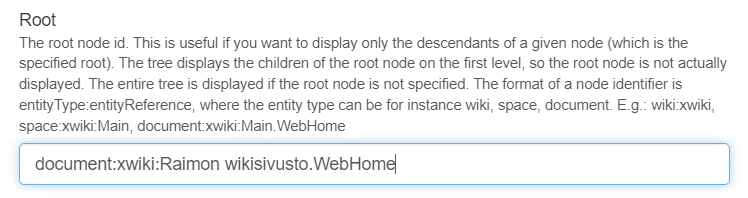
- In the Edit macro window, select (1) More and scroll down until you find (2) Root.

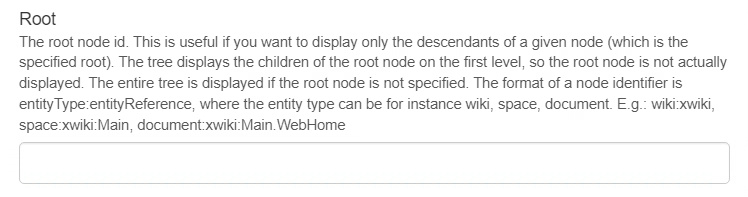
- The Root parameter determines the page that the page tree macro uses as the root when creating the page tree. At the beginning of the field, type “document:” and then, directly after it, paste the root page address you just copied to your clipboard by right-clicking (or pressing ctrl+v).
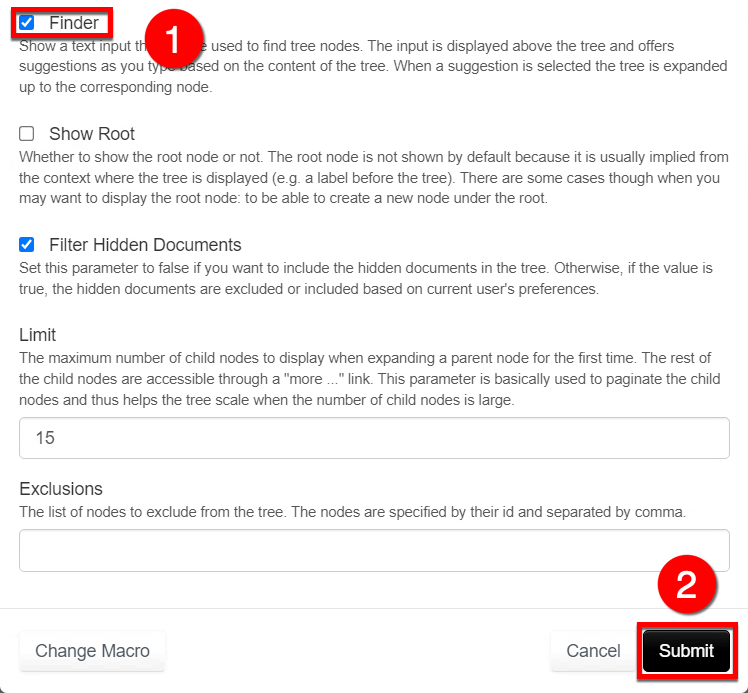
- Scroll down further in the Edit macro window and select (1) Finder if you want the page tree macro to create a search field for your wiki site.
- Then, select (2) Submit to create a page tree for your page.
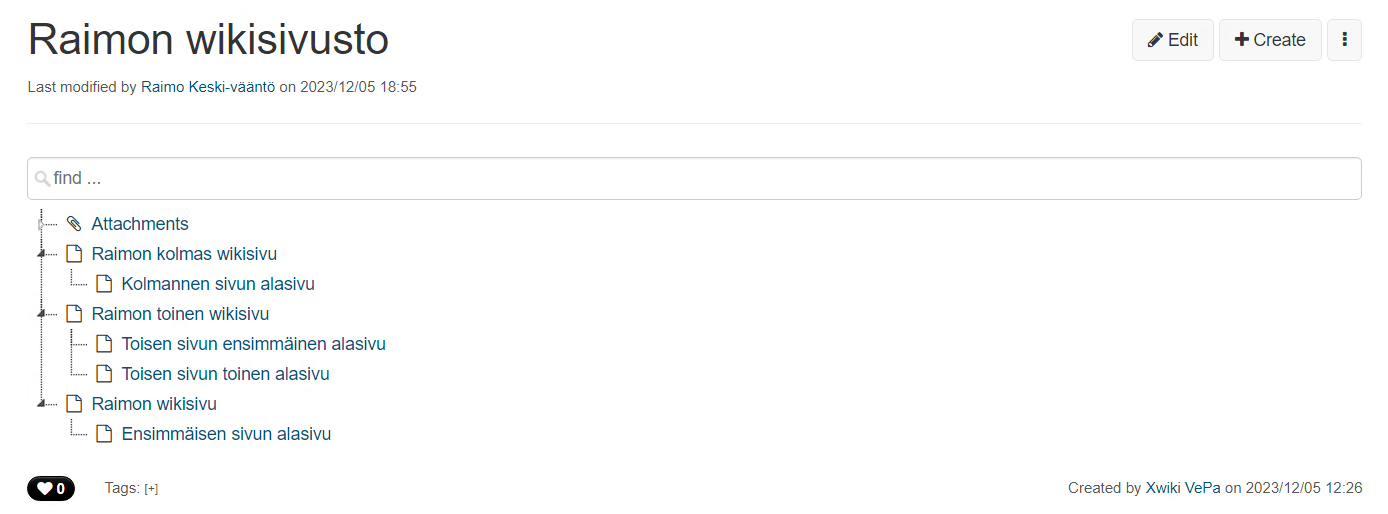
- The page tree macro will now create a page tree in the specified location on your wiki page.
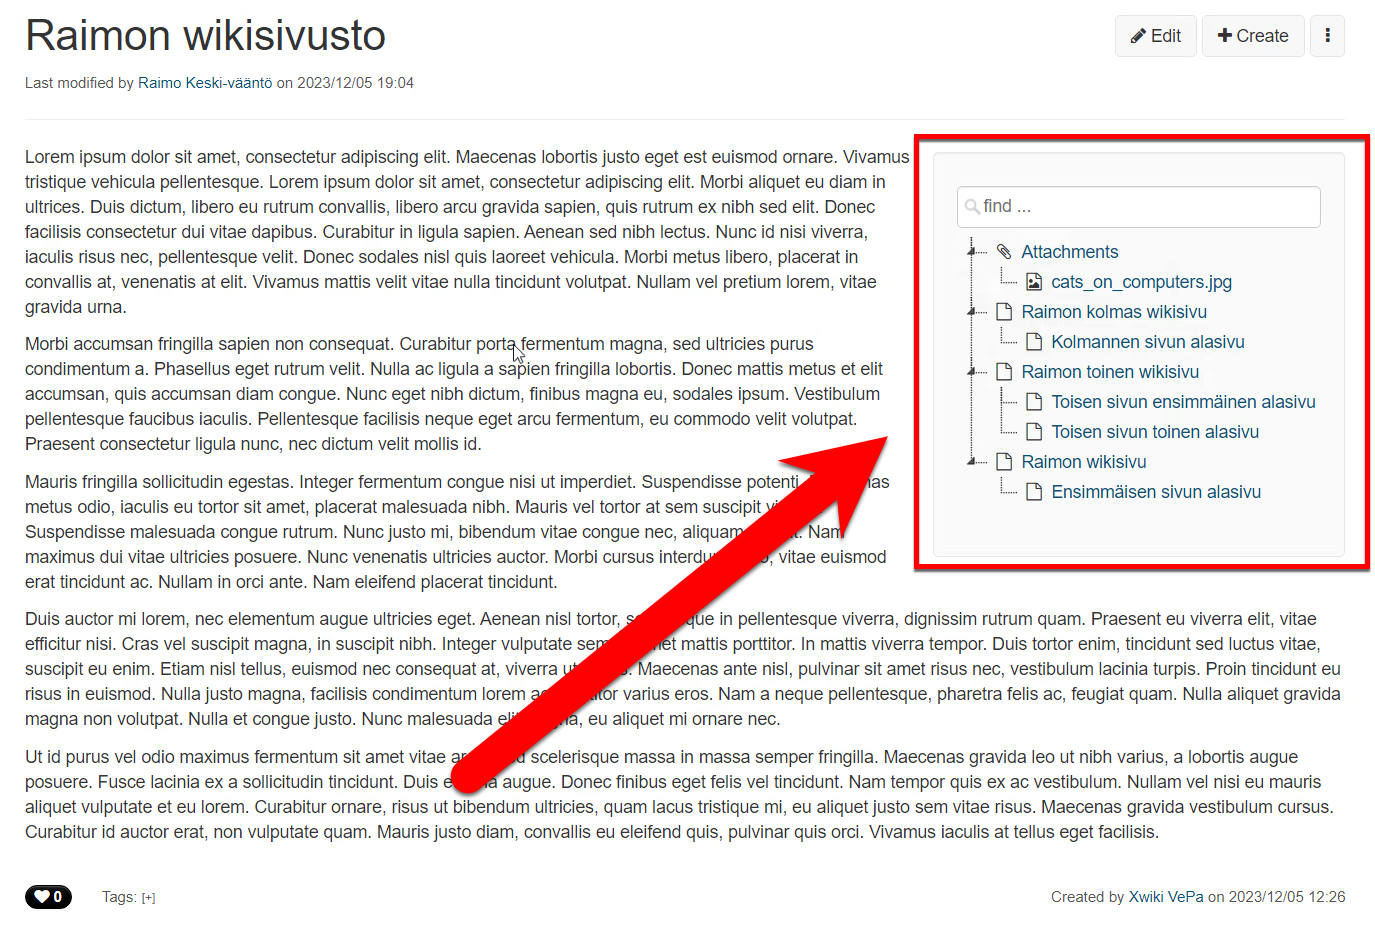
- If you want to create a page tree in a separate box, follow the table of contents macro instructions for making a Floating Box. Then, follow the instructions above to create a page tree in the box you created.
Tables
In the Wiki, you can create tables for a page in the edit window by copying a table from Excel or by setting the parameters directly in the source code. In addition, you can save an Excel file as an attachment on the page or link the table as a file shared in Teams. An Excel spreadsheet shared in Teams is easy to edit directly in the browser window, while an Excel attachment is automatically downloaded to the user’s computer.
- To create a table in the XWiki edit window, go to the page where you want to create the table, select Edit and click the Table icon.

- A window will be displayed where you can define the properties of the table you are creating (Table Properties).
- Rows determines the number of rows in the table.
- Columns determines the number of columns in the table.
- Width defines the width of the table and Height its height. You can also leave these blank when creating a table and adjust them later in the table settings or by dragging the table and cell boundaries in edit mode.
- Under Alignment, you can decide whether the table you create is positioned on the left, right or in the center of your page.
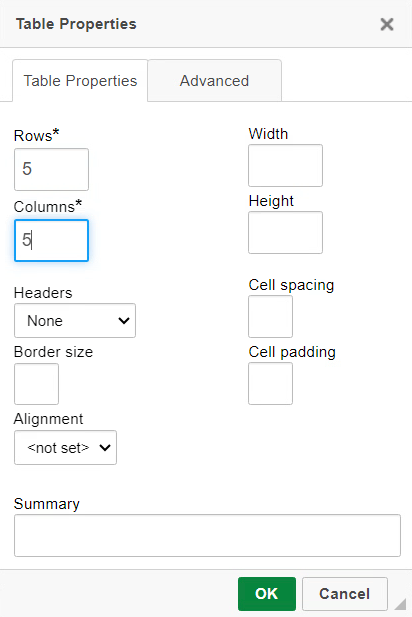
- A table with five columns and five rows will be created as an example.
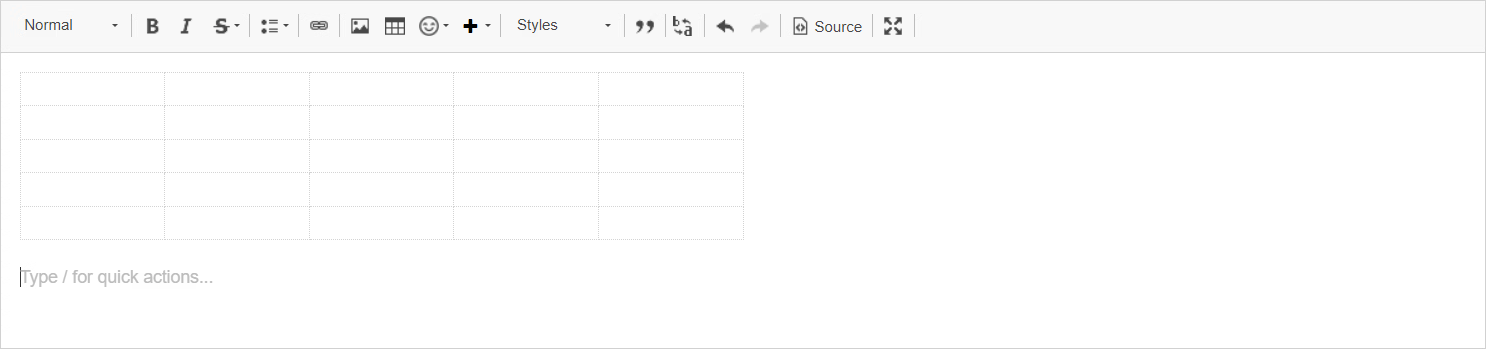
- After creating the table, you can adjust the table and cell parameters by right-clicking on the table. If you have not selected any cell, you can adjust the properties of the entire table and, by selecting a cell, you can adjust its properties. You can also select several cells at a time.
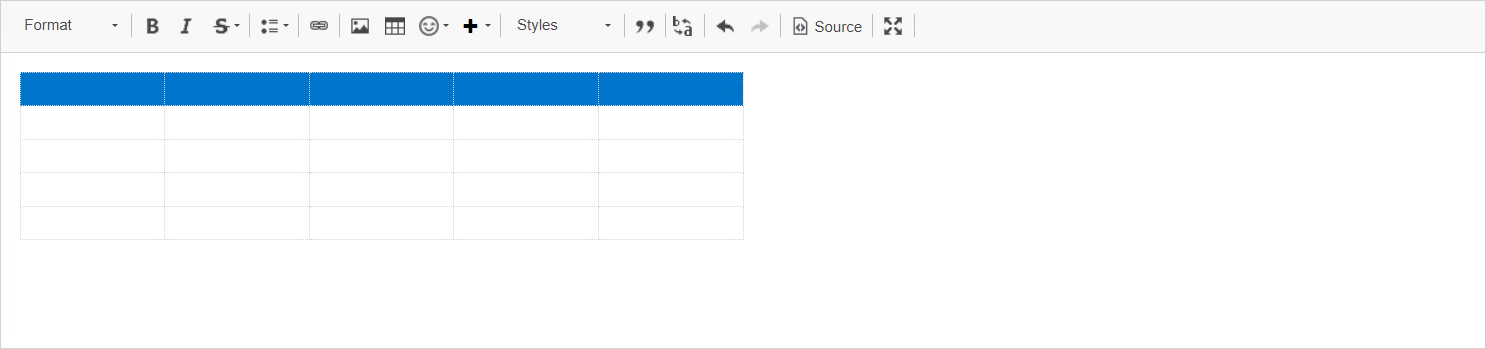
- For example, by selecting the entire first row, you can set a grey background for the table header row to make it clearer, for example. To select the entire row, click the first cell and then the last cell while holding down the Shift key.
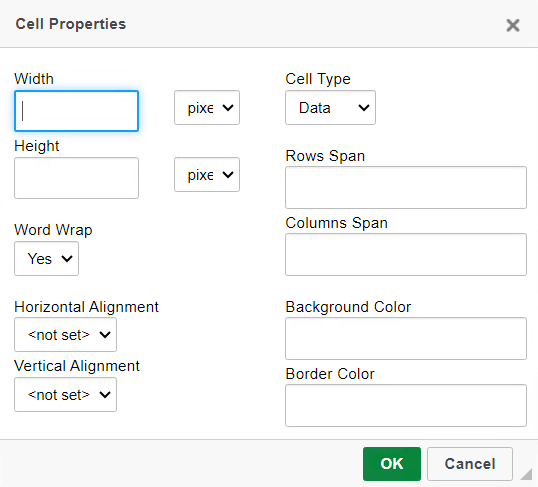
- When all the cells have been selected, right-click to display the table edit menu. In the menu, select Cell and Cell properties.
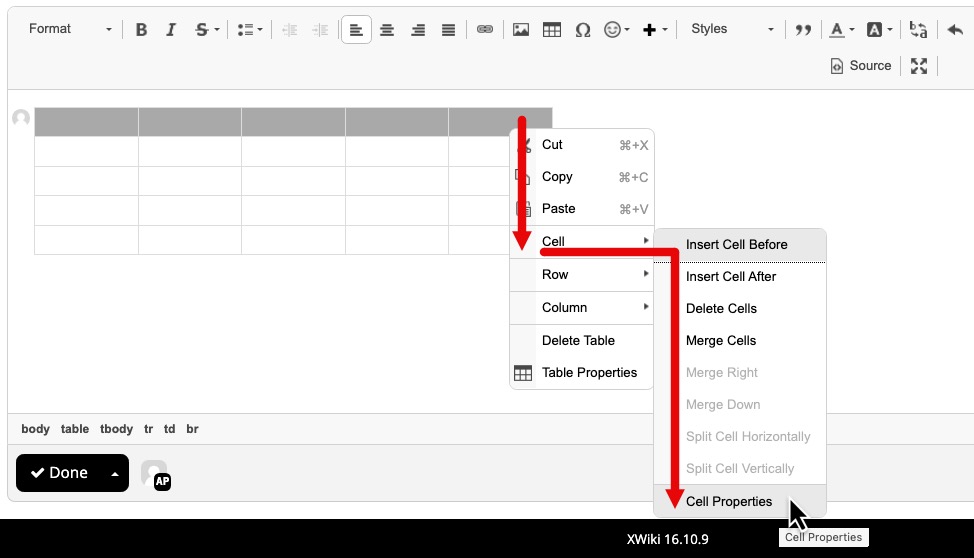
- You can now edit the properties of the selected cells in the menu that opens.
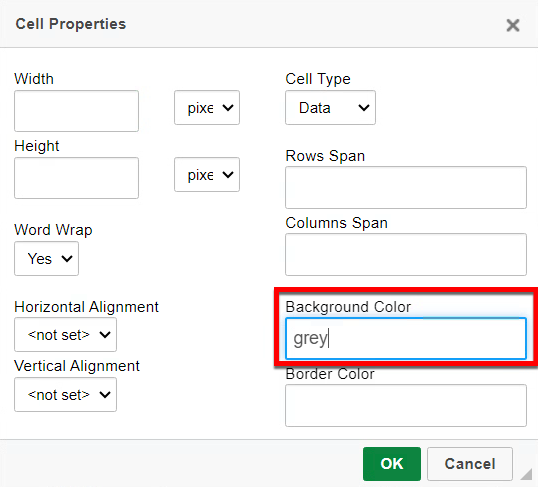
- Under Background Color, type “grey” to select a grey background colour for the cells in the title bar.
You can enter the colour as text (e.g. grey: “grey”) or as RGB code (e.g. grey: “128, 128, 128”).
- Now, the background colour of the cells in the first row is grey.
Copying and pasting an Excel spreadsheet to a Wiki page
You can copy and paste a table directly from Excel to a Wiki page by using the copy and paste functions. In this case, the formatting of the table may change from the one in Excel, but the content is still copied correctly to the Wiki. If you want the table to have the same formatting as in Excel, you can use the Wiki’s table formatting to align the colours and other properties of cells, as well as the properties of the entire table, with the original Excel file.
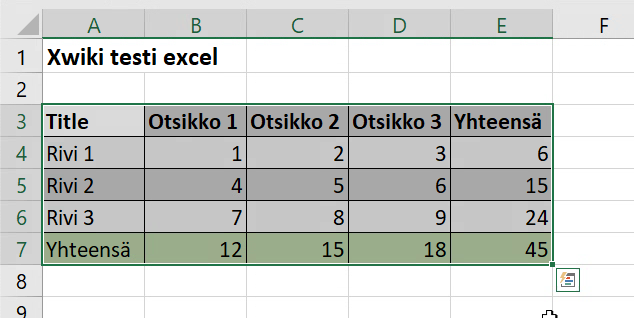
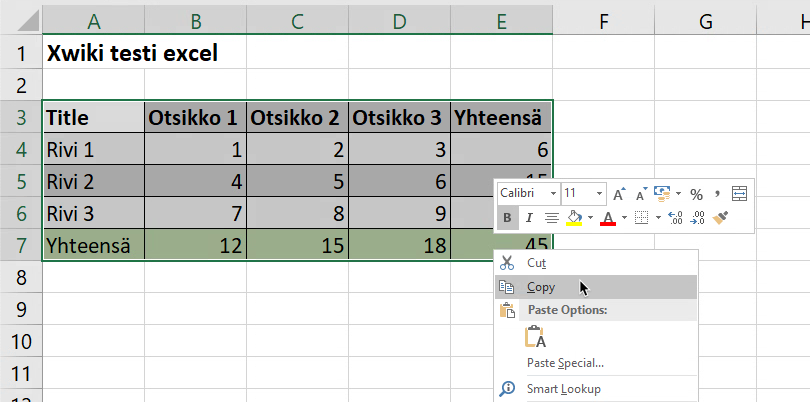
- To copy a spreadsheet from an Excel file to the Wiki, go to the original spreadsheet in Excel and select the part of it you want to copy. In the example below, we do not want to copy the title “XWiki test Excel”, so we will just select the table.
- To select the table, paint all the rows and columns you want to copy.
- After selecting the desired part of the table, right-click the selected area while it is active. Select “Copy” in the menu that is displayed or press CTRL+C.
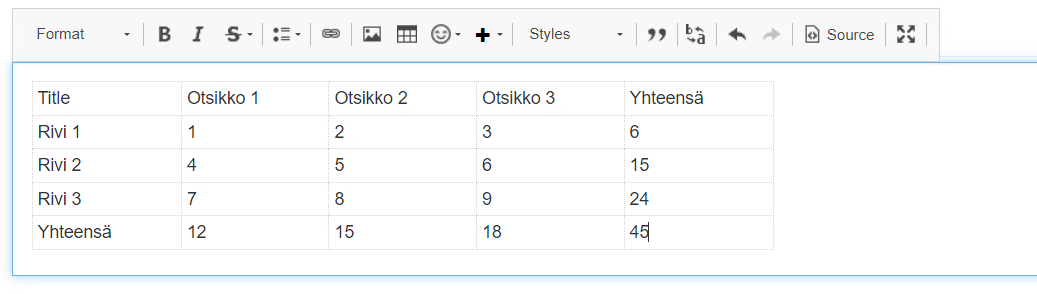
- In the Wiki, go to the page where you want to copy the table and ensure that you are in edit mode.
- The Wiki does not allow pasting using the mouse, so make sure the cursor is in the editing window where you want the table to be pasted and press CTRL+V.
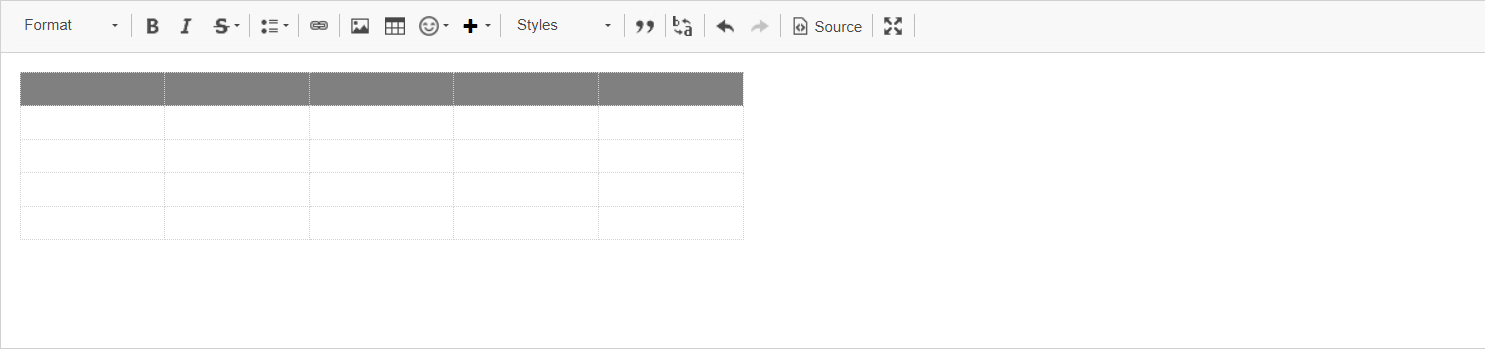
- The table above will look like this when pasted to a Wiki page.
- Follow the instructions for editing tables if, for example, you want to make the colours of the pasted table similar to those in the original Excel.
Sharing an Excel spreadsheet via Teams
You can also share an Excel file directly via Teams. This is the recommended way if you want to use Excel features and the original formatting, but want users to have easy access to the table via the Wiki page. If you share the table as a hyperlink in Teams, it will open directly in the browser for editing.
- Create or upload the Excel spreadsheet you want to share on the Wiki in Teams. When creating a share link in Teams, pay attention to whom you grant read and edit access. Find the table in Teams, under Files, select Share and, after setting edit and read permissions, select Copy link to copy the link.
- On the Wiki page, go to the spot where you want to share the table link. Select the Link tool in the editing window.

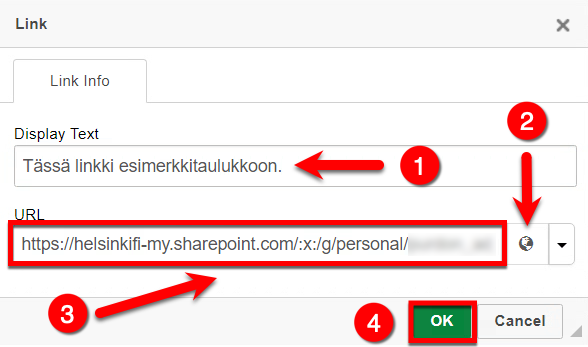
- In the link window that is displayed, type the text that you want to serve as a link to your table in the Display Text (1) field.
- In the drop-down menu for link type, select URL (2).
- Insert the share link to the Excel file that you just created in Teams in the URL (3) field.
- Select OK (4) to create a hyperlink to the table.
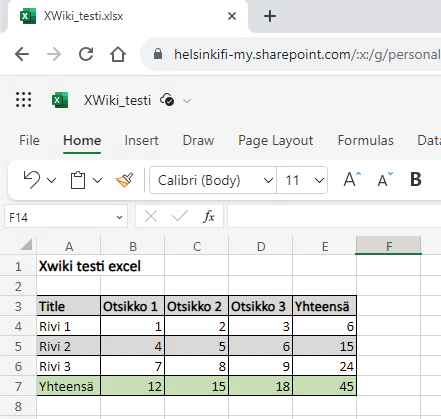
- Your page now has a link to a table that the page user can click to view or edit the table according to the permissions you have specified. In the browser, the table opens in an Excel window, where it is easy for users with the required edit permissions to edit the table.
Sharing a table as an attachment on the wiki page
The third way to share a table is to upload it as an attachment from your computer to your Wiki page. In this case, the table will not be displayed or opened for editing in the browser for page visitors or editors. Instead, it will be downloaded directly to the user’s computer. This option is therefore not recommended for tables that you want other users to be able to edit directly through the Wiki page.
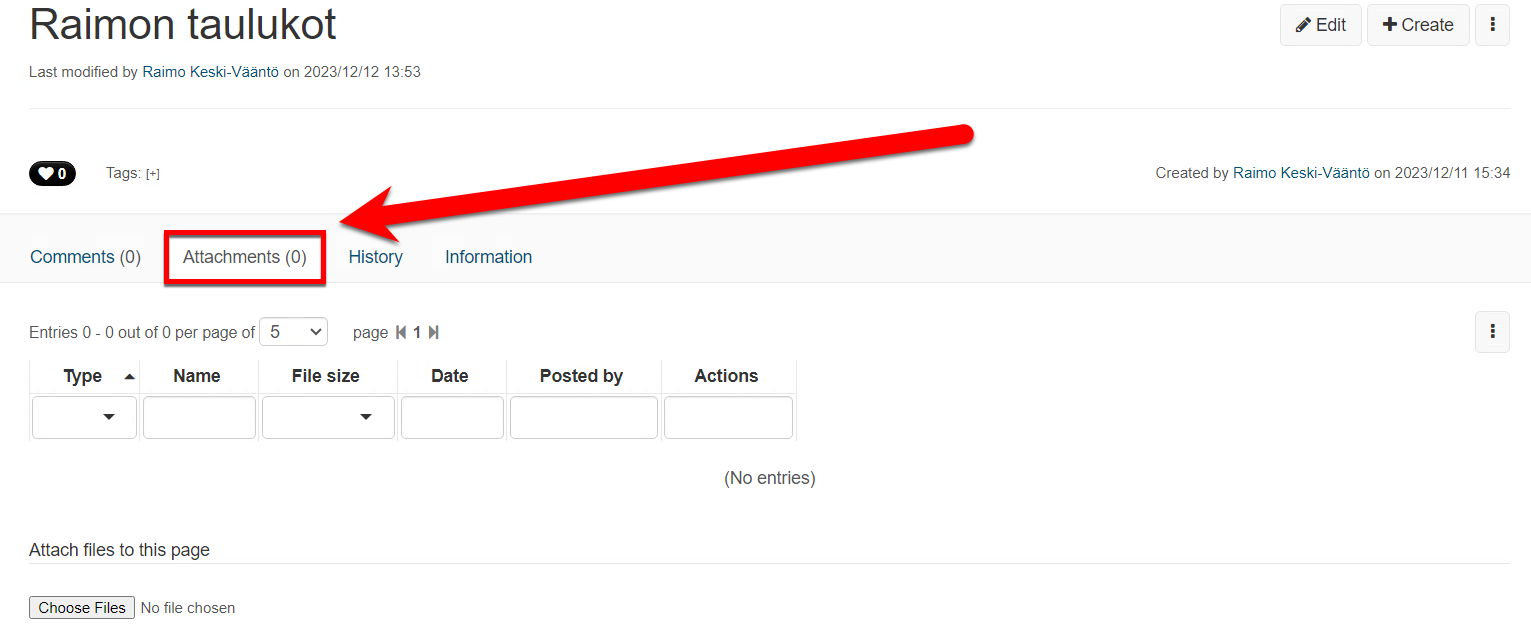
- To upload an Excel file as an attachment, go to the bottom of the page and click Attachments.
- Under Attach files to this page, select Choose Files to select the Excel file to attach.
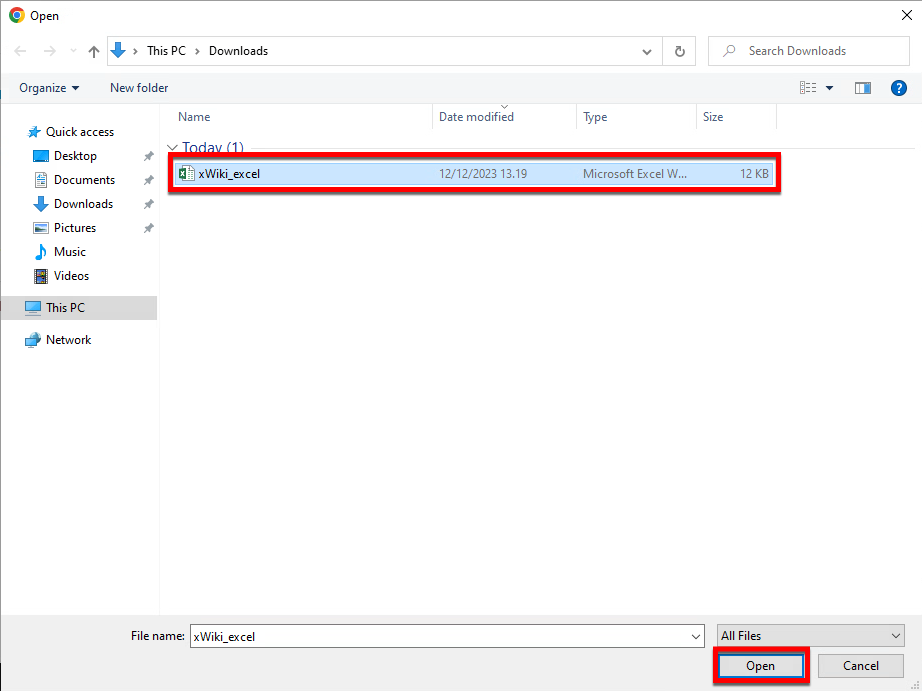
- Locate the file on your computer and select Open to attach the file to your Wiki page.
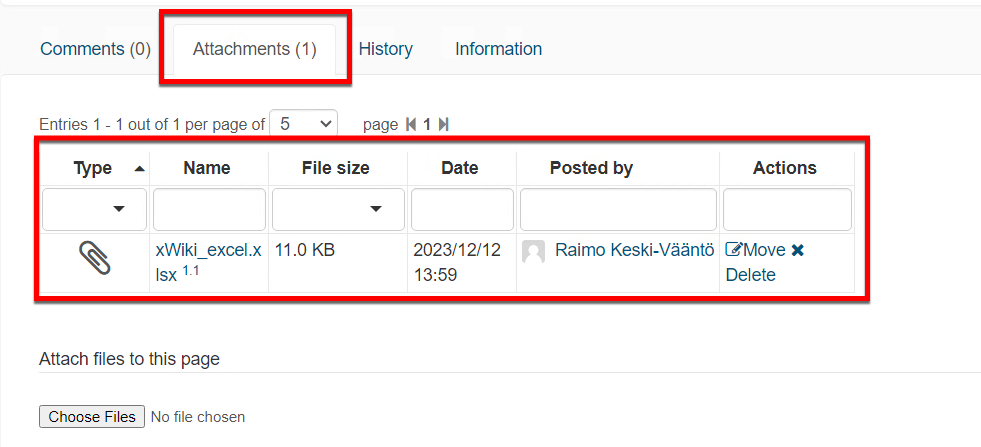
- The file will now appear as an attachment at the bottom of the page under Attachments. Page visitors can open it here directly, or you can create a hyperlink to the file in the text on your page just like you would create an external link. If you decide to create a link, select Attachment instead of URL and find the attachment in the Wiki page tree that opens.
Video instruction
Give feedback
The instructions site of the University of Helsinki's IT Helpdesk helps you with IT-related issues related to your work. Let us know how we can improve our instructions. We greatly appreciate your feedback!
How would you improve these instructions?