
You can use Microsoft Clipchamp’s automatic subtitling feature to add subtitles to your video. First, upload the video to OneDrive, then edit it in Microsoft Clipchamp following these instructions.
The Clipchamp service can be found at https://app.clipchamp.com/
Please note! We recommend using MS Edge to access MS Clipchamp.
Quick help
- Upload the video you want to add subtitles to using Clipchamp to OneDrive.
- Open the video in Clipchamp by right-clicking and selecting View online.
- If you’re opening the video via the OneDrive browser version, click ... > Open > Open in Clipchamp next to the name of the video.
- Create automatic subtitles by clicking Video settings > Transcript and captions > Generate in the video’s edit menu.
- Select the language spoken in the video and click Generate.
- You can edit the transcript and download it to your computer via the Transcription menu that appears after the transcript has been generated.
Read the illustrated instructions on the Detailed instructions tab
Detailed help
Table of contents
Adding subtitles to a video using Microsoft Clipchamp
- Move the video you want to subtitle to the folder of your choice in OneDrive.
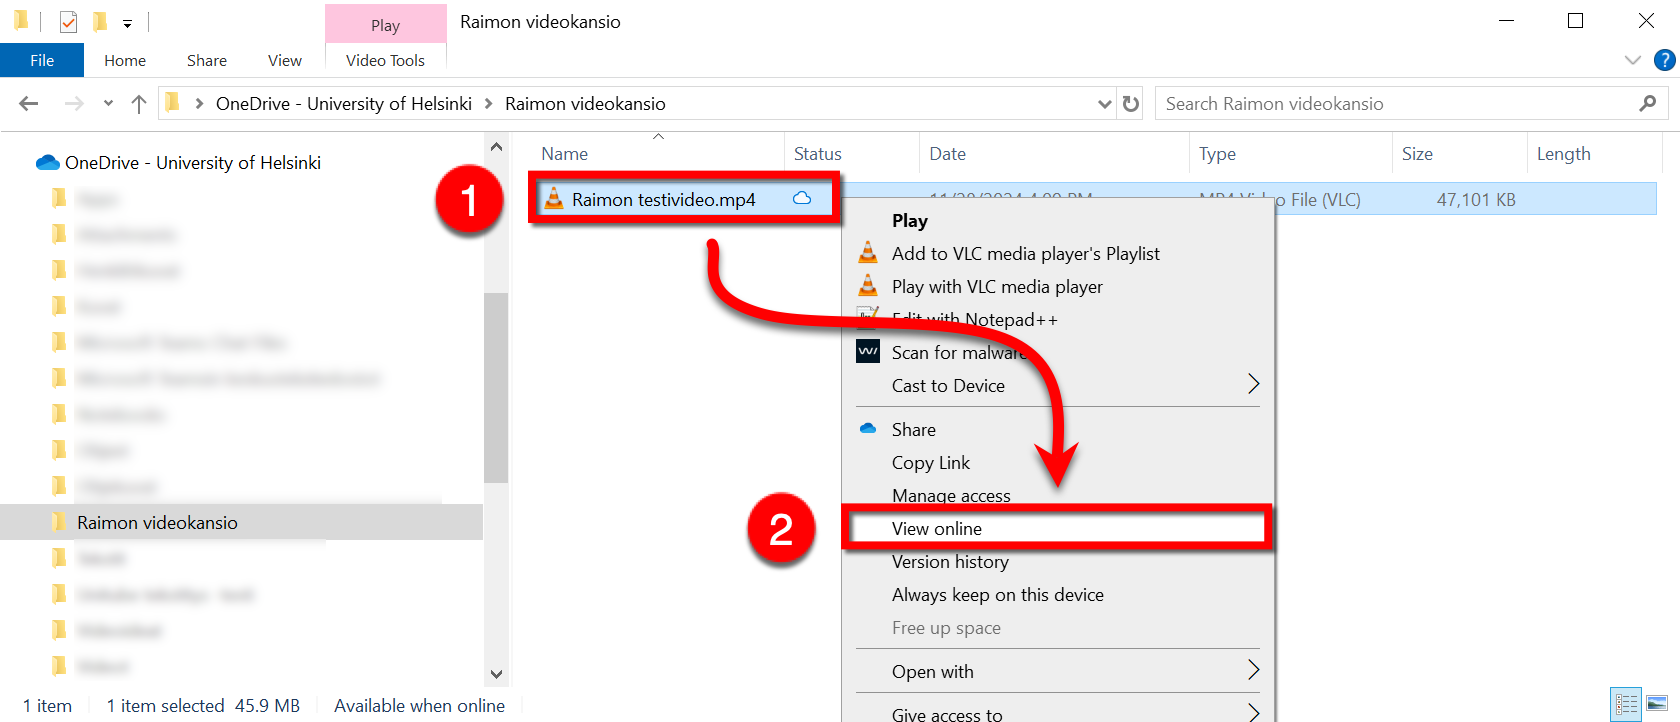
- Open the folder in Windows File Explorer (1), locate the video and right-click on it. From the menu that appears (2), select View online, and the video will automatically open on the Microsoft Clipchamp website.
You can also open the video using OneDrive in the browser. To do this, find the video in OneDrive (1), click the ... icon next to its name, select Open, and then click (2) Open in Clipchamp. Then continue by following these instructions.

- The video will now open on your screen in Microsoft Clipchamp.
- Next to the video preview pane, you’ll find various tools and settings for processing and editing your video.
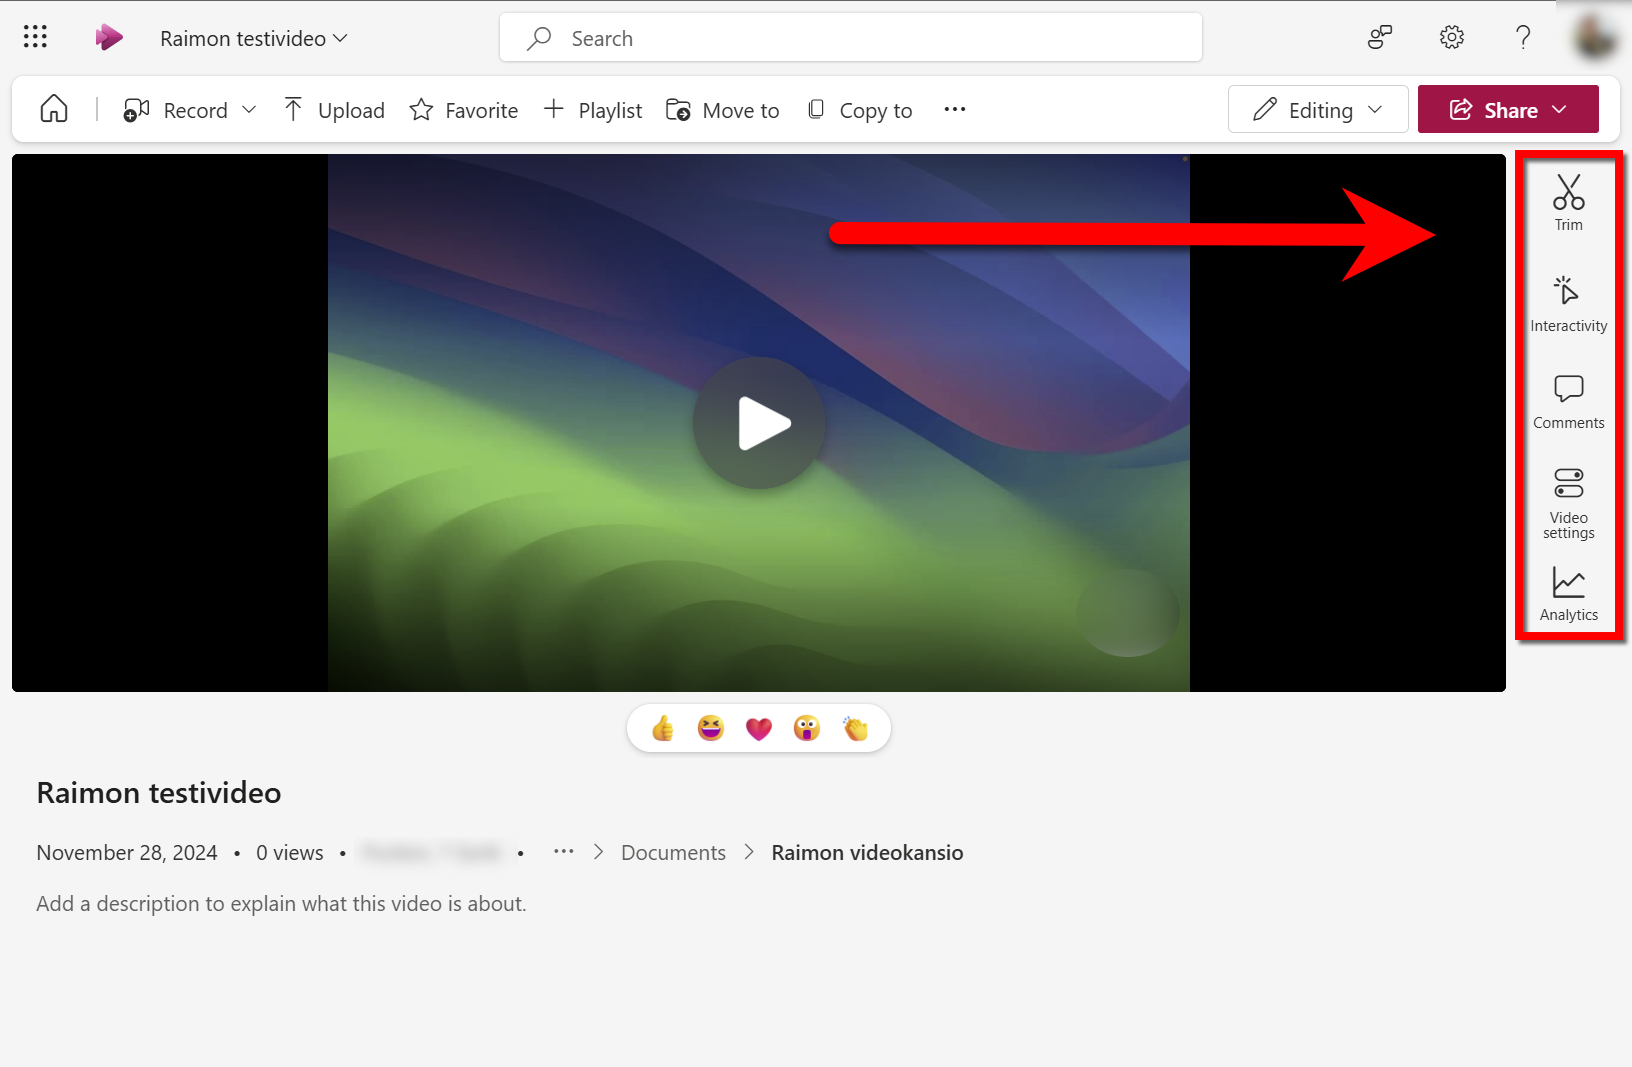
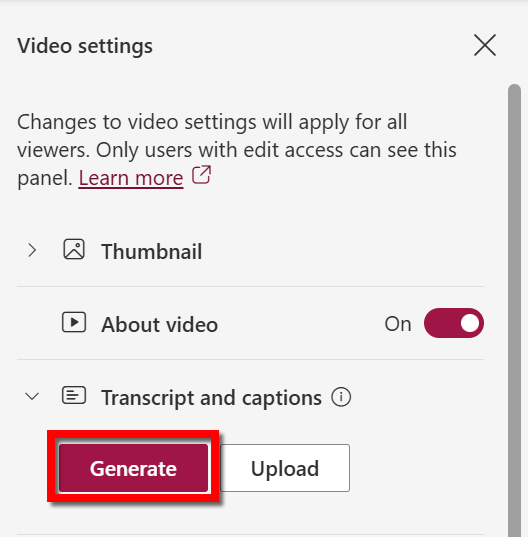
- Functions relating to video subtitling can be found under Video settings, under the Transcript and captions heading. Under Upload, you can upload a ready-made subtitle file for your video. Click Generate, and Clipchamp will create automatic subtitles for your video.
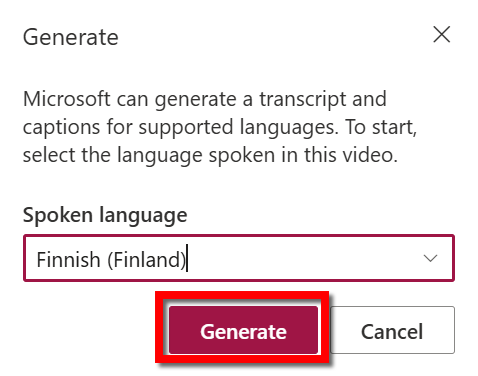
- Next, the Generate menu will open, allowing you to select the language spoken in your video. Once you’ve selected the language, click Generate again, and Clipchamp will start adding subtitles to your video.
- A progress bar illustrating the progress of the automatic subtitling will now appear in the Transcript and captions section, allowing you to see when the subtitles are ready.
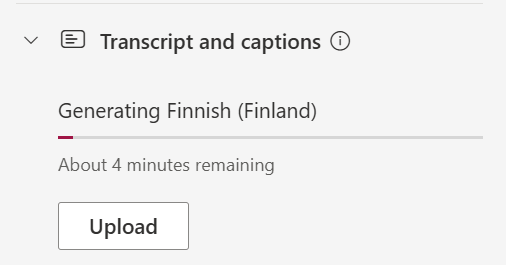
- Once the subtitles are ready, a Transcript section will appear in the settings bar; by clicking on this, you can view and edit the subtitles generated for your ClipChamp video. If you do not see the Transcript option once the automatic subtitles are ready, refresh the page in your browser.
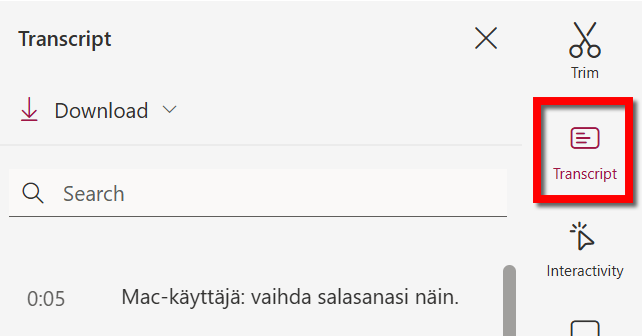
- If you wish to edit a section of the subtitles, locate the text block you want, hover your mouse over it and click the Edit button that appears.

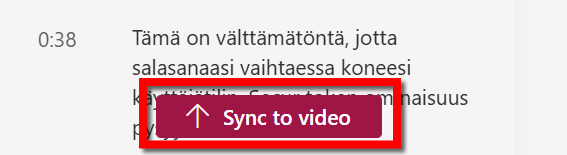
- Once you have made the desired edits, select Done.

- Finally, click the Sync to video button that appears once you have finished editing, so that the new, edited subtitles are synchronised with the video.
- Under the Transcript section, you can also download the subtitle file created in Clipchamp to your computer in .docx or .vtt formats. If necessary, you can upload this subtitle file to, for example, Unitube (in .vtt format) or edit the file using another subtitling tool.
Video instruction
Give feedback
The instructions site of the University of Helsinki's IT Helpdesk helps you with IT-related issues related to your work. Let us know how we can improve our instructions. We greatly appreciate your feedback!
How would you improve these instructions?