
You can use the IAM group management tool to check whether any existing group is suitable for your purpose. You can use the tool to create groups for different purposes and manage the groups you own: the group members, owners and other group details.
The group management tool is available at https://idm.helsinki.fi/web.
NB! A VPN connection is required to access the group management tool outside the University network
Quick help
Finding and creating a suitable group
- Click on Create your own group on the front page. Complete the group information carefully, as it helps users identify existing groups. The fields marked with an asterisk are compulsory.
- Only a person with a valid University of Helsinki user account can be added as an individual member to an IAM group.
- Other groups managed in IAM can also be added as group members.
- University service addresses cannot be added as group members.
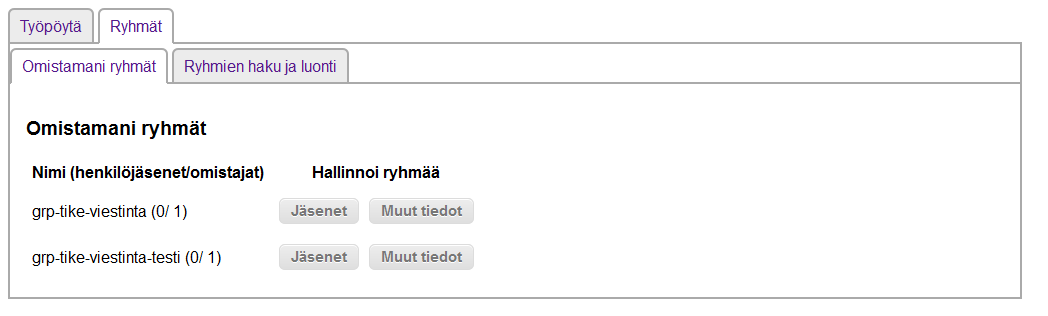
- Review your own groups: Link to a list of the groups you own and links to management tools
Different groups for different purposes
Detailed help
The changes will be updated in the various systems in a few hours.
Logging in
Log in to the group management tool at https://idm.helsinki.fi/web Automatic login is available when you are using a University computer. When using other computers, you must log in using your University user account.
Please note that a VPN connection is required outside the University network.
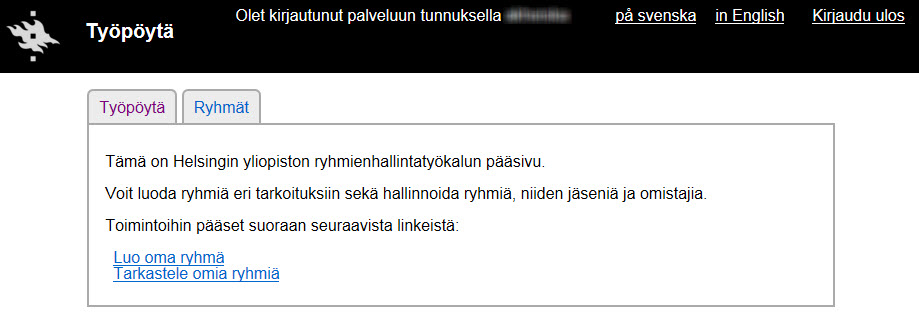
The front page looks like this:
Search groups
The search function allows you to search for a suitable group among the existing groups.
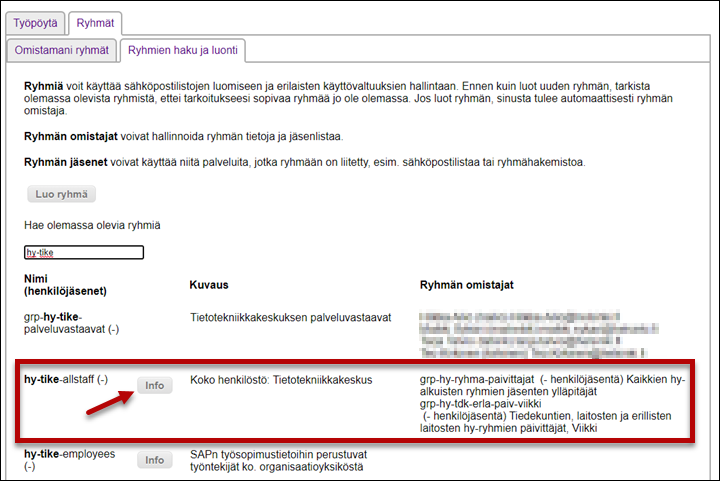
- The following example illustrates a search for groups with the string ‘hy-tike’ in the name.
- The search results indicate:
- The group name
- A short description of the group
- A list of the group owners (name, user account and email address)
- Note the Infobutton for the ‘hy’ group.
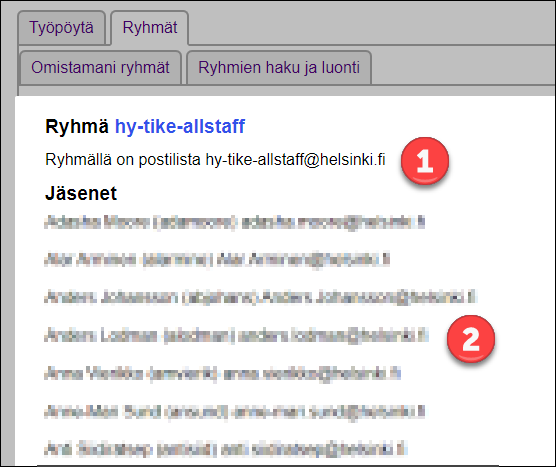
Click on the Info button to see more information about the group:
- Group mailing list (if any) (1)
- Information about the group members (2)
Create a new group
Groups can be used for creating mailing lists and managing various access rights. If you cannot find a group that meets your needs among the existing shared groups that start with ‘hy’, please send a message to hy-ryhmat@helsinki.fi and ask the administrators to create the group you need. You can create a group starting with ‘grp’ yourself.
Group owners can administer the group’s information and list of members. Owners are not automatically group members. You will automatically become the owner of the group you create, but not a member. Please remember to add yourself to the group if you intend to be a member of the group.
Group members can use the services added to the group, such as a mailing list or group disk space. Group members are added after the group has been created. Please remember to add yourself to the group if you intend to be a member of it. You will automatically receive a link to the member management page at the end of group creation.
The IT Center reserves the right to change the name of the group if the name is later needed for another purpose or if it is inappropriate. The group name cannot be changed afterwards for any other reason.
Click on Create your own group on the front page. Complete the group information carefully, as it helps users identify existing groups. The fields marked with an asterisk are compulsory.
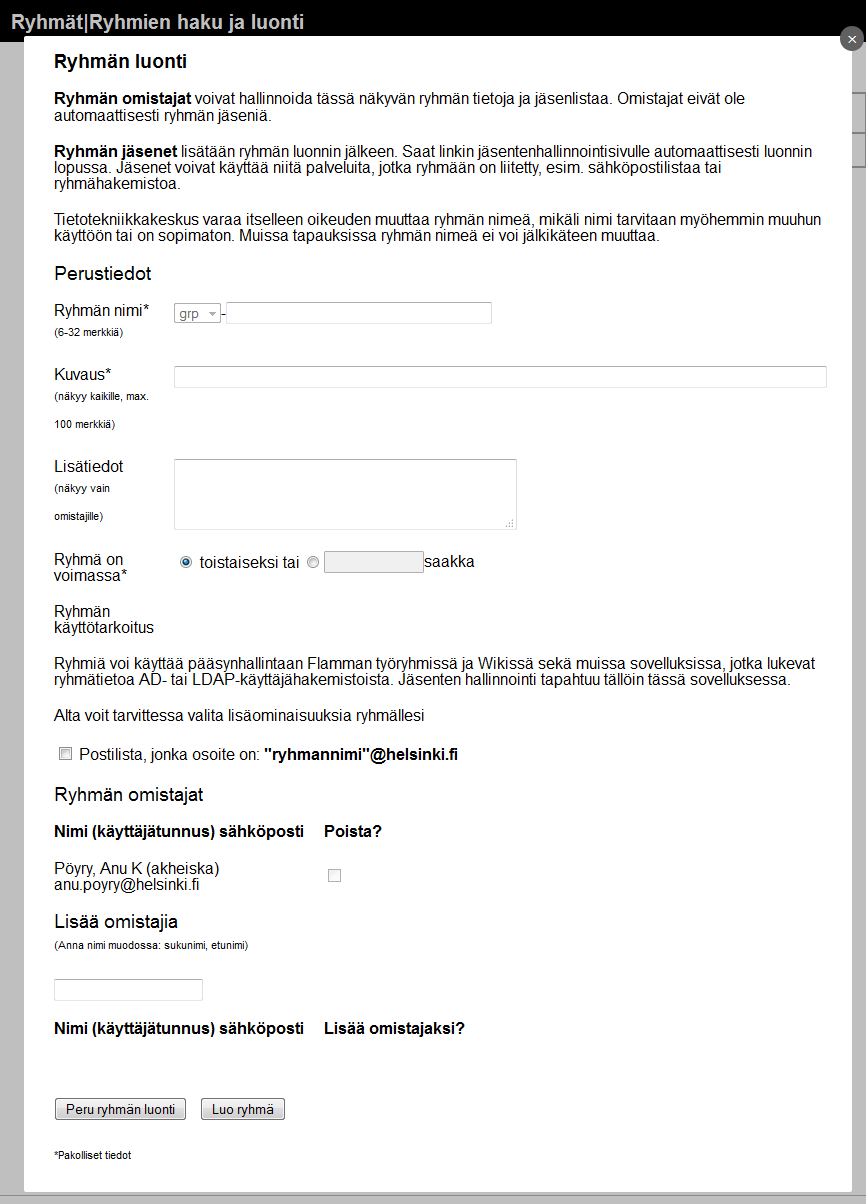
- The group name cannot be changed later, so choose it carefully.
- The group name, description and validity are compulsory details.
Enter the required information in the form and click on the Create group button at the bottom.
When you create a new group, you automatically become the group owner, or the administrator. Please note that the owner is not automatically a group member. If you want to be a member of the group you own, you must add yourself as a member just like any other member.
NB! Assign the group at least two owners from the start so that group updates can be carried out during any absences. Helpdesk cannot add group members or owners.
Edit group information
Find the group on the My groups page. Click on “Other information” for the group.
You can edit the group’s information, including:
- Changing the description
- Changing the validity information: for example, if the group is no longer needed, you can terminate its validity.
- Changing, deleting or adding additional information or choosing additional properties for the group
- Adding or deleting group owners
- NB! A group can also be added as an owner, but only the individual members of the group added as an owner will become owners.
If the group added as an owner has other groups as members, the individual members of such groups will not become owners.
- NB! A group can also be added as an owner, but only the individual members of the group added as an owner will become owners.
Make the required changes in the administration form and click on Update group at the bottom.
Validity of groups and extension of validity
New groups are automatically valid until further notice, unless an expiration date is separately defined.
The group owner will receive a warning email two months, two weeks and two days before their group expires. If necessary, you can change your group’s expiration date on the My groups tab, under the section Other information.
Edit group members
A member administration tool can be found on the My groups page.
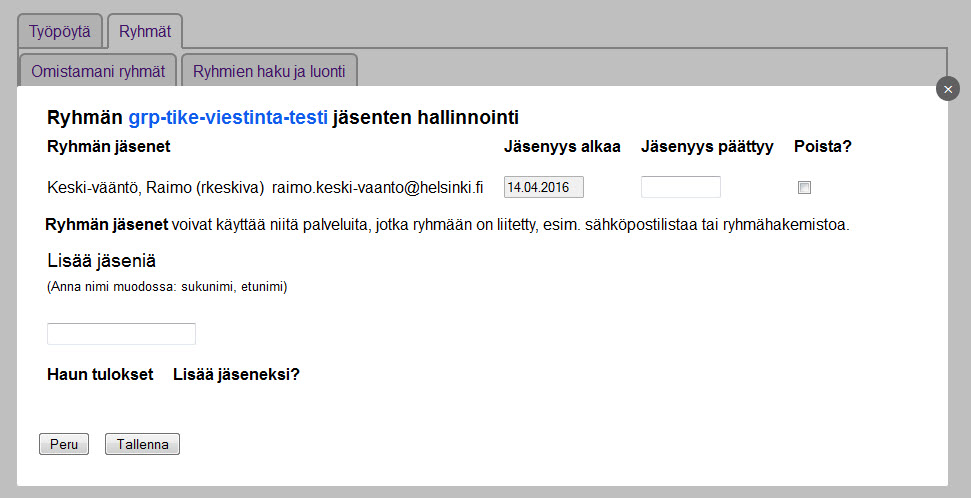
- The administration page shows the current members of the group in alphabetical order.
- For individual members, the name, user account and email address are shown.
- For group members, the group name, number of members, validity of the group and the description are shown.
- You can add both individuals and groups as members.
- If the membership has been set to begin in the future, it will do so at 00:00 on the date in question.
- The membership and its rights will expire at 11:59:59 p.m. on the end date. The person will still be displayed on the list but their name and the end date are shown in grey. The purpose of this is to show the owners whose rights have been removed and when. To completely remove a person from the list, the owner must remove them manually.
- If a person’s fixed-term membership has ended, the membership cannot be extended. However, if the membership is still required, you must first delete the expired membership and then add the person again as a member.
- Remember to click on Save.
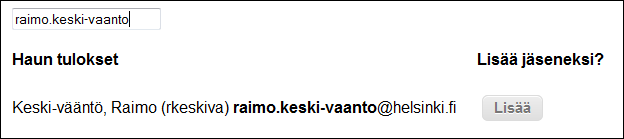
Add members or groups
Enter the person’s name, user account or email / group name or description or part of these in the search field below, under Add members. Choose the person/group from the search results by clicking on Add to the right. Remember to click on Save.
Remove a member or a group from the group
To open the list of members, click on Members on the My groups page.
Find the person you want to remove and check the Remove checkbox. Remember to click on Save.
You can carry out several actions at the same time:

The changes will be updated in the various systems in a few hours.
Matters to consider
- Assign the group at least two owners from the start so that group updates can be carried out during any absences. Helpdesk cannot add group members or owners.
- New mailing lists are created automatically several times a day on weekdays.
- NB! If the group has an email address, newly added members will be saved in the list within approximately five minutes. Please wait a moment before using the mailing list after making changes to it.
- Only persons with a University of Helsinki user account can be added to an IAM group. You can also add another IAM group as a member of your IAM group.
IAM groups do not generate a Microsoft 365 mailing list, and they cannot be found in the M365 address book. No M365 calendar is created for them. You can send email to the groups as usual if you know the group’s address.
- If you only need to use the group as an access group for a shared mailbox, there is no need to request a separate email address for it.
- If you only need the group for a mailing list, please note that a majordomo list offers the following benefits compared to an email list set up using the group management feature:
- You can also add other than University email addresses (firstname.lastname@helsinki.fi) to the group.
- Group members can independently join and leave the email list.
The visibility of members in groups starting with the letters ‘grp’ has been restricted due to information security. If you need to know who the members of the group are, contact the owners of the group.
Video instruction
Give feedback
The instructions site of the University of Helsinki's IT Helpdesk helps you with IT-related issues related to your work. Let us know how we can improve our instructions. We greatly appreciate your feedback!
How would you improve these instructions?